Rialto Beach – Hole in the Wall, Olympic National Park: Complete Guide

The beaches in Olympic National Park are legendary.  Strewn with gigantic driftwood and dotted with picturesque sea stacks offshore, they are often windswept and misty.  They are places to wander, explore tidal rockpools, and soak in the majesty of nature.

And one of the most picturesque of them all is Rialto Beach.

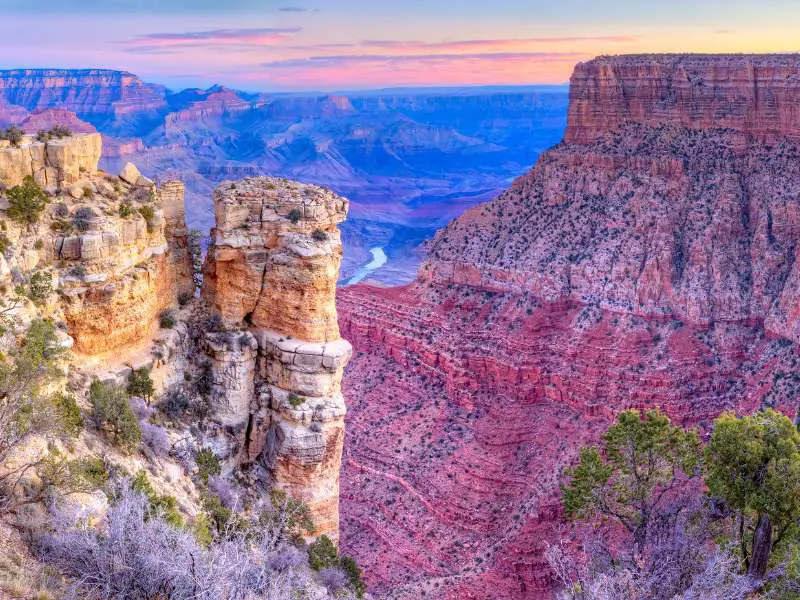
Hole in the Wall is a natural arch carved by the sea in a rocky outcrop that creates a headland.  Surrounded by dramatic pinnacles jutting out of the sand and rocky pools filled with colorful anemones, sea stars, and mollusks, this is a highlight of any trip to Olympic National Park.

Here is a complete guide to Rialto Beach, with everything you need to know about the hike to Hole In The Wall and more.

TOP TOUR: Book a tour to Rialto Beach Hole-in-the-Wall
TOP HOTEL PICK IN FORKS: Check availability now
FIND THE CHEAPEST CAR RENTAL: Search Discover Cars for the best deals
FIND THE CHEAPEST FLIGHTS: Search Skyscanner for the best deals
GET TRAVEL INSURANCE: Get insured with Travelex before you go

No time right now to read this guide to Rialto Beach – Hole in the Wall, Olympic National Park? Pin It and save it for later:

Please note this post may contain affiliate links, which means we may receive a commission, at zero cost to you, if you make a purchase through a link. Please see our full Disclosure for more information. If you have any questions, please contact me.

FREE DOWNLOAD
Subscribe to regular updates with tips for planning, travel inspiration and trip ideas and get instant access to the free PDF of this guide to
Rialto Beach – Hole in the Wall, Olympic National Park

Guided tours of the Hole in the Wall beach hike

If you have your own vehicle and a reasonable level of fitness, it’s easy to do this hike yourself.  However, if you don’t want to drive, prefer not to deal with the hassle of parking, or just want an expert guide to explain things along the way, an organized tour is a great option. 

There are a couple of tours that include this hike on Rialto Beach.

Hoh Rain Forest and Rialto Beach Guided Tour

A full-day tour that leaves from Port Angeles and goes to the Hoh Rainforest and Rialto Beach. After a morning hiking the two main loops in the Hoh Rainforest and a quick stop in Forks, you’ll spend the afternoon on Rialto Beach where you can either join a guided hike led by an expert naturalist hiking guide or explore the coast at your own pace as time and tides permit.

Book the full-day guide tour from Port Angeles to Rialto Beach and Hoh Rainforest

Private Day Hike- Rialto Beach Tide Pooling

If you want more flexibility than a small group tour provides – and more time at the beach, then this private tour is the way to go.  The 4-6-hour tour goes just to Rialto Beach and includes the hike to Hole in the Wall. The time of the tour varies to take advantage of the low tide, so you know you’ll get the most out of your time there. ** RECOMMENDED **

Book the private guided tour to Rialto Beach/ Hole in The Wall


Details of the Hike: Rialto Beach Hole in the Wall, Olympic National Park

Distance: 3.3 miles round trip

Type: Out-and-back

Elevation change: Minimal

Time: 1 – 1.5 hours + time spent there

Difficulty: Easy-moderate.  It’s flat, but walking in soft sand can be tiring.

Trailhead: Rialto Beach parking lot

Highlights: Beach, driftwood, sea stacks, hole-in-the-wall natural arch, tide pooling

Fee: There is no special trail fee and you don’t pass through any Olympic National Park entrance station to enter Rialto Beach, so you can do this hike for free.

However, if you are going to enter other sections of Olympic National Park like Sol Duc, Hoh Rain Forest and Hurricane Hill, you’ll need to pay the Olympic National Park entrance fee.  Plus, rangers do visit Rialto Beach to check for entrance passes.

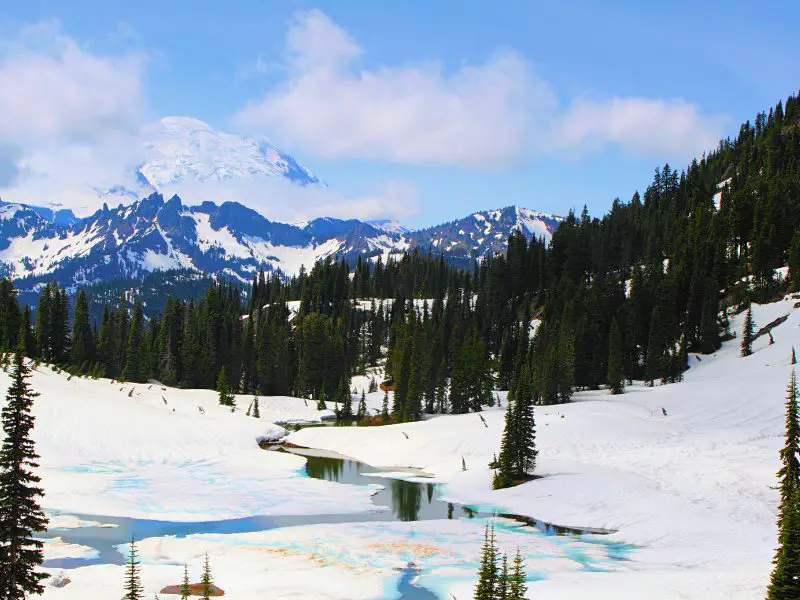
Buy it online or, if you are planning to visit more than just Olympic National Park this year (Mount Rainier National Park and North Cascades National Park are both close), it can be great value to purchase an America The Beautiful pass.

Open: Open year-round


Rialto Beach Trail Map

You can use this Rialto Beach map – it’s perfectly sufficient for this hike, which is along the beach and back, so it’s impossible to get lost. 

However, if you’re going to be doing more hiking in Olympic National Park, the Rialto Beach WA map won’t be enough and it’s worth getting a National Geographic topographic hiking trails map of Olympic National Park before you go.


The Hole in the Wall Hike (Rialto Beach) Description

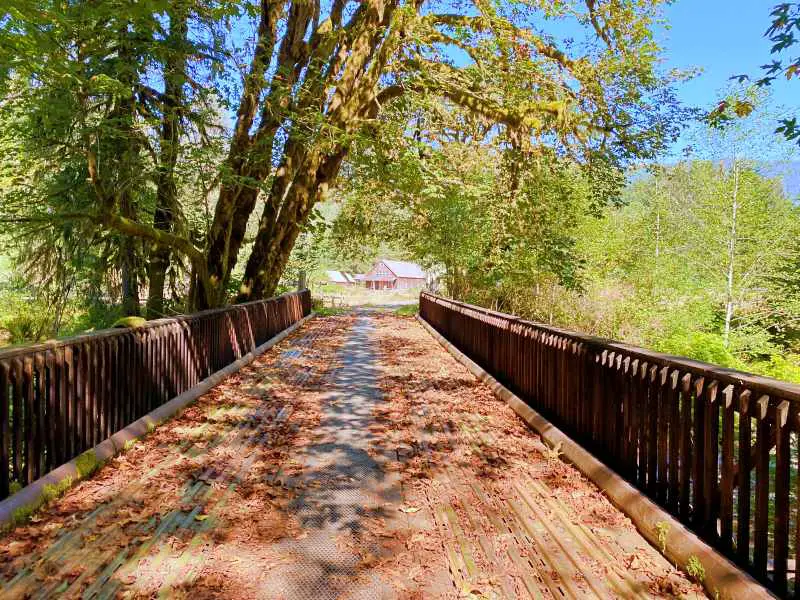
From the parking lot, there is a flat, short path to the beach. This is one of the few Olympic beaches that doesn’t have stairs and/ or a sloped path. 

The walk from the beach is also very short.  So, this is one of the most accessible beaches on the Olympic Peninsula. 

It’s a 1.65-mile walk along the beach to get to Hole in the Wall, but if you have limited mobility and just want to be on the beach and not walk very far, then Rialto Beach is a great option.

As you arrive on the beach, look around and behind you so that you notice what the entrance back to the parking lot looks like from the beach.  This will help you easily find the path back on your return.

Look to your left and in the distance, you’ll see two islands.  The small forested islands are called “James Island” and “Little James Island”.

You can walk left to see them closer, but this is the opposite direction from Hole in the Wall, so if time is limited, just turn right.

As you look down the beach to your right, you’ll see a rocky headland far in the distance.  This is your destination, Hole in the Wall.

As you start to walk, keep an eye for birds and marine wildlife. It’s possible to see whales offshore in season (October – July, peaking in April-May), plus sea lions and otters.  Birds often seen here include bald eagles and many types of sea birds. 

I saw a small flock of brown pelicans playing at the water’s edge when I was there recently.

Another thing that’s hard to miss is the drift wood.  Enormous logs formed from the trunks of fully grown trees, stripped bare by the elements, frequently line the edge of the beach.  

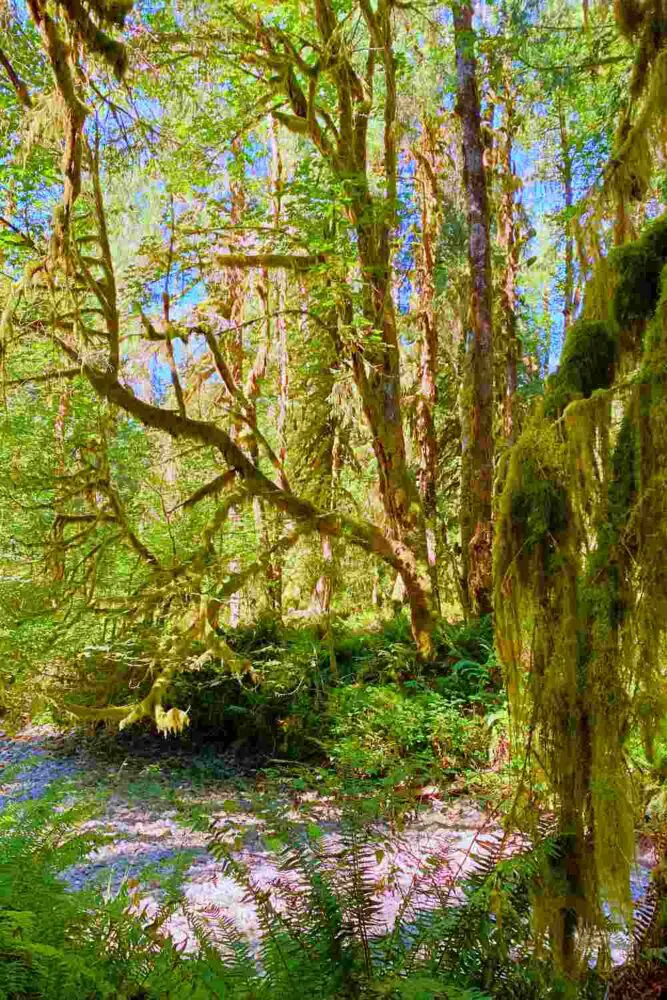
The Olympic Peninsula is filled with forests and trees often fall into the rivers and then float down to the ocean.  In the ferocious storms that are not uncommon in this region, enormous waves toss the trees up on to the beach, and the wind soon strips the bark from them.  

You can also see the sea slowly encroaching on the forest and many of the trees at the water’s edge are dead or dying and eventually collapse on to the beach. Those same storms cause saltwater to surge among the trees, slowly killing them.

You can use the driftwood to make a fire if you are here in the evening, but it isn’t permitted to take any with you.

Another thing you’ll notice are the Rialto Beach sea stacks. Sea stacks are rocky outcrops in the ocean that are bigger than a rock and smaller than an island.  Yes, that’s the official definition!

You’ll see many small stacks off shore pretty much the whole way, but the larger and closer stacks await as you get closer to Hole in the Wall.

About half way, in a bit less than a mile, you’ll come to Ellen Creek.  Sometimes someone has created a log bridge over the shallow creek that hasn’t yet been washed away.  Other times you may need to get your feet wet (you can take off your shoes to avoid getting your socks wet).  Or, if it hasn’t rained much, you may not even notice that the creek is there at all, which was the case when I was there recently. 

Ellen Creek is as far as dogs (on leashes) are allowed to go. 

Soon after, you’ll get close to the Twin Rocks.  These are two incredibly picturesque sea stacks right on the beach. 

In this area, look off to the right for a kind-of-hard-to-find staircase heading up off the beach.  They take you to a fairly short path that provides an elevated view of the sea stacks. 

Return the way you came.  The path does continue back down to the beach the other side, but it’s steep and not in great shape, so it’s easier to go back the way you came.

The beach now turns rockier.  

A few hundred yards further along, you’ll come to Hole in the Wall. This is a natural arch carved by the sea over hundreds of years.

The area is a great place for exploring the tidal pools at low tide.

Make sure you have shoes that are OK walking on sharp rocks and have good traction and keep an eye on the water levels so you don’t accidentally get caught in an incoming tide.  Walk carefully, as the wet rocks can be very slippery.

You will see mollusks, star fish and colorful anemones.

For the classic photo of the Twin Rocks seen through Hole in the Wall, go through the arch and then turn back, carefully framing the sea stack in the middle. This is only possible if the tide is out. 

If it’s high tide, you can take the path above the beach to see the Hole in the Wall from an elevated angle.

When you’re done exploring the tidepools, you can either continue further along the beach or head back.  If you go further, make sure you have enough time to return safely before the tide rises and blocks off your return path.

The view is different on the way back, as you see the Twin Rocks from a different angle.


What You Need To Take/ Wear on the Rialto Beach and Hole in the Wall, Washington Hike

  1. I recommend taking a rain jacket and wearing layers that you can take off or put on depending on the weather, which can change throughout the day. If you need one, I like this Columbia rain jacket for men and this Little Donkey Andy rain jacket for women.
  2. You will definitely want to take a camera.  I love the GoPro HERO 12.  It is designed for travel.  It’s water resistant and durable and takes photos, video and even does streaming.  Check current prices on the GoPro HERO 12 here 
  3. Take water.  There is a refill station at the parking lot, so you just need a refillable water bottle. I love this hydroflask. It’s easy to carry, keeps temperatures well, and comes in multiple colors. 
  4. You’ll need shoes or boots suitable for walking on rocks (that you may get wet).  If you’re visiting at low tide, you’ll want to explore the tidal rock pools, which involved walking on sharp rocks.
    If you’re visiting at high tide, you’ll probably end up taking the costal path in the woods for at least part of the way.
    So, in either instance, even though this is technically a beach walk, you’ll want to wear good hiking boots or shoes. If you need to get some, take a look at my Guide to Buying the Best Hiking Shoes/ Boots to help you know what to look for and get some recommendations.
    My top pick is this pair of Salomon Gore-Tex boots.
  5. Check my list of essential things to take and wear on a day hike to make sure you have everything else you need.

Tips for Hiking the Hole in the Wall Rialto Beach, Washington State

  1. Note the entrance/ exit to the beach so you recognize it when you return. After you’ve followed the short path from the parking lot to the beach, turn around and notice how the area looks from the beach.  This will help you identify where to return to your car after the hike. 
  2. Time the hike for low tide.  You can hike along part the beach at high tide by scrambling over driftwood, but it’s often impossible to navigate the whole beach of the tide is very high. Plus, if you want to explore the rock pools and walk through the hole in the wall, you’ll need to visit at low tide.
    If you’re there at high tide, when you get to the Hole in the Wall, you can use the overland trail that goes above the arch to get to the other side of the arch, where there are panoramic views along the beach.
    Always time your visit around the tides so you don’t get stranded or forced to take the inland trail by an incoming tide.
  3. Plan time for tide pooling. Although there is better tide pooling at Beach 4, the tide pools around the Hole in the Wall are worth exploring.  Plan to arrive at the Hole in the Wall at least 30 minutes before the lowest tide so you have sufficient time to spend there before your return hike.
  4. Consider continuing along the beach. If there is sufficient time with the tides and you have the energy for the return trip, you can continue past the Hole in The Wall and go further along the beach.  You’ll leave the crowds behind and often have the beach to yourself.  However, don’t cross through Hole in the Wall when the tide begins to cover the floor of the arch!
  5. Don’t expect warm sunny weather, even in summer.  The Pacific Northwest is much more famous for fog and rain than it is for sun. The beach is often shrouded in fog, even when it’s sunny inland, and it can rain at any time.
    I recommend taking a raincoat with you. If you need a raincoat, I like this Columbia rain jacket for men and this Little Donkey Andy rain jacket for women.

Rialto Beach Hole in the Wall Tide Chart

It’s worth exploring the Rialto Beach tide pools around the Hole in The Wall.  To do so – and to easily get along the beach to Hole in The Wall – you’ll need to visit at low tide.  Plan to arrive at Hole in the Wall at least 30 minutes before the lowest tide. 

I recommend checking the official tide chart here when you’re planning your trip so you can visit at the right time. 

When you look at the tide chart, you may notice that some low tides are ‘negative tides’ meaning that they go below sea level.  I am not sure how this is worked out, but the negative tides are best for tide pooling, as the water levels are the lowest.  However, even regular low tides are fine for the Hole in the Wall tide pools.  


Parking near Rialto Beach, Olympic National Park

The Rialto car park is at the main entrance to the beach and the start of this hike. It’s a good-sized park lot, but even so, it does fill up at peak times, especially in summer.

There are restrooms and drinkable water available at the parking area.


Rialto Beach Weather

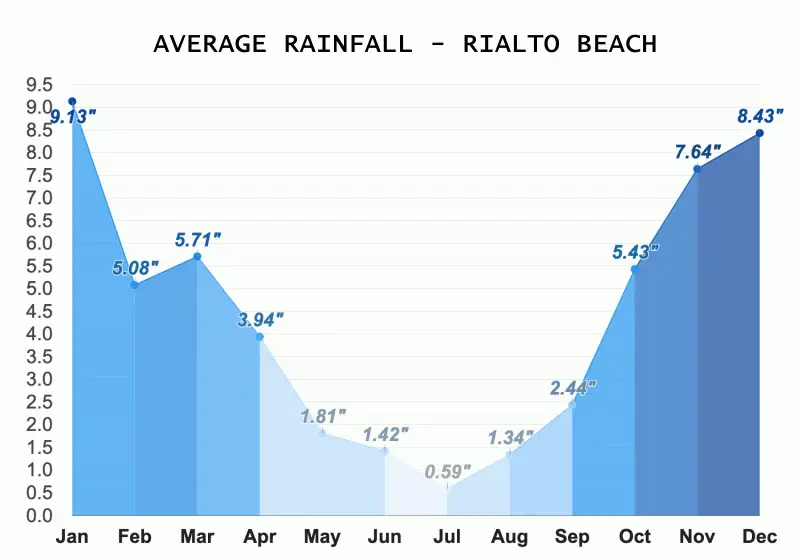
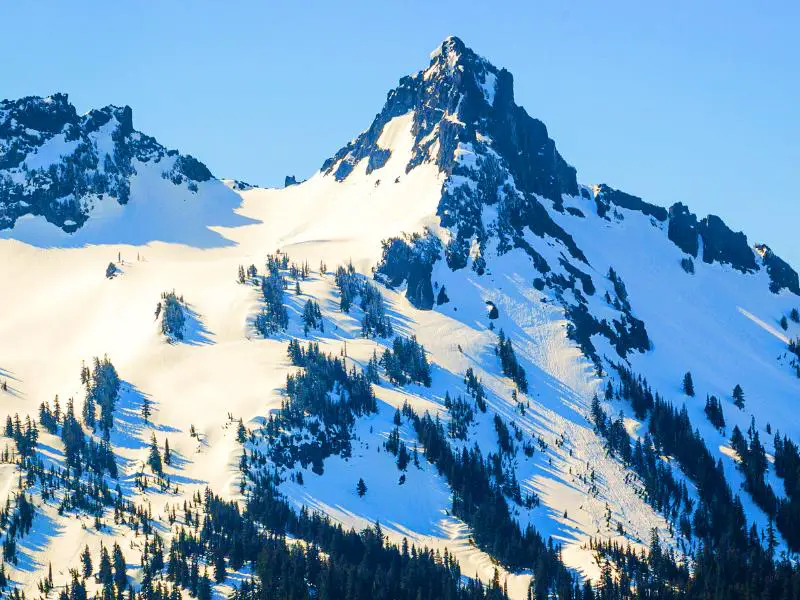
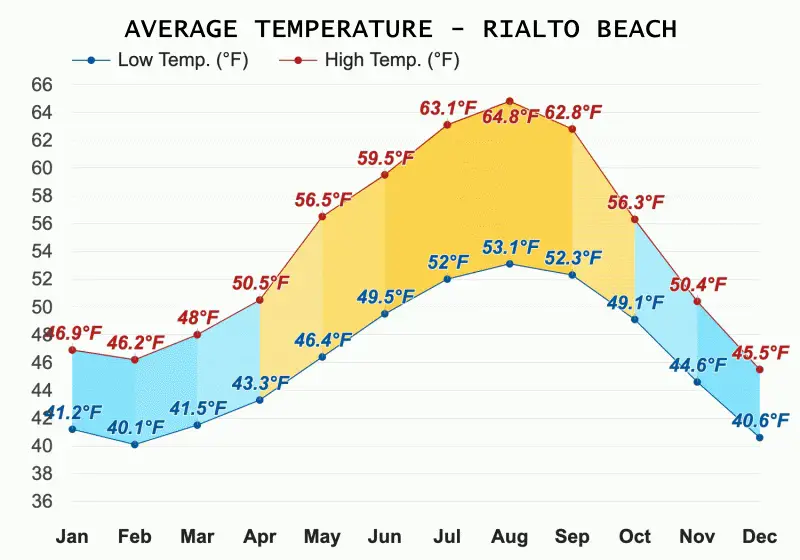
Summer is by far the most popular time to visit and this is also when the weather is by far the best.  There is a lot less rain in summer, though rain and thunderstorms are possible at any time and it can be foggy on the coast even on sunny days.  Temperatures are mild. August is the warmest month of the year, but even then, average temperatures are between 53.1°F and 64.8°F.

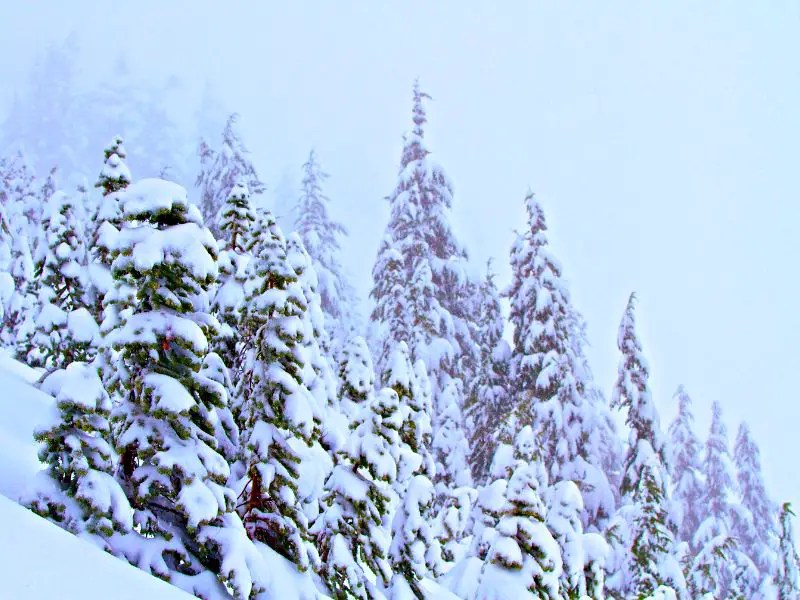
Winter is by far the wettest season.  This is when the region gets the bulk of the rain – and it is a LOT of rain.  Temperatures are surprisingly mild, though. The coldest month is December, with an average low-temperature of 40.6°F and an average high-temperature of 45.5°F.

Spring and Fall are similar but opposite.  In spring, the temperature is rising and the rainfall is decreasing, while in fall, temperatures are falling and rainfall is increasing.  

September is a lovely month with still very mild temperatures and not too much rain, but the other months are a mixed bag, with unpredictable weather. 


Directions to Rialto Beach

Where is Rialto Beach, Washington?

Rialto Beach lies at the end of Mora Road, which is a side road off La Push Road. Rialto Beach is about a 5-minute drive from Mora Campground.  It’s 36 miles southwest of Lake Crescent, and about 75 miles from Port Angeles. Click here to see the Rialto Beach address on Google maps.

Rialto Beach directions from key departure points

Forks to Rialto Beach 

Follow WA-101 north from Forks for 1.5 miles.  Turn left onto La Push Road (WA-110). After 7.8 miles, take the turnoff to Mora Road on your right. After 5.0 miles, the road ends at the Rialto Beach parking lot.

Mora and Rialto Beach – La Push 

Although they are super close as the crow flies, they are a 20-minute drive apart.  From La Push, follow Front Street towards Forks.  This turns into La Push Road (WA-110).  Follow this for 5.5 miles.  Then turn left onto Mora Road. Follow this for 3.2 miles and you’ll see the turnoff to Mora Campground on your left.  Continue for another 1.8 miles.  The road ends at the Rialto Beach parking lot. 

Port Angeles to Rialto Beach

From Port Angeles, drive US-101 west for 55 miles. Turn onto SR-110 west for 7.7 miles. Then go right on Mora Road for 5 miles to the trailhead at road’s end.

Hoh Rainforest to Rialto Beach 

Take Hoh Valley Rd/Upper Hoh Rd for 18 miles back to WA-101.  Turn right and take WA-101 north for 14.6 miles.  Drive through Forks. Another 1.5 miles from the center of Forks, take the turnoff to La Pish Road (WA-110) on your left. After 7.8 miles, take the turnoff to Mora Road on your right. After 5.0 miles, the road ends at the Rialto Beach parking lot.

Seattle to Rialto Beach

There are two main routes from Seattle to Rialto Beach.

The northern route heads out from Seattle via the Seattle – Bainbridge Ferry to Bainbridge Island.  Check ferry times here

Then get on WA-3 N in Poulsbo from WA-305 N. Follow WA-104 W and US-101 N for 113 miles through Port Angeles to WA-110 W/La Push Rd in Forks.  Turn right onto La Push Road. After 7.8 miles, take the turnoff to Mora Road on your right. After 5.0 miles, the road ends at the Rialto Beach parking lot. 

This trip takes a little under 4 hours, though travel times vary with the ferry schedule and traffic.

The southern route is only a little longer.  Head south from Seattle to Tacoma. Follow I-5 S, WA-8 W, and US-12 W to 95190/Wynoochee Valley Rd in Grays Harbor County. Take the exit toward Devonshire Road from US-12 W. Continue on 95190/Wynoochee Valley Rd. Take 51800/Wynooche Wishkah Rd to US-101 N.  Turn right onto US-101 N and follow 101 North for 91 miles, driving through Forks. 

Another 1.5 miles from the center of Forks, take the turn off to La Pish Road (WA-110) on your left. After 7.8 miles, take the turnoff to Mora Road on your right. After 5.0 miles, the road ends at the Rialto Beach parking lot.

This route typically takes a little over 4 hours but doesn’t require a ferry. 


Rialto Beach Hotels

There is no Rialto Beach lodging super close.  But here are some good hotels near Rialto Beach, WA.

LUXURY OPTION: Woodlands Inn 

Located in Forks, this isn’t a five-star resort, but does have very comfortable cabins with porches in a pleasant setting.  Each cabin features a patio, a fully equipped kitchen with a microwave, a fireplace, a seating area with a sofa, a flat-screen TV, and a private bathroom with shower and a hairdryer. There are several bed configurations offered.

Check availability for Woodlands Inn

MID-RANGE OPTION: Red Lion Hotel

If you prefer to stay in Port Angeles, this is a very comfortable option. It’s located right on the harbor in downtown Port Angeles and many of the rooms have private balconies with ocean views.  There’s a seasonal outdoor pool, a restaurant and lounge.

Check availability at Red Lion Hotel

BUDGET OPTION: Pacific Inn Motel

Located in Forks, this motel is a comfortable, clean option at a more affordable price.  Rooms have private bathrooms, free WiFi, a flat-screen TV, and air conditioning. Some rooms have private balconies and family rooms are offered.

Check availability at Pacific Inn Motel


Rialto Beach Camping

There are two options for camping at Rialto Beach.  

1. Mora Campground

This is an official NPS campground and is less than 5 minutes from Rialto Beach.   I’ve stayed here and it’s a nice campground with sites for tents and RVs set amongst trees.  There is a reservation system in effect for late May to late September.  There are 94 sites available and you can book on recreation.gov.  The rest of the year, it is first come, first-served.

Each campsite has a fire ring with a grate and picnic table. Potable water and flush toilets are located throughout the campground.  No electrical hookups are available at any campsites, but there is an RV dump station available (summer only) for $10 ($5 for Senior or Access Passes).

2. Camping on Rialto Beach

You can camp on the beach itself if you have a tent and a permit.  Because the beach is a short, flat walk from the parking lot, this is a great option if you want to experience the beach at different times of the day.  There is something magical about waking up to the sight and sound of the ocean just outside your tent door.

You need to obtain a backcountry permit for camping on the beach. You can make your reservations here at the National Park Service website. Click on the “North Coast” and then “Hole-in-the-wall”.

If you want to do this, a few things to keep in mind:

  • Bear Canisters are required.  You can get some ultra-lightweight ones here.
  • Be sure to set up your tent above the high-water mark (which is very close to the edge of the beach).
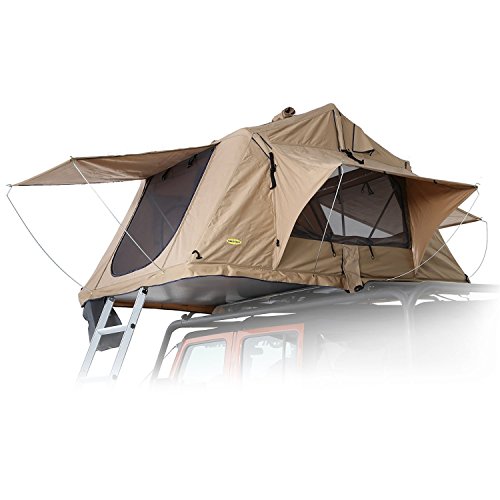
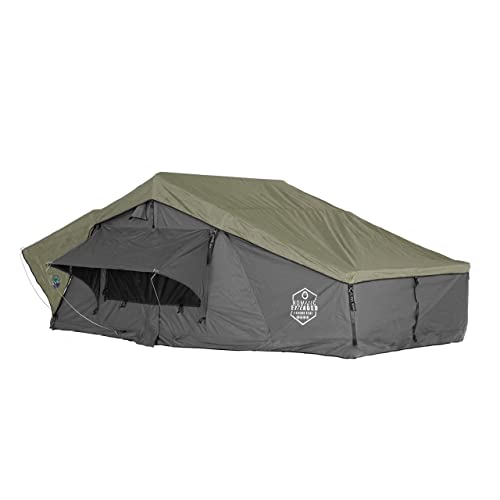
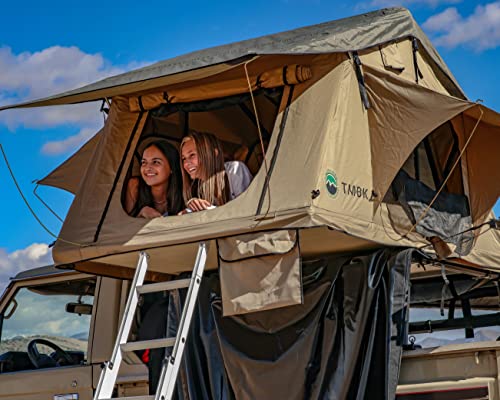
  • If you are looking to get a tent, check my Guide to the Best Beach Camping Tents before you make a final decision. 
  • You can use driftwood to create a fire.
  • There is no fresh water, so you’ll need to take all the water you need. There is potable water at the parking lot.
  • Although access to the beach is short and easy, you’ll need to walk some distance to get to a campsite, so you’ll need to be able to carry all your gear with you.
  • Check my Beach Camping Packing List to make sure you have all you need.

Rialto Beach, Forks, WA: FAQS

What is a hole in the wall at Rialto Beach?

Hole in the Wall is a natural arch carved in a rocky outcrop about 1.6 miles along Rialto Beach from the parking lot.

How do you get to the Hole in the Wall, Forks?

From Forks, follow WA-101 north for 1.5 miles.  Turn left onto La Push Road (WA-110). After 7.8 miles, take the turnoff to Mora Road on your right. After 5.0 miles, the road ends at the Rialto Beach parking lot.

Can you take rocks from Rialto Beach?

Rialto Beach is within Olympic National Park, so it’s not permitted to remove/ collect rocks, driftwood or any other souvenirs from the beach.

Are there bathrooms at Rialto Beach?

There are restrooms are at the Rialto Beach parking lot, as well as drinkable water.  According to the NPS, “a pit toilet may be available just south of Hole-in-the-Wall near the ‘split rock'”, though I haven’t seen it there.

Can you walk Rialto Beach at high tide?

It depends on how high the high tide is, but basically, no.  Once the tide reaches about 6 feet, the water completely covers the beach and you’ll be left scrambling over driftwood and through the edge of the forest in parts.

There is a forest trail parallel to the beach that is accessible during high tide, but you won’t be able to reach Hole in the Wall on this path.

Can you see hole in the wall at high tide?

No.  If Hole in the Wall is your destination, plan to arrive at Hole in the Wall at least 30 minutes before the lowest tide. This will give you time at the tide pools and plenty of time to return before the high tide cuts off the beach access. 

Do you have to pay to go to Rialto Beach?

Rialto Beach lies inside Olympic National Park. Technically you need to pay the Olympic National Park entrance fee; however, there is no entrance station at the beach. 

To be on the safe side (and support the parks), you can pay it at one of the entrance stations (Hoh Rainforest, Heart o’ the Hills, or Sol Duc) or buy it online.  Or, if you are planning to visit more than just Olympic National Park this year (Mount Rainier National Park and North Cascades National Park are both close), it can be great value to purchase an America The Beautiful pass.

What is Rialto Beach famous for?

Rialto Beach is one of the most accessible beaches on the Olympic coast. A short path leads to the beach and ocean view.  In summer, there’s a wheelchair accessible ramp on the path.

It’s also home to the famous Hole in the Wall natural arch. 

Rialto Beach is a wonderful place to look for wildlife, from otters and seals to pelicans and bald eagles.

Why does Rialto Beach have so much driftwood?

One of the first things you notice when arriving at Rialto Beach is the enormous driftwood logs lining the beach.  There’s a reason this is often called the “tree graveyard”.

There are two ways driftwood arrives at the beach.  Trees in the forest on the Olympic Peninsula fall into rivers and then get washed down to the sea.  Waves in powerful storms fling these enormous tree trunks up on the beach.  Those same storms surge waves into the forest lining the beach, uprooting trees and weakening the roots of others, which then fall directly onto the beach.

What is the best time of year to go to Rialto Beach?

The best time of year to visit Rialto Beach is summer.  Although the summer months are the busiest, this is also the warmest and driest time of year.  Rain and fog are a possible at any time of the year, but this is when you have the best chance of nice weather. 

Can you drive on Rialto Beach?

You can’t drive ON Rialto Beach, but you can drive right TO Rialto Beach.  Unlike most of the Olympic Peninsula beaches that you need to hike to, the beach is a very short walk from the parking lot. 

Can you have a fire on Rialto Beach?

Yes, campfires are permitted on Rialto Beach using driftwood found on the beach.  However, you aren’t allowed to bring your own firewood to the beach or take firewood from the surrounding forest.

Can I bring my dog to Rialto Beach?

Yes.  Leashed pets are allowed on Rialto Beach during the daytime until Ellen Creek, which is 0.8 miles from the parking lot. Camping with pets is prohibited, however.

Does Rialto Beach have tide pools?

Yes.  There are plenty of tide pools all around Hole in the Wall, which is located 1.65 miles along Rialto Beach from the parking lot.

The tidal pools have purple and orange sea stars, colorful anemones, mollusks, sea grasses, nudibranchs tiny crabs.  You’ll need to visit at low tide to see them, though. 

Rialto Beach vs Ruby Beach: Which is better?

Rialto Beach and Ruby Beach are both iconic Pacific Northwest beaches.  Both have enormous driftwood, offshore sea stacks and tidal pools.

Rialto Beach is easier to get to and more accessible – there is a short, flat path from the parking lot.  To get to Ruby Beach, you need to hike a 0.25-mile trail down to the beach and usually need to climb over driftwood to reach the beach.

Ruby Beach is arguably a little more picturesque, but both are beautiful.  Rialto Beach has the famous Hole in the Wall arch.

If you have time to visit both, I recommend doing so.


Travel Insurance for Olympic National Park – Rialto Beach, WA

You should definitely get travel insurance for your trip to Rialto Hole in the Wall.  This can protect you not only against medical and emergency repatriation, but can also cover things like trip cancellation, loss and/ or theft of property, etc.  

A great insurance option is Travelex.  It has coverage for all you’ll need. You can choose the best travel insurance plan for your trip here or get a quote right now:

728x90 Get Quote

Enjoy the Rialto Beach hike!

You might also like

>> Olympic National Park Guide
>> The Best Olympic National Park Beaches 
>> Best Lake Quinault Rainforest Hikes
>> Best Hoh Rainforest Hikes 
>> Best Sol Duc Hikes 
>> Best Lake Crescent Hikes 
>> Best Hurricane Ridge Hikes 
>> Guide to Visiting Hurricane Ridge
>> Best Waterfalls in Olympic National Park


Do you have any tips for the Rialto Beach trail to Hole in the Wall or questions about Rialto Beach hiking?  I’d love to hear about them.  Join my private Facebook group National Parks Collectors and comment and let me know (you can also pick up extra planning tips, share your photos and stories with other national park lovers and more).

FREE DOWNLOAD
Subscribe to regular updates with tips for planning, travel inspiration and trip ideas and get instant access to the free PDF of this guide to
Rialto Beach – Hole in the Wall, Olympic National Park

If you liked this post about the hike on Rialto Beach to Hole in the Wall, please share the love and Pin It to your Olympic National Park board! 

WHERE ARE YOU IN YOUR PLANNING PROCESS?

Are you just starting to think about taking a national parks trip? Get Inspiration
Are you starting to plan a trip to Olympic National Park? Read my Guide to Olympic National Park
Are you looking for a place to stay? Seach accommodation guides
Are you ready to book your trip? Use these Planning and Booking Resources
Do you want to read a book about national parks? Check out my Recommended Reading List

About the Author

James Ian Yosemite

James Ian is a national park, camping and hiking expert.

He has dedicated his life to travel, visiting more than 80 countries, all 7 continents and all of the main national parks in the United States. With over 35 years experience in the travel industry, James has worked on cruise ships, at resorts and hotels, and as a travel planner who’s helped hundreds of people plan successful trips to US national parks. 

Based on his experience visiting our national parks multiple times, in-depth research and expertise as a travel planner, James has published detailed itineraries for most of the major national parks in the US. These itineraries, as well as in-depth park guides, comprehensive camping and hiking gear reviews and buying guides, and helpful packing lists and gift guides will help you have your own incredible trip to US national parks without stress and hassle.

As a national park expert, James has contributed to many publications, including Time Business News, Savoteur, Best Trip, and Wired.

Read more…


Parks Collecting is a participant in the Amazon.com Services LLC Associates Program, an affiliate advertising program designed to provide a means for sites to earn advertising fees by advertising and linking to amazon.com. Amazon and the Amazon logo are trademarks of Amazon.com, Inc. or its affiliates. As an Amazon Associate I earn from qualifying purchases.

10 Fun Facts about Great Smoky Mountains National Park

Great Smoky Mountains National Park is one of the highlights of the east coast of the United States.  But there is more to the park than just forests.  There are plenty of fun facts about the Smoky Mountains that you may well not know.

If you’d like to learn some interesting facts about Great Smoky Mountains National Park, read on …

No time right now to read these fun facts about Great Smoky Mountains National Park? Pin It and save it for later:

Please note this post may contain affiliate links, which means we may receive a commission, at zero cost to you, if you make a purchase through a link. Please see our full Disclosure for more information. If you have any questions, please contact me.

FREE DOWNLOAD
Subscribe to regular updates with tips for planning, travel inspiration and trip ideas and get instant access to the free PDF
10 Fun Facts about Great Smoky Mountains National Park>

The Great Smoky Mountains National Park Facts (the Basics)

Location: Half of Great Smoky Mountains National Park lies in Tennessee (TN) and the other half in neighboring North Carolina (NC). The main road through the park is a major connecting road between the two states. There are three main entrances: Gatlinburg, TN; Townsend, TN; and Cherokee, NC.

Size: Great Smoky Mountains National Park is 522,427 acres. 

Number of Visitors each Year: In 2022, 12,937,633 people visited the park.  

Annual Rainfall: The rainfall varies throughout the park.  It ranges from an average of 55 inches per year in the lowlands to 85 inches per year at Clingmans Dome.

Highest Elevation: 6,643 feet (Clingmans Dome)

Lowest Elevation: 840 feet (Abrams Creek)

Date it Became a National Park: President Calvin Coolidge signed a bill that provided for the establishment of Great Smoky Mountain National Park in May 1926.  However, it took a while to acquire land and build the park, so it wasn’t until September 2, 1940 that President Franklin D. Roosevelt officially opened the park.

Charles Bunion Trail Great Smoky Mountains National Park

10 Fun Facts about Great Smoky Mountains National Park

1. Great Smoky Mountain National Park is the most popular National Park in the USA

Clingmans Dome Great Smoky Mountains National Park

Did you know there are 63 major National Parks and a total of 424 Units within the national park system?  So, it’s pretty impressive that Great Smoky Mountains National Park is the most popular of the 63 major National Parks and the 3rd most popular unit in the entire NPS system (after Blueridge Parkway and Golden Gate National Recreation Area).  

In 2021, it’s busiest year ever, more than 14 million people visited the park!  

This is partly because about 2/3 of the country live within a 24-hour drive from the park (and unlike most parks, there is no entrance fee). 

But it’s also because there is great hiking, fishing, horseback riding and other outdoor activities to enjoy.  You can also take a step back in time and learn more about the history of the Appalachian Mountains (more on that in some of the other fun facts about the Great Smoky Mountains National Park below). 

READ MORE: See all the National Parks and download a free checklist


2. The Spaniards searched for gold in the Smoky Mountains

Black and White image of Map with the text below that says FLORIDA with the March of De Soto and His Men 1539-1544
The probable route of De Soto’s El Florida expedition

As you may well know, the Spanish ‘conquered’ most of what is now Latin America and soon became the richest country in the world on the back of all the silver and gold they took from the Americas. 

In less than 50 years, more than 100 tons of gold were taken. But they didn’t stop there. 

From 1539-1543, Hernando De Soto, who was the governor of Cuba at the time, explored much of what is now the southeastern United States, including the Great Smoky Mountains, searching for gold and for a passage to China or the Pacific coast.

De Soto didn’t find gold, and died on the banks of the Mississippi, but a later expedition tried again.

About 30 years later, in 1567-8 another Spaniard, Juan Pardo, ventured into the area and helped establish 6 Spanish forts, that were subsequently destroyed in a native American uprising.  

Pardo’s soldiers also searched for gold, but didn’t find any.  If they had, the entire area of the US south of the Mason Dixie Line may well have become part of the Spanish empire!

READ MORE: To learn more about Hernando de Soto, read: Hernando De Soto: A Savage Quest in the Americas by DE Duncan.


3. Cherokee Indians lived in the area for more than 1,000 years

De Soto may not have found gold, but he did find native Americans living in the area (so did Juan Pardo – hence the destroyed forts!).

The Cherokee Indians are a branch of the Iroquois nation.  And although the name “Cherokee” was first recorded by De Soto’s party, the Cherokee people have lived in the area for more than a thousand years.

Historically, the Cherokee culture was based in hunting, trading, and agriculture and people lived in small, permanent communities.

When gold was discovered (not by the Spanish) in Georgia in the early 1800’s, a treaty was signed (by people who didn’t have the right to sign it), and  almost 14,000 Cherokees were taken from their homes, held in stockades, and then forced to move to Oklahoma and Arkansas.  The infamous 6-month journey in 1838, in which than 4,000 people died from cold, hunger, and disease, became known as the “Trail of Tears.”

Many others hid, and about 11,000 members of the ‘Eastern Tribe’ now live on the on the Cherokee Indian Reservation, or the “Qualla Boundary” as it is often called.

If you’re interested in learning more about the history and stories of the Cherokee people, visit the Museum of the Cherokee Indian located in Cherokee, North Carolina, just outside the national park.

READ MORE: A recommended read is Living Stories of the Cherokee by BR Duncan


4. Great Smoky Mountains National Park has a ‘mother’ and a ‘father’ 

Anne Davis and her husband, Willis, lived in Knoxville and loved the Smokies.  Returning from a visit to the western national parks in 1923, Anne remarked to her husband “Why could not our Great Smokies be made a national park—and those magnificent monarchs of the forest preserved for posterity?”. 

This is credited as the first time someone suggested that the area become a national park.  It prompted Willis to start talking about to anyone who would listen.  This kickstarted the idea of making the region a national park. 

In 1924, Anne Davis became the third woman to serve in the Tennessee legislature. She sponsored legislation that would allow the purchase of more than 78,000 acres of land from Little River Lumber Company for the national park and later organized an inspection trip for the entire legislature to overcome opposition, so in 1925 the bill was signed into law and Anne eventually became known as the ‘mother’ of the park.

From Anne’s idea came a lot of hard work to make the park a reality.  Enter the park’s ‘father’, Colonel David Chapman

From 1924 until well into the 1930’s, he helped bring the park idea to fruition, especially on the Tennessee side of the park. He was president of a Knoxville drug company, but also became chairman of the Great Smoky Mountains Conservation Association. In this capacity, he worked tirelessly to overcome obstacles such as opposition from park opponents, lack of funding for land purchase, and controversial condemnation actions.

READ MORE: For more stories about key people in the park’s history, check out Great Smokies Myths and Legends: The True Stories behind History’s Mysteries by MR Bradley


5. Many families had to leave their homes when the park was created

Black and white photo of a family consisting of seven people, two of them holding music instruments.
Credit: Robert L. Mason

So why was creating Great Smoky Mountains National Park so difficult? Because people lived there! 

There were literally thousands of small farms, larger properties and other miscellaneous parcels of land that people owned and lived on.  

There were timber and paper companies that operated in the mountains – and they all had valuable equipment and inventory. All this had to be bought – and the federal government itself was prohibited from purchasing them directly (but could accept donations from companies that were created to buy the land, homes and companies).  

This was incredibly traumatic for the people who had homes there and a way of life involving hunting, trapping and the lumber industry that could not be easily replaced.  

Today, we’re happy to have this place for all people to enjoy, but it didn’t come without a lot of difficulty for many people, including the original Cherokee inhabitants and the early settlers. 

READ MORE: Learn more about the birth of the national park The Great Smoky Mountains National Park (Images of America) by S. Cotham


6. Great Smoky Mountains National Park is the Salamander Capital Of The World

Yellow-spotted salamander on the rock in Great Smoky Mountains National Park
Yellow-Spotted Salamander

You might not think “Smokies” and “salamanders” together, but there are a lot of salamanders in the mountains.

Salamanders are tiny amphibians that look kind of like lizards.  They can be very colorful and cute!

There are 30 different species of salamanders in the Smoky Mountains! Of these, there are 24 species of lungless salamanders. As their name suggests, these incredible creatures don’t have lungs – instead they use walls of tiny blood vessels in their skin and linings of their mouths and throats to exchange oxygen and carbon dioxide. 

Despite the fact that Great Smoky Mountains National Park is the most popular park in the US and the fact that there are over 17,000 species of plants and animals in the park, in fact over half of the animals in the park with vertebrae (a spine) – and that includes humans – are salamanders.  

Look for them near creeks and under rocks, logs, and leaf litter in the forests.

READ MORE: Kids will love Salamanders!: A My Incredible World Picture Book for Children by H. Aicher


7. You can see synchronous fireflies flashing in Great Smoky Mountain National Park

Nature is truly incredible.  There are almost 20 species of fireflies in Great Smoky Mountains National Park, but one species (Photinus carolinus) does something amazing during their mating season. 

For a couple of weeks every summer (usually late May – early June), the thousands of fireflies all flash in unison.  They are one of only a few species in the world known to synchronize their flash patterns.

The synchronous fireflies live in the Elkmont region of the Great Smoky Mountains National Park and seeing them is truly an awe-inspiring sight.  

Due to the popularity of this rare event, the NPS runs a lottery for the limited spots available in the official viewing area. Check the NPS website in late April for an announcement of the dates

READ MORE: A fun kids book is Piddle Diddle, the Widdle Penguin, and the Synchronous Fireflies of the Great Smoky Mountains by W Major, R Major and T Wilkerson


8. The mountains ‘smoke’ is actually a plant-produced fog

The mountains are named because they often appear to be shrouded in a mystical blue smoke.  They have had this name this for centuries.  The Cherokee call the mountains “Shaconage” (Sha-Kon-O-Hey), which means the “Land of Blue Smoke.

This is not regular smoke, however.  It’s actually a fog created by the native plants in the park. 

The plants give off something called a volatile organic compound (VOC).  Since there are millions of plants on the area, the VOCs come together to form a vapor, which scatters blue light from the sky, creating the iconic blue-hued mist that makes the mountains look so smoky. 

READ MORE: Enjoy the scenery on these Best Hikes in Great Smoky Mountains


9. The Great Smoky Mountains used to be as high as the Himalayas

Clingmans Dome surrounded by trees under the blue sky in Great Smoky Mountains National Park.
Clingmans Dome

The tallest point in the Great Smoky Mountains National Park is Clingmans Dome.  At 6,643 feet, it’s a lot shorter than Mount Everest (29,032 feet).  But at one point in time, the mountains were just as tall! 

Three hundred and thirty million years ago, what is now Africa smushed into what is now North America, forming the super continent Pangaea. This pressure pushed the land up, forming the Appalachian Mountains.  At the time, they towered as tall as the Himalayas are today.  

About 200 million years ago, the continents drifted apart again (the Atlas Mountains in Morrocco are part of the same mountain range that form the Appalachian Mountains!). 

That decrease in pressure and 200 million years of erosion have reduced the mountains to their current much humbler heights. 

Though it does mean they are lot easier for us to visit. 

READ MORE: Learn more about Clingman’s Dome: Clingmans Dome: Highest Mountain in the Great Smokies by M. Spencer


10. The Civilian Conservation Corps (CCC) built Great Smoky Mountains National Park

1934-1935 Working on bank sloping and daylighting operations.

The Civilian Conservation Corps (CCC) were created as part of president Franklin D. Roosevelt’s New Deal in the Great Depression. Roosevelt’s goal was to give unemployed young men work that would help build up their health and morale while contributing to the economic recovery of the country. The CCC was employed around the country to build roads, bridges and other infrastructure.  

They did a lot of work in the national parks. But perhaps no park more than Great Smoky Mountains National Park. 

Remember that it was made up of lands purchased from farmers, lumber yards, logged forests, small villages and other privately-owned property.  To turn all that into a national park took a lot of work. 

About 4,000 men in the CCC worked hard over almost a decade to restore the Smoky Mountains, focusing on planting trees, fighting fires, managing agriculture, addressing erosion, and constructing roads.

By the time the CCC program was terminated in 1942, they had planted more than three billion trees and constructed trails and shelters in more than 800 national and state parks.

READ MORE: Learn more about the CCC in this interesting book: Nature’s New Deal: The Civilian Conservation Corps and the Roots of the American Environmental Movement by Neil M. Maher


More Information about Great Smoky Mountains National Park


Do you have any other Great Smoky Mountains National Park info to share?  I’d love to hear them. Join my private Facebook group National Parks Collectors and comment and let me know (you can also pick up extra planning tips, share your photos and stories with other national park lovers and more).

FREE DOWNLOAD
Subscribe to regular updates with tips for planning, travel inspiration and trip ideas and get instant access to the free PDF
10 Fun Facts about Great Smoky Mountains National Park

If you liked these fun facts about Smoky Mountains National Park, please share the love and Pin It to your Great Smoky Mountains National Park board!

WHERE ARE YOU IN YOUR PLANNING PROCESS?

Are you just starting to think about taking a national parks trip? Get Inspiration
Are you starting to plan a trip to Great Smoky Mountains National Park? Read my Guide to Great Smoky Mountains National Park
Are you looking for a place to stay near Great Smoky Mountains National Park? Find an Airbnb near Great Smoky Mountains National Park
Are you ready to book your trip? Use these Planning and Booking Resources

About the Author

James Ian Yosemite

James Ian is a national park, camping and hiking expert.

He has dedicated his life to travel, visiting more than 80 countries, all 7 continents and all of the main national parks in the United States. With over 35 years experience in the travel industry, James has worked on cruise ships, at resorts and hotels, and as a travel planner who’s helped hundreds of people plan successful trips to US national parks. 

Based on his experience visiting our national parks multiple times, in-depth research and expertise as a travel planner, James has published detailed itineraries for most of the major national parks in the US. These itineraries, as well as in-depth park guides, comprehensive camping and hiking gear reviews and buying guides, and helpful packing lists and gift guides will help you have your own incredible trip to US national parks without stress and hassle.

As a national park expert, James has contributed to many publications, including Time Business News, Savoteur, Best Trip, and Wired.

Read more…


Parks Collecting is a participant in the Amazon.com Services LLC Associates Program, an affiliate advertising program designed to provide a means for sites to earn advertising fees by advertising and linking to amazon.com. Amazon and the Amazon logo are trademarks of Amazon.com, Inc. or its affiliates. As an Amazon Associate I earn from qualifying purchases.

Best Truck Bed Tent for Camping in 2024: Complete Guide

Truck camping has become increasingly popular in recent years, and for good reason. It’s a convenient way to explore the great outdoors without sacrificing all the comforts of home. One of the essential items for truck camping is a truck bed tent, which provides a comfortable sleeping area in the back of your truck. 

When it comes to purchasing a truck bed pop up tent, there are a few critical things to consider. Firstly, you need to ensure that the tent is compatible with your specific truck model and bed size. Secondly, you should look for a tent that is easy to set up and take down, as well as durable enough to withstand the elements. 

We are national park and camping experts and after researching and testing various options, we have identified the best truck bed tents on the market. These tents offer a comfortable and convenient camping experience and are suitable for a range of truck models and bed sizes. 

No time to read about the best truck bed tent for camping now?  Pin It and save it for later: 

3 photos of tents on back of truck beds with text The Best Tents for Truck Beds
3 photos of tents on back of truck beds with text The Best Truck Bed Tents

What’s the best truck camping tent for the bed of your truck?

Want to cut right to the chase? After trying all top five choices, what was our favorite? Our pick for the best truck bed tent is the Napier Outdoors Sportz Truck Tent.

Why? Well, let’s look at each of the main things to consider:

Size and Compatibility

There are 7 models & 5 sizes, so finding a model compatible with your truck is a sure thing.  They also provide a size chart to make it easy to pick the right model.

The tent has good headroom and you can buy an additional attachment tent to add even more space.

Material and Durability

It has a sewn in floor and is made from polyester.

Ventilation and Privacy

There’s a large rear access panel that gives easy access to the truck cabin and provides ventilation.  There’s also an optional additional 4′ x 4′ shade awning that secures to the tailgate so it can be set-up anywhere.

Ease of Setup and Takedown

Although it isn’t the easiest of the five tents to install, the color-coded pole and sleeve system helps.

Get the attachment tent here


Comparison Chart of the Top Camper Tents for Pickup Trucks

This handy table lets you compare tents for the bed of your truck at a glance. We’ve listed our top truck bed tents, so you can compare camping tents with ease.

If you are reading this on a mobile device, you might need to swipe to scroll across. 

NameImageSleepsOur Rating (/5)Price
Napier Backroadz

N/A

24.8CHECK NOW
Guide Gear Full Size

N/A

24.5CHECK NOW
Kariyee Double Layer

N/A

24.6CHECK NOW
Sportz Truck tent

N/A

24.9CHECK NOW
Vevor Standard

N/A

24.7CHECK NOW

Best Truck Bed Tent Picks

If you’re an avid camper or adventurer, you know that sleeping in a tent on the ground can be uncomfortable and inconvenient. That’s where truck bed tents come in!

These tents are designed to fit snugly over the bed of your truck, providing a comfortable and elevated sleeping area.

In this article, we conducted extensive research into the tents available and then tested our top five picks, so feel confident that those listed here are the best truck bed tents on the market. Whether you’re planning a weekend camping trip or a cross-country road trip, we’ve got you covered. 

1. Napier Backroadz Truck Tent Compact Short Bed

If you’re looking for a pickup bed tent, we highly recommend the Napier Backroadz Truck Tent Compact Short Bed as a top pick for best pickup truck bed tent for camping. We’ve used it multiple times and it’s been a great addition to our camping gear. 

Pros 

  • The color-coded pole system makes set-up a breeze. I can easily set it up in under 10 minutes. 
  • The bathtub floor keeps you clean from your truck and dry from the elements. 
  • The full rainfly with taped seams, zippable windows, and door storm flap provides water protection. 
  • More headroom than most, which is good for tall people like me. 

Cons 

  • The tent is designed for compact short beds only, so it may not fit all truck models. 
  • The mesh windows are not completely opaque, so privacy may be an issue in some locations. 
  • We’ve taken it on trips in regular weather conditions and it’s been great, but it’s not suitable for extreme weather conditions. 

We’ve found that the Napier Backroadz Truck Tent Compact Short Bed is perfect for a spontaneous road trip or a trek to the national parks. It’s comfortable to sleep in and has ample headroom, comfortably sleeping two people. The sturdy frame and strapping system keeps you secure in the windy conditions, and the two large mesh windows and rear ceiling vent provide optimal ventilation. 

If you’re like me and need a little extra help staying organized, this tent is great. It comes with a gear loft, lantern holder, and I personally love the interior pocket that I use keep small items like my phone and flashlight organized.

The compact carry bag makes it easy to store and transport. Plus, for every product sold, Napier Outdoors plants one tree in partnership with Trees for the Future. 

Overall, we highly recommend the Napier Backroadz Truck Tent Compact Short Bed for anyone looking for a reliable and easy-to-use pick up tent camper. It’s perfect for car camping and outdoor lifestyle enthusiasts. 

>> See these Napier Backroadz pickup bed tents here


Guide Gear Full Size Truck Tent for Camping 

We highly recommend the Guide Gear Full Size Truck Tent for Camping for anyone who loves camping and wants to take their campsite anywhere with them. 

Pros 

  • The tent is very easy to set up and comes with 4 total poles. It took us only 10 minutes to set it up. 
  • The tent is made of 190T polyester with 1500mm water-resistant coating, which makes it very durable and weather-resistant. We were very comfortable and dry in the tent, even during heavy rain. 
  • The tent fits most full-sized beds measuring 79-81″ with the tailgate down. It fits perfectly on my mate’s Chevy Silverado when we took for a test trip. 

Cons 

  • The tent is a bit heavy and weighs 11 lbs, which makes it a bit difficult to carry around. 
  • The tent is not very spacious and can only accommodate 2 people. It wouldn’t use it for more than that.
  • The tent does not have a lot of ventilation, which made it a bit stuffy at times. 

We used the Guide Gear Full Size Truck Tent for Camping on our recent camping trip and we were very impressed with its performance. The tent is very easy to set up and comes with 4 total poles, which makes it very stable and sturdy.  

Overall, we highly recommend the Guide Gear Full Size Truck Tent for Camping for anyone who loves camping and wants to take their campsite anywhere with them. This pick up truck tent camper perfect for couples or small groups who want to enjoy the great outdoors without having to worry about setting up a traditional tent. 

>> Check latest price for this Guide Gear back of truck tent here


Kariyee Double Layer Truck Tent

If you’re looking for a waterproof truck bed tent that is easy to set up and provides ample space, the Kariyee Truck Tent is another great option. 

Pros 

  • The tent is made of durable ripstop material that can withstand harsh weather conditions. 
  • The color-coded pole and sleeve assembly makes the setup process quick and easy (though the instructions are a bit confusing). 
  • The sewn-in floor ensures that dirt and debris from your truck bed won’t get inside the tent. 

Cons 

  • The instructions could be better illustrated. I found it a bit confusing and was glad I practiced setting it up at home before my trip so I figured out how to do it before heading off. 
  • The tent only fits full-size long bed pickups, so it’s not suitable for those with short beds. 
  • Some users have reported issues with missing or defective poles, though I didn’t experience this myself. 

We recently took the Kariyee Truck Tent on a camping trip and were impressed with its overall performance. Once I figured out the instructions, the tent was pretty easy to set up. The color-coded poles helped me to figure out which piece went where. 

The tent is spacious and provides ample headroom, making it comfortable to move around in. The two large mesh windows provide excellent ventilation, and the full rainfly offers great weather protection. We also appreciated the additional storm flaps covering the windows and doors. 

The tent is made of ripstop material that is durable and long-lasting. It also features a lantern hook and inside storage pocket, which were convenient additions to our camping experience. 

Overall, we would recommend the Kariyee Truck Tent to anyone looking for a waterproof truck bed tent that is easy to set up and provides ample space. This camper tent for truck beds is perfect for those who enjoy camping, hiking, or tailgating, and want a comfortable and convenient sleeping option. 

>> Read more about this truck bed tent camper HERE


Napier Outdoors Sportz Truck Tent 

We recently tried out the Napier Outdoors Sportz Truck Tent for a weekend camping trip and were impressed with its ease of use and comfort. 

Pros 

  • The sewn-in floor adds an extra layer of protection from the elements and keeps the tent clean. 
  • The large rear access panel and entrance door provide easy access to the truck’s cab and plenty of ventilation. 
  • The color-coded pole and sleeve system help with setup. 

Cons 

  • The tent can collect moisture, so be sure to keep the vents open when it’s wet outside. 
  • It’s not the easiest for one person to install, so you may need a helping hand. 
  • The setup instructions could be more detailed. 

The tent offers occupants over 5.6 feet of interior headroom – enough for some (though not me) to stand up in. An access panel is another great bonus as it allows you to access the cab area while camping, meaning you can store gear in there.  

BONUS: There is also a 4-person attachment tent you can buy to increase the sleeping capacity to 6. Tents on trucks are usually limited in size, so if you’re looking for a 6 or 4 person truck tent, this is a great option. 

BUY THE ATTACHMENT TENT HERE 

Overall, we would recommend this tent for the back of your pickup truck for anyone looking for a convenient and comfortable camping experience in the back of their truck. This tent truck camper perfect for couples or solo travelers who want to enjoy the great outdoors without the hassle of setting up a traditional tent. It also has the flexibility to be expaned with the additional attachemnt tent.

>> See current prices for this tent for your pickup bed here


Vevor Standard Truck Tent

If you’re looking for a reliable truck bed tent, the VEVOR Truck Tent is definitely worth considering. 

Pros 

  • The weatherproof structure of this pickup bed tent makes it perfect for camping in any season. 
  • The spacious inner space of the tent can comfortably sleep two adults. 
  • The tent is easy to assemble and comes with a set-up & pack-up instruction for quick and fast assemble. 

Cons 

  • I thought that the poles and pole pockets are not very sturdy. 
  • The tent may not fit all truck models and sizes. 
  • The quality of the storage bag could be improved. 

We recently used the VEVOR Truck Tent on a camping trip and were impressed with its performance. The tent is constructed with water-proof fabric with tape sealed seams (PU 2000mm), which kept our truck clean and dry during a rainy night. The heavy-duty belt and buckles of the tent also did not damage the paint of our truck. 

The tent provided ample headroom and comfortably slept two adults. We also appreciated the large viewing windows that allowed us to enjoy the panoramic sky and provided more light, better vision, and ventilation. The fully stitched waterproof floor ensured that we stayed dry. 

The tent was easy to assemble, and we were able to locate the poles quickly thanks to the easy-to-use poles and pole pockets. The set-up & pack-up instruction was included, which made the process quick and fast. We also liked the fact that a flashlight was included for our convenience. 

Overall, we would recommend the VEVOR Truck Tent for anyone looking for a reliable truck bed tent. It’s perfect for camping, tailgating, fishing, or even lounging at the beach.

>> Read more about this tent truck bed for camping here


Buying Guide: Finding the best truck bed tents for camping

When choosing the best truck bed tent, there are a few features that you should consider to ensure that you get a product that meets your needs. Here are some factors that we’ve found helpful to keep in mind: 

Size and Compatibility 

The first thing to consider is the size and compatibility of the tent. Make sure to measure your truck bed to ensure that the tent will fit properly. Additionally, some tents are designed to fit specific truck models, so be sure to check the compatibility before making a purchase. 

Material and Durability 

The material and durability of the tent are also important factors to consider. Look for a tent made from high-quality materials that can withstand the elements and provide a comfortable camping experience. A tent with a sturdy frame and reinforced seams will be more durable and long-lasting. 

Ventilation and Privacy 

Ventilation and privacy are also important considerations. Look for a tent with plenty of windows and mesh panels to allow for airflow and keep the interior cool.  

Ease of Setup and Takedown 

Finally, consider the ease of setup and takedown. Look for a tent that is easy to assemble and disassemble, with clear instructions and minimal parts. A tent that can be set up quickly and easily will save you time and hassle on your camping trip. 

By considering these factors, you can find the best truck bed tent for your needs and enjoy a comfortable and convenient camping experience.


Frequently Asked Questions about tents for the bed of a truck

What are the main types of truck tent camping tents?

There are two general types of truck tents – tents for beds of trucks and tents that go on top of trucks. This guide is all about truck bed tents.

What is a truck bed tent?

A truck bed tent is a type of tent that is designed to attach to the bed of a pickup truck. It provides a comfortable and elevated sleeping area that is protected from the elements. 

What are the advantages of a tent for the truck bed?

Using a truck bed tent offers several advantages. It provides a comfortable sleeping area that is elevated off the ground, which can help keep you dry and comfortable in wet or muddy conditions. It also provides protection from insects and other pests, as well as from wildlife. 
A tent for bed of a truck is more affordable than rooftop tents. Tents for pickup beds also tend to be lightweight and therefore easy to transport. They also require no rack for fitting. Plus, you don’t need to climb a ladder to get into them which is more comfortable if you have any mobility difficulties. 

Are all tents that attach to trucks the same size? 

No, truck bed tents come in a variety of sizes to fit different types of trucks. It is important to choose a tent that is designed to fit your specific make and model of truck. 
Most of the tents for a truck bed listed here come in different size options. If you want see more sizes, click on the tent’s link and then scroll down to see which other sizes are available. Most manufacturers make all sizes, from short bed truck tent products to long bed truck tent models.
Be sure to choose a size that fits your truck. Check the tent and your vehicle specs carefully before you buy.

What size truck bed tent do I need? 

To determine the size of truck bed tent you need, measure the length and width of your truck bed. You will also need to consider the height of the tent and the amount of headroom you require. 

Can you sleep in a truck bed tent? 

Yes, truck bed tents are designed to provide a comfortable sleeping area. They are sometimes equipped with a foam or air mattress, and some models even have built-in storage compartments and other amenities. 

What are some things to consider when choosing tent campers for trucks? 

When choosing a tent for a truck bed, it is important to consider factors such as the size and type of your truck, the climate and weather conditions you will be camping in, and the number of people who will be using the tent. 
Ideally it will have a way to hang a lantern inside and some storage. Some also come with a back doorway that gives direct access to the cabin – great if you have gear or a family member staying in the truck cabin.

Are truck bed tents waterproof? 

Most truck bed tents are designed to be waterproof or water-resistant. However, it is important to check the manufacturer’s specifications to ensure that the tent you choose is suitable for the climate and weather conditions you will be camping in. 

How do you set up a truck bed tent? 

Setting up a truck bed tent typically involves attaching the tent to the bed of your truck using straps or other fasteners. The tent may also require assembly, which typically involves inserting poles and securing them in place. It is important to follow the manufacturer’s instructions carefully to ensure that the tent is set up properly and safely. 


Which is the best pick up truck tent for you?

The answer will depend on your truck, what size tent you’re looking for and how important the various pros and cons are for you? By looking at these top five picks, you should be able to find the right tent for you.

Whichever you choose, I hope this article helps you pick from the best camping tents for trucks out there.

Enjoy your next adventure!

Do you have another pick for the best pickup truck tent camper?  I’d love to hear what it is.  Join my private Facebook group National Parks Collectors and comment and let me know.

If you liked this post about pickup tents, please share the love and Pin it to your Camping Gear board!  

3 photos of tents on back of truck beds with text The Best Truck Bed Tents
3 photos of tents on back of truck beds with text The Best Tents for Truck Beds

Read more travel product reviews 

Camping 

Other Travel Products 


About the Reviewer  

James Ian Yosemite

James Ian has dedicated his life to travel and has traveled to 82 countries and all 7 continents.  He’s visited all of the main national parks in the United States, as well as many national monuments and state parks.

As a national park expert, James has contributed to many publications, including Time Business News, Savoteur, and Wired. He also has several published detailed itineraries in addition to many free online guides.

James has rafted through the Grand Canyon; rappelled down slot canyons near Zion and Arches; hiked among the hoodoos in Bryce and the enormous trees in Sequoia; admired the waterfalls in Yosemite and the colored hot springs in Yellowstone; seen moose in Grand Tetons and seals in the Channel Islands, and much more.

Read more…


Parks Collecting is a participant in the Amazon.com Services LLC Associates Program, an affiliate advertising program designed to provide a means for sites to earn advertising fees by advertising and linking to amazon.com. Amazon and the Amazon logo are trademarks of Amazon.com, Inc. or its affiliates. As an Amazon Associate I earn from qualifying purchases.


Best Rooftop Tents for Trucks: Top Picks for Adventurers in 2024

Camping is an excellent way to get out and experience the great outdoors. However, it can be challenging to find a comfortable and safe place to sleep, especially if you are traveling by truck. That’s where rooftop tents for trucks come in. These tents are designed to mount onto the roof of your truck, creating a comfortable and elevated sleeping space that is off the ground. 

When looking for the best rooftop tents for trucks, there are a few critical things to consider. First, you’ll want to make sure that the tent is compatible with your specific truck model. You’ll also want to consider the size of the tent and how many people it can comfortably sleep. Other factors to consider include the tent’s weight, ease of setup and takedown, and durability. 

We are national park and camping experts. We spent countless hours researching the various rooftop tents for trucks to identify the ones that offer the best combination of comfort, convenience, and durability. We then tested each of the best six that we shortlisted here, so you can benefit from our personal experience.

In this article, we’ll share our top picks and highlight the features that make them stand out.

Whether you’re a seasoned camper or just getting started, we’re confident that one of these rooftop tents will be the perfect addition to your next outdoor adventure. 

No time to read about the best rooftop tents for trucks now?  Pin It and save it for later: 

3 photos of rooftop tents with text The Best Roof Top Tent
4 photos of roof top tents with text Best Rooftop Tents

Please note this post may contain affiliate links, which means we may receive a commission, at zero cost to you, if you make a purchase through a link. Please see our full Disclosure for more information. If you have any questions, please contact me.

What’s the best rooftop tent for trucks?

Want a quick solution? The extending Overland Vehicle Systems Nomadic 3 is my top overall pick among all the best truck tents for camping.

Why buy the Overland Vehicle Systems Nomadic 3?

This superb product is the best of all these tents for pickups due its good quality and impressive features. These include marine grade materials, LED lighting, a high density foam mattress and ease of fitting.

>> See the best truck mounted tent here


Comparison Chart of the Best Rooftop Camper Tents for Pickup Trucks

This handy table lets you compare our shortlist for the best roof top tent for a pickup.

If you are reading this on a mobile device, you might need to swipe to scroll across. 

NameImageSleepsOur Rating (/5)Price
Thule
Tepui
Kukenam


N/A

34.8CHECK NOW
Raptor
Offgrid
Voyager


N/A

24.6CHECK NOW
SmittybilT
Overlander


N/A

24.7CHECK NOW
Nomadic 3
Extended


N/A

34.9CHECK NOW
TMBK
3-Person
Tent


N/A

34.7CHECK NOW
ARB
Simpson
with annex


N/A

34.7CHECK NOW

Best Rooftop Tents for Trucks

We understand that camping is a great way to escape the hustle and bustle of everyday life and spend some quality time with nature. However, finding a comfortable and safe place to sleep while camping can be a challenge.

This is where rooftop tents come in handy. They are easy to set up, provide a comfortable sleeping space, and keep you off the ground away from any wildlife.

In this article, we have put together a list of the best truck tent topper selection that will make your camping experience much more enjoyable. 

Thule Tepui Kukenam Rooftop Tent

We recently had the chance to try out the Thule Tepui Kukenam Rooftop Tent Explorer Haze Gray on a what turned out be a very stormy camping trip and we were impressed with its features. 

Pros 

  • The tent fabric is UV resistant and withstands the elements of any season. 
  • The mesh panels offer plenty of ventilation and open for more airflow. 
  • The tent includes a high-density foam mattress for added comfort. 
  • Big enough for three people.
  • I found the large pockets inside super handy for storing small gear

Cons 

  • The ladder doesn’t always lock when extended. Ladder feet dig into the metal frame of the tent. I taped some rubber to the bottom and it was fine.
  • Doesn’t fold up that easily – you may have to crawl up on top to fold it away.
  • The zipper around the cover shield is really hard to use. 
  • The way you fasten it onto your car’s crossbars is tedious. 

The tent is constructed from coated 600 denier and a 260g poly-cotton blend, making it durable and able to withstand the elements of any season. The four large internal pockets are great for storing gear and camping accessories. 

Setting up the tent was easy and quick, taking only a few minutes to install. The tent’s mesh panels offer plenty of ventilation and open for more airflow, keeping you cool and comfortable. The included high-density foam mattress is also a nice touch, adding extra comfort to your camping experience. 

However, we did find a few cons with the tent. The ladder doesn’t always lock when extended, which can be frustrating. The zipper around the cover shield is also hard to use, making it difficult to access the tent. Finally, the way you fasten it onto your car’s crossbars is tedious and can take some time to get right. 

Overall, we would recommend the Thule Tepui Kukenam Rooftop Tent Explorer Haze Gray to anyone looking for a durable and comfortable rooftop tent. It’s a great option if you camp in stormy weather. 

>> CHECK THE PRICE ON AMAZON HERE

>> CHECK THE PRICE ON REI HERE

>> CHECK PRICE ON SPORTMANS.COM


Raptor Series Offgrid Voyager Truck Camping Rooftop Tent

We highly recommend the Raptor Series Offgrid Voyager Truck SUV Camping Rooftop Tent for anyone looking for a durable and easy-to-set-up pickup truck roof top tent. 

Pros 

  • Sets up and closes in seconds, eliminating the need for additional setup.
  • Aerodynamically engineered to withstand heavy winds and shed rainwater. We also noticed minimal drag and wind noise when driving.
  • Built-in air vents with quick adjust control feature and mosquito netting.
  • We found the high-density foam mattress comfortable and slept well on it.

Cons 

  • We noticed that the nylon straps holding up the door and screen may wear out quickly. They have been fine so far – but something to keep in mind.
  • The ladder may be too short for some trucks, which could make getting in and out of the tent difficult. Make sure you check the specs and measure your vehicle.
  • The tent is kind of heavy. It was OK for us, but I can imagine some people might find it a bit heavy if you have a smaller truck. Check the specs of your vehicle carefully.

We found the Raptor Series Offgrid Voyager Truck SUV Camping Rooftop Tent to be easy to set up and take down. The heavy-duty telescoping aluminum ladder was sturdy and made getting in and out of the tent a breeze. The tent itself was aerodynamically designed to withstand heavy winds and shed rainwater, which made for a comfortable and dry camping experience. 

The built-in air vents with quick adjust control feature and mosquito netting were a nice touch, as they allowed for plenty of airflow while keeping bugs out. We also appreciated the 2 hanging shoe and storage pockets that rolled up and stored with ease. 

Overall, we believe that the Raptor Series Offgrid Voyager Truck SUV Camping Rooftop Tent is best for those who want a durable and easy-to-set-up tent topper for truck campers at a reasonable price. 

>> Check the current price of this roof top truck tent here


Smittybilt Overlander Tent

We recently tested out the Smittybilt Overlander Rooftop Tent during a camping trip and here’s what we found. 

Pros 

  • The tent sets up quickly and easily, taking only a few minutes to assemble and disassemble. 
  • The high-density foam double/full mattress is comfortable and spacious, providing a great sleeping experience. 
  • The tent is completely self-contained, freeing up critical storage space in the truck bed. 
  • The ‘sunroof’ flaps give good ventilation.
  • There is a 12V power adaptor and even LED strip lighting inside.

Cons 

  • The tent is quite heavy at 145 pounds, which can make installation and removal difficult for some users. 
  • The tent is relatively expensive compared to other rooftop tents on the market. 
  • The included ladder is a bit short, which may be an issue for taller vehicles. 

I also really liked the flexible options for increasing space. The XL size sleeps up to 4 people (standard size is 2-3, so this is great for larger groups or if you just want more space). For more space, you can buy a tent annex (see details here) 

Smittybuilt also has an awning you can attach to your vehicle to expand your outdoor living space (see the awning here).  

The Smittybilt Overlander Rooftop Tent is a great option for serious traveling adventurers. With its ease of use, comfort, and durability, these pickup truck tent campers are perfect for those who want to set up camp quickly and enjoy a good night’s sleep.  

However, this is one of my top picks for best rated truck rack tent, it may not be the best option for those who are looking for a more budget-friendly or lightweight option.  

Overall, we recommend this tent for those who value convenience, security, and comfort on their camping trips. 

>> Check the current price of the Smittybuilt Overlander truck topper tent here


Overland Vehicle Systems Nomadic 3 Extended Roof Top Tent

We highly recommend the Overland Vehicle Systems Nomadic 3 Extended Rooftop Tent (RTT) for anyone looking for a durable and easy-to-use rooftop tent. 

Pros 

  • The truck top tent camper is made of high-quality materials that are waterproof and durable. 
  • It is easy to set up and take down, and requires no drilling or modification to your vehicle if equipped with factory or aftermarket roof rack. 
  • The tent comes with a bonus pack that includes memory foam pillows and a mini broom and dustpan. 
  • It’s spacious, so it’s good for larger groups or you just want more room. 

Cons 

  • The instructions for installation are not the greatest, but they get the job done. 
  • The tent is quite heavy, which may be an issue for some people. 

The Overland Vehicle Systems Nomadic 3 Extended Rooftop Tent RTT is a great choice for anyone who wants a high-quality rooftop tent that is easy to set up and take down.  

The top of truck tent is made of rip stop, marine grade waterproof and durable materials, and comes with a bonus pack that includes rip stop, marine grade memory foam pillows with cotton cover. It also has held and Velcro strip LED lights, a storage loft and six pockets and even comes with a mini broom and dustpan.  

The rip stop, marine grade fabric repels water and wind and there is a comfortable 3-inch foam mattress with cotton cover.  

The tent also has a reinforced diamond plate base and a user-friendly fold and go design. 

Overall, we think this tent is best for anyone who wants a durable and easy-to-use rooftop tent that will last for years to come. It’s ideal for people new to tent truck camping looking for a good quality, reliable option. 

>> See the current price of the Overland Vehicle Systems Nomadic truck roof top camper tent on Amazon

>> See the current price of the Overland Vehicle Systems Nomadic 3 tent on Overland Junction


TMBK Roof Top Tent

If you’re looking for a durable rooftop tent with a comfortable mattress, Overland Vehicle Systems TMBK 3 Person Roof Top Tent with Rain Fly Tan Base & Green Rainfly is a great choice. 

Pros 

  • The high-density foam mattress with cover is comfortable for a good night’s sleep. 
  • The insulated base keeps you warm on chilly nights. 
  • The telescoping ladder makes it easy to climb up and down. 

Cons 

  • The mattress is only about 2 inches thick, so it may not be comfortable enough for some people. 
  • The ladder is a bit flimsy and may not be sturdy enough for heavier individuals. 
  • The tent is quite heavy, so it may be difficult to install and remove on your own. 

We recently took this rooftop pickup camper tent on a camping trip and were impressed with its overall performance. The mattress was comfortable enough for a good night’s sleep, although we did add a mattress topper for extra cushioning. The insulated base kept us warm on chilly nights, and the marine grade waterproof body plus rain fly kept us dry during a light rain.  

The telescoping ladder was easy to use and felt secure when climbing up and down. Again, this fits any truck with a roof rack, without requiring any drilling or modifications. 

Overall, if you’re looking for a durable rooftop tent with a comfortable mattress, the Overland Vehicle Systems TMBK 3 Person Roof Top Tent with Rain Fly Tan Base & Green Rainfly is one of the best truck top tents on the market. Just be aware of its weight and the thickness of the mattress before making your purchase. 

>> Read more reviews of the TMBK pickup roof top tent on Amazon

>> Check the price of the TMBK roof top tent on Overland Junction


ARB Series III Simpson Rooftop Tent with Annex

We highly recommend the ARB Series III Simpson Rooftop Tent and Annex Combo Kit for anyone who loves camping on top of their truck. 

Pros 

  • The tent is made of high-quality materials that can withstand harsh weather conditions. 
  • It comes with a 2.5-inch foam mattress that provides excellent comfort for a good night’s sleep. 
  • The insect screens keep bugs and mosquitoes out, ensuring a peaceful night’s sleep. 
  • It had great ventilation, which helped keep us cooler. 

Cons 

  • The installation instructions are not very clear, making it difficult to set up for the first time (although we found it easy to set up once it was installed). 
  • The tent is quite heavy, which makes it difficult to move around. 
  • The annex provides extra space, but it doesn’t have a floor, which may be inconvenient for some campers (you can buy a tarp here). 

We found the ARB Series III Simpson Rooftop Tent and Annex Combo Kit to be a great investment for our camping trips. One of the reasons it’s one of our top picks for best truck roof top tent is that it’s made of high-quality materials that can withstand harsh weather conditions, and the insect screens keep bugs and mosquitoes out, ensuring a peaceful night’s sleep. The 2.5-inch foam mattress provides excellent comfort, and we slept well in the tent. 

In summary, the ARB Series III Simpson Rooftop Tent and Annex Combo Kit is a pickup truck camper tent if you’re looking for a durable and comfortable rooftop tent that can withstand harsh weather conditions. 

>> See the current price of the ARB elevated truck tent with annex here


Buying Guide 

When it comes to choosing the best rooftop tent for your truck, there are several factors to consider. We’ve compiled a list of features you should look for when making your decision: 

Size and Capacity 

The first thing to consider is the size and capacity of the tent. You’ll want to make sure that it fits your truck roof rack and that your truck roof can support the weight of the tent (and occupants).

You’ll also want to check that it can comfortably accommodate you and any other occupants. Consider the number of people who will be using the tent and how much gear you’ll need to store. 

Material and Durability 

The material and durability of the tent are also important factors to consider. Look for a tent made from high-quality materials that can withstand harsh weather conditions and frequent use. You’ll also want to ensure that the tent is easy to clean and maintain. 

Setup and Installation 

The setup and installation process should also be taken into account. Look for a tent that is easy to set up and take down, and that doesn’t require a lot of tools or equipment. You’ll also want to ensure that the tent is securely attached to your truck bed and won’t shift or move during use. 

Features and Accessories 

Finally, consider the features and accessories that come with the tent. Look for a tent that has plenty of ventilation, windows, and doors for easy access. You may also want to consider additional features such as built-in lighting, storage pockets, and awnings. 


Finding the Best Pickup Tent Campers – Frequently Asked Questions

What are the main types of truck tent camping tents?

There are two general types of truck tents – tents for beds of trucks and tents that go on top of trucks. This guide focuses on the best truck topper tents, but I have a separate guide if you’re looking for a tent for your truck bed.

Why consider roof top campers for trucks? 

We recommend rooftop tents for trucks because they offer a comfortable and convenient way to camp. They are elevated off the ground, which provides a better view and keeps you away from bugs and other critters. Because they provide good protection from weather and wildlife as you sleep, they’re a great option if you’re headed somewhere with frequent storms or lots of local fauna (like bears).
Additionally, once fitted, they can be really easy to set up and take down in just a few steps.
They don’t take up any space inside your truck bed and tend to be sturdier than truck bed tents – the poles, fabric and floors are generally better for stormy weather.
This type of truck tent can – depending on the model – also sleep more people.
The major con is the price. They are definitely pricier than bed tents or regular camping tents and because they’re attached to the top of your truck, they increases drag – and gas mileage. However, they much cheaper than an RV to buy and drive! And, although they are more expensive, a mattress is included with every model, giving them built-in comfort.

What do I need to consider when choosing a rooftop tent? 

When choosing a rooftop tent, you should consider the weight limit of your truck’s roof, the size of the tent, the type of material it’s made from, and the weather conditions you’ll be camping in.
You’ll also want to think about the price, as rooftop tents can be quite expensive. 
In addition, tents on top of trucks should have a comfortable built-in mattress, have a good ladder, and not create too much drag as you drive when stored on your roof. The floor bolts to your roof rack, so be sure to check that your roof rack has the right capacity and setup for the tent before buying it.
Other things you’ll want to consider are annexes, which give extra space; durability; and how well they do in bad weather.

Can any car take a rooftop tent? 

No, not all cars can take a rooftop tent. You’ll need to make sure that your vehicle has a roof rack that can support the weight of the tent and its occupants. 
You should never use a rooftop tent if the rooftop load limit of your vehicle is under 165 lbs. 
In general, rooftop tents are not suitable for cars, sedans and hatchbacks but can be used with SUVs and trucks.

How do you know if your car can handle a roof top tent? 

It should have a roof load limit of at least 165 pounds, but check with the tent manufacturer specs on purchasing website to make sure it’s suitable before your own vehicle before buying. The weight limit of your vehicle’s roof rack. This information can usually be found in the owner’s manual or on the manufacturer’s website. 
You’ll want to look at:
Tent weight (check the specs).
Static weight capacity, which is the weight of the tent + the people inside + their gear + the rack. Rooftops are usually engineered to withstand a lot of weight in case they roll over, so this is not usually a problem, but double check.
Car and rack dynamic weight capacity. This is the ability to support the tent weight while you’re driving. Verify it for your truck and the rack.
Rack compatibility – make sure your rack and tent are OK together.

Rooftop tents are typically OK with most raised rail and some fixed point systems.  You should not use a rooftop tent with a clip (Q-Tower or BaseLine) or flush rail type system.  Do not use them with a Landing Pad 6 or 7.

What is the weight limit for rooftop tents? 

The weight limit for rooftop tents varies depending on the tent and the car’s roof rack. However, most rooftop tents can hold up to 600 pounds. 

How do I choose the right size rooftop tent? 

You’ll need to consider the number of people who will be sleeping in the tent, as well as the size of your car’s roof. Most rooftop tents come in two sizes: a two-person tent and a four-person tent. 

What are the benefits of a hard shell rooftop tent? 

Hard shell rooftop tents are more durable than soft shell tents, and they provide better insulation. They are also easier to set up and take down, as they can be opened and closed with just a few simple movements. 

Can rooftop tents be used in all weather conditions? 

Yes, rooftop tents can be used in all weather conditions. However, you’ll want to make sure that the tent is properly insulated and that you have the appropriate gear for the weather conditions. 

Are rooftop tents easy to install?

Yes, rooftop tents are relatively easy to install. However, you’ll need to make sure that your car’s roof rack is properly installed and that the tent is securely attached to the rack. 

How long does it take to set up a rooftop tent? 

Once they’re installed, it typically takes about 5-10 minutes to set up a rooftop tent. However, this can vary depending on the tent and your level of experience. 

How do you install a rooftop tent? 

To install a rooftop tent, you’ll need to attach the tent to your car’s roof rack. Most rooftop tents come with instructions on how to do this, and it typically involves using bolts and screws to secure the tent to the rack. 

How To Install a Rooftop Tent


Which is the best pick up truck tent for you?

This will depend on your truck, the types of trips you’ll be taking an which factors are more important for you. Each of the six tents here are good – take a careful look at the pros and cons of each to help decide which is the best for you.

Whichever you choose, I hope this article helps you pick from the best camping tents for trucks out there.

Enjoy your next adventure!

Do you have another pick for the best pickup truck tent camper?  I’d love to hear what it is.  Join my private Facebook group National Parks Collectors and comment and let me know.

If you liked this post about pickup tents, please share the love and Pin it to your Camping Gear board!  

4 photos of roof top tents with text Best Rooftop Tents
3 photos of rooftop tents with text The Best Roof Top Tent

Read more travel product reviews 

Camping 

Other Travel Products 


About the Reviewer  

James Ian Yosemite

James Ian is a national park, camping and hiking expert.

He has dedicated his life to travel, visiting more than 80 countries, all 7 continents and all of the main national parks in the United States. With over 35 years experience in the travel industry, James has worked on cruise ships, at resorts and hotels, and as a travel planner who’s helped hundreds of people plan successful trips to US national parks. 

Based on his experience visiting our national parks multiple times, in-depth research and expertise as a travel planner, James has published detailed itineraries for most of the major national parks in the US. These itineraries, as well as in-depth park guides, comprehensive camping and hiking gear reviews and buying guides, and helpful packing lists and gift guides will help you have your own incredible trip to US national parks without stress and hassle.

As a national park expert, James has contributed to many publications, including Time Business News, Savoteur, Best Trip, and Wired.

Read more…


Parks Collecting is a participant in the Amazon.com Services LLC Associates Program, an affiliate advertising program designed to provide a means for sites to earn advertising fees by advertising and linking to amazon.com. Amazon and the Amazon logo are trademarks of Amazon.com, Inc. or its affiliates. As an Amazon Associate I earn from qualifying purchases.

Best Yeti Cooler for Camping in 2023: A Complete Guide

Camping is an activity that many people enjoy during the summer months. Whether you’re going on a weekend camping trip or an extended stay in the great outdoors, it’s important to have the right gear to make your experience as comfortable as possible. One essential item for any camping trip is a high-quality cooler to keep your food and drinks fresh and cold.

Yeti coolers are one of the most popular brands on the market, known for their durability and ability to keep ice frozen for days. When it comes to camping, having a reliable cooler is crucial, but with so many options available, it can be challenging to know which one to choose.

Whether you’re seeking compact, portable tote or backpack coolers from Yeti or want something large for longer trips, this guide will help you find the best Yeti for camping and days out.

I started by conducting extensive research into the major coolers on the market and narrowed them down to a short list. I then tried all the top products to give you the benefit of my personal experience.

I included a full range from a cooler not much bigger than a lunch bag to big Yeti coolers for longer trips, to help make your life simpler. 

Let’s take a look.

No time right now to find the best Yeti cooler for camping?  Pin It and save it for later: 

Best Yeti Cooler for Camping

Please note this post may contain affiliate links, which means we may receive a commission, at zero cost to you, if you make a purchase through a link. Please see our full Disclosure for more information. If you have any questions, please contact me.

Finding the best Yeti cooler for camping 

I regard these highly sought-after coolers as the best in the business, and with a great range, there’s one for every kind of outdoor adventurer. Soft and hard sided coolers are included, as are tote bags, backpacks, buckets and even a cooler on wheels. In fact, you’re sure to be surprised by the range of coolers you can choose from.  

The best Yeti cooler for camping overall is the Tundra Haul. View it here. 

Why buy the Yeti Tundra Haul?  

The Yeti Tundra Haul is so much easier to move around than other large Yeti coolers, due to the fact that it’s got wheels. These have a NeverFlat design so there’s no risk of a puncture, and the cooler also has all the usual Yeti features such as a rotomolded construction. A StrongArm handle makes this virtually indestructible cooler easy to pull around.  

These coolers can hold anywhere between a modest 8 cans to a huge 222 cans. Whether it’s a quick overnight camping trip for one or months of traveling around in an RV as a family, the cooler for you is covered here. 

First, why not take a look at the quick reference comparison chart below? It’s the fastest way to see the options offered, from a small soft cooler you can carry as a tote or backpack to the biggest cooler Yeti have ever made.  

Next, the categories are outlined, before some of the most frequently asked questions about Yeti coolers are answered. Finally we move into out in-depth reviews of each cooler, so you can pick the right one for your camping needs. Let’s get started.  

>> Click here to see the Yeti Tundra Haul on Amazon 

>> Click here to see the Yetu Tundra Haul on Al’s.com 


Best Yeti Coolers Comparison Table

Here is a handy chart of the top Yeti camping coolers so you see them all together at a glance.

If you’re viewing this on a mobile device, you may need to scroll across.

NameImageTypeCapacityKey FeaturesOur Rating
(/5)
Price
YETO ‎Hopper Two 30

N/A

Tote bag40 litersTapered design
Ultra tough shell
Waterproof zipper
4.7CHECK PRICE HERE
Yeti Hopper 18

N/A

Soft cooler20 cansDryHide shell
HydroLock zipper
8 colors
4.8CHECK PRICE HERE
Yeti Roadie 24

N/A

Hard cooler18 cansWine bottle height
NeverFail hinges
Rotomolded build
4.8CHECK PRICE HERE
Yeti Tundra 35

N/A

Hard cooler 20 cans1-man carry
PermaFrost insulation
Bear-proof
4.8CHECK PRICE HERE
Yeti Tundra 105

N/A

Hard cooler 67 cansFreezer grade gasket
Tough handles
Non-slip feet
4.8CHECK PRICE HERE
Yeti Tank 45

N/A

Bucket cooler52 cansVortex drainage
Bucket shape
Multi-purpose
4.8CHECK PRICE HERE
Yeti Hopper Flip 8

N/A

Soft cooler 8 cansColdCell insulation
Shoulder strap
Hitch point grid
4.6CHECK PRICE HERE
Yeti Hopper Flip 12

N/A

Soft cooler 12 cans12 colors
Ultra lightweight
DryHide shell
4.8CHECK PRICE HERE
Yeti Tundra Haul

N/A

Wheeled cooler 45 cansRotomolded
StrongArm handle
NeverFlat wheels
5.0CHECK PRICE HERE
Yeti Tundra 210

N/A

Hard cooler140 cansExtra tall
Bear-proof build
T-Rex latches
4.7CHECK PRICE HERE
Yeti Tundra 350

N/A

Hard cooler222 cansFatWall construction
Biggest Yeti cooler
4.9CHECK PRICE HERE

The Best Yeti Coolers for Camping 

As an avid camper, I know how important it is to keep your food and drinks cold during your outdoor adventures. That’s why I’ve put together a list of the best Yeti coolers for camping.

Yeti is a trusted brand that offers high-quality and durable coolers that can keep your food and drinks cold for days. Whether you’re planning a weekend camping trip or a longer excursion, these coolers are sure to meet your needs.

So, without further ado, here are the best Yeti ice chests for camping.

Best Yeti Soft Cooler 

Should you get a soft sided cooler and a hard sided one? The main deciding factor is how to do plan to use your cooler.

If you’re looking for a cooler that’s easy to transport and can fit in tight spaces, a soft cooler might be the way to go. Yeti offers a range of soft coolers made with durable materials and are designed to keep your food and drinks cold for hours, even in hot weather.

Soft sided coolers are lighter than hard coolers. They’re typically made of fabric or vinyl rather than the rotomolded plastic that hard sided coolers are made of. This makes them more portable. In fact, some of them are actually backpacks or tote bags, making them super easy to carry.

They are also easier to store, as they can be squashed or rolled up, so they less space in your vehicle or tent on your trip, and your home when storing them between trips.

The downside is that they are also typically smaller than most hard-sided models.

If you’re backpacking or want a cooler for a day trip, then a soft-sided cooler is probably best.

The options in this category include a small Yeti backpack cooler, a tote bag and a regular soft Yeti Hopper cooler.  

YETI Hopper Two Portable Cooler

I highly recommend the YETI Hopper Two Portable Cooler for camping trips. It’s a bit pricey, but it’s worth every penny.

Pros

  • The YETI Hopper Two 30 is 100% leakproof and can keep ice for days.
  • The updated design makes it easy to access your contents.
  • The tapered body makes it comfortable to carry on long hauls.

Cons

  • It’s on the expensive side.
  • It’s a bit heavy when fully loaded.
  • The straps can be uncomfortable when carrying for long periods of time.

I recently took the YETI Hopper Two Portable Cooler on a camping trip, and it exceeded my expectations. The DryHide Shell kept everything inside dry, and the HydroLok Zipper prevented any spills. Plus, the cooler was able to keep ice for days, even in the hot summer weather.

Overall, if you’re looking for a high-quality, durable cooler that can keep your food and drinks cold for days, the YETI Hopper Two Portable Cooler is definitely worth considering.

>> Click here to view the Yeti Hopper Two Portable Cooler on Amazon 


Yeti Hopper Flip 18

Another great option if you’re looking for soft Yeti coolers with a 20 capacity  – or thereabouts – is the Hopper Flip 18.

Pros

  • The ColdCell Insulation keeps ice for days and offers superior cold-holding to ordinary soft coolers.
  • The HydroLok Zipper is 100% leakproof and airtight.
  • The DryHide Shell is waterproof and resistant to punctures, and abrasions.

Cons

  • The price point may be higher than some other coolers on the market.
  • The Hopper Flip 18 may be too heavy for some users to carry comfortably.
  • The cooler may not fit all of your camping supplies if you have a large group.

I recently took the YETI Hopper Flip 18 Portable Soft Cooler Charcoal on a camping trip and was impressed with its performance.

This range is one of the top Yeti products and comes in a choice of colors. (There are also different sizes, some of which are featured further on in this guide under the small coolers category.) 

The Yeti Hopper 18 can accommodate up to 20 cans with ice.   The ColdCell Insulation kept my ice frozen for days, and the HydroLok Zipper prevented any leaks. The DryHide Shell was also a nice touch, as it withstood punctures and abrasions (I’m not that careful when I’m camping) and helpedresist UV rays.

This could the best Yeti cooler to buy when you want something for a picnic, a full day out, or a short camping trip – it’s a versatile, compact size that’s not at all bulky or awkward to store and carry. I also love that there are 8 colors to pick from.

Overall, I highly recommend the YETI Hopper Flip 18 Portable Soft Cooler Charcoal for your camping trips. Its superior insulation and leakproof design make it a worthwhile investment.

>> Click here to view the Yeti Hopper 18 cooler on Amazon 

>> Click here to see the Yeti Hopper 18 cooler on REI 


Best Yeti Hard Cooler

For those who need a larger cooler for extended camping trips, a hard cooler might be a better fit.

Hard-sided coolers have a big advantage – because they typically have thicker insulation, they retain temperature and keep ice frozen for much longer than soft-sided models. Hard-sided Yeti coolers consistently keep ice frozen for longer than other brands as well.

Hard-sided coolers also come in much larger sizes than soft-sided coolers. So if you have lots of food and drinks, this is your best option for sure.

Yeti’s hard coolers come in a range of sizes, but all are built to withstand tough conditions and are designed to keep your food and drinks cold for days at a time. I’ve provided sizes in terms of cans capacity, but hard-sided coolers are used for food and drinks.

Hard-sided coolers are also more durable than their soft-sided counterparts. The hard rotomolded plastic can take a beating, so these are great in more rugged environments. It also means that, while they aren’t cheap to buy, they will last you a very long time, s they’re a great investment.

For longer camping trips where you are staying in one place and have more people/ food, then you’ll want to look at a hard-sided model.

Yeti Roadie 24 

If you’re looking for a high-quality Yeti small hardside cooler for camping, the YETI Roadie 24 Cooler Bimini Pink is a great choice. This cooler is built to last and can keep your food and drinks cold for days.

Pros

  • The Roadie 24 is 10% lighter in weight and holds 20% more than a Roadie 20, it even performs 30% better thermally.
  • It’s got a taller build than its predecessor, so it now accommodates a standard bottle of wine (or 2-liter bottle) upright
  • It’s handy to have in the car, too.  The design is a better fit behind the driver’s or passenger’s seat of a car and it’s been designed to offer one-handed access
  • The rotomolded construction is thin and lighter-weight but still really tough.

Cons

  • It’s a bit pricey compared to other coolers on the market.
  • The handle can be a bit difficult to use at times.
  • It’s not as easy to clean as some other coolers.

I recently took the YETI Roadie 24 Cooler Bimini Pink on a camping trip and was impressed with its performance. The cooler kept my food and drinks cold for several days, even in hot weather. The rotomolded construction makes it incredibly tough and durable. 

It’s a revamped version of the Roadie 20, and this one is lighter and more effective than its predecessor. It’s also got a taller build allows for more storage space.  It holds 20% more, and as it’s taller can accommodate a full-sized bottle of wine, which, if you’re like me and enjoy a wine or two at the end of a day’s hiking, is great!

Overall, if you’re looking for a high-quality cooler that can keep your food and drinks cold for days, the YETI Roadie 24 Cooler Bimini Pink is definitely worth considering. This hard sided cooler is the best Yeti size for camping when you want to travel light, yet want to keep your food and drinks chilled in the way that only a hard cooler can.

>> Click here to view the Yeti Roadie 24 cooler on Amazon

>> Click here to see the Yeti Roadie 24 cooler on REI 


Yeti Tundra 35

Yeti 35 coolers are a favorite and this one offers a good alternative to the Roadie. If you’re looking for a portable cooler that will keep your drinks and food cold for days, the YETI Tundra 35 Cooler is a great option.

Pros

  • With up to 3 inches of Permafrost Insulation and an extra thick Fat Wall design, this cooler can keep your ice frozen for days.
  • The rot molded construction makes the Tundra armored to the core and virtually indestructible, so it’s perfect for outdoor adventures.
  • The T-Rex Lid Latches are constructed of heavy-duty rubber and made with patented technology, so you’ll never have to worry about a busted latch.
  • The bear-resistant build makes it handy for many national park trips.

Cons

  • At 17 lbs, this cooler is a bit heavy when loaded, so it may not be the best option for long hikes or backpacking trips.
  • Not the most slimline design, so you’ll need sufficient space at your campsite to store it
  • I noticed that this cooler eats up ice faster than some of other YETI models I tried.

I recently took the YETI Tundra 35 Cooler on a camping trip, and overall, I was impressed.

It’s a different shape from the Roadie model and holds a couple of additional cans. This sort of shape fits snugly into a gap inside a camper van or RV, and the wide, smooth lid means you can even use it for sitting on or as a tabletop.

The Permafrost Insulation and Fat Wall design really do make a difference, and I was able to keep my ice frozen for several days. The outer wall is actually certified bear-resistant – handy when I was in bear country! The T-Rex Lid Latches are also a great feature, and I never had to worry about the lid coming open or the latches breaking.

However, the weight of the cooler was a bit of a drawback, especially when I had to carry it over rough terrain. It’s definitely not the lightest cooler on the market, but the durability and ice retention make it worth the extra weight.

The Tundra 35 comes in 9 colors and is a good-looking bit of outdoor gear.

Overall, I would definitely recommend the YETI Tundra 35 Cooler to anyone looking for a high-quality, durable cooler for camping or outdoor adventures. It’s a bit heavy and pricey, but the ice retention and build quality make it worth the investment.

>> Click here to view the Yeti Tundra 35 cooler on Amazon 

>> Click here to see the Yeti Tundra 35 cooler on REI 


Yeti Tundra 105

If you’re looking for a cooler that can keep your drinks and food cold for a week, the YETI Tundra 105 is definitely worth your consideration.

Pros

  • The PermaFrost Insulation and FatWall design keep ice frozen for days
  • The Rotomolded Construction makes it extremely durable and impact-resistant
  • The T-Rex Lid Latches and NeverFail Hinge System ensure that the cooler stays securely closed

Cons

  • It’s quite heavy, even when empty.
  • It may be too large for some people’s needs. At this size, you’re looking at either a longer trip or one with more than just yourself. You can have someone help you carry it, or invest in a dolly to help you if you’re setting up your own campsite.

I recently took the YETI Tundra 105 on a camping trip and was thoroughly impressed with its performance. The cooler kept my food and drinks cold for the entire week, even in the hot summer weather. The build quality is exceptional, and I have no doubt that this cooler will last for many years to come.

The Yeti Tundra 105 is around the middle of the range when it comes to size – you can find smaller options above or an extra big Yeti cooler below

This one can hold up to 67 cans and has added height so you can stack up food and drinks while still leaving sufficient space for a layer of ice on the top. This also has a certified bear-resistant build. 

Like other Yeti models this one has military grade DoubleHaul handles, an InterLock lid system, a freezer level ColdLock gasket, BearFoot non-slip feet and tie-down slots for secure mounting. 

One thing to keep in mind is that the Tundra 105 is quite heavy, even when empty. This can make it difficult to move around, especially when it’s fully loaded with ice and food.

Overall, if you’re looking for a high-quality cooler that can keep your food and drinks cold for days, the YETI Tundra 105 is definitely worth considering. It’s especially useful for longer trips and camping trips where you’ll be in the one spot for a while, so you don’t need to move it around too much.

>> Click here to view the Yeti Tundra 105 cooler on Amazon 

>> Click here to see the Yeti Tundra 105 deep cooler on Sportman’s Warehouse 


Best Small Yeti Coolers 

If you’re going on a short camping trip or just need a smaller cooler for day trips, Yeti’s small coolers might be the perfect fit. These coolers, which are , which are mostly, but not always, soft-sided, are designed to be compact and easy to transport, without sacrificing durability or cooling power. 

I find them a useful supplement to the larger models. Having a large cooler for the campsite plus a smaller cooler to take with me on day trips gives me the most flexibility.

Yeti Tank Bucket Cooler 45 

If you like the sound of a versatile cooler that’s also one of the best Yeti products for shorter trips and even parties, then take a look at this ultra-cool ice bucket model.

Pros

  • The YETI Tank 45 can hold up to 52 cans or a slim quarter keg, making it perfect for large gatherings.
  • The Permafrost Insulation technology used in the YETI Tank 45 ensures that your drinks will stay cold for longer periods of time.
  • The DoubleHaul Handles and Vortex Drain System make it easy to haul, load, and drain the YETI Tank 45.

Cons

  • The YETI Tank 45 is a bit heavy, weighing in at 13 pounds when empty.
  • The YETI Tank 45 doesn’t come with a lid, which can be a bit of a hassle if you’re planning on using it for extended periods of time.

I recently used the YETI Tank 45 on a short camping trip with friends and was impressed with its performance. The cooler was able to keep our drinks cold for the entire weekend, even in the hot summer weather. The Yeti Tank 45 can hold an impressive 52 cans and comes in a bucket shaped design with side handles for easy carrying. 

Despite the relaxed look and compact shape, these bucket-style Yeti coolers 45 are serious bits of camping kit with the usual features such as DoubleHaul handles, PermaFrost insulation and a Vortex drainage system, which made it easy to load and unload the cooler, and the BearFoot Non-Slip Feet prevented it from sliding around on uneven terrain.

One downside of the YETI Tank 45 is its weight. At 13 pounds when empty, it can be a bit of a hassle to carry around, especially if you’re hiking to your campsite. Additionally, the lack of a lid can be a bit of a pain if you’re planning on using the cooler for extended periods of time.

These Yeti 45 coolers are great for cookouts, BBQs, beach parties, and tailgate parties as well as camping, and like other Yeti coolers should give many years of reliable service.  I like them best for short beach camping trips.

>> Click here to view the Yeti Tank 45 cooler on Amazon


Yeti Hopper Flip 8

If you’re looking for a high-quality cooler that can keep your drinks and food cold for an extended period, then the YETI Hopper Flip 8 Portable Soft Cooler Alpine Yellow is an excellent choice for you.

Pros

  • The YETI Hopper Flip 8 has ColdCell Insulation, which provides superior cold-holding to ordinary soft coolers, with a capacity of up to 6 cans plus ice.
  • Features a 100% leakproof HydroLok Zipper and high-density fabric that withstands punctures and UV rays.
  • The DryHide Shell is waterproof and resistant to punctures, and abrasions so it will hold its own when faced with the hazards of the wild.

Cons

  • Limited capacity, so it’s best for day or weekend camping trips

Other than the Yeti lunch bag, the Yeti Hopper 8 is the smallest soft-sided cooler from Yeti. It’s capable of holding up to 8 cans, so is ideally sized for all-day outings or shorter overnight trips when it’s just one or two of you. 

This also comes in a nice range of color options and features Yeti’s DryHide shell that can withstand scrapes, UV rays and scuffs. To the outer there’s a long shoulder strap, a top grab handle, and a hitchpoint grid for attaching accessories. 

A tough, leakproof HydroLock zipper, ColdCell insulation and a sleek, compact design complete the picture.

I took it on a recent overnight trip to a local state park and the ColdCell Insulation kept my drinks and food cold for hours, and the HydroLok Zipper kept everything in place and prevented any leaks. The DryHide Shell was also very durable and held up well against punctures and abrasions.

One thing I liked about this cooler is its compact size, making it easy to carry around. The only downside is that it’s a bit pricey compared to other coolers on the market, but the quality and performance make it worth the investment.

Overall, if you’re looking for a high-quality cooler that can withstand extreme conditions and keep your drinks and food cold for an extended period, then the YETI Hopper Flip 8 Portable Soft Cooler Alpine Yellow is an excellent choice for you.

>> Click here to view the Yeti Hopper Flip 8 cooler on Amazon

>> Click here to see the Yeti Hopper Flip 8 cooler on REI


Yeti Hopper Flip 12

When you want something a little larger than the Yeti Hopper Flip 8,the Flip 12 is a good option for you.

Pros

  • The ColdCell Insulation technology helps keep your drinks and food cold for a long time.
  • The HydroLok Zipper and high-density fabric make the cooler leakproof and durable.
  • The DryHide Shell is waterproof and resistant to punctures and abrasions, making it perfect for outdoor activities.
  • Comes in 12 different colors.

Cons

  • The zipper can be difficult to open and close.
  • The cooler is heavier than some other portable coolers, though at juts over 3 lbs is still very portable.
  • Bulkier than the Flip 8 (but also has a larger capacity).

I recently took the YETI Hopper Flip 12 on a weekend camping trip and was impressed with how well it kept my drinks and food cold. It’s on the smaller size but can hold up to a dozen cans plus ice.

The ColdCell Insulation technology really works, and I was able to keep my drinks cold for a long time even on a hot day. The HydroLok Zipper and high-density fabric also make the cooler leakproof and durable, so I didn’t have to worry about any spills or leaks.

However, the zipper can be a bit difficult to open and close, especially if you have cold hands. The cooler is also heavier than some other portable coolers, which can make it a bit more difficult to carry around.

Overall, if you’re looking for a reliable, highly portable cooler that can keep your drinks and food cold for a long time and can withstand the hazards of the wild, the YETI Hopper Flip 12 is a great choice.

>> Click here to view the Yeti Hopper Flip 12 cooler on Amazon 

>> Click here to see the Yeti Hopper Flip 12 cooler on REI 


Yeti Large Cooler Options 

For those who need a lot of storage space for their food and drinks, Yeti’s large coolers are the way to go. These coolers can hold a lot of items and are designed to keep them cold for days at a time.

The larger coolers tend to be hard-sided. For longer trips and/ or larger groups, this is they way to go. Having a large cooler at base camp gives you the space to store all your food and drink. Then you can take a smaller one with you on a day trip or hike.

You can find some of the biggest Yeti coolers in this category, including an easy-to-move wheeled Yeti cooler, a taller chiller and the largest model Yet offer.  

Yeti Tundra Haul 

The Tundra Haul is the Yeti camping classic roller cooler. If you are looking for a cooler that is durable, reliable, and comfortable to tow, it’s a great option.

Pros

  • The solid, single-piece tire construction is impact- and puncture-resistant, making it suitable for any terrain.
  • The NeverFlat wheels make this very portable without needing to compromise on size. It’s big enough for a basic camping trip and easier to get to the campsite and move around.
  • The durable welded aluminum arm has comfortable grips and is easy to use and tracks left or right for heel-friendly towing.
  • The rotomolded build make it durable and really well insulated to it keeps things cold for a long time

Cons

  • The Tundra Haul is not compatible with the dry goods basket or divider, which can be a drawback for some users.
  • This cooler is a bit heavy, weighing in at 32 pounds when empty, so those wheels are necessary

I recently took the YETI Tundra Haul Portable Wheeled Cooler Tan for a camping trip, and I was impressed with how well it performed.

Like other hard models these large Yeti coolers on wheels feature the brand’s rotomolded build and PermaFrost Insulation, which kept my contents frosty, even in triple-digit temperatures. The NeverFlat Wheels and T-Bar StrongArm Handle make it easy to tow, and the curved design of the handle is comfortable to hold.

Up to 45 cans of beer can fit inside this cooler and it comes in a selection of 7 colors.

The cooler is virtually indestructible, thanks to its Rotomolded Construction, which makes it armored to the core. The solid, single-piece tire construction is impact- and puncture-resistant, making it suitable for any terrain. The durable welded aluminum arm with comfortable grips is easy to use and tracks left or right for heel-friendly towing.

Iif you are looking for a cooler that is built to last and can handle any terrain, this is an excellent option.

>> Click here to view the Yeti Tundra Haul cooler on Amazon 

>> Click here to see the Yetu Tundra Haul cooler on Al’s.com 


Yeti Tundra 210

If you’re looking for a cooler that can handle a large amount of food or drinks, the YETI Tundra 210 is an excellent option.

Pros

  • The PermaFrost Insulation and extra thick FatWall design keep ice frozen for days.
  • The Rotomolded Construction makes the Tundra virtually indestructible.
  • The T-Rex Lid Latches are heavy-duty and won’t break easily.

Cons

  • The cooler is quite heavy, making it difficult to move around.
  • It’s quite expensive compared to other coolers on the market.
  • The size may be too large for some camping trips.

I recently took the YETI Tundra 210 on a camping trip and was impressed with its overall performance.

The Yeti Tundra 210 stands out because it’s the deepest one available. It’s taller than others like the Yeti 105 coolers, the Yet coolers 110 or the Yeti 125 coolers, and thus has less of a footprint for when floor space is at a premium.

The PermaFrost Insulation and extra thick FatWall design kept ice frozen for days, even in the hot summer weather. As with all of the Tundra range it features a rotomolded, bear-proof construction, is fully armored, making the cooler virtually indestructible.  This gave me peace of mind knowing it could handle any bumps or drops during transport. I’m never super careful when camping, TBH, and this barely registered any bumps along the way.

This is one of Yeti’s biggest coolers, but is narrower and more compact that some of the other Tundra models due to the added height.  

Overall, if you’re looking for a durable and reliable cooler that can handle a large amount of food or drinks, the YETI Tundra 210 is a great option to consider.

>> Click here to view the Yeti Tundra 210 on Amazon 

>> Click here to see the Yeti Tundra 210 on Sportman’s Warehouse


Yeti Tundra 350

If you want the biggest Yeti cooler ever made, then the YETI Tundra 350 this is the one.

Pros

  • The 82.4-gallon capacity is perfect for large groups or extended trips.
  • The PermaFrost Insulation and FatWall design keep ice frozen for days.
  • The rotomolded construction is virtually indestructible and bear-resistant.

Cons

  • The empty weight of 89 lbs makes it difficult to move around, even with two people.
  • The price point is on the higher side.
  • The size may be too large for some users.

The YETI Tundra 350 is designed along the same lines as the Tundra Yeti 160 coolers and Yeti 250 coolers, but can hold a whopping 222 cans of beer or soft drink. That’s one huge family, group or camping trip chiller.  I took it on a week-long camping trip with a group of 10 people. The cooler was able to hold all our food and drinks with room to spare.

The FatWall design is bear-proof, so it’s ideal for many of our national and state parks. The PermaFrost Insulation and FatWall design kept our ice frozen for the entire trip, even with the hot summer weather. The rotomolded construction made me feel confident that the cooler would hold up to any bumps or drops during transport.

However, the weight of the cooler was a bit of a challenge. Even with two people, it was difficult to move around once it was fully loaded.

Overall, I would recommend the YETI Tundra 350 for those who need a large, durable cooler for extended trips or large groups.

>> Click here to view the Yeti Tundra 350 on Amazon 

>> Click here to see the Yeti Yundra 350 on Sportman’s Warehouse


Yeti Camping Coolers Buying Guide

When looking for the best Yeti cooler for camping, there are a few key features to consider. As someone who has done extensive research on this topic, I have found that the following factors can greatly impact the quality and usefulness of your cooler:

Size and Capacity

One of the first things to consider is the size and capacity of the cooler. You want to make sure it’s big enough to hold all of your food and drinks, but not so big that it’s difficult to transport or takes up too much space in your campsite. Consider the length of your camping trip and the number of people you’ll be feeding when choosing the size of your cooler.

Insulation

The insulation of the cooler is another important factor to consider. Look for coolers with thick walls and a tight-fitting lid to ensure maximum insulation. Some coolers even have additional insulation layers or features like freezer-grade gaskets to keep your food and drinks cold for longer periods of time.

Durability and Portability

Since you’ll be using your cooler in outdoor environments, durability and portability are key factors to consider. Look for coolers made with sturdy materials like rotomolded plastic or stainless steel. Additionally, consider the weight and size of the cooler, as well as any additional features like handles or wheels that can make it easier to transport.

Additional Features

Finally, consider any additional features that may be important to you. Some coolers have built-in bottle openers, cup holders, or even cutting boards. Others may have drainage systems or be designed to fit perfectly in your vehicle. Think about your specific needs and preferences when choosing a cooler.

Cooler-for-camping

Choosing The Best Yeti Ice Chest – Frequently Asked Questions 

What is a Yeti cooler?

A Yeti cooler is made by a US company based in Texas. Yeti coolers come from a company that specializes solely in this specific sort of outdoor product, and their range of ice chests and portable coolers is one of the biggest and best around.
The high-end coolers are designed for outdoor activities such as camping, fishing, and hunting. Yeti coolers are known for their durability, ice retention, and rugged construction.

Where are Yeti coolers made?

So where is Yeti made? Yeti say their coolers are manufactured at various sites. The Tundra range of hard-sized coolers is made at factories in Wisconsin and Iowa or the Philippines, while the Hopper coolers are made in China.

Why are Yeti coolers so popular? 

You may equally ask why are Yeti coolers the best, as the reason for their popularity is the quality, longevity and reliability of the products. When considering ‘Why buy a Yeti cooler?’, check out how many models and colors they offer, which simply wouldn’t be practical if they didn’t sell in such vast quantities. 
Some of the things that make Yeti coolers the best on the market include two or more inches of insulation in the walls and lids of most sizes, a freezer-quality sealing gasket and one-piece construction. This means that your food stays colder for longer, and the cooler is more durable and has a longer life than cheaper models. 
So, they’re not the cheapest coolers on the market, but once you’ve invested in a Yeti cooler, it’s a premium product that can last for a lifetime.  
An alternative is to buy a fridge for camping + a generator and/ or solar panels. Buy a good Yeti cooler can keep cool long enough that all this extra equipment may not be necessary! 

What Yeti cooler sizes are there?  

Yeti coolers’ sizes range from small lunch bags to a huge 222 can cooler. Whether you want to find Yeti coolers with a 25 can capacity, medium-sized Yeti 75 coolers or are looking at Yeti 110 coolers plus, there’s a Yeti ice chest that will be the best Yeti cooler size for your requirements. 

What’s the most popular Yeti cooler size? 

Many of Yeti’s coolers are huge sellers. The most popular Yeti size options include the Tundra 35, the Hopper Flip 12 and the Roadie 24. All of these are made in 9 or more colors, which is testament to how popular they are.  
What size Yeti cooler to buy depends on your needs, though – all are made to the same high quality standards and offer outstanding benefits.  

What’s the best size Yeti cooler for camping? 

As the size of Yeti coolers varies so much, how do you pick which is the best size for you? Each cooler lists its capacity in terms of cans, so it’s easy to visualize how much each one can hold.
Think about how long your trips are, how much food and drink you typically want to take and how many of you travel to help you decide on the best option for your camping trips.  

What are the best coolers for camping in hot weather?

The best coolers for camping in hot weather are those with thick insulation and airtight seals, which is why the Yeti coolers are ideal.

What’s the most popular Yeti cooler color? 

This varies by model, but the favorite color of many customers is white. This is because a white Yeti cooler already has advantage when it comes to keeping things chilled. White reflects heat rather than absorbing it, perhaps giving the cooler a headstart.  
On the other hand, white shows dirt far more easily, and the technology used in the design should mean all colors are equally effective.


Which is the best Yeti camping cooler for you? 

If you were wondering should I buy a Yeti cooler, we hope this guide has helped to answer your questions. Once you’ve decided to go for it, which Yeti cooler to buy is a matter of matching one of the above products to your precise needs. 

These will depend on where you go camping, how long for, who with, and how much food and drink you think is adequate. The cooler may also be used for days out or even parties in your backyard, so it’s worth bearing that in mind when picking the right one. 

Having a reliable Yeti cooler means constant access to fresh food and chilled drinks, which of course can make every trip into the wilderness a much more enjoyable event! 


Do you have any Yeti ice coolers you highly recommend? Join my private Facebook group National Parks Collectors and comment and let me know.

If you found this review helpful but are not quite ready to buy yet, Pin It so you can find it easily!

Best Yeti Cooler for Camping

Read more travel product reviews

About the Reviewer

James Ian Yosemite

James Ian is a national park, camping and hiking expert.

He has dedicated his life to travel, visiting more than 80 countries, all 7 continents and all of the main national parks in the United States. With over 35 years experience in the travel industry, James has worked on cruise ships, at resorts and hotels, and as a travel planner who’s helped hundreds of people plan successful trips to US national parks. 

Based on his experience visiting our national parks multiple times, in-depth research and expertise as a travel planner, James has published detailed itineraries for most of the major national parks in the US. These itineraries, as well as in-depth park guides, comprehensive camping and hiking gear reviews and buying guides, and helpful packing lists and gift guides will help you have your own incredible trip to US national parks without stress and hassle.

As a national park expert, James has contributed to many publications, including Time Business News, Savoteur, Best Trip, and Wired.

Read more…


Parks Collecting is a participant in the Amazon.com Services LLC Associates Program, an affiliate advertising program designed to provide a means for sites to earn advertising fees by advertising and linking to amazon.com. Amazon and the Amazon logo are trademarks of Amazon.com, Inc. or its affiliates. As an Amazon Associate I earn from qualifying purchases.

Maple Glade Rainforest Trail and Kestner Homestead Trail: Complete Guide

If you’re visiting Olympic National Park, don’t miss these two connected trails in the Quinault Rain Forest.  

They are great for lovers of nature and history, as they combine one of the most spectacular pockets of temperate rain forest in the park with a fascinating historical site.

I’m a national park expert and I love these trails. I’ve written this guide to give you the full low down.

TOP TOUR: Book a Quinault Rain Forest tour now
TOP HOTEL PICK: Check availability now
FIND THE CHEAPEST CAR RENTAL: Search Discover Cars for the best deals
FIND THE CHEAPEST FLIGHTS: Search Skyscanner for the best deals
GET TRAVEL INSURANCE: Get insured with Travelex before you go

No time right now to read about the Maple Glade Rainforest Trail and Kestner Homestead Trail? Pin It and save it for later:

Please note this post may contain affiliate links, which means we may receive a commission, at zero cost to you, if you make a purchase through a link. Please see our full Disclosure for more information. If you have any questions, please contact me.

FREE DOWNLOAD
Subscribe to regular updates with tips for planning, travel inspiration and trip ideas and get instant access to the free PDF of this guide for the
Maple Glade Trail and Kestner Homestead Trailsk


Guided Tours of the Maple Glade Trail / Kestner Homestead Loop

If your time is limited and you want to visit the Lake Quinault area as a day trip from Seattle, then there is a good option for you.  This private Quinault Rainforest tour gives you the opportunity to do both these hikes and also visit the world’s largest spruce tree.

BOOK A FULL-DAY PRIVATE TOUR FROM SEATTLE TO LAKE QUINAULT & THE QUINAULT RAINFOREST

Small road surrounded by mossy trees, ferns, and other trees in Kestner Homestead - Maple Glade Olympic National Park.

Maple Glade Rainforest Trail and Kestner Homestead Trail Details

Distance: 0.5 miles (Maple Glade Loop Only) | 1.3 miles (Kestner Homestead Loop)

Type: Loop

Elevation change: 16 – 30 feet

Time: 15 minutes (Maple Glade Loop Only) | 30 minutes (Kestner Homestead Loop)

Difficulty: East

Trailhead: Maple Glade Rain Forest Trailhead

Highlights: Temperate Rain Forest with maple trees and moss; Historic homestead/ farm

Fee: There is no special trail fee and you don’t pass through any entrance station to enter this section of Olympic National Park, so you can hike these trails for free.
However, if you are going to enter other sections of Olympic National Park like Sol Duc, Hoh Rain Forest and Hurricane Hill, you will to pay the Olympic National Park entrance fee.  You can buy it online or, if you are planning to visit more than just Olympic National Park this year (Mount Rainier National Park and North Cascades National Park are both close), it can be great value to purchase an America The Beautiful pass.    

Open: Open year-round

Mossy trees surrounded by ferns and other plants in Kestner Homestead - Maple Glade Olympic National Park.

Map of Kestner Homestead Trail + Maple Glade Loop Trail

You can use this fun map, which provides a nice visualization of the trail.  The trails are easy to follow and this is sufficient. 

However, if you’re going to be doing more hiking in Olympic National Park, it’s worth getting a National Geographic topographic hiking trails map of Olympic National Park before you go.

Colorful image of Kestner Homestead Trail Map

The Maple Glade Rainforest Trail and Kestner Homestead Trail Description

I’m describing these two trails together because the Maple Glade Loop is a small loop within the longer Kestner Homestead Loop.  I recommend doing both, as they are both easy and provide a nice combination of nature and history.

Mossy trees surrounded by ferns and other plants in Kestner Homestead - Maple Glade Olympic National Park.

Maple Glade Rain Forest Loop

This easy 0.5 loop starts at the Quinault Ranger Station. The trailhead is across the parking lot from the ranger station.  

A junction road with three wooden signage surrounded by mossy trees, ferns, and other plants in Kestner Homestead - Maple Glade Olympic National Park.

After a couple of minutes, you’ll come to a fork in the path.  You can go either direction.

If you go left, you’ll hike through the Maple Glade Loop first and then continue on to Kestner Homestead.  This is what I did, and I recommend it because I like that you experience the rain forest first and then see the historic homestead so you can really appreciate what the early settlers encountered when they first moved into the region.  

I’m describing the trail in this clockwise direction, but there is no problem is you prefer to go right and hike clockwise instead. 

You’ll soon find yourself surrounded by Big Leaf Maple trees.  These trees twist and turn seeking light.

Huge mossy trees surrounded by other plants in Kestner Homestead - Maple Glade Olympic National Park.

These trees, along with the evergreen conifers, are covered in moss. There are hundreds of varieties of moss growing on tree trunks and draped over the twisted branches.

Mossy trees surrounded by ferns and other plants in Kestner Homestead - Maple Glade Olympic National Park.

This creates a mystical, other-worldly environment to wander through and admire.

Small road surrounded by mossy trees, ferns, and other trees in Kestner Homestead - Maple Glade Olympic National Park.

There are several areas that turn into swampy ponds after (the frequent) rain, but in late summer/ early fall, are often dried up and covered in lush grasses instead.

Dried pond surrounded by mossy trees in maple glade in Olympic National Park

Enormous ferns are common at ground level, so whether you are looking up, down or all around, there is something to see and admire.

Ferns, Mossy trees, and other plants in Kestner Homestead - Maple Glade Olympic National Park

There are endless opportunities for photos and just to stop and admire the incredible beauty of this temperate rain forest.

Small road surrounded by mossy trees, ferns, and other trees in Kestner Homestead - Maple Glade Olympic National Park.

When you come to an intersection, you have a choice.  To the right is the trail to Kestner Homestead.  To the left is the second half of the Maple Glade Loop.

If you are just hiking the Maple Glade Loop, go left.  If you want to also visit the Kestner Homestead, you can either complete the Maple Glade Loop and then double back over the first half of this loop to get back to this intersection OR skip the second half of the Maple Glade Lop and continue straight on to Kestner Homestead.

This is a personal decision. If time is limited, then go straight.  There are still many more maple trees and mounds of moss, but if you have more time, why not spend more time in this amazing place?

Small road surrounded by mossy trees, ferns, and other trees in Kestner Homestead - Maple Glade Olympic National Park.

Kestner Homestead Loop

From the Maple Glade Loop Trail, the trail continues through similar landscape of magical trees, moss and ferns.

A man standing in the middle of the minor road in Mossy trees surrounded by ferns and other plants in Kestner Homestead - Maple Glade Olympic National Park surrounded by mossy trees, ferns, and other plants.

Look down to find banana slugs and through the trees, where you may see Roosevelt Elk.

Yellow banana slug in Hoh Rainforest Olympic National park

After about half an hour/ 0.7 miles, you’ll emerge from the forest into the Kestner Homestead.

The Kestner Homestead Site is the oldest surviving settler-built homestead in the Quinault River Valley and is listed on the National Register of Historic Places.   

The Kestners built their homestead on the northeast side of Lake Quinault because in addition to the forest, which provided building materials, the site also had a water supply. 

It took several years to clear the dense forest north of the Quinault River. The main buildings were built in 1897 and then rebuilt in 1900-1905 by Anton Kestner after their first home was demolished in a flood.

A man on the small road between two cabins and behind are trees in Small road surrounded by mossy trees, ferns, and other trees in Kestner Homestead - Maple Glade Olympic National Park.

There’s a wooden farmhouse and several sheds and small outbuildings with wood shingled roofs.  

You can get a sense from the arrangement of the buildings, pasture and orchard how these early settlers organized their lives and how their difficult existence functioned in this remote area of the country in the last 19th and early 20th centuries. 

Huge old Buildings and behind are trees in Kestner Homestead - Maple Glade Olympic National Park.

There are also pieces of abandoned, rusty farm equipment scattered around the property, plus (somewhat randomly) a bathtub sitting in a nearby field.  

The largest building is the barn.  Although the original barn was removed in 1997 because
of a powder post beetle infestation, a replacement 1/3 of the size was built in 2001 with materials salvaged from the original barn.

An old bathtub on the grassy ground, and behind are cabins surrounded by trees in Olympic National Park

There are two of the three original pastures, plus a reasonably-sized fruit orchard.  It’s a very picturesque to place around and appreciate the life that these early homesteaders lived.

The Kestners had beef cattle, milk cows, sheep and work horses that grazed in the pastures
and forest. The land within the building cluster was used for kitchen and flower gardens and for raising chickens, geese, and pigs.

It was a hard life and the heavy rain that this area gets in winter caused the Quinault River and Kestner Creek to overflow almost every year beginning the first winter the Kestners were in the valley. 

The hard life proved to be too much in the end and it was abandoned in 1939 when the original Kestners died.

An old surrounded by trees inside the wooden fence in Kestner Homestead - Maple Glade Olympic National Park

The loop trail continues for another 0.4 miles.  Head down the main farm road and across a modern bridge.

A wooden bridge surrounded by trees and leaves, and on the other side are buildings in Maple Glade Rainforest Trail and Kestner Homestead Trail Olympic National Park

You’ll pass a boom gate then come to a junction with the road right in front of you.  

A man standing in the middle of the junction road and beside the roads are mossy trees, ferns and other plants in Mossy trees surrounded by ferns and other plants in Kestner Homestead - Maple Glade Olympic National Park.

Take the path to the right. It passes some maple trees but mostly it’s fairly unexciting second growth forest.

Small road in the trees with small trunks and surrounded by ferns and other plants in Mossy trees surrounded by ferns and other plants in Kestner Homestead - Maple Glade Olympic National Park.

The trail goes alongside Kestner Creek, but this can be dried up in late summer/ early fall.

Mossy trees surrounded by ferns and other plants in Kestner Homestead - Maple Glade Olympic National Park.

About ten minutes after leaving the homestead, you’ll see the Quinault Ranger Station through the trees. This is the end of the trail.

Trees and other plants beside the road and behind is a blue roof building in Kestner Homestead - Maple Glade Olympic National Park

What You Need To Take/ Wear on The Maple Glade and Kestner Homestead Loop

  • These trails are short, flat and well maintained, so you don’t need any special clothing other than comfortable walking shoes.   However, there can be muddy sections in winter, spring and through early summer.
    Good quality waterproof hiking boots will really make a difference in the mud. If you need to get some, take a look at my Guide to Buying the Best Hiking Shoes/ Boots to help you know what to look for and get some recommendations.  My top pick is this pair of Salomon Gore-Tex boots.
  • This is a rain forest, so it can rain a lot.  I recommend taking a rain jacket and wearing layers that you can take off or put on depending on the weather, which can change throughout the day. If you need one, I like this Columbia rain jacket for men and this Little Donkey Andy rain jacket for women
  • There can be ticks and bugs, especially in spring and summer.  Although I’m not aware of any reports of Lyme Disease, bug spray is a good idea. I’m a fan of DEET-free insect repellent, as it’s better for the environment and your skin.  Get some here
  • You will definitely want to take a camera.  I love the GoPro HERO 12.  It is designed for travel.  It’s water resistant and durable and takes photos, video and even does streaming.  Check current prices on the GoPro HERO 12 here 
  • Check my list of essential things to take and wear on a day hike to make sure you have everything you need.
A small road and mossy trees, ferns, and other trees in Kestner Homestead - Maple Glade Olympic National Park.

Tips for Hiking the Maple Glade Rain Forest Trail and Kestner Homestead Loop

The loop to Kestner Homestead can be hiked in either direction. I prefer clockwise because then you visit Maple Glade first and get a real sense of the forest as it was before it was farmed, which helps you appreciate even more the task that early pioneers faced when turning the forest into farmland.

There are often ranger-led hikes into Maple Glade from the Quinault Ranger Station.  These are a great introduction to the temperate rain forest. Check the NPS website for the dates of your visit.

The light in Maple Glade is best early morning, when the sunlight makes the moss glow. 

The trail is easy, but can be muddy in winter and spring.  If you’re hiking then, or after it has rained, a good pair of hiking shoes or boots will come in handy. If you need to get some, take a look at my Guide to Buying the Best Hiking Shoes/ Boots to help you know what to look for and get some recommendations.  

Because most of the annual precipitation is in winter, the rain forest can be a little dry looking by early fall.  There’s not much you can do about this other than to adjust your expectations or the timing of your trip.  Though even in September, it’s stunning. 

Keep an eye out for animals. Banana slugs are around, but may be hidden if it’s been dry.  Roosevelt elk and deer are often seen in this area.  It’s also bear country, so stay aware.

These hikes can be accessed along the Lake Quinault Loop Drive.  Read my guide to this scenic drive for more information.

Old wooden railings and behind are three houses surrounded by trees and plants in Lake Quinault Olympic National Park

Travel Insurance for Olympic National Park

Even though these are easy hikes, you should definitely get travel insurance before your trip to Olympic National Park.  This can protect you against medical and emergency repatriation, as well as things like trip cancellation, loss and/ or theft of property, etc. 

A great insurance option is Travelex.  It has coverage for all you’ll need. You can choose the best travel insurance plan for your trip here or get a quote right now:

728x90 Get Quote

Enjoy the trails!

You might also like

>> Olympic National Park Guide
>> Lake Quinault Loop Drive
>> Best Lake Quinault Rainforest Hikes
>> Best Hoh Rainforest Hikes 
>> Best Sol Duc Hikes 
>> Best Lake Crescent Hikes
>> Best Hurricane Ridge Hikes 
>> Guide to Visiting Hurricane Ridge
>> The Best Olympic National Park Beaches 
>> Best Waterfalls in Olympic National Park


Do you have any tips for or questions about hiking the Maple Glade and Kestner Homestead Loop trail I’d love to hear about them.  Join my private Facebook group National Parks Collectors and comment and let me know (you can also pick up extra planning tips, share your photos and stories with other national park lovers and more).

FREE DOWNLOAD
Subscribe to regular updates with tips for planning, travel inspiration and trip ideas and get instant access to the free PDF of this guide for the
Maple Glade Trail and Kestner Homestead Trails

If you liked this post, please share the love and Pin It to your Olympic National Park board! 

WHERE ARE YOU IN YOUR PLANNING PROCESS?

Are you just starting to think about taking a national parks trip? Get Inspiration
Are you starting to plan a trip to Olympic National Park? Read my Guide to Olympic National Park
Are you looking for a place to stay? Seach accommodation guides
Are you ready to book your trip? Use these Planning and Booking Resources
Do you want to read a book about national parks? Check out my Recommended Reading List

About the Author

James Ian Yosemite

James Ian is a national park, camping and hiking expert.

He has dedicated his life to travel, visiting more than 80 countries, all 7 continents and all of the main national parks in the United States. With over 35 years experience in the travel industry, James has worked on cruise ships, at resorts and hotels, and as a travel planner who’s helped hundreds of people plan successful trips to US national parks. 

Based on his experience visiting our national parks multiple times, in-depth research and expertise as a travel planner, James has published detailed itineraries for most of the major national parks in the US. These itineraries, as well as in-depth park guides, comprehensive camping and hiking gear reviews and buying guides, and helpful packing lists and gift guides will help you have your own incredible trip to US national parks without stress and hassle.

As a national park expert, James has contributed to many publications, including Time Business News, Savoteur, Best Trip, and Wired.

Read more…


Parks Collecting is a participant in the Amazon.com Services LLC Associates Program, an affiliate advertising program designed to provide a means for sites to earn advertising fees by advertising and linking to amazon.com. Amazon and the Amazon logo are trademarks of Amazon.com, Inc. or its affiliates. As an Amazon Associate I earn from qualifying purchases.

Best Time to Visit Mount Rainier National Park: Complete Guide

Deciding when to visit Mt. Rainier should be one of the first things on your list in making your travel plans. Your interests, attractions you want to see, Mt. Rainier weather conditions, and peak seasons can help you figure out when to go. 

Let’s go into the details of the best time to visit Mt. Rainier National Park so you can decide what suits you. 

No time right now to read about the best time to visit Mount Rainier National Park? Pin It and save it for later:

Four photos of the view of wildflowers with different colors below the mountain and surrounded by trees, with the text, The Best Time to Visit Mount Rainier National Park.
Two photos of the view of wildflowers with different colors below the mountain and surrounded by trees, with the text, Mount Rainier National Park Best Time to Visit

Please note this post may contain affiliate links, which means we may receive a commission, at zero cost to you, if you make a purchase through a link. Please see our full Disclosure for more information. If you have any questions, please contact me.

FREE DOWNLOAD
Subscribe to regular updates with tips for planning, travel inspiration and trip ideas and get instant access to the free PDF of this guide to the
Best Time to Visit Mount Rainier National Park

You might also like:

>> Mount Rainier National Park Guide 
>> Best hikes in Mount Rainier National Park 
>> Which airports to choose for Mt Rainier National Park
>> 20 Best Hikes in Mount Rainier National Park
>> How To Get to Mount Rainier National Park


The Best Time to Visit Mount Rainier National Park In a Nutshell

Mount Rainier National Park is open all year round so you’ll have different experiences each season. The best time of year to visit Mount Rainier is the summer months, but the fall and winter seasons are equally beautiful. 

  • Mid-July to Mid-August: The summer season is at its fullest and crowds are plenty, but the weather is warm and this is when the wildflowers are at their peak. 
  • Early September to early October: Crowds are fewer and spectacular fall foliage takes in. 
  • Mid-October to January: Winter weather welcomes park visitors.  Only a few places in the park are open, but if you enjoy winter activities, this is a great time to visit.

The weather in Mount Rainier National Park presents short peak seasons and longer cold seasons. So the best time to go to Mount Rainier depends on what activities you plan to do. Let’s look at the different seasons at the park. 


Mount Rainier National Park Weather

Mt. Rainier weather conditions are fairly unpredictable since the weather is affected not only by the region (Pacific Northwest), but also by altitude.  The mountain creates its own weather system and this can change suddenly throughout the day.  

Rains are more likely around spring, fall, and winter seasons, but the Mount Rainier climate is cool and rainy even in the driest seasons in July and August. 

It snows a lot in winter – and you’ll often find snow on popular hiking trails well into July. 

If you plan to go hiking or mountain climbing, make sure you’re aware of Mt. Rainier National Park weather updates and alerts. It’s also best to prepare tents, extra clothing, and gear for the changing weather in Mount Rainier National Park. 

Also, if you’re driving to the park in winter months, the only available entrance you can access is the southwest Nisqually Entrance going to Paradise. You can still drive up to the Carbon River Entrance but beyond that, you need to go on foot or bike. 


Mount Rainier in Spring (April-June)

Flowers with different colors and besides are trees and a huge snow-capped mountain in Mount Rainier National Park

From April to June, there are some good things about visiting Mt. Rainier. Spring season sees the park start to open up again after the winter.

Snows start to melt at the lower altitudes and baby animals are born.  The park’s waterfalls are especially impressive with the snowmelt.  The busy summer season hasn’t started and there are a lot fewer people during this season so you can enjoy a more leisurely trip around the park. 

Visiting Mount Rainier in April

Snow-capped mountains and below are trees and mountains with melting ice in Mount Rainier National Park

What’s there to see and do at Mount Rainier National Park in April? Is it the best time to visit the park? Not totally. Though it’s a beautiful time to see the park since the snow is melting and very early low altitude wildflowers are starting to bloom, you’ll expect unpredictable spring weather. Warm weather can quickly turn to cold steady drizzles within a day.

Expect temperatures to range from the low 30s to the high 40s. Weather can also determine the availability of park facilities like campgrounds, trails, and activities. 

If you love hiking, you’ll find several trails at lower elevations that are suitable for spring hikes. Be sure to wear good quality hiking boots or gaiters because the trails are wet and muddy in this season. Read my Guide to the Best Hiking Shoes/ Boots for FAQs, tips on what to look for and recommendations and reviews if you’re looking to buy some new boots.

Seeing Mount Rainier’s waterfalls is also another thing to enjoy. Drive to Paradise to see the majestic views of Christine Falls and Narada Falls. Comet Falls, Carter, and Madcap Falls are also stunning this time of the year, along the Myrtle Falls which is one of the popular vistas at Mount Rainier. 

Visitor Centers and Information Centers open during the season include the Longmire Museum and Carbon River Ranger Station.

Pros:

  • Scenic trails for spring hikes at lower elevations
  • Waterfalls to visit

Cons:

  • Unpredictable weather
  • Wet and muddy trails 
  • Many facilities and accommodations are not be available/ open
  • The most popular trails are still covered in snow

Key Events in April:


Visiting Mount Rainier in May

Blue flowers and behind is a snow-capped mountain in Mount Rainier National Park

You’ll still expect some feet of snow at Mount Rainier in May, especially in the Paradise and Sunrise areas.  Many of the park roads are still closed, though the Stevens Canyon entrance to Mount Rainier usually opens sometime in May.

Mt. Rainier weather in May is typically humid and cool, with daily temperatures ranging from a 59°F high to 39°F lows. Be sure to check weather forecasts before heading out to the park and have appropriate clothing and gear when hiking. 

You can have a great waterfall experience in Mt. Rainier in May. Since snow is melting in the highland areas, the waterfalls at Mt. Rainier National Park are at the peak of their glory. Whether you’ll go for a scenic drive or plan to hike to get views up close, the sights are worth it. From parking areas along Paradise, you can already see the stunning view of Narada and Christine Falls from a distance. 

You can also go for waterfall hikes and take the Paradise River Trail to see spectacular views of Carter and Medcap Falls. Likewise, the path to Conmet Falls gives you a good hike. 

More park facilities also open at Mount Rainier National Park in May including the Henry M. Jackson Memorial Visitor Center at Paradise, along with Information Centers namely Longmire Wilderness Information Center, White River Wilderness Information Center, and Paradise Wilderness Information Center / Guide House. For your accommodation, you can stay at Paradise Inn which typically opens in late May.

You can camp or enjoy a picnic at the Cougar Rock and Ohanapecosh grounds and picnic areas which also open later in May. 

So if you’re asking, “Is May a good time to visit Mt Rainier?’ It’s best to schedule your trip for later in May. 

Pros:

  • See stunning waterfall views 
  • More park facilities open later in May

Cons:

  • Spring rainy weather during the day 
  • Many of the roads may still be closed 
  • Many facilities and lodgings are still closed until later in the month
  • Most of the popular trails are still covered in snow

Key Events in May:


Visiting Mount Rainier in June

Flowing river surrounded by rocks, grass below a snow-capped mountain in Mount Rainier National Park

June is summer in most parts of the country, but for most of Mount Rainier National Park, it is still spring. The weather in Mt. Rainier in June is warming up, though still cool and the higher elevation areas of the park are still snowy. The Paradise area is open, though the trails are typically covered in snow.  You can still enjoy great hikes at Paradise and Longmire, including the famous Skyline Trail, but you’ll need to wear microspikes or other traction devices.  If you need to buy some microspikes, read my Guide to the Best Microspikes for Hiking for tips and recommendations.  

The popular Sunrise region doesn’t usually open until late June or even early July. 

The good things is that in addition to this heading into the drier season in Mount Rainier National Park, June temperatures are increasing, ranging from the mid-60s to mid-40s.

At this time, you can also find additional park facilities opening at Mount Rainier National Park in June. The Ohanapecosh Visitor Center, White River Campground, and Paradise Picnic Area are available in the later weeks. 

Pros:

  • Warmer temperatures 
  • Lesser rains 
  • Hiking trails at Paradise and Longmire 
  • Additional park facilities open later in June
  • Crowds are lesser 

Cons:

  • Most areas of the park are still closed 
  • Hiking trails can be mushy later in the day 

Mount Rainier in Summer (July-August)

Colorful wildflowers and behind are pine trees and a huge snow-capped mountain in Mount Rainier National Park

July and August are peak seasons in Mount Rainier.  Summer is short and the park becomes busy, especially on weekends and the Fourth of July.  On summer weekends, you’ll need to get to some of the more popular spots like Paradise and Sunrise before 7:00am to get a parking spot! 

You can avoid the heavy crowds by going there early or planning your visit during the weekdays. 

Perhaps, you can also head out to more remote locations in Mt. Rainier. Summer offers equally great views along the park’s northwest section in the Carbon River area and the Gobblers Knob area in the southwest. 

Visiting Mount Rainier in July 

Colorful flowers surrounded by pine trees, and behind are mountains in Mount Rainier National Park surrounded by trees

Summer is definitely the best time to visit Mount Rainier National Park. Wildflowers covering the meadows are in full bloom and warm weather is perfect for hiking and picnicking. 

You can expect clearer skies during this time of the year with minimal fog and more favorable trail visibility. Mt. Rainier in July is fairly cool with highs ranging from the 60s to 70s. Average lows are around the mid-50s. 

You can still expect lots of snow along the highland trails until the end of the month, so wear hiking boots and take microspikes if you’re planning to go on longer hikes like the Skyline Trail. 

Read my Buying Guide to the Best Hiking Boots and Buying Guide to the Best Microspikes for Hiking if you’re looking to buy some. 

Always check the weather at the location you’re heading to because weather conditions may differ from one area of the park to another. 

Everything is usually open by early July, including the Sunrise Day Lodge and the Sunrise Visitor Center.  

Pros:

  • Park season is at its peak
  • Warm weather perfect for hiking and picnics
  • Wildflowers are in full bloom by mid-July

Cons:

  • Park is crowded 
  • Parking is challenging 
  • Lines to entrance gates are long 
  • Snow persists on many trails well into July

Key Events in July:

  • 4th of July Celebrations at Enumclaw
  • Mt. Rainier Annual Wine Festival at the Alpine Inn
  • Rails to Ales Event; Craft Brew Tasting & Train Ride at Mt. Rainier Railroad
  • Annual Pacific Northwest Highland Games at Enumclaw

Visiting Mount Rainier in August

Colorful flowers and behind are trees and snow-capped mountains in Mount Rainier National Park

The first weeks in August are the best times to see the wildflowers in Mt Rainier National Park. All park facilities are open so it’s a good time to visit and explore many of its attractions. 

August also has the best weather, with an average temperature of 42 ˚F to 63 ˚F, with less rain than other months of the year, so you have the best chance of actually seeing the mountain. Nonetheless, you still have to be prepared because the weather at the park can easily change on any day. 

Most of the park areas are snow-free at this time so you’ll enjoy some warmer hikes. Wildlife also roams the park so you’re likely to see elk, black bears, and mountain goats in the alpine areas. 

Summer is also the season for bugs and mosquitos in Mount Rainier so bug spray is a must during hikes. Get some DEET-free insect repellant here if you need some.

Pros:

  • All park facilities are open 
  • Best wildflower views in the season 
  • Spotting wildlife

Cons:

  • Park is crowded
  • Parking may be limited 
  • Lines to entrance to gates are possibly longer  

Key Events in August:

  • Anniversary of the Great American Outdoors Act (free day at the park) 

Mount Rainier: Fall (September-October)

Brown-leaf trees and beside is a huge snow-capped mountain in Mount Rainier National Park

Mt. Rainier in fall offers you a different feel of the park with fall colors starting to replace most of the lush greens. The best time to see this fall foliage is around the first few weeks of October since many of the park trails start to close by late October because of snow conditions. Mount Rainier in fall also lets you enjoy the park attractions minus the large crowds. 

Visiting Mt Rainier in September

Pine trees and other plants surround red plants, and behind is a snow-capped mountain covered with fog in Mount Rainier National

Is it a good time to visit Mount Rainier in September? Yes. 

Two good reasons to plan your trip during the fall season? There are a lot fewer people in the park right after Labor Day and the weather is good at this time of the year. I’ve been the week after Labor Day and it was easy to get a park, the trails weren’t super crowded and the weather was perfect!

The main areas are snow-free so you’ll enjoy the cool rainforest climate while hiking the trails. Many of the plants are still green and there are even some late-season wildflowers on some meadows, but you’ll start to see more orange and red hues taking place around the park. 

Black bears and deer are also active during the season so you’re likely to spot them along the trails. 

Fall weather at Mount Rainier National Park in September averages between highs of 68°F and 45°F low temperature. You can access all park visitor centers and facilities at this time, but when snowfall starts in Mount Rainier in late September, some park facilities also close for the coming winter season. 

Visitor Centers in Sunrise and Ohanapecosh close in mid-September. Paradise Inn also ends its open season while Sunrise Day Lodge and Paradise Wilderness Information Center / Guide House close earlier during the month. 

Pros:

  • Fewer people
  • Stunning fall colors
  • Spot some wildlife  

Cons:

  •  Some park facilities start to close by the end of the month  

Key Events in September:

  • National Public Lands Day (free day at the park)

Visiting Mt Rainier in October

Pine trees and other colorful plants below the snow-capped mountain in Mount Rainier National Park

Mount Rainier in October gives you brilliant Autumn colors and cooler weather. Crowds thin out by this time since rain also starts to be more frequent. 

Is it a good time to visit Mount Rainier National Park in October? Visiting the park during the early weeks is best so you can enjoy the fall foliage at the peak of its colors. Mt. Rainier October weather ranges between highs of 48°F and average lows of around 32°F. 

The fall season is also the best time to see wildlife. You’ll see black-tailed deer roaming around the Paradise meadows and hoary marmots and pikas making their typical whistling high-pitch calls. Black bears are also more visible feeding on berry patches. They’re feeding to gain as much weight as possible and prepare themselves to hibernate for winter. 

You can also enjoy berry-picking at Mt. Rainier. Fall season is when huckleberries, blackberries, thimbleberries, and salmonberries are ripe. You’ll find plenty of these berries along Sunrise, Paradise, the Naches Peak Loop, and the Tipsoo Lake-Chinook Pass. 

By late October, chances of snow start to increase, so make sure to prepare for the cold weather if you’ll be visiting at that time. Also, the Longmire Wilderness Information Center and White River Wilderness Information Center close in mid-October. 

Pros:

  • Stunning all foliage colors 
  • Spotting more wildlife 
  • Picking berries 
  • Cooler weather 
  • Crowds have thinned out  

Cons: 

  • Snow starts later in the month
  • Many accommodations and facilities close during this month

Visit Mount Rainier in winter (November-March)

Mountains covered with snow and trees in Mount Rainier National Park

Mount Rainier National Park is known to be one of the “snowiest” places in the country. Does Mt Rainier always have snow? It’s capped with glaciers so the highest elevations have snow all year, but the main areas casual visitors go to are clear in summer but snowy in winter.  

Winter here lasts for several months and is really cold. Paradise has an annual average snowfall of around 640 inches, which measures more than 50 feet. This makes Mount Rainier snow perfect for winter activities. The park is stunningly beautiful with the thick and heavy snow. And there are a lot fewer people at this time.

The southwest Nisqually Entrance and the Carbon River Entrance are the only entrances open at Mount Rainier National Park in winter. Though the Carbon River Road is only accessible to foot traffic and bicycles, vehicles are only allowed at this park entrance. 

Can you visit Mt Rainier in the winter with a car? Yes. But in any weather condition, the park requires all vehicles to carry tire chains during the winter season for safety precautions while visiting the park. 

Most of the roads are closed in Mount Rainier National Park in winter, so make sure you check accessible roads. Roads from Nisqually Entrance to Longmire are accessible all year-round but closes when weather is extreme, while roads along Longmire and Paradise opens only on weekends and closes every night.

If you’re visiting Mt Rainier in winter, plan your travel well and always get information on road status and weather forecasts, and keep yourself updated with possible winter hazards. 

Visiting Mt Rainier in November

Huge building with many windows surrounded by trees and snow, and behind is a snow-capped mountain in Mount Rainier National Park.

As the season shifts to winter in Mount Rainier National Park, November isn’t really a good time to visit the park. Rain is often non-stop and the weather is mostly cloudy. So if you’re aiming to go sightseeing, it’s not the best time to do so. 

You may still be able to go on some hikes but make sure you’re prepared for the trip and be aware of sudden weather changes. Mt Rainier winter temperature in November ranges from 39°F highs to 28°F lows. 

It’s still possible to visit Mt Rainier in winter but basically, you won’t enjoy much of it until around mid-December when snow is thick enough for winter activities. The Henry M Jackson Memorial Visitor Center at Paradise still opens on the weekends, along with the Longmire Museum and Carbon River Ranger Station which are open all year round. 

Pros:

  • Lesser crowds 

Cons:

  • Mostly rainy and cloudy weather 
  • Most accommodations and park facilities are closed for the winter
  • There usually isn’t enough snow for winter activities, but too much for summer activities

Visiting Mount Rainier in December

Pine trees covered with snow in Mount Rainier National Park

Mount Rainier National Park in December has abundant snowfall and gives park visitors lots of opportunities to enjoy winter recreation. By the middle of December, you’ll see the spectacular winter scenery as the park gets covered with blankets of snow. 

Is it a good time to visit? Yes, if you love winter. The weather is in its coldest months with high temperatures averaging around 33.8°F and an average low of 21°F.  The snow is thick enough for snowshoeing, snowboarding, sledding, and skiing. 

Read my Guide to the Best Snowshoes for Beginners if you’re looking to buy some. 

You can go for snow walks or winter camping in Paradise, Mazama Ridge, and Reflection Lakes. You can get a wilderness permit at the Longmire Museum or the Longmire Wilderness Information Center. 

Another advantage of taking the Mt Rainier National Park winter trip is the cheaper rates during the season, particularly from December to January. You’ll get the best prices this time of the year. 

Pros:

  • Great time to enjoy winter activities 
  • Spectacular winter landscape  
  • Cheapest vacation rates 

Cons:

  • Weather is at its coldest 
  • Park facilities are limited  

Visiting Mount Rainier in January

People walking toward snow-capped mountains in Mount Rainier National Park

Temperatures in Mount Rainier in the winter range between 23˚° F to 35°˚F. Mount Rainier’s weather in January is pretty much the same as in December so the park is still full of winter activities like cross-country skiing, snowboarding, and hiking. When you go for winter hikes, make sure to check on road closures and avalanche warnings for your safety. 

You’ll also enjoy Mount Rainier National Park winter activities like weekend snowshoe tours led by rangers. 

If you’re planning an overnight stay, National Park Inn just next to Longmire Museum is open even during winter. Also, you’ll find several sledding areas in Paradise and snowmobile sites along Westside Road and loop roads on Cougar Rock Campground.

Pros:

  • Stay overnight at National Park Inn
  • Winter Activities 

Cons:

  • Inclement weather 
  • Many areas of the park are closed and even Paradise is often closed on weekdays

Key Events in January:

  • Martin Luther King, Jr. Day (free day at the park) 

Visiting Mount Rainier National Park in February

Pine trees surrounded by snow and water, and behind are snow-capped mountains in Mount Rainier National Park

Is it a good time to visit Mount Rainier in February? Yes, if you want to make the most of the park’s wintry month. Snow accumulations during this season can reach up to 8 feet. Rains are still frequent and days are still shorter, so you’ll need to constantly check for weather and road advisories when you tour around the park. 

Temperatures Mt. Rainier in February typically average between 22°F and 38°F. If you plan to visit this time of the year, pack extra layers of clothes, boots, coats, and snow gear. 

Read more:

You can still enjoy fun snow activities including camping, sledding, climbing, and much more before the start of spring in the next coming months. You can only access park facilities open year-round like Longmire Museum, Henry M Jackson Memorial Visitor Center at Paradise on the weekends, and Carbon River Ranger Station. 

Pros:

  • Winter Activities 

Cons:

  • Freezing temperatures
  • Most areas of the park are closed

Visiting Mt Rainier National Park in March

Pine trees covered with snow in Mount Rainier National Park

Though it’s spring in most parts of the country, March is still cold in Mt. Rainier. Snow still covers much of the park with around seven and a half feet of snow accumulations. Average highs are usually 37˚F lows can go around 23˚F. 

Is it a good time to visit Mount Rainier? Not really, because on an average day, there’s almost a 50% chance of snow or rain. It’s also the rainiest month in the park and very humid. Since Mount Rainier’s weather is really cold and wet, the bottom line is March is one of the worst times to visit the park.

Though sledding areas are still open at this time and you can probably still do some winter activities, you won’t get to enjoy much because of the weather. 

Pros:

  • Very few crowds 
  • Winter activities are still available

Cons:

  • Frequent rain and snow 
  • The wettest month in the park

Best Time To Visit Mt Rainier Wildflowers

July and August are the best times to see the colorful wildflowers. Mt. Rainier is also the busiest during these summer months. The first weeks of August are the peak season for wildflowers. Mt Rainier National Park has plenty of trails where you can see these beautiful sights. 


When is the best time of year to visit Mt Rainier National Park

The best weather: July and August have the most pleasant weather Mt. Rainier has to offer. 

The best time to see the wildflowers: Mid-July until the first weeks of August 

The best time to avoid the crowds: September until the winter months from November to March  

The best time to travel to Mount Rainier National Park (summer): Even though they are also the busiest months, July and August are the best months for Mt Rainier National Park. Summer season is when all park facilities open. 

The best time to travel on a budget: December and January

The best time to have a winter adventure in Mount Rainier National Park: December to January

The worst time to visit Mount Rainier National Park: November and March


Travel Insurance for Olympic National Park  

No matter what when you go to Olympic National Park, you should definitely get travel insurance.  This can protect you not only against medical and emergency repatriation, but can also cover things like trip cancellation, loss and/ or theft of property, etc. 

A great insurance option is Travelex.  It has coverage for all you’ll need. You can compare Travel Insurance plans here or get a quote right now:

728x90 Get Quote

Enjoy Mount Rainier National Park!

What do you think is the best time to visit Rainier National Park?  Join my private Facebook group National Parks Collectors and comment and let me know (you can also pick up extra planning tips, share your photos and stories with other national park lovers and more).

FREE DOWNLOAD
Subscribe to regular updates with tips for planning, travel inspiration and trip ideas and get instant access to the free PDF of this guide to the
Best Time to Visit Mount Rainier National Park

If you liked this post about Mount Rainier National Park (best time to visit) please share the love and Pin It to your Mount Rainier National Park board!

Two photos of the view of wildflowers with different colors below the mountain and surrounded by trees, with the text, Mount Rainier National Park Best Time to Visit
Four photos of the view of wildflowers with different colors below the mountain and surrounded by trees, with the text, The Best Time to Visit Mount Rainier National Park.
WHERE ARE YOU IN YOUR PLANNING PROCESS?

Are you just starting to think about taking a national parks trip? Get Inspiration
Are you starting to plan a trip to Mount Rainier National Park? Read my Guide to Mount Rainier National Park
Are you ready to book your trip? Use these Planning and Booking Resources

About the Author

James Ian Yosemite

James Ian is a national park, camping and hiking expert.

He has dedicated his life to travel, visiting more than 80 countries, all 7 continents and all of the main national parks in the United States. With over 35 years experience in the travel industry, James has worked on cruise ships, at resorts and hotels, and as a travel planner who’s helped hundreds of people plan successful trips to US national parks. 

Based on his experience visiting our national parks multiple times, in-depth research and expertise as a travel planner, James has published detailed itineraries for most of the major national parks in the US. These itineraries, as well as in-depth park guides, comprehensive camping and hiking gear reviews and buying guides, and helpful packing lists and gift guides will help you have your own incredible trip to US national parks without stress and hassle.

As a national park expert, James has contributed to many publications, including Time Business News, Savoteur, Best Trip, and Wired.

Read more…


Parks Collecting is a participant in the Amazon.com Services LLC Associates Program, an affiliate advertising program designed to provide a means for sites to earn advertising fees by advertising and linking to amazon.com. Amazon and the Amazon logo are trademarks of Amazon.com, Inc. or its affiliates. As an Amazon Associate I earn from qualifying purchases.

12 Fun Facts About the Grand Canyon in Arizona

The first time you lay eyes on the Grand Canyon, it takes your breath away.  There is no way for photos to capture its size and grandeur.  It’s a place of superlatives – and has been a land of fascinating adventures and stories over the years. 

Do you want to learn more interesting facts about the Grand Canyon? Let’s take a look at the Grand Canyon: facts and history.

No time right now to read these fun facts about the Grand Canyon? Pin It and save it for later:

Four photos: Rock mountains, Structure near the cliff of the mountain, Mountains; and people in a kayak, with the text above that says 12 Fascinating Facts About the Grand Canyon.
Two photos: Wooden and historic signage and a cabin in the mountain surrounded by trees, with the text, 12 Fun Facts About the Grand Canyon National Park.

Please note this post may contain affiliate links, which means we may receive a commission, at zero cost to you, if you make a purchase through a link. Please see our full Disclosure for more information. If you have any questions, please contact me.

If you are planning to visit Grand Canyon National Park in spring, summer or fall, make your planning easy and stress free with a detailed itinerary. I have 1-, 2-, and 3-day itineraries for Grand Canyon’s South Rim that include all the park highlights, give you choices based on your preferred activity level, and take all the stress out of planning your trip. 

Check out the three Grand Canyon itinerary options

The Grand Canyon Facts and History (the Basics)

  • Location: Arizona
  • Size: 1,217,403 acres
  • Number of Visitors each Year: 4.73 million people in 2022
  • Annual Rainfall: The North Rim receives an average of 27 inches of rain and 144 inches of snow each year.  The South Rim receives an average of 16 inches of rain and 60 inches of snow each year. Phantom Ranch at the bottom of the canyon receives an average of 8 inches of rain and no snow in a typical year.
  • Highest Elevation: 9,165 feet at the North Rim Entrance
  • Lowest Elevation: 1,200 feet at the Colorado River
  • Date it Became a National Park: It became a national monument in 1908 and fully fledged National Park in 1919.
Navajo Point Grand Canyon
FREE DOWNLOAD
Subscribe to regular updates with tips for planning, travel inspiration and trip ideas and get instant access to the free PDF
12 Fun Facts About the Grand Canyon

12 Fun Facts about the Grand Canyon

Want to discover 10 facts about Grand Canyon National Park?  Well, here are 12!

1. The Grand Canyon is one of the Seven Wonders of the Natural World

Grand Canyon sunrise Grand Canyon

One of my favorite Grand Canyon National Park fun facts is that it’s one of the Seven Natural Wonders of the World. This puts it in the same company as Mount Everest, Victoria Falls and the Great Barrier Reef. 

Grand Canyon was formed by the Colorado River eroding a path through layers and layers of rock over millions of years.  All that erosion has created a really big canyon.  The Grand Canyon is 277 miles (446 km) long, 18 miles (29 km) wide at its widest point, and over a mile (1,857 meters) deep!

Read more: Best Viewpoints of the Grand Canyon


2. The weather in Grand Canyon varies wildly

stone cabin at phantom ranch grand canyon

One of the more interesting pieces of Grand Canyon information and facts relates to the weather. Given its incredible size, it’s not surprising, perhaps, that the weather can vary radically depending where you are.  The temperature on the rim and at the bottom of the canyon can vary as much as 25 degrees at any given time.

There is a significant difference even at the rims. The North Rim is about 1,000 feet (300 meters) higher than the South Rim. Winters at the North Rim are bitter and the entire area is snowed in an inaccessible for about 6 months of the year. 

The South Rim, on the other hand, will often get a light dusting of snow, and is open year-round.  

The bottom of the canyon is much hotter and gets no snow in winter and its scorching hot in summer.  

Phantom Ranch, the only place other than camping that you can stay at the bottom of the canyon inside the national park, is the hottest, and one of the driest places in the national park. The highest temperature recorded in Grand Canyon National Park was 120°F at Phantom Ranch.  

The coldest and wettest place is just eight miles away, at the North Rim’s Bright Angel Ranger Station. The lowest temperature recorded in the national park was a chilly –22°F. That’s a difference of 144°!

READ MORE: If you’d like to stay inside the canyon, read my guide: How to Stay at Phantom Ranch


3. No one is quite sure how old the Grand Canyon is

Trail of Time Grand Canyon

Another of the more interesting facts about the Grand Canyon National Park is its age.

So, how old is it? Well, if you’d asked that question a decade or so ago, geologist would have told you that the Colorado River started carving its path through the area about 6 million years ago. 

But, since you’re asking now, the answer is a definite, possible, maybe 70 million years. A new study in 2012 suggested that the process of erosion began much, much earlier than previously thought.  

No one is quite sure, but it seems likely that smaller side canyons started being formed about 70 million years, but the larger main canyon began appearing sometime after that. 

What is known for sure is that it’s very old. 

READ MORE: Learn more about the carving of the canyon in this comprehensive book Carving Grand Canyon: Evidence, Theories, and Mystery by W. Ranney


4. There are fossils of ancient sea creatures in the Grand Canyon

An image of a Fossil Worm in Grand Canyon National Park
Fossil Worm Trails in the Bright Angel Shale – NPS photograph by Michael Quinn

Another of the Grand Canyon National Park facts is that there are fossils – lots of fossils – inside the canyon.  There are ancient fossils of marine creatures more than 1.2 billion years old!  They range all the way to very young fossils of land mammals just 10,000 years old. 

That’s a lot of history trapped in the rocky layers of the canyon. 

READ MORE: Are you fascinated by fossils?  Check out An Introduction to Grand Canyon Fossils by D. Thayer


5. There’s a town inside the Grand Canyon

Huge rock formations and below are small wooden houses surrounded by trees in Supai village Grand Canyon National Park

Another of the Grand Canyon interesting facts is that there is a town inside the canyon.  Located just outside the national park, Supai is on the Havasupai Indian Reservation.

Accessible only by an eight-mile hike or a helicopter ride, it’s the most remote village in the contiguous United States and the only place in the United States where mail is delivered by mule.

There are just 208 residents, but it is possible to stay overnight.  There’s a store and café in the village in addition to a tourist lodge.  A campground is a further two miles along, near the spectacular Havasu Falls.  Reservations are required before entering the Havasupai Reservation.

You can visit the official Havasu Tribe website for more information.

READ MORE: Exploring Havasupai: A Guide to the Heart of the Grand Canyon by G. Witt


6. The first European to ride the rapids of the Colorado River through Grand Canyon was a one-armed man

small wooden boats and oars inside grand canyon on river rafting trip through grand canyon

Some of my favorite Grand Canyon history facts are about the famous one-armed explorer, John Wesley Powell

Powell had already had a life full of adventure before venturing through the Grand Canyon.  He’d walked across Wisconsin; rowed the length of the Mississippi River from Minnesota to the sea; rowed from Pittsburgh to St Louis; lost an arm in the Civil War; worked as a professor of geology; and was one of a group of men who were the first documented white men to climb Long Peak in the Rockies.

Then, in 1869, he became the first documented white person to successfully navigate the white water rapids of the Green and Colorado Rivers through the entire length of the Grand Canyon from Green River, WY to St. Thomas, NV.  

The three-month trip wasn’t without incident.  Ten men set out in four wooden boats called dories.  On the trip, they lost one boat, all their equipment for recording the trip, about 1/3 of their supplies and four men.  One left after a month, and survived.  Three more left in the third month at what is now called Separation Canyon and were never seen or heard from again.  

Two years later, Powell did it all over again, but with better equipment and three photographers, which resulted in photos, a map, and a more accurate and detailed description of the canyon. 

READ MORE

Read more about Powell’s epic journey down the Colorado River in Down the Great Unknown: John Wesley Powell’s 1869 Journey of Discovery and Tragedy Through the Grand Canyon by E. Dolnick 

You can follow in Powell’s footsteps and ride in a wooden boat (dory) or a modern raft through the canyon.  Read my Guide to River Rafting in the Grand Canyon for more details.


7. It used to be called the Big Canyon

Moran Point Grand Canyon

What are some nicknames for the Grand Canyon?  

Prior to 1869, the canyon was called Big Canyon.  It was John Wesley Powell who popularized the slightly more poetic sounding Grand Canyon

The Paiute Indians called the canyon “The Mountain Lying Down.” 

My favorite, though, is a common slang name still used in Arizona: “The Big Ditch”.  

READ MORE: If you’re interested in names, check out Grand Canyon Place Names by G. McNamee


8.  Tourism photography was invented at the Grand Canyon – and the longest running movie ever was shown there

Kolb Studio Grand Canyon

Here’s some Grand Canyon trivia for you. Tourism photography was invented by the Kolb Brothers at the Grand Canyon.  

Ellsworth and Emery Kolb started out with a photography studio in William, AZ mostly taking photos of saloon women. They realized, however, the opportunities for taking photos of visitors to the Grand Canyon and moved there in 1902.

In 1904, 15 years before Grand Canyon became a national park, the brothers set up shop in a small studio perched right on the edge of the canyon. It was right near the start of the Bright Angel Trail, so they could photograph people as they descended into the canyon on donkeys.  

This became their home, photography studio, and theater for their slideshows and films.  It was the first permanent commercial photographers’ studio at the canyon and one of the earliest commercial tourist businesses there.

In 1911, the brothers were part of the eighth successful expedition on the Colorado River through the Grand Canyon.  They filmed their harrowing journey and turned it into a documentary.

After a transcontinental trip promoting the film, Ellsworth moved to Los Angeles.  Emery, however, moved back to the Grand Canyon, where he regularly showed the movie they had made of their trip through the canyon. The movie ran from 1915 until his death in 1976.  The 61-year run makes it the longest running movie of all time!

Today, there’s an art gallery, bookstore and information booth operated by the Grand Canyon Conservancy inside the historic building. There are also great views of Grand Canyon from the studio.

READ MORE: Visiting Kolb Studios is just of the things to do on the South Rim of Grand Canyon.  Read more fun things to do in Grand Canyon National Park.


9.  You can find pink snakes in the Grand Canyon

Huge rattle snake on the ground in Grand Canyon National Park

Here are some more fun facts: Grand Canyon is home to six species of rattle snakes.

The most common of them are pink!  So, yes, if you see a pink snake, you are not seeing red or looking at the world through rose-colored glasses.  The Grand Canyon Pink Rattlesnake (crotalus oreganus abyssus) is only found in the Grand Canyon and its color helps it blends into the reddish rocks around it.

These snakes are usually found on rocks and sandy trails looking for lizards to eat. They are dangerous, so don’t try to pick one up, but they are generally more scared of you than you are of them. 

READ MORE: If you’re into identifying animals, pick up the Field Guide to the Grand Canyon: A Folding Pocket Guide to Familiar Plants & Animals (Wildlife and Nature Identification) by J Kavanagh


10. Squirrels are the most dangerous animals in Grand Canyon National Park

Brown squirrel standing on the rock in Grand Canyon National Park

You can find not only rattle snakes in Grand Canyon, but also mountain lions, coyotes, foxes, bats, big horn sheep, and elk.  However, none of these are the most dangerous animal in Grand Canyon National Park.  That honor goes to the humble rock squirrel.

This is one of the most surprising Grand Canyon facts and information, right?

These furry critters may look cute – but they are feral and they bite. They attack more visitors to the Grand Canyon than any other animal.  This may not sound like a big deal, but their bites can be severe, require stitches, and get infected.  

So, don’t feed them, stay well away, and don’t turn your back on them.  That cute selfie with a squirrel could quickly take a turn for the worse!


11. There are 1,000 hidden caves in the Grand Canyon

Redwall Cavern Grand Canyon

Grand Canyon facts and trivia reveal that the Grand Canyon is home to about 1,000 caves.  For comparison, Carlsbad Caverns has only around 120!  

Of these, only 335 have been explored and recorded.

And of those 335, only one is open to the public without special permission. The Cave of the Domes is reached on a difficult 3.5-mile hike down the Grandview Trail and across Horseshoe Mesa.

Other caves can be visited with a permit; however, they are currently closed and only allowed for research purposes. Unfortunately, park officials routinely deal with unauthorized cave access and even vandalism by visitors who attempt to carve into the natural rock walls. These marks are irreversible due to the delicate preservation quality of the caves.

The caves vary in size: Some are so low and narrow you can only enter on all fours, while others are roomy enough to spin in without touching the walls.

These caves are some of the more fascinating features of Grand Canyon National Park. The network of caves and caverns within the steep walls is filled with the mummified remains of Ice Age fauna and some archaeological remains.  For tens of thousands of years, these hard-to-reach crannies have sheltered wood rats, bats, birds, and now-extinct mountain goats and sloths. 

The bone-dry conditions create an ideal preservation environment, allowing researchers to peer back into over 40,000 years of history and get a sense of a world that existed when much of North America was covered in a thick sheet of ice. 

READ MORE: Read all about a possible treasure cave hidden deep in Grand Canyon and filled with Aztec gold in Grand Canyon Treasure Cave! By R. Crawford


12. Grand Canyon was saved from damming by the Sierra Club

An image of a colored map of Proposed dams Grand Canyon

If you interested in environmentalism, this is one of the more interesting and important facts about the Grand Canyon to know.

From the 1920 through the 1960’s, two dams were proposed at either end of the Grand Canyon, Bridge Canyon and Marble Canyon (also known as Redwall Dam) as part of a hydroelectric scheme.  

According the Sierra Club, who campaigned vociferously against them, the dams would have backed up lakes into 148 miles of canyon gorge, up to 600 feet deep, and reduced the Colorado River through the rest of the canyon to a trickle.  

Fortunately, as a result of the public outcry that ensued, neither dam was built.  

The Marble Canyon site became part of a new Marble Canyon Monument in 1968, which was added to Grand Canyon National Park in 1975.

The fact that the dams were never built is a great example of public opinion influencing congress and the success that environmental organizations can achieve. 

There are, of course, two major reservoirs either end of the Grand Canyon, but neither of them are inside the canyon itself.  Lake Powell that was created by Glen Canyon Dam and Lake Mead lies behind Hoover Dam. 

READ MORE: See the original Sierra Club ads from 1966 protesting the two proposed dames.


More Information About Grand Canyon National Park

Now that you’ve discovered these 11 fun facts about the Grand Canyon National Park, are you feeling inspired to visit Grand Canyon National Park?  Start planning your trip now with these guides:


Do you have any other Grand Canyon fun facts to share?  I’d love to hear them. Join my private Facebook group National Parks Collectors and comment and let me know (you can also pick up extra planning tips, share your photos and stories with other national park lovers and more). 

FREE DOWNLOAD
Subscribe to regular updates with tips for planning, travel inspiration and trip ideas and get instant access to the free PDF
12 Fun Facts About the Grand Canyon

If you liked this post sharing the Grand Canyon facts, please share the love and Pin It to your Grand Canyon National Park board! 

Two photos: Wooden and historic signage and a cabin in the mountain surrounded by trees, with the text, 12 Fun Facts About the Grand Canyon National Park.
Four photos: Rock mountains, Structure near the cliff of the mountain, Mountains; and people in a kayak, with the text above that says 12 Fascinating Facts About the Grand Canyon.
WHERE ARE YOU IN YOUR PLANNING PROCESS?

Are you just starting to think about taking a national parks trip? Get Inspiration
Are you starting to plan a trip to Grand Canyon National Park? Read my Guide to Grand Canyon National Park
Are you looking for a place to stay near Grand Canyon National Park? Find a vacation rental near Grand Canyon National Park
Are you ready to book your trip? Use these Planning and Booking Resources
Do you want to read a book about Grand Canyon National Park? Check out my Recommended Reading List for Grand Canyon National Park

About the Author

James Ian Yosemite

James Ian is a national park, camping and hiking expert.

He has dedicated his life to travel, visiting more than 80 countries, all 7 continents and all of the main national parks in the United States. With over 35 years experience in the travel industry, James has worked on cruise ships, at resorts and hotels, and as a travel planner who’s helped hundreds of people plan successful trips to US national parks. 

Based on his experience visiting our national parks multiple times, in-depth research and expertise as a travel planner, James has published detailed itineraries for most of the major national parks in the US. These itineraries, as well as in-depth park guides, comprehensive camping and hiking gear reviews and buying guides, and helpful packing lists and gift guides will help you have your own incredible trip to US national parks without stress and hassle.

As a national park expert, James has contributed to many publications, including Time Business News, Savoteur, Best Trip, and Wired.

Read more…


Parks Collecting is a participant in the Amazon.com Services LLC Associates Program, an affiliate advertising program designed to provide a means for sites to earn advertising fees by advertising and linking to amazon.com. Amazon and the Amazon logo are trademarks of Amazon.com, Inc. or its affiliates. As an Amazon Associate I earn from qualifying purchases.

When is the Best Time to Visit Arches National Park?

Are you trying to figure out the best time to go to Arches National Park?

With its otherworldly landscape and captivating beauty, it’s no surprise that many travelers are eager to explore this Utah gem. However, choosing the right time to visit can be challenging, as each season offers unique experiences and conditions.

I’m James and I’m a national park expert. In this article, I’ll give you a quick summary of the best time to visit Arches National Park so you can make the right decision.

While this is my choice for the best time to go to Arches National Park, the park is great throughout the year.  I have provided a detailed breakdown by season and every month so you can easily see what to expect and then make your own choice.

TOP TOUR: Book a half day tour now
TOP HOTEL PICK: Check availability now
FIND THE CHEAPEST CAR RENTAL: Search Discover Cars for the best deals
FIND THE CHEAPEST FLIGHTS: Search Skyscanner for the best deals
GET TRAVEL INSURANCE: Get insured with Travelex before you go

No time right now to discover the best time to visit Arches National Park? Pin It and save it for later:

Please note this post may contain affiliate links, which means we may receive a commission, at zero cost to you, if you make a purchase through a link. Please see our full Disclosure for more information. If you have any questions, please contact me.

FREE DOWNLOAD
Subscribe to regular updates with tips for planning, travel inspiration and trip ideas and get instant access to the free PDF of this guide to the
Best Time to Visit Arches National Park

If you are planning to visit Arches National Park in spring, summer or fall, make your planning easy and stress free with a detailed itinerary. I have 1-, 2-, and 3-day itineraries for Arches National Park that include all the park highlights, give you choices based on your preferred activity level, and take all the stress out of planning your trip. 

Check out the three Arches itinerary options


The Best Time to Visit Arches National Park in a Nutshell

A huge rock arch and behind are rock mountains under the blue sky in Arches National Park

I think that the best time to visit Arches National Park is the shoulder seasons of spring (April to May) and fall (September to October).

During these months, the weather in Arches National Park is typically mild and pleasant, offering comfortable conditions for hiking, sightseeing, and photography. The days are warm with clear skies, while the nights are cool and perfect for stargazing. Spring wildflowers and vibrant fall foliage add an extra touch of charm to the park’s landscapes.

Visiting during the shoulder season is also the best time to visit the Arches National Park if you want fewer crowds and a more tranquil experience when you can enjoy the park’s natural wonders at a leisurely pace without the congestion of peak tourist season.

In contrast, the sweltering summer months (June to August) can be less enjoyable due to scorching temperatures, intense sunlight, and an increased likelihood of flash floods. Similarly, the winter season (December to February) can be challenging due to snow, ice, and limited accessibility to some park areas.


When is the best time of year to visit Arches National Park (for different interests?

Huge rock formation in the middle of the day in Arches National Park

The best weather in Arches National Park

The most pleasant months in Arches National Park are April-May and September-October.

The best temperatures

Ideal temperatures for outdoor activities occur from April to May and September to October.

The best time to avoid the crowd

To avoid crowds, consider visiting the park during April – May and September – October.

The best time to travel to Arches National Park in summer

For summer visits, early June is the best time to avoid the worst of the crowds and heat.

The best time to travel on a budget

Budget-friendly travel to Arches National Park is best during December – February.

The best time to have an adventure in Arches National Park in the winter

For Arches winter adventure, plan your trip in late February or early March.

The worst time to visit Arches National Park

The peak of summer, specifically July and August, is the worst time to visit due to extreme heat, intense sunlight, and an increased likelihood of flash floods.

Check my detailed breakdown of what to expect every month in the year for much more detailed information.


Arches National Park Weather

Aerial photo of rock formation in arches national park and behind is a snow capped mountain.

Arches National Park in Utah is a mesmerizing destination, showcasing over 2,000 natural arches carved from red sandstone by nature’s whims. The weather in Arches National Park creates an ever-changing environment for visitors to explore. Here, we delve into Arches weather to help you plan an unforgettable journey.

The Arches National Park Utah weather is characterized by hot summers, cool winters, and a relatively low annual precipitation.

A closer look at the Arches National Park monthly weather patterns shows how the changing seasons can affect your visit to the park.

During the heat of summer, average temperatures in Arches National Park can reach scorching highs of 97°F in July, with nighttime lows hovering around 66°F. Thunderstorms and lightning strikes are common at this time of year. Due to the dry landscape, even minor storms can cause flash floods.

As the leaves begin to change, fall brings more moderate weather at Arches National Park. Highs range from 85°F in September to lows of 55°F in November. This season offers a comfortable window for discovering the park’s hiking trails.

Winter transforms Arches National Park into a frosty wonderland, with the climate of Arches National Park dipping to lows of 18°F in January and highs of 42°F in December. The snowy landscape is picturesque and offers a serene escape from the crowds, as long as you’re prepared for the cold and potentially icy roads.

With spring‘s arrival, the Arches National Park temperature becomes milder, and the park bursts into life with vibrant wildflowers. April sees highs of 69°F and lows of 40°F, making it a lovely season for exploration.

The Arches National Park has a low precipitation (rainfall) rate, which makes it an ideal location to observe wildlife that has developed specific adaptations to thrive in dry environments.

Arches National Park’s climate is a symphony of contrasting seasons, each providing a distinct backdrop for adventure. From the scorching summers to the frost-kissed winters and everything in between, being ready for the full range of weather at Arches National Park will help you make the most of your visit.

Weather: Monthly Averages

MonthHigh / Low(°F)Rain
January40° / 182 days
February49° / 25°2 days
March60° / 34°3 days
April69° / 40°3 days
May79° / 49°3 days
June92° / 59°1 day
July97° / 66°3 days
August94° / 64°3 days
September85° / 54°3 days
October71° / 41°3 days
November55° / 29°2 days
December41° / 20°2 days

If you are planning to visit Arches National Park in spring, summer or fall, make your planning easy and stress free with a detailed itinerary. I have 1-, 2-, and 3-day itineraries for Arches National Park that include all the park highlights, give you choices based on your preferred activity level, and take all the stress out of planning your trip. 

Check out the three Arches itinerary options


Travel Insurance for Arches National Park  

No matter when you visit Arches National Park, you should definitely get travel insurance.  This can protect you not only against medical and emergency repatriation, but can also cover things like trip cancellation, loss and/ or theft of property, etc. 

A great insurance option is Travelex.  It has coverage for all you’ll need. You can compare Travel Insurance plans here or get a quote right now:

728x90 Get Quote

Enjoy Arches National Park!

You might also like

Detailed Itineraries for Arches National Park
7 Mistakes to Avoid When Planning a Trip to Arches National Park
How Many Days do you Need in Arches National Park?
12 Fun Facts About Arches National Park
Best Hikes in Arches National Park
Best Airports for Arches National Park
How to Get to Arches National Park
Guide to Timed Entry in Arches National Park
Guide to the Devil’s Garden Trail
Recommended Books To Read About Arches National Park
Vacation Rentals Near Arches National Park


What do you think is the best month to visit Arches National Park?  Join my private Facebook group National Parks Collectors and comment and let me know (you can also pick up extra planning tips, share your photos and stories with other national park lovers and more).

FREE DOWNLOAD
Subscribe to regular updates with tips for planning, travel inspiration and trip ideas and get instant access to the free PDF of this guide to the
Best Time to Visit Arches National Park

If you liked this post about Arches National Park: best time to visit, please share the love and Pin It to your Arches National Park board!

WHERE ARE YOU IN YOUR PLANNING PROCESS?

Are you just starting to think about taking a national parks trip? Get Inspiration
Are you starting to plan a trip to Arches National Park? Read my Guide to Arches National Park
Are you looking for a place to stay near Arches National Park? Find a vacation rental near Arches National Park
Are you ready to book your trip? Use these Planning and Booking Resources
Do you want to read a book about Arches National Park? Check out my Recommended Reading List for Arches National Park

About the Author

James Ian Yosemite

James Ian is a national park, camping and hiking expert.

He has dedicated his life to travel, visiting more than 80 countries, all 7 continents and all of the main national parks in the United States. With over 35 years experience in the travel industry, James has worked on cruise ships, at resorts and hotels, and as a travel planner who’s helped hundreds of people plan successful trips to US national parks. 

Based on his experience visiting our national parks multiple times, in-depth research and expertise as a travel planner, James has published detailed itineraries for most of the major national parks in the US. These itineraries, as well as in-depth park guides, comprehensive camping and hiking gear reviews and buying guides, and helpful packing lists and gift guides will help you have your own incredible trip to US national parks without stress and hassle.

As a national park expert, James has contributed to many publications, including Time Business News, Savoteur, Best Trip, and Wired.

Read more…


Parks Collecting is a participant in the Amazon.com Services LLC Associates Program, an affiliate advertising program designed to provide a means for sites to earn advertising fees by advertising and linking to amazon.com. Amazon and the Amazon logo are trademarks of Amazon.com, Inc. or its affiliates. As an Amazon Associate I earn from qualifying purchases.

The Best US National Parks

Imagine riding white water rapids surrounded by the towering walls of the Grand Canyon. 

  • Or walking inside the hollowed-out trunk of one of the largest trees on the planet. 
  • Or walking across a narrow ridge in Fin Canyons. 
  • Or seeing a bison with a geyser erupting behind it. 
  • Or hiking between craggy peaks topped with ice and ribboned with waterfalls. 
  • Or swimming through giant kelp forests, accompanied by curious seals and bright orange Garibaldi fish.  
  • Or kayaking past pebbly beaches and beautiful forested islands.
  • Or stepping back in time as you walk through ancient dwellings built in the side of steep cliffs. 
  • Or wading through a river in a narrow slot canyon … 

You can do these and more in the incredible national parks in America.  Natural wonders, fascinating history, incredible wildlife … these national parks have it all!

But, what are the best US national parks? Here are my top picks for the best nature parks in USA.

I started making a list of the top 10 national parks in USA but in the end it was too hard and I couldn’t limit my favorite list of national parks in USA to just ten.  So, here are my 15 best national parks to visit!

No time to read about the best US national parks now?  Pin It and save it for later:

4 photos with text in middle "the ultimate national parks bucket list" Photos are cliffs, river and trees, enormous sequoia trees, colorful hot springs with steam
two photos - lake and mountains at top and beach with driftwood and sea stacks at bottom. In middle text "15 unforgettable national parks to visit this year"

Please note this post may contain affiliate links, which means we may receive a commission, at zero cost to you, if you make a purchase through a link. Please see our full Disclosure for more information. If you have any questions, please contact me.

If you plan to visit more than a couple of parks in a year (or the same park more than twice), then look at getting the America the Beautiful Pass.   It gives you unlimited access for a year (from date of purchase) to over 2,000 federal recreation sites including all U.S. national parks plus national forest and BLM lands.  It includes admission for one vehicle or four people (for places that charge per person).

Buy the America the Beautiful Pass here

Map of the Best National Parks: United States

FREE DOWNLOAD
Subscribe to monthly updates with tips for planning, travel inspiration and trip ideas and get instant access to the free PDF of this
The Best U.S. National Parks

What’s the #1 national park?

What’s the best national park to go to? 

So, you’re going to make me choose just one? That’s like Sophie’s Choice.  How do I choose just one?  But if you twist my arm and make me choose,  my top pick for best national park to visit in the US is … (drum roll) … Yellowstone. 

With so much wildlife, incredible geothermal activity and one of the most spectacular waterfalls in the world, it’s easy to see why this was the world’s first national park ever!


The 15 Best U.S. National Parks

1. Acadia National Park, Maine

Acadia is the classic northeast United States coastal landscape, easily making it the north Atlantic’s best national park. United States has many amazing parks, and Acadia is in the top ten most-visited for a reason.

Without a doubt Acadia is one of the best parks in USA.  It’s all about woods and water.  The surrounding seas are dotted with islands and strewn with lobster buoys.  There are lakes, a sandy beach, 27 miles of historic motor roads, 158 miles of hiking trails, and 45 miles of carriage roads.  

Acadia is a hiker’s paradise, but you can also cycle on the carriage rides, kayak around the islands, join sailing trips, and even take a ferry out to the nearby Cranberry Islands.

PLAN YOUR TRIP: Acadia National Park Guide

Top Things to Do in Acadia National Park

  • Hiking.  Some of the most famous hikes in Acadia include the Beehive and the Precipice, with sometimes challenging technical elements culminating in specular views over the surrounding islands.  There are easier routes to the same lookouts!
  • Swimming.  The north Atlantic can be icy, even in summer, but beautiful Sand Beach makes it more appealing.  For warmer water, head to Echo Lake, where a cool dip is the perfect end to a hike in the hills. These beaches made it on to my Top 15 National Parks Beaches
  • Enjoying delicious popovers.  These eggy, airy pastries are a New England classic.  Have them smothered in lashings of butter and jam at an outdoor lakeside table at the Jordan Pond House.
  • Cycling.  The carriage roads that lace the park, built at the behest of John D. Rockefeller Jr. in the early part of the 20th century, are perfect for cycling.
  • Kayaking.  Kayaking around the islands is a lovely way to enjoy the natural beauty of this area.
  • Sailing.  A sunset sailing trip helps you appreciate the islands.  Life doesn’t get much better this.
  • Taking the ferry to the Cranberry Islands.  Travel between islands past lobster pots and lobster fishermen and have lunch at a waterfront lobster shacks.  The lobster here is delicious, fresh and affordable.  Then walk around the small towns and on the pebbly beaches before heading back to Bar Harbor.

Access to Acadia National Park

Acadia National park is in Maine. The national park is divided over part of Mount Desert Island, the Schoodic Peninsula and Isle au Haut, though the most visited part is Mount Desert Island, which is accessed over a short land bridge. 

The town of Bar Harbor is adjacent to the park on Mount Desert Island.  There are free shuttles in summer from Bar Harbor into the park, and they have bicycle racks on the front.


2. Arches National Park, Utah

Arches National Park in Utah is one of the must see national parks in USA because of its incredible natural beauty.  The arches that give the park its name are fascinating, but they are not all there is to see. 

The park has several distinct sections, each with several spectacular arches, ‘fins’ or narrow ridges that the arches form in, cliffs, narrow canyons, and even an historic cabin. 

The main areas, in the order you encounter them as you drive along the only road in and out of the park are:

  • Park Avenue, a small canyon with dramatic cliffs
  • Balancing Rock
  • The Windows section with several key arches including Double Arch, North Window, South Window and Turret Arch
  • Fiery Furnace.  Can only be accessed by ranger-guided hike or with a special permit.  Arches include Skull Arch and Surprise Arch
  • Delicate Arch, reached by a hike or seen from the distance. This free-standing arch features on Utah’s license plate. 
  • Arches alongside the road, including Sand Dune Arch and Skylight Arch
  • Devil’s Garden.  Nearby hikes take you to Tapestry Arch and Broken Arch.  Arches inside Devil’s Garden include Tunnel Arch, Pine Tree Arch, Landscape Arch, Partition Arch, Navajo Arch, and Double O Arch.

PLAN YOUR TRIP: Arches National Park Guide

Top Things to Do in Arches National Park

  • Hiking. The main activity onside the national park is hiking.  Hikes to arches range from short, flat and very easy to the challenging all-day hike through Devil’s Garden.
  • Canyoneering.  The area surrounding the park is riddled with narrow slot canyons, making this area a prime destination for canyoneering.  Canyoneering involves traversing down and through canyons, including rappelling, some short climbing, squeezing between narrow openings and sometimes even swimming. 
  • Climbing.  This area is also very popular for climbing and there are opportunities for all levels of expertise.
  • Mountain biking.  From simple routes to some of the most challenging mountain biking routes in the entire country, there is something for everyone.

Access to Arches National Park

Arches National Park is in Utah.  The nearest town is Moab, just five miles from the park entrance.  There are plenty of accommodation options in Moab, as well as outfitters for a variety of adventure sports.


3. Bryce Canyon National Park, Utah

Bryce Canyon is an alien-like landscape like nothing else you will ever see.   It’s one of the best parks in United States because it is home to the largest collection of hoodoos (stone pillars) in the world. 

The incredible natural formations crowd Bryce Canyon Amphitheater and other areas along the canyon.  You can see them on the scenic rim drive from above and then hike down into the ‘canyon’ among them. 

PLAN YOUR TRIP: Bryce Canyon National Park Guide

Top Things to Do in Bryce Canyon National Park

  • The scenic rim drive.  Drive the one-way road from the Bryce Amphitheater out to Rainbow point, stopping off frequently to enjoy the very changing views from viewpoints along the way.
  • See Bryce Amphitheater from all angles on the Rim Trail.  The vast majority of the national park’s signature orange, pink and red hoodoos are concentrated in the dazzling bowl-shaped Bryce Amphitheater. 
  • Hike among the hoodoos.  There is nothing quite like walking down into the ‘canyon’ (it’s not really much of a canyon) and being surrounded by towering pillars of stone.  There all have different shapes; famous ones include Thor’s Hammer and Queen Victoria.  There are several incredible hikes among the hoodoos that you can do.
  • Take in a western show.  At night, in season, you can dine on authentic cowboy chow and enjoy a fun show of western songs, dancing and lasso skills.

Access to Bryce Canyon National Park

Bryce Canyon is in Utah, near Zion National park, and they are often visited together.  The small but functional Bryce Canyon Village is just outside the park.  There are accommodations and stores there, but not much else.  The main airport access is Las Vegas, several hours away.


4. Channel Islands National Park, California

The Channel Islands National Park consists of five of the eight Channel Islands off the coast of southern California.  The islands have good hiking opportunities, but it’s the surrounding waters that make this one of the top national parks in America.

This area is home to giant kelp forests. Suba diving through a forest of golden kelp is a fascinating experience, made even better by curious seals and sea lions and small bright orange Garibaldi fish that frequent the forests.

PLAN YOUR TRIP: Channel Island National Park Guide

Top Things to Do in Channel Islands National Park

  • Diving.  If you like scuba diving, you will love diving through the giant kelp. This is one of the most unique marine environments in the world.  Read my guide to diving the Channel Islands for more details.
  • Sailing/ boating.  Enjoy the beauty of this area from the water.
  • Hiking.  There are trails on the islands, ranging from well-signed, fairly flat trails on Anacapa to more primitive unsigned trails on Santa Rosa.
  • Kayaking.  You can go with your own kayaks or, if you don’t have one, there are several companies that you can use to arrange a guided sea kayaking trip along the shores and into the coves of the islands.
  • Whale watching.  Whale and dolphin watching trips leave throughout much of the year.  Gray whales are in the area from mid- to late-December through mid-March and blue and humpback whales can be seen during the summer.  Dolphins are in the waters all year round.

Access to Channel Islands National Park

The Channel Islands National Park is off the coast of California.  The five Channel Islands in the national park are Santa Cruz, San Miguel, Santa Barbara, Santa Rosa and Anacapa Islands. 

There are visitor centers on the mainland in Ventura (just north of Los Angeles) and Santa Barbara, and these are the main access points for the park concessionaire boats and planes and private boat that you need to access the islands.   


5. Death Valley National Park, California – Nevada

Death Valley is the lowest and driest place in the United States and the hottest place on earth!  Summer temperatures are often in excess of 120°F in the shade; however, November-March is very pleasant. 

Death Valley is more than just extreme temperatures, however.  There are several incredible desert landscapes all within easy driving distance of each other, making this another of the top national parks in United States.  

Visit badlands, a volcanic crater, sand dunes, slot canyons, salt flats and even a Spanish villa all in the one valley!

PLAN YOUR TRIP: Death Valley National Park Guide

Top Things to Do in Death Valley National Park

  • Stand at the lowest point in North America at Badwater basin.  These are salt flats that are the lowest point in North America, 282 feet below sea level.
  • Enjoy the views over the valley.  Dantes Point is 5,000 feet (1,500m) above the valley, giving you a stunning birds’ eye view
  • Hike into narrow canyons.  There are several narrow slot canyons you can hike (early morning is recommended).  A highlight is Mosaic canyon, with multi-colored, layered stone.
  • Walk on sand dunes.  The Mesquite Flat Sand Dunes are white sand dunes 100-feet/ 30 m high. 
  • Admire Ubehebe Crater.  A 600 feet/ 183 m deep volcanic crater.
  • Be awash in living history at Scotty’s Castle.  A fascinating Spanish Colonial Revival villa that makes an interesting stop for a living history tour (closed 2020 due to flood damage)
  • Marvel at the natural colors along Artist’s Drive.  A 9-mile/ 14.5-km drive through multi-colored hills.  The colors are a result of different ores.
  • Take in sunset or sunrise at Zariskie Point.  Golden badlands make a stunning sunrise and sunset spot

Access to Death Valley National Park

Death Valley National Park is in California and Nevada.  The main place to stay in the park is Furnace Creek, where there are campsites and motel-style accommodations (with a very welcoming swimming pool), restaurants and stores.

It’s a two – two and a half-hour drive from Las Vegas.  Route 190 cuts through the valley.


6. Grand Canyon National Park, Arizona

Grand Canyon is one of the most famous national parks in the US and really needs no introduction.  Its size is overwhelming (in a good way) and is guaranteed to take your breath away.

You should definitely take in its grandeur from the rim (the south rim is the most popular and easiest to access), but there is much more to see and do.

Hike down into the canyon, and even stay overnight in a cabin at Phantom Ranch.  Take a multi-day river trip through the canyon, riding the river rapids and seeing the canyon from the very bottom.  Explore historic buildings…  There is so much to do and explore.

PLAN YOUR TRIP: Grand Canyon Guide

Top Things to Do in Grand Canyon National Park

  • Take in the views from rim.   There are plenty of opportunities to see the sprawling vistas of Grand Canyon.  Hike the rim trail; hike, cycle or take a shuttle along Hermit Road (West Rim Drive); and drive along Desert View Drive (East Rim Drive).  There are multiple vantage points along the way.
  • Hike below the rim.  Nothing beats the feeling of being surrounded by the canyon walls.  The Bright Angel Trail is the most famous and easiest to access, though there are other trails too. You can even hike rim to rim and then take a shuttle back to your starting point (an overnight stop in the canyon is required).
  • Overnight at Phantom Ranch.  Stay in a rustic cabin or dorm at the only lodging at the bottom of the canyon.  It’s very popular, so book early.  Learn how, including all about the complicated lottery system here.
  • White water rafting.  Riding along the Colorado River gives you a unique perspective.  See the walls slowly rise up higher and higher as you progress through the canyon, ride wild rapids, hike into side canyons only accessible by boat, and camp each night on sandy beaches surrounded by the canyon walls.  Choose from regular rafts, large motorized rafts or tiny wooden dories.  Read more details here.
  • Step back in time.  From the historic south rim train station, the “Geologic Fireplace” in the Bright Angel Lodge History Room and the Kolb Studio to the Tusayan Pueblo/Museum and Desert View Watchtower, there is loads of fascinating history to discover.
  • Learn about the geology.  The Yavapai Museum of Geology has fascinating displays teaching you all about the layers of the Grand Canyon (and gives you a rare rim view of the Colorado River).
  • Take a mule ride.  You can ride a mule down to Phantom Ranch (if you have a booking) or do a shorter sample through woods at the top of the south rim to a canyon viewpoint.
  • Enjoy the galleries and shops at Grand Canyon Village on the south rim. Don’t miss the Hopi House for native American art.

Access to Grand Canyon National Park

Grand Canyon National Park is in Arizona.  The canyon can be accessed from the north rim, which is less accessible, or the south rim, where there are plenty of facilities.

The main access town for the south rim is Flagstaff.  You can also reach Horseshoe Bend from Paige.


7. Grand Teton National Park, Wyoming

The dramatic craggy peaks of the Grand Teton range rise straight up from the plains of the Jackson Hole valley. 

The Snake River winds its way around the valley, lakes sidle up to the mountains and canyons drive deep wedges between the peaks.  Moose wander down to the water to drink and eat, river otters dart around, and bison wander the flats …

There are so many reasons that this is one of the best parks in the United States.

PLAN YOUR TRIP: Grand Teton National Park Guide

Top Things to Do in Grand Teton National Park

  • Take a drive.  The classic 42-mile scenic drive takes you in a loop on the inner and outer roads along the main length of the mountain range, stopping at many park highlights along the way.  Read a full guide to the Grand Teton scenic drive here.
  • Take in the views.  There are several classic spots to see and capture the incredible beauty of this park.  For a full list, read my guide to the best viewpoints in Grand Teton National Park, but highlights include Oxbow Bend, Signal Mountain, Snake River Overlook and Schwabacher Landing.
  • Go hiking.  There are so many awesome hikes in Grand Teton National Park.  Includes hikes into canyons such as Cascade Canyon, to and around lakes, and up to viewpoints.
  • See the wildlife. Grand Teton has some of the best wildlife of any national park.  This is a great place to see moose, but you can also see bison, antelopes, black bears and river otters.
  • Go boating, swimming, snow shoeing, etc.  There are so many other things to do in the park and the surrounding area that I have compiled a detailed guide to the top 25 things to do in Grand Teton NP.
  • Take in history (and get the perfect foreground for your classic Grand Teton shot) at the Moulton barns in Mormon Row.

Access to Grand Teton National Park

Grand Teton National Park is in Wyoming.  The nearest town is Jackson, accessed by the Jackson airport.  Yellowstone National Park is immediately to the north, which is why many people combine visits to both of the parks in one itinerary.


8. Great Smoky Mountains National Park, Tennessee – North Carolina

Great Smoky Mountains National Park in the fall

When you see a list of the most visited national parks America has, Great Smoky Mountains is right there at the top. 

Almost 13 million visitors can’t be wrong.  With miles of beautiful forest, rivers, and waterfalls it’s easy to lose the crowds and soak up the natural beauty of the Smoky Mountains.

PLAN YOUR TRIP: Great Smoky Mountains National Park Guide

Top Things to Do in Great Smoky Mountains National Park

  • Hiking.  There are hikes to mountain peaks with breathtaking views over the smoky mountains below; hikes to beautiful waterfalls; and hikes to lovely rivers or creeks. A highlight is Clingman’s Dome, the highest point in the park.
  • Horseback Riding.  Give your feet a break and ride on a trail through the woods instead.  There are horseback riding stables located in Cades Cove, Sugarlands and Smokemont.
  • Discover history.  Before the Smokies became a national park, the hills were occupied by early settlers.  This means that there are still plenty of remnants of pioneer history to explore.  Discover well-preserved log cabins, one-room school houses and grist mills, and learn more about their fascinating history.

Access to Great Smoky Mountains National Park

There are three main park entry points you can access. The two entrances of the Great Smoky Mountains National Park in Tennessee are Gatlinburg, and Townsend while the south Cherokee or Oconaluftee entrance is located in North Carolina.


9. Mesa Verde National Park, Colorado

Mesa Verde, home to some of the best-preserved and most fascinating native American cliff dwellings, is one of the top national parks in the United States for history.

Native American people lived in dwellings built into overhangs in steep cliffs hundreds of years ago and seeing them and visiting them is a truly amazing experience. 

PLAN YOUR TRIP: Mesa Verde National Park Guide

Top Things to Do in Mesa Verde National Park

  • Visit the cliff houses and villages.  These are the main reason to visit Mesa Verde, after all.  A couple of the dwellings are well set up for visitors and are open every year.  These include Balcony House, which you have to access via wide ladders, and the large Cliff Palace.  Spruce Tree House is unstable and can only be seen from across the ravine.  Others like Step House are closed some years and open others (for limited visits), in order to minimize impact on them.
  • Go hiking.  Hiking isn’t the thing most people think of when they think of Mesa Verde, but there are actually a few good hikes that you can do.  Highlights include the Spruce Canyon Trail and the Petroglyph Point Trail, which has signs along the way highlighting various plants and natural features and ends at some well-preserved ancient petroglyphs.
  • Visit the Chapin Mesa Archaeological Museum.  Get an insight into the people who built and lived in the cliff dwellings.

Access to Mesa Verde National Park

Mesa Verde National Park is in southwest Colorado.  The cliff dwellings are on top of Mesa Verde, which is at least an hour uphill drive from the visitor center near the entrance to the park at the bottom of the mesa.

Nearby towns are Mancos and Cortez.  Durango is also only about 35 miles away.  


10. Olympic National Park, Washington

Olympic National is one of the top 10 most beautiful U.S. national parks due in part to its variety of landscapes.  

There are mountains, with snow-capped peaks stretching to the horizon.  There are dramatic windswept beaches with over-sized driftwood, craggy sea stacks and tide pools to explore.  There are lush temperate rainforests with moss and ferns. There are beautiful lowland lakes and rivers with waterfalls and leaping salmon. 

It’s easy to see why this is such a spectacular park to visit.

PLAN YOUR TRIP: Olympic National Park Guide

Top Things to Do in Olympic National Park

  • Hiking.  There are great hikes in Olympic National Parks.  Hike in the mountains and enjoy panoramic views.  Hike in the rain forest and wow at the Dr Seuss-like trees covered in moss and grounded by enormous ferns.  Hike to and along Pacific Northwest beaches.  Hike through gigantic conifer trees to waterfalls, river views, or interpretative signs.
  • Tidepooling.  Olympic is one of the best parks in USA for tide pooling. At low tide, the intertidal pools are exposed and you can spend several hours exploring them, admiring green sea anemones; purple and orange seastars; tiny hermit crabs scuttling around, and more.
  • Chase waterfalls.  Olympic National Park doesn’t have the biggest waterfalls in the United States, but there are plenty to choose form, and they are beautiful.  Many are surrounded by lush rainforest and you need to hike to see them.  But there are also coastal waterfalls falling directly into the ocean.  And even an aqua-colored cascade that salmon leap up on their return to their breed ground twice a year.

Access to Olympic National Park

Olympic National Park lies on the Olympic Peninsula not far from Seattle.  There are several convenient places to stay around the peninsula including Port Angeles and Forks.

Distances between the distinct sections of the park are pretty big, so although you can visit part of the national park as a day trip from Seattle, it’s much better if you have the time, to spend several days exploring the park.


11. Rocky Mountain National Park, Colorado

Rocky Mountains National Park in fall

On any list of U.S. national parks ranked from ugliest to most beautiful, Rocky Mountain is sure to make it to the top of the most beautiful national parks in the US.

Stunning mountain peaks, breathtaking lakes that form a mirror for the surrounding peaks, beautiful flowers and wildlife all help make this a national park not to miss. 

PLAN YOUR TRIP: Rocky Mountain National Park Guide

Top Things to Do in Rocky Mountain National Park

  • Hiking.  There are dozens of hiking trails in the mountains.  Many go to picturesque alpine lakes, with others end at viewpoints with stunning vistas of the surrounding peaks. Bear Lake is a popular choice, but the trail to Nymph, Dream and Emerald Lakes is a highlight if you have the energy.
  • Drive the Trail Ridge Road.  Only open when the winter snows have melted away, 11 miles of the 48-mile road are alpine tundra (above the treeline). The highest point is an impressive 12,183 feet above sea level. It’s a beautiful drive with incredible views and good chances of seeing wildlife along the way.
  • Winter sports.  Although you can’t cross from one side of the park to the other in winter and the trails are buried under snow, that doesn’t mean you should stay away.  There is a huge variety of winter activities to enjoy, including cross country skiing and snowshoeing and tubing.

Access to Rocky Mountain National Park

The continental dive runs through the national park.  One road, Trail Ridge Road, crosses from one side of the park to the other but this is closed in the winter months.  The road connects the two main access towns – Estes Park on the east side of the park and Grand Lake in the west.

There are time entry permits needed for Rocky Mountain National Park needed in the busy summer months. 

READ MORE: Rocky Mountain National Park timed entry system


12. Sequoia National Park / Kings Canyon National Park, California

Redwoods may be the tallest – and most famous – trees, but sequoias are actually the largest trees on the planet.  Most of them – including the biggest of them all – are in Sequoia National Park and the adjacent Kings Canyon National Park. 

Nothing quite prepares you for how truly awe-inspiring – and just plain BIG – they are.   If this doesn’t give you an appreciation for how amazing this planet is, then I don’t know what will.   This is an easy pick for one of the best national parks in the United States.

PLAN YOUR TRIP: Sequoia National Park Guide

Top Things to Do in Sequoia National Park

  • Hiking.  There are plenty of trails that take you to and between the largest sequoia trees.  A top pick is the Congress Trail, which is an easy loop from the General Sherman Tree (the largest tree on earth) to many sequoia trees that have been named after famous political and historical figures. 
  • Seeing wildlife.  The meadow in the middle of the Big Tree Trail is a great spot to see black bears at dawn and dusk (keep your distance).
  • Learning about the sequoia trees at the Giant Forest Museum.

Access to Sequoia and Kings Canyon National Parks

Sequoia National Park is in California.  The park is a five-hour drive from San Francisco and a two-hour drive from Fresno.


13. Yellowstone National Park, Idaho – Montana – Wyoming

Yellowstone is not only one of the best national parks in United States (well, I think we can agree it’s one of the best national parks in the world), it is also the oldest. 

Highlights include spouting geysers, bubbling mud pots, churning cauldrons, steaming fumaroles, brightly colored hot springs, thundering waterfalls and beautiful lakes. 

Add in herds of bison, elk, wolves, trumpet swans, black bears, and antelope and there is very little that this national park does not have.

PLAN YOUR TRIP: Yellowstone National Park Guide

Top Things to Do in Yellowstone National Park

  • Geysers.  The most famous – and popular – geyser is Old Faithful, which faithfully gushes several times a day.  The surrounding area has plenty of others, though, and seeing them is truly awe-inspiring.
  • Brightly colored hot springs/ pools.  From the enormous, sun-like Grand Prismatic Spring (best seen from the Grand Prismatic Spring Overlook trail) to the smaller but no less stunning Morning Glory Pool, the bright blue Sapphire Pool, and more, the colors of these hot springs will amaze you.
  • Mudpots, bubbling cauldrons and steaming fumeroles.  You can see and learn about so many different types of geothermal marvels. 
  • Waterfalls.  Yellowstone Falls are incredible and there are several vantage points – including from the brink of the falls. The falls are split into the Upper and Lower Falls and then enter the Grand Canyon of the Yellowstone.  The scenery will truly make your jaw drop.  Nothing can quite prepare you for the natural splendor of this part of the park.
  • Wildlife.  Lamar Valley and Hayden Valley are the best places in the park to see wildlife.  Indeed, this is the best place in the United States to see bison.  You may even find yourself in a traffic jam as all vehicles stop while a herd of bison saunter down the road.  There are also elk, antelope and even wolves, that were reintroduced to the park several years ago.
  • Hiking.  There are plenty of great hikes that you can do, from simple walks on boardwalks to keep you safe from hot water and steam, to longer back country hikes away from the geothermal activity.

Access to Yellowstone National Parks

Most of Yellowstone National Park is in Wyoming, but parts are also in Montana and Idaho.  The roads through the park basically form a large figure eight, and there are access points on both sides, top and bottom of the ‘eight’. 

Grand Teton National Park is to the south.  There are airports at Cody and Jackson, WY; Bozeman, Billings and West Yellowstone, MT; and Idaho Falls, ID.


14. Yosemite National Park, California

Yosemite National Park is famously one of the United States best national parks due to its sheer beauty. 

The sheer cliffs and dramatic shapes of El Capitan, Half Dome and Sentinel Rock are equally appealing to climbers as they are to casual visitors who just want to soak in their grandeur. 

The park, one of the best national parks in California, is also home to waterfalls of all shapes and sizes, and fascinating wildlife.

PLAN YOUR TRIP: Yosemite National Park Guide

Top Things to Do in Yosemite National Park

  • Hiking.  Yosemite is a hiker’s paradise.  From the Misty Falls trail, which goes to two stunning waterfalls, or the Upper and Lower Yosemite Falls trails, which have views of the falls AND Yosemite Valley, to more adventurous treks to stunning viewpoints, there is something for everyone.
  • Driving.  Either a self-guided drive, or a ranger-led ‘train’ along the valley floor, will let you see wildlife and varying views.  You can also drive up into the hills for absolutely breathtaking views over the valley and the surrounding incredible rock formations

Access to Yosemite National Park

Yosemite National Park is in California.  It is a 4.5-hour drive from San Francisco and a 3.5-hour drive from Sacramento.


15. Zion National Park, Utah

Zion National Park regularly makes it on to the top 10 US national parks lists. It’s easy to see why this is one of the most popular national parks in USA.

The main part of the park is Zion Canyon, and, unlike most canyons, the floor of the canyon, rather than the rim, is the main section visitors see. There are incredibly narrow slot canyons all around the area in addition the main canyon. The park has stunning views and some of the best hikes in the country!

PLAN YOUR TRIP: Zion National Park Guide

Top Things to Do in Zion National Park

  • Hiking.  There are several truly classic hikes in Zion.  The most famous is The Narrows, which is actually a hike in a river (sometimes thigh deep) along a narrow, very tall, slot canyon.  The other really famous hike is Angel’s Landing, which has several technical elements and is not for the faint-hearted (or those with a fear of heights).  If you do it, you be rewarded with stunning views of Zion Canyon.  Another, less scary but totally awesome, hike is the Canyon Overlook Trail.
  • Taking the shuttle along the bottom of Zion Canyon.  Most canyons are seen from above, but the main access to Zion Canyon is actually the canyon floor.  A free shuttle goes along the length of the canyon, from Springdale to the start of the Narrows hike. Along the way, there are stunning views, and the main lodge, where you can have lunch or an ice cream under an enormous cottonwood tree.
  • Canyoneering.  The area around the national park is riddled with multi-layered slot canyons.  There are several companies in Springdale that organize guided trips that take you rappelling down a series of stepped tubes carved into the rocks over the years by flashfloods.  This is an adventure enthusiast’s paradise!

Access to Zion National Park

Zion National Park is in Utah.  The nearest town is Springdale, right outside the main entrance to the park. 

Most of the floor of the Zion Canyon is closed to traffic – you need to take a free shuttle from Springdale to access the canyon for most of the year.  This keeps traffic down and makes it easy to access.


Enjoy the national parks!

What National Parks have you been to in the USA and which is your favorite? What is the best national park? I’d love to hear your thoughts. Join my private Facebook group National Parks Collectors and comment and let me know.

FREE DOWNLOAD
Subscribe to monthly updates with tips for planning, travel inspiration and trip ideas and get instant access to the free PDF of this
The Best U.S. National Parks

Read More  

Do you love visiting national parks?

  • Get Inspiration with lists of the best parks, most scenic drives, legendary inns and lodges, best beaches in national parks, and more
  • Read a national parks book with these curated reading lists of guide books, picture books, novels, history books, field guides, books for kids and more
  • Find the perfect gift for with hand-picked gift ideas for people who love national parks, campers, hikers, outdoorsy people, and nature lovers
  • Buy the right gear for your next national parks adventure with comprehensive buying guides for clothing and gear you may need
  • Plan your next trip to a US national park with these detailed guides, covering planning, where to stay, what to do, best hikes, and more
  • Find a great place to stay, whether it’s a lodge, vacation rental or campground
  • Book your national park adventure with these useful booking resources, including flights, car rental, accommodations and tours

If you liked this list of national parks USA, please share the love and Pin it to your Top National Parks in US or US Bucket List boards!

two photos - lake and mountains at top and beach with driftwood and sea stacks at bottom. In middle text "15 unforgettable national parks to visit this year"
4 photos with text in middle "the ultimate national parks bucket list" Photos are cliffs, river and trees, enormous sequoia trees, colorful hot springs with steam

About the Author

James Ian Yosemite

James Ian is a national park, camping and hiking expert.

He has dedicated his life to travel, visiting more than 80 countries, all 7 continents and all of the main national parks in the United States. With over 35 years experience in the travel industry, James has worked on cruise ships, at resorts and hotels, and as a travel planner who’s helped hundreds of people plan successful trips to US national parks. 

Based on his experience visiting our national parks multiple times, in-depth research and expertise as a travel planner, James has published detailed itineraries for most of the major national parks in the US. These itineraries, as well as in-depth park guides, comprehensive camping and hiking gear reviews and buying guides, and helpful packing lists and gift guides will help you have your own incredible trip to US national parks without stress and hassle.

As a national park expert, James has contributed to many publications, including Time Business News, Savoteur, Best Trip, and Wired.

Read more…


Parks Collecting is a participant in the Amazon.com Services LLC Associates Program, an affiliate advertising program designed to provide a means for sites to earn advertising fees by advertising and linking to amazon.com. Amazon and the Amazon logo are trademarks of Amazon.com, Inc. or its affiliates. As an Amazon Associate I earn from qualifying purchases.