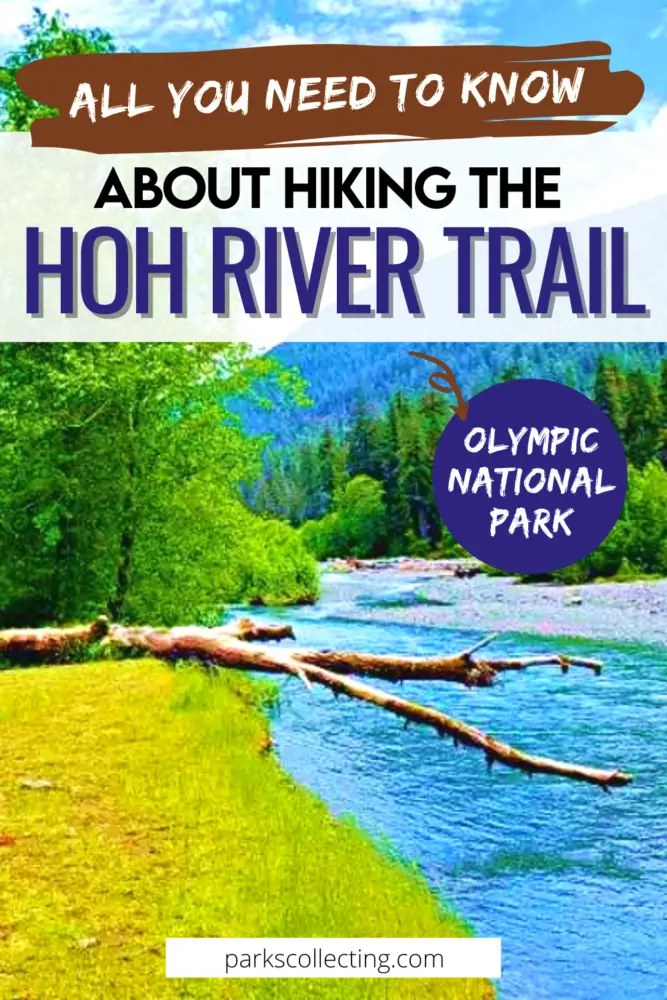
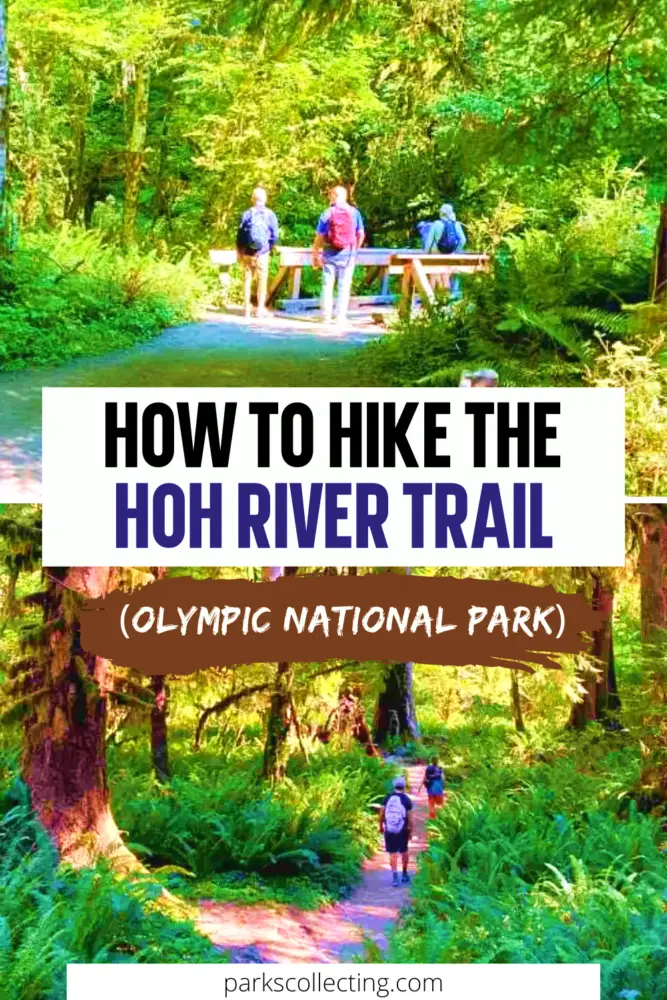
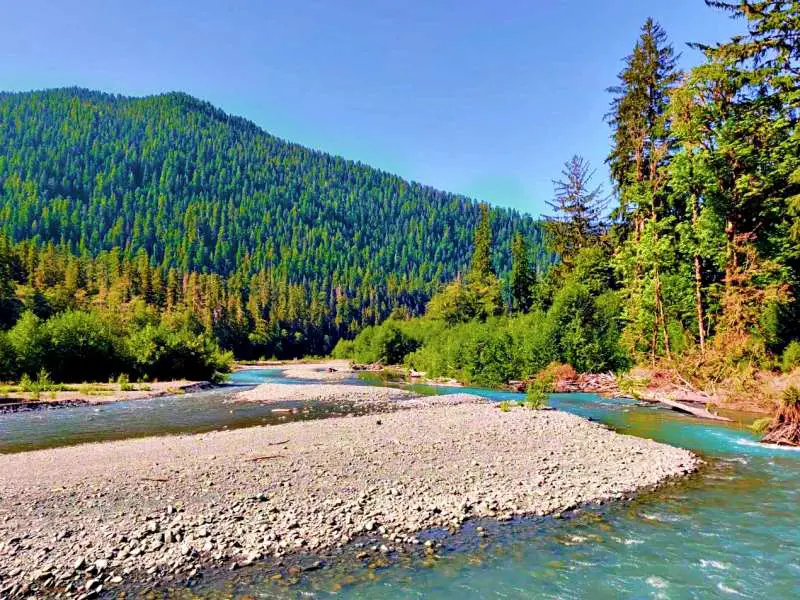
Moss. Towering trees. Ferns. Elk. River views. Check, check, and check. The Hoh River has it all! In fact, it’s my favorite hike in Hoh Rainforest.
This guide to the Hoh River Trail in Olympic National Park has everything you need to know before setting out on this trail for a day hike. It includes full trail details, a detailed description, tips, a map, what to take and wear, and more.
No time right now to read about hiking the Hoh River Trail? Pin It and save it for later:
Please note this post may contain affiliate links, which means we may receive a commission, at zero cost to you, if you make a purchase through a link. Please see our full Disclosure for more information. If you have any questions, please contact me.
FREE DOWNLOAD Subscribe to regular updates with tips for planning, travel inspiration and trip ideas and get instant access to the free PDF of this Hoh River Trail
Guided Tours of the Hoh River Trail
You can definitely do this hike by yourself, but if you’re not able to drive or if you just want an expert guide to share tips and information about the area with you, there are a couple of day tours that include this hike.
This small group (maximum eight people) leaves from the Kalaloch Campground, so you get to spend more time in the park and less time in the bus. In addition to the Tree of Life and Ruby Beach, you’ll hike 2 miles each way along the Hoh River Trail.
A private tour means you get the guide all to yourself – and have more flexibility in what you do. An expert naturalist guide can point out all the features of what you’re seeing and give you extra information that will enhance your hikes.
You get picked up at Kalaloch Beach 4 and spend some time at Ruby Beach as well as the Hoh Rainforest. Choose this hike in the Hoh and you won’t be disappointed!
Get to the Hoh Rain Forest before 8:00AM if you’re visiting in the busy summer months. This is a very popular part of the park and when there is no more parking available, the rangers hold traffic at the entrance station and only let a vehicle enter when another one leaves.
If you find yourself stuck at the entrance, there is a restroom just before the entrance, so if you need to go, you can walk along the side of the road from your vehicle. There are also restrooms at the Visitor Center and a basic drop toilet at Five Mile Island (and other campgrounds along the trail if you’re hiking farther).
There’s a parking lot right next to the trailhead and Visitor Center, which is where you should try to park. If it’s full, there are other lots around the campsite area where you can park. You are also permitted to park on the side of the road in the vicinity of the Visitor Center.
The light is best for photography early in the morning. When the early morning sun hits the moss, turning it into a golden glow, it is truly magical.
The trail can be muddy in spring. If you’re hiking then, or after it has rained, a good pair of hiking shoes or boots will come in handy. If you need to get some, take a look at my Guide to Buying the Best Hiking Shoes/ Boots to help you know what to look for and get some recommendations.
Because most of the annual precipitation is in winter, the rain forest can be a little dry looking by early fall. There’s not much you can do about this other than to adjust your expectations or the timing of your trip. Though even in September, it’s stunning.
The Hoh Rain Forest can be very crowded in summer. However, the further you go along the trail, the fewer people you’ll encounter.
You’ll sometimes come to splits in the trail. Heading out from the Visitor Center, take the left trails. The ones to the right sometimes rejoin the trail, but sometimes they dead end at the river.
There are often ranger talks at the Hoh Rain Forest Visitor Center and guided walks. These are a great introduction to the temperate rain forest. Check for ranger programs for the dates of your visit.
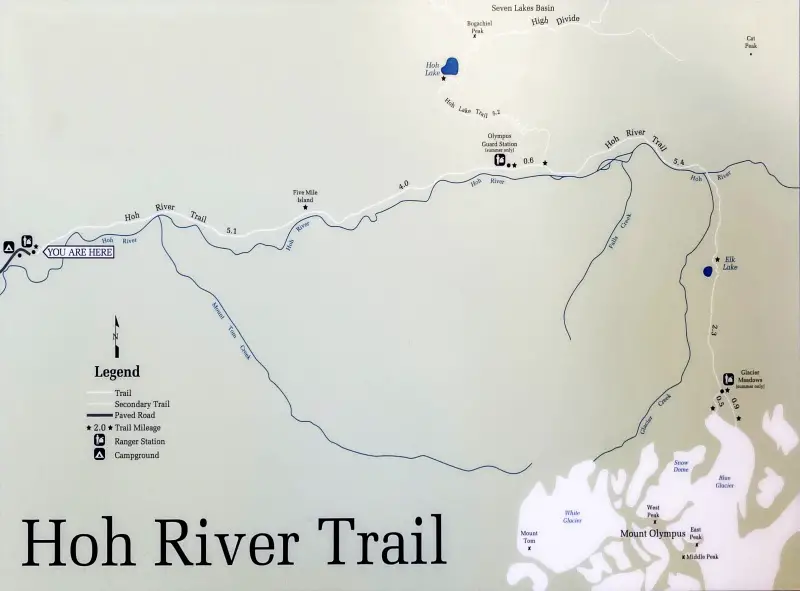
Description of the Hoh River Trail to 5 Mile Island
The Hoh River trail follows the river as it flows through theHoh River Valley.
There are several common places to turn back, so this hike can be as short or as long as you want. In fact, you can hike over 18 miles (each way) to see Blue Glacier, though what I’m focusing on here is the Hoh River day hike options. Typically, the farthest place to turn back on a day hike is Five Mile camp.
Hoh River Trail to First River Access
0.9 miles each way | 1.8 miles total
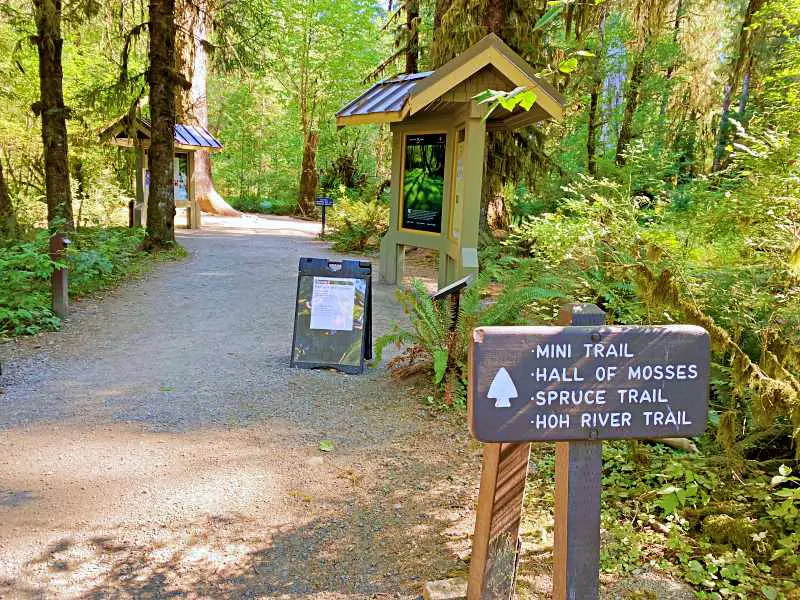
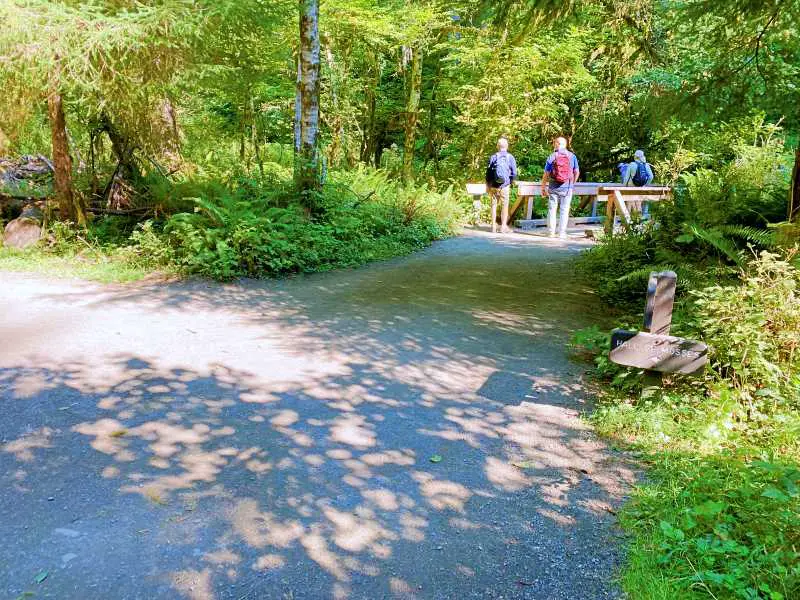
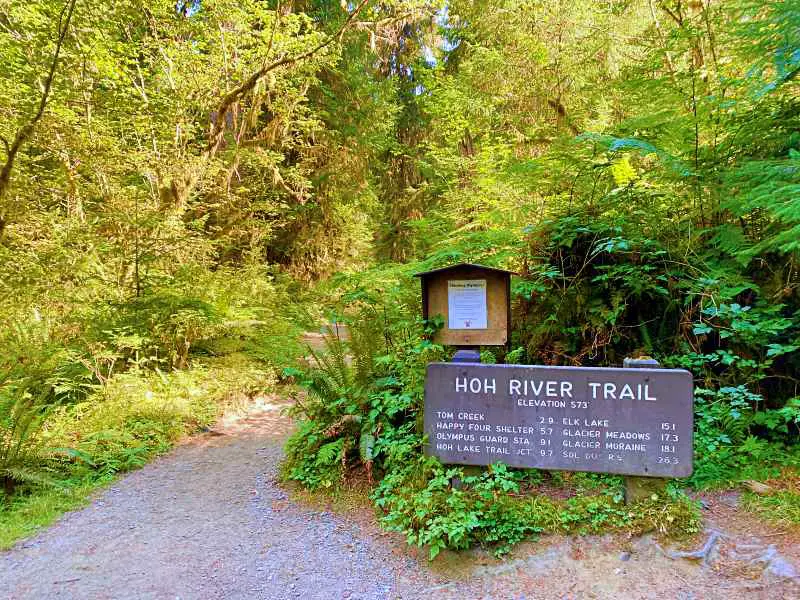
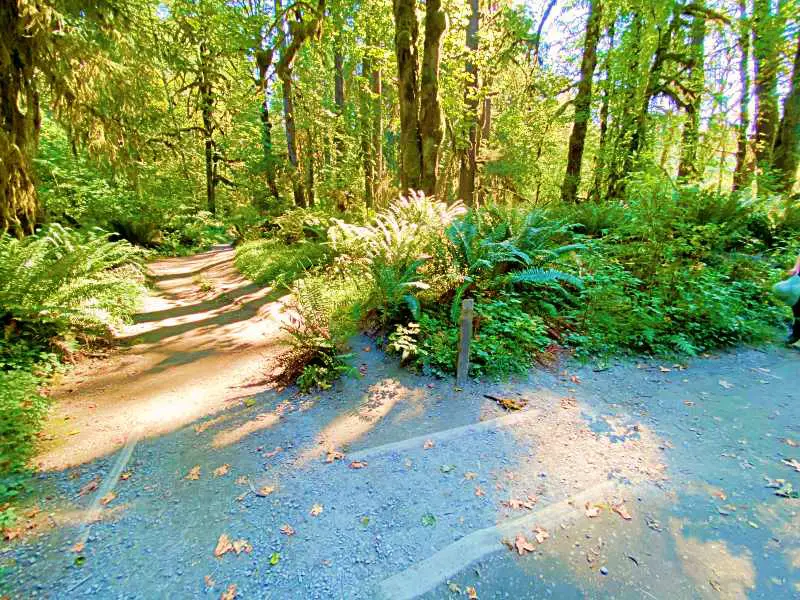
The trail starts at the Visitor Center. There are several trails all winding around the area, but there are also plenty of signs. You’ll see the main trail notice board and a wide trail beyond.
You’ll soon see a small bridge off to your right. Go over the bridge.
Keep following the signs for the Hoh River Trail.
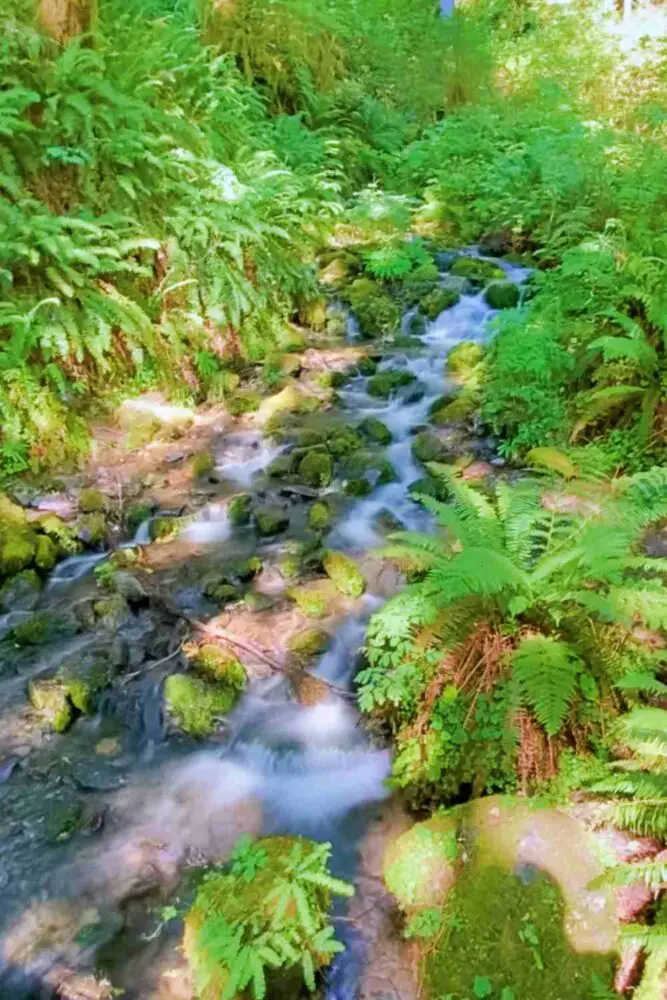
Look down into the creek. You may see salmon and/ or river otters in season.
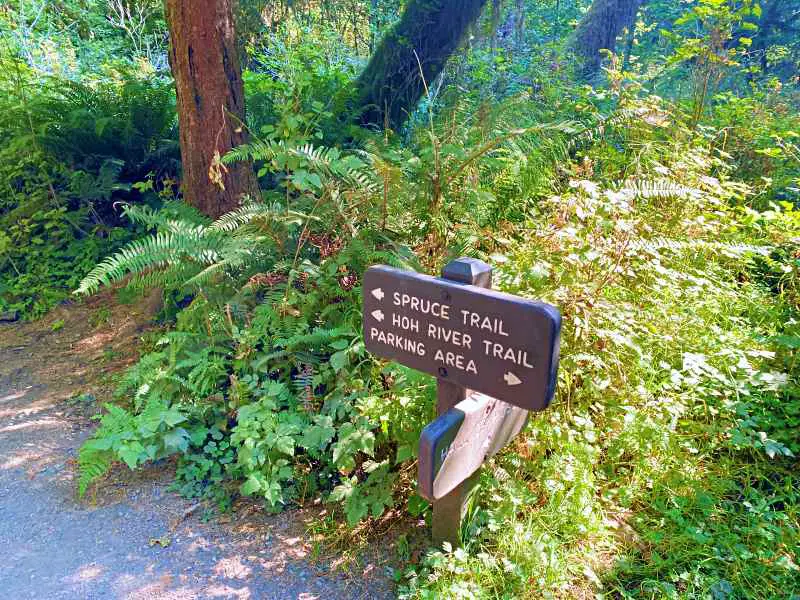
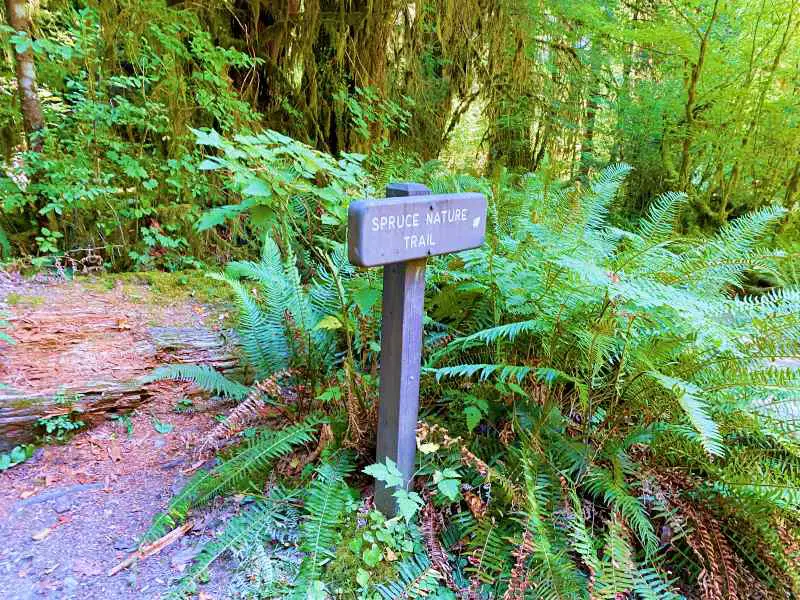
You’ll pass a sign for the Spruce Nature Trail to the right – stay on the main trail.
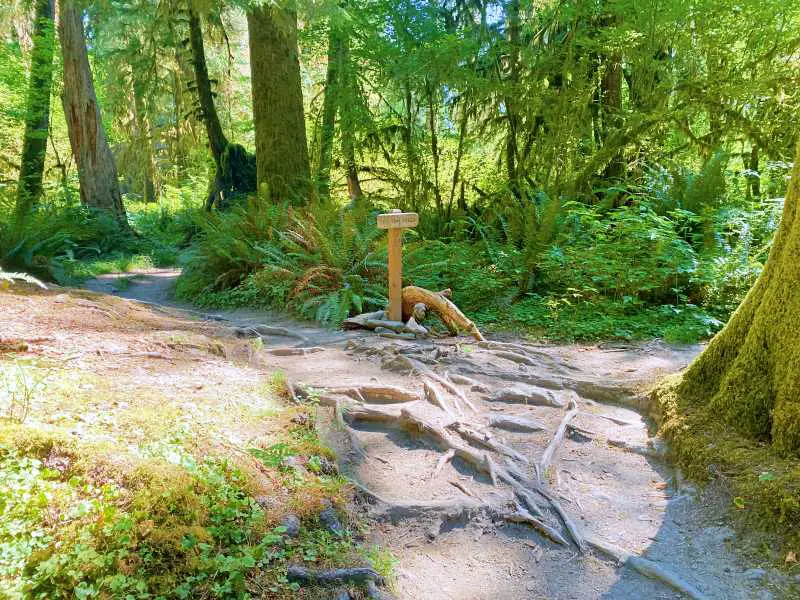
Then soon after is another small sign and then the main sign indicating that you are now on the Hoh River Trail. The sign shows distances to key places on the trail, though these are mostly relevant for hikers doing a multi-day trek to Blue Glacier, not day hikers.
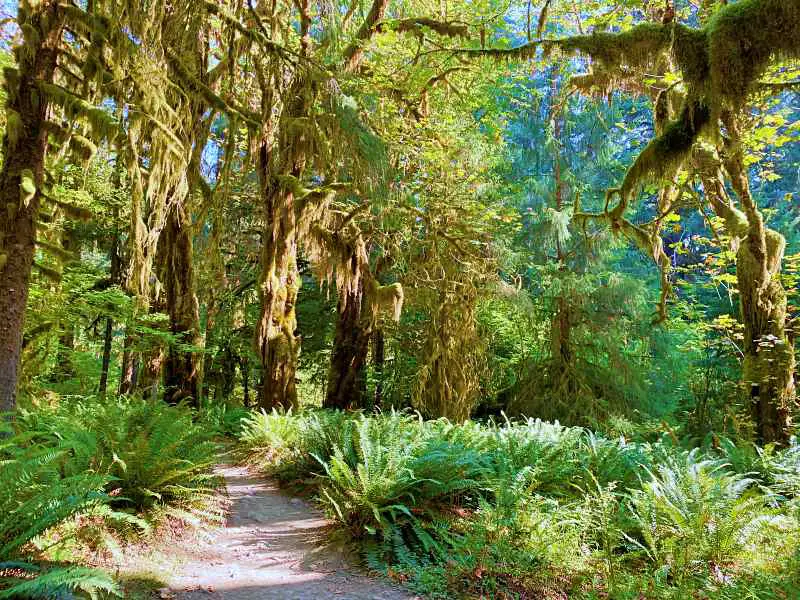
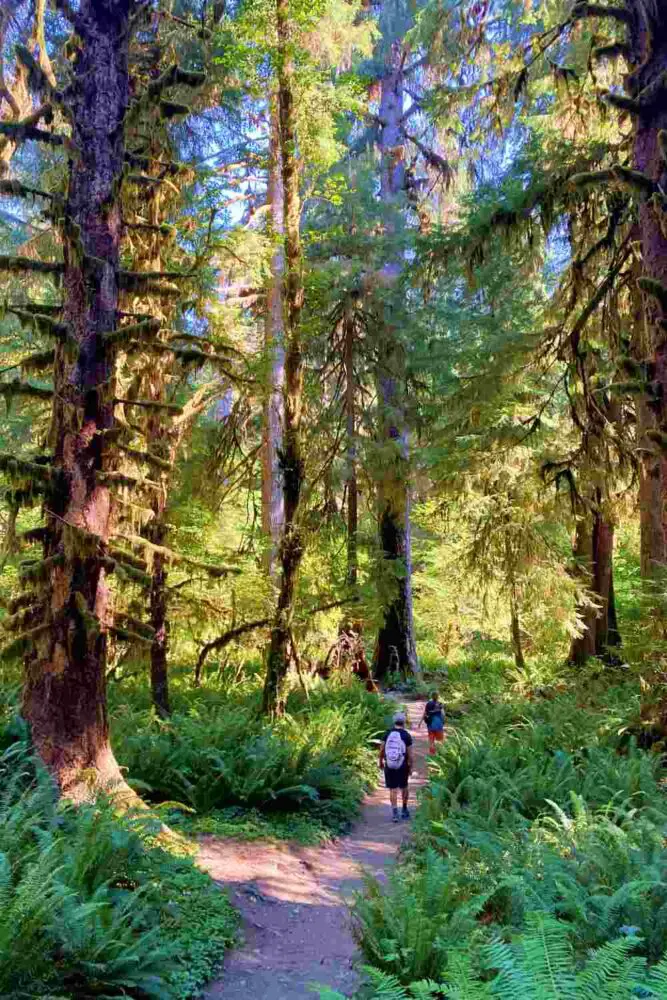
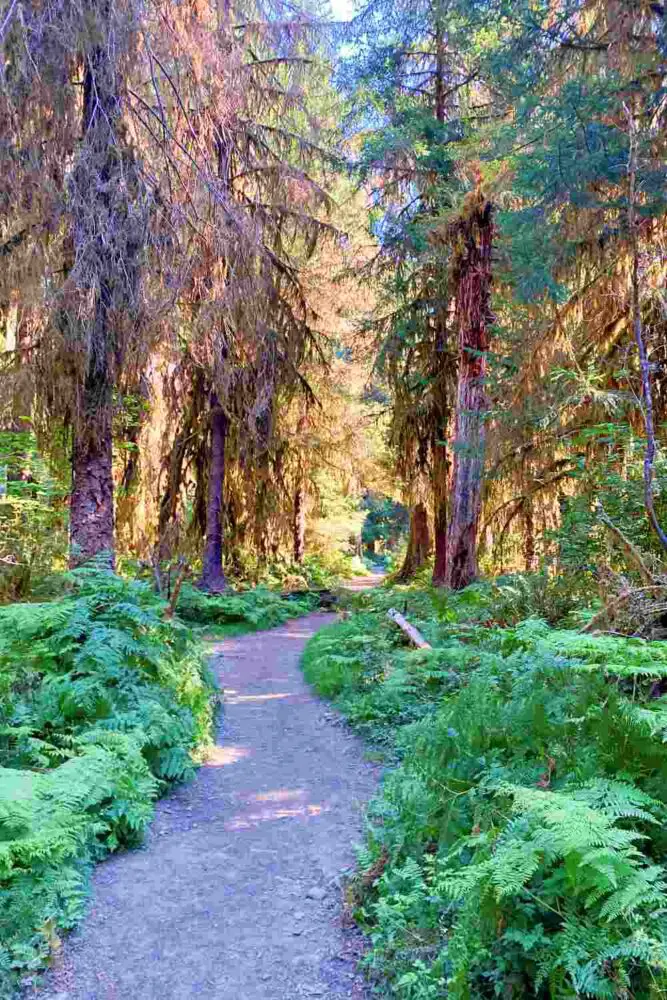
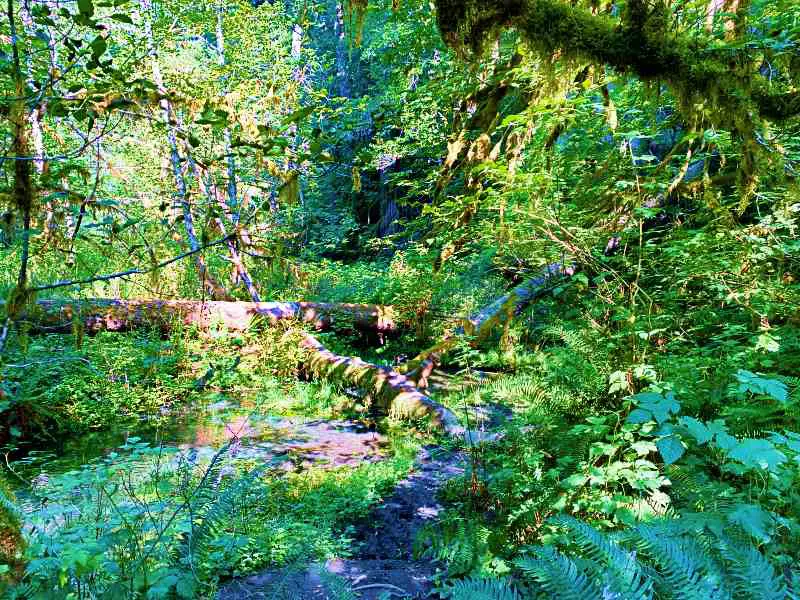
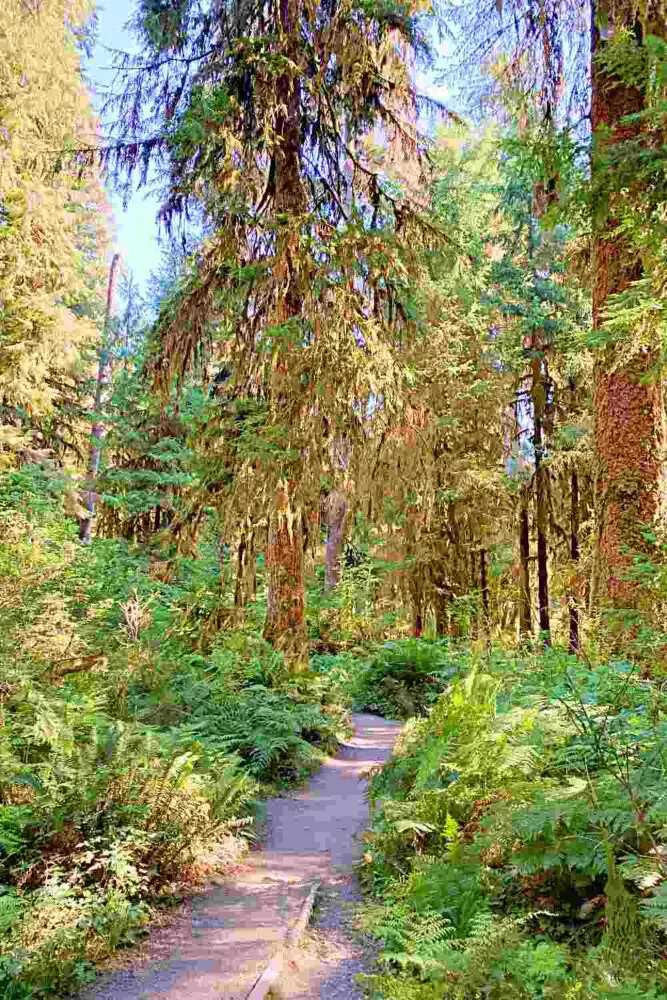
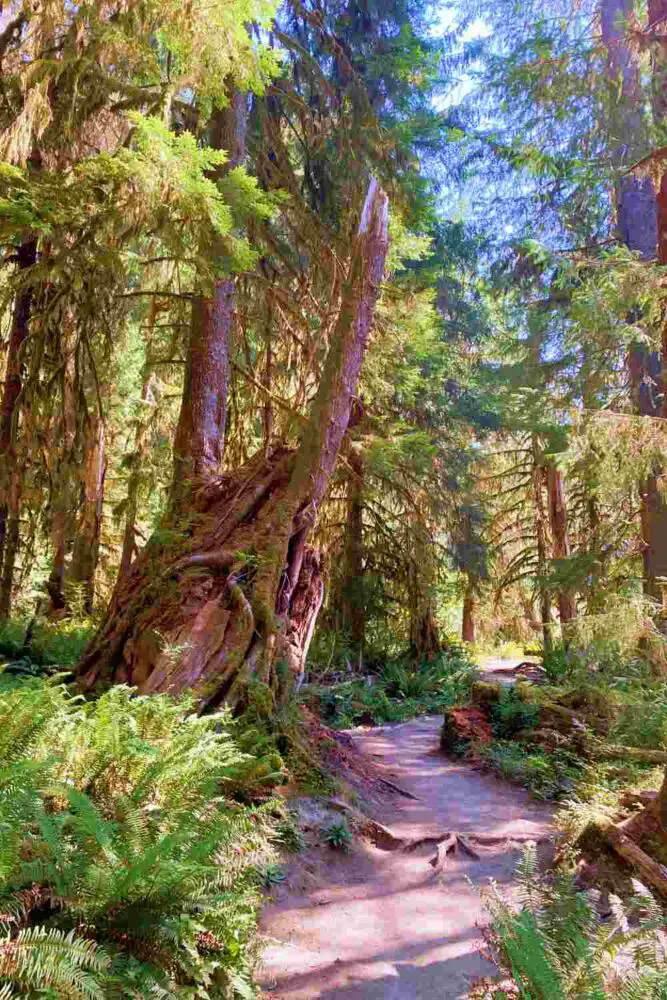
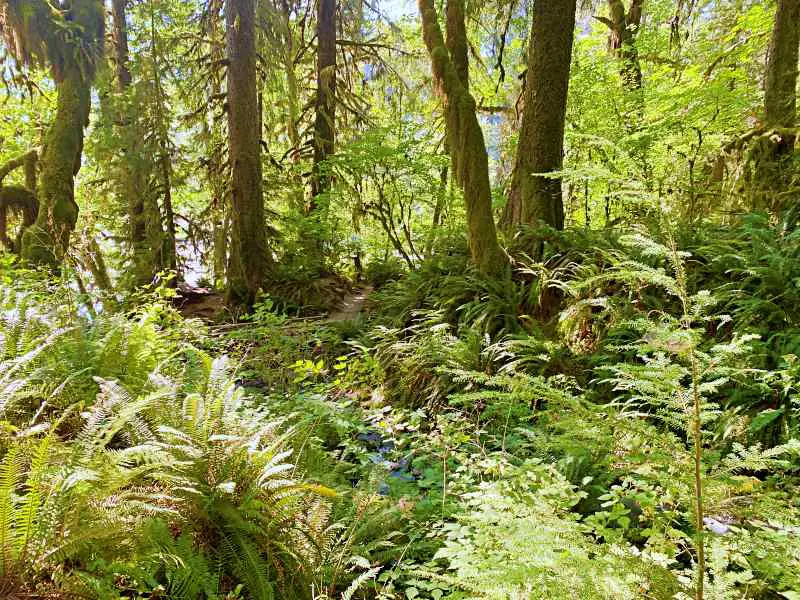
The trail heads straight into a series of groves of fern-covered trees with enormous ferns immediately around you.
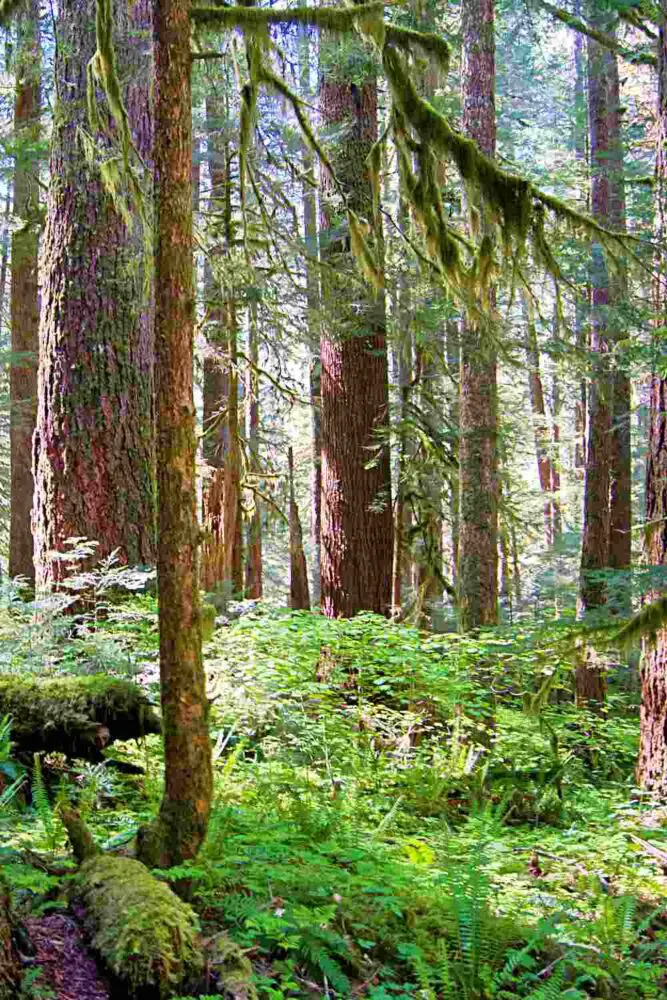
The further you go, the fewer people you’ll see and you may soon find yourself alone in the magic forest.
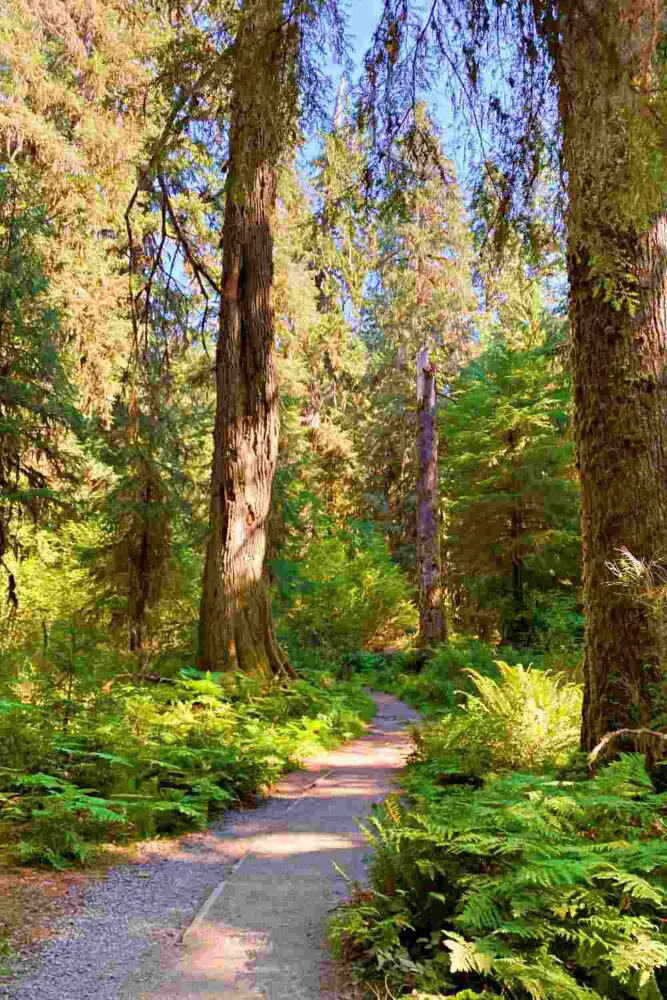
Many of these giant trees are over 200 feet tall. The conifer trees are a mix of Douglas-fir, western hemlock, cedar, and Sitka spruce trees.
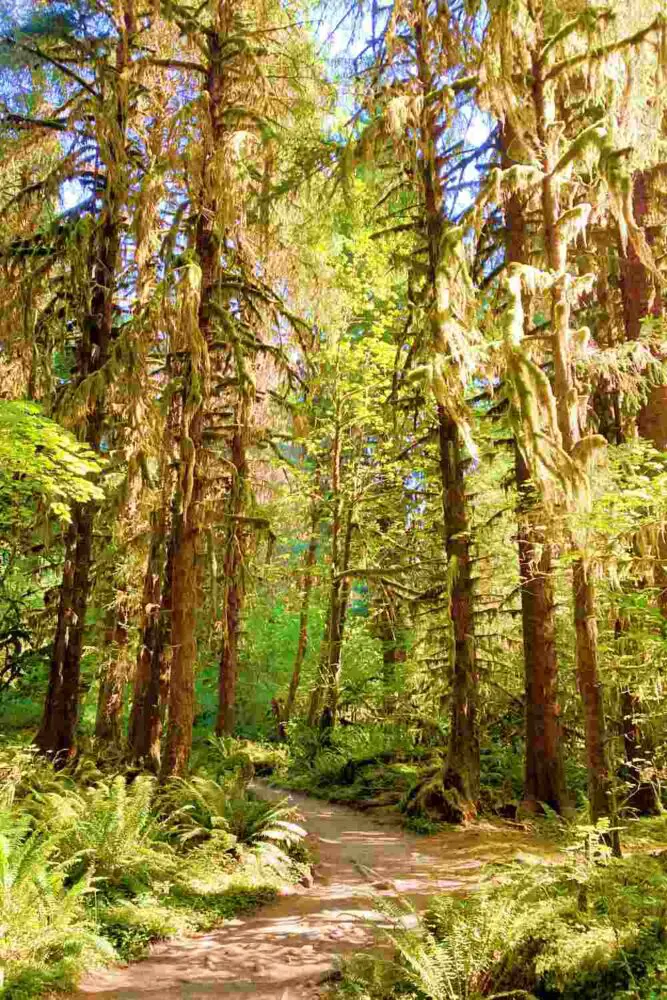
There are literally hundreds of different varieties of moss in the Hoh Rain Forest. Moss is interesting – unlike the ferns that you’ll also see growing everywhere along this trail, moss doesn’t have leaves, stems or roots!
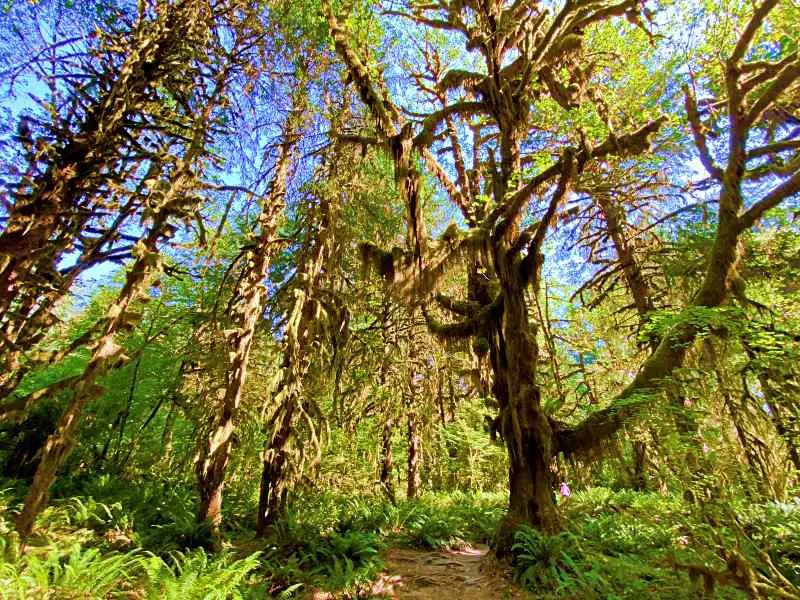
Not all moss is actually moss. Most of the ‘hanging’ moss is actually lichen, which are a combination of fungi and green algae. They have a symbiotic relationship, as the fungus provides the structure and the algae uses photosynthesis to provide nutrition.
Many of these gnarly tress, wrapped in strange shapes and covered in moss, look like something from a Dr. Seuss book.
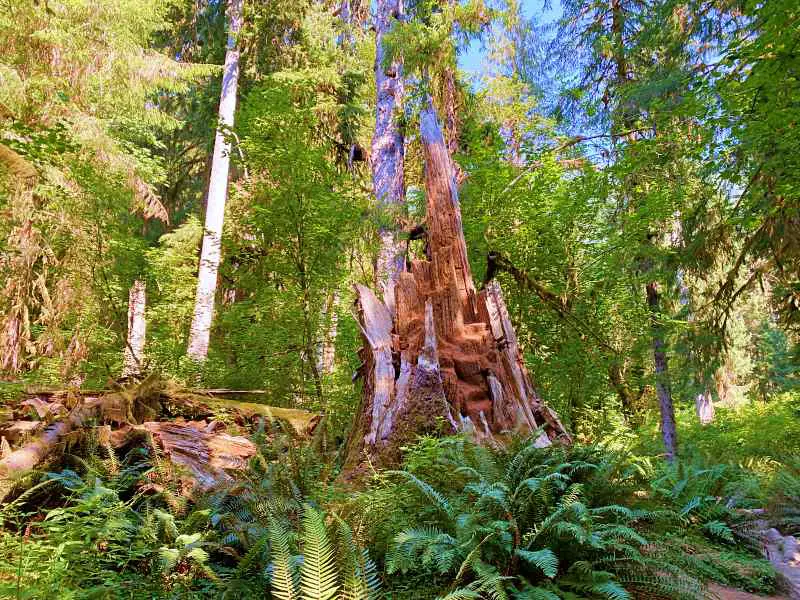
Keep an eye for snags. They are the broken stumps of trees that have fallen over. They are a source of food for bears that search for bugs in the soft wood, and homes for birds and small mammals.
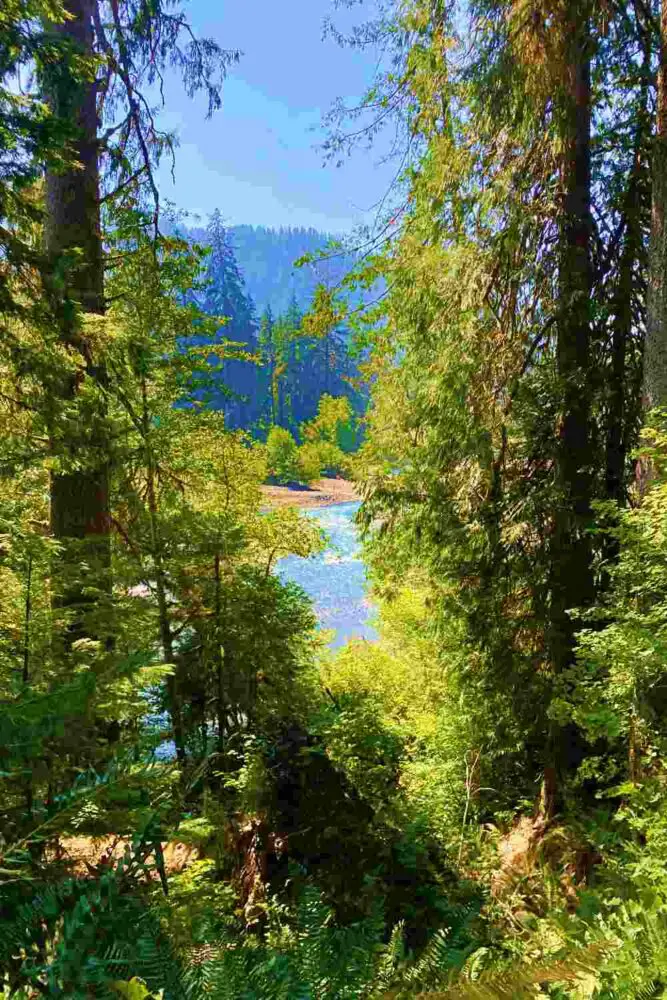
About half an hour after you set out, you’ll come to a path off to your right. This is the first point on the trail that you can get access to see the Hoh River.
If this is as far as you’ll be going, then take this side trail and enjoy the views of the river. If you’re going further, you’ll have more opportunities to see the river, so you can choose to go straight ahead if you want to shave off a little bit of hiking.
Hoh River Trail to Mineral Creek Falls
2.7 miles each way | 5.4 miles total
The trail continues through the rain forest.
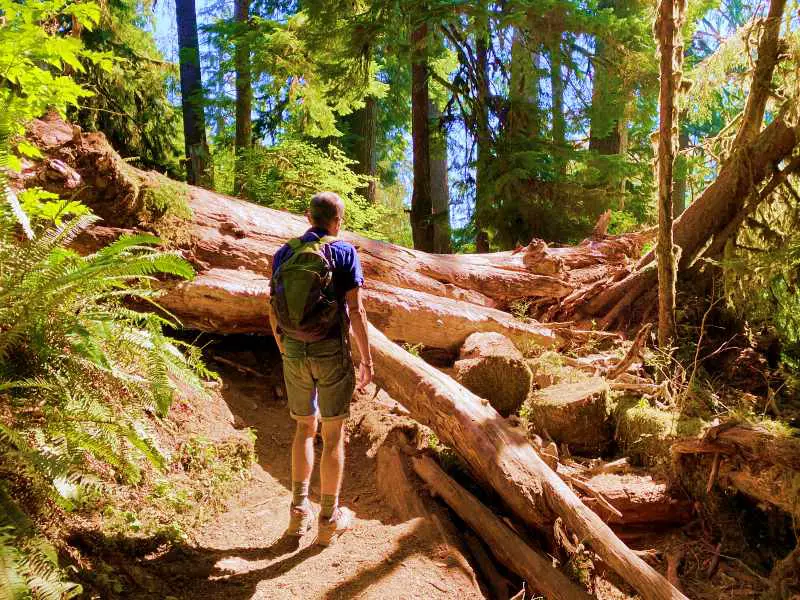
While the National Park Service does a great job of maintaining trails, you may come to a section where a tree has fallen across the path and the NPS haven’t cleared it yet. It’s generally possible to climb over, but if this is too challenging, then you will need to turn around at this point.
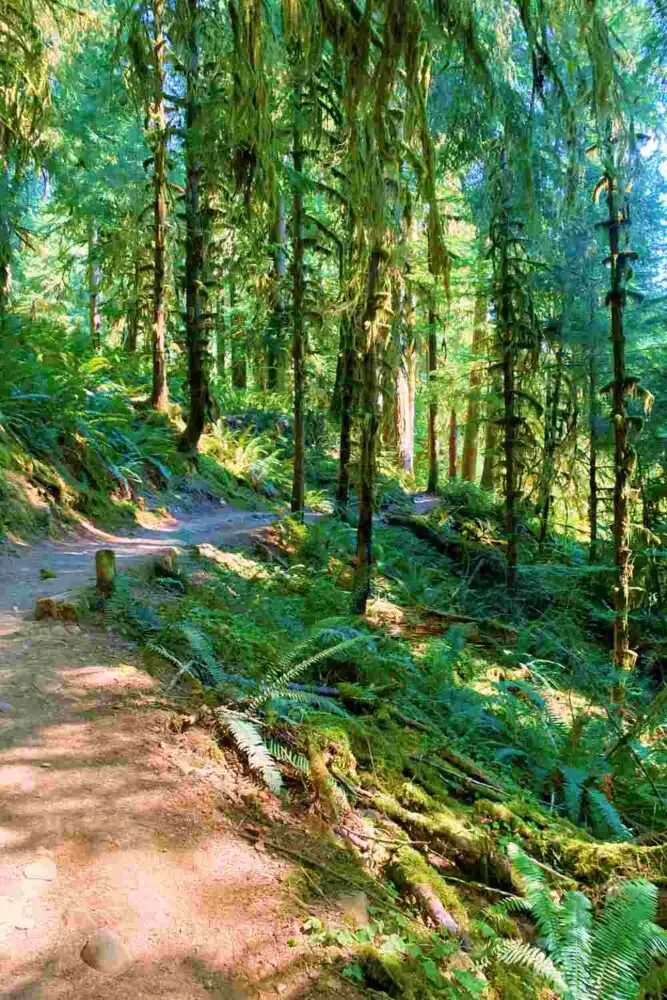
The trail is mostly flat, but there is some up and down and at one point the trail skirts along the top rim of a gully, with the river below.
Keep an eye out on your right for glimpses of the Hoh River through the trees.
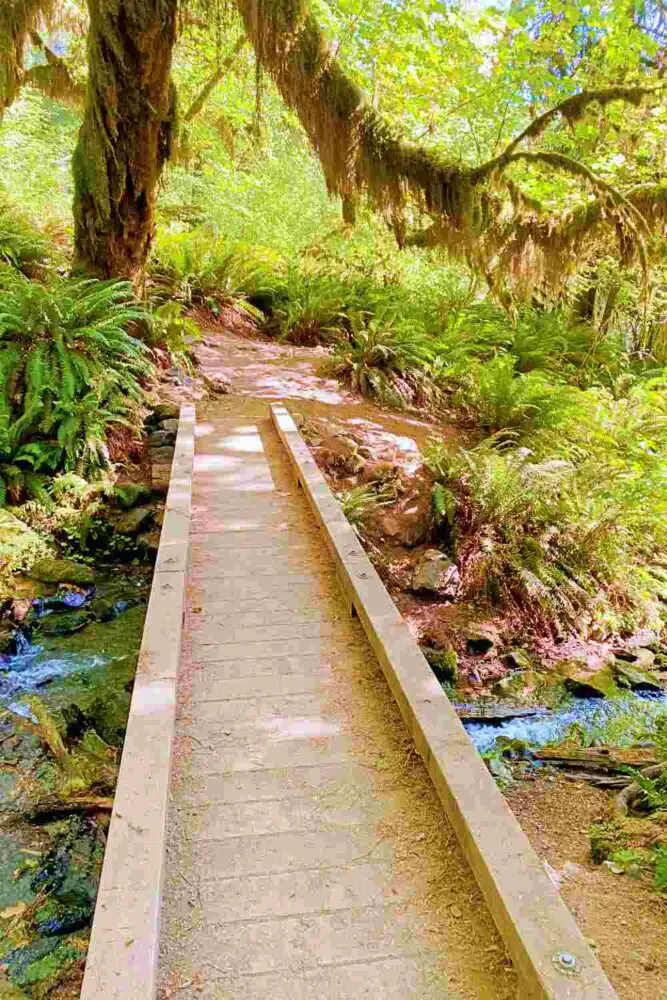
After about an hour and a half, you’ll cross a wooden footbridge that spans Mineral Creek.
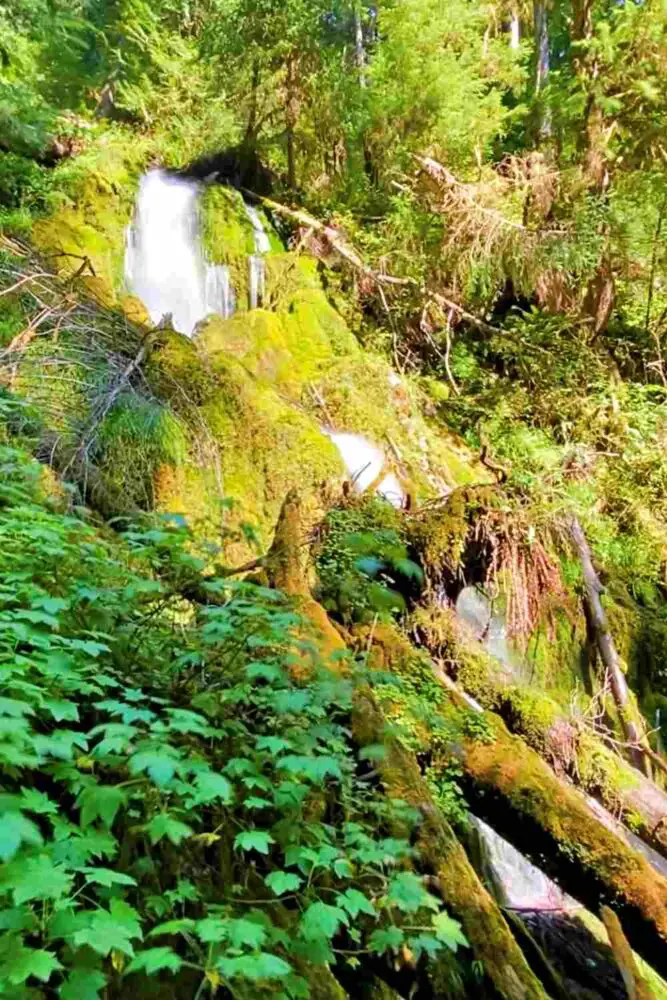
Mineral Creek Falls is to the left and uphill. You’ll catch glimpses through the trees.
This is a particularly lush area and a common turning back point.
It definitely makes a great place to stop and have a snack.
There is a short primitive side trail off to the left that goes up to the falls. This is steep and narrow and only take it if you feel very confident. It gets you closer to the falls, though the distant view from the main trail is good enough if you don’t want to do this.
Hoh River Trail to Cedar Grove
4.0 miles each way | 8.0 miles total
Another 0.2 miles past the falls, you’ll come to Mt Tom Creek. There is a basic campground here. This is another place you can turn back, or keep going to Cedar Grove.
It’s a little hard to know when you’ve arrived at Cedar Grove – there are cedar trees the whole way, but keep an eye out for a grove of trees that look very similar. If you miss it, the worst that can happen is you end up at Five Mile Creek 😊.
Hoh River Trail to Five Mile Island
5 miles each way | 10.0 miles return
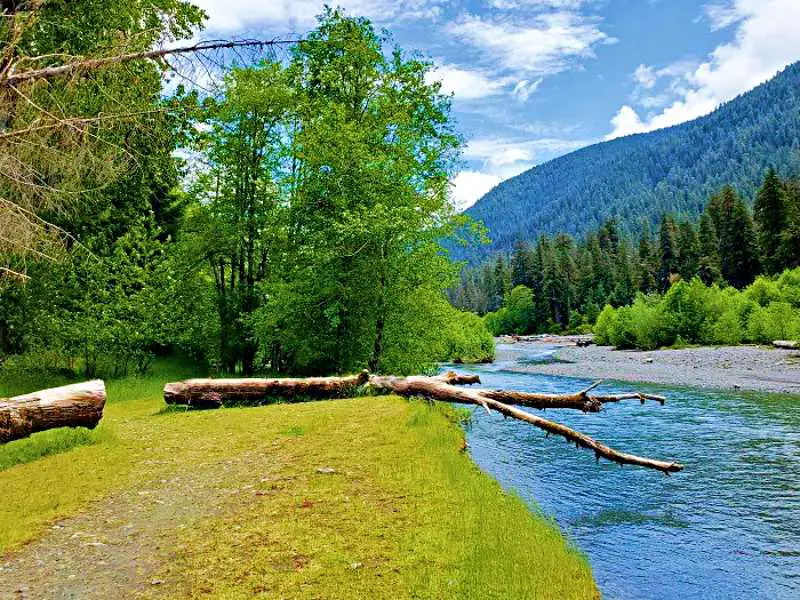
The trail continues through the woods until you arrive at Five Mile Island/ 5 Mile Camp. There is an open grassy section here, with access to the river. There’s also a campground here, with toilets that day hikers can use (BYO toilet paper). You can see the top of Bogachiel Peak peaking over top of the nearer hills.
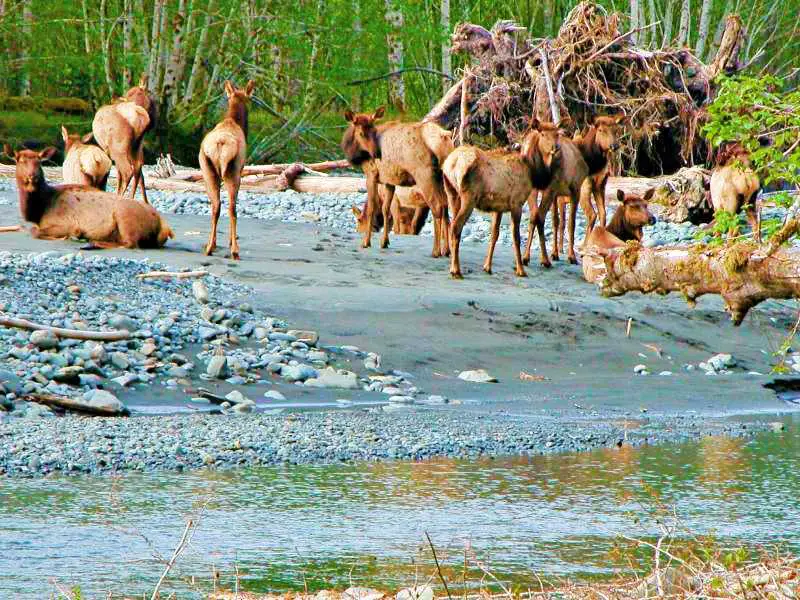
You may well see deer, Roosevelt Elk or black bears anywhere along this trail, but Five Mile Island is a particularly good spot to see them, as deer and elk often graze in the area and go down to the river to drink, and bears forage for food in the area.
This is a great spot for lunch and to relax and enjoy the views before heading back. Most day hikers turn back here, though the trail does continue on for many more miles to Blue Glacier.
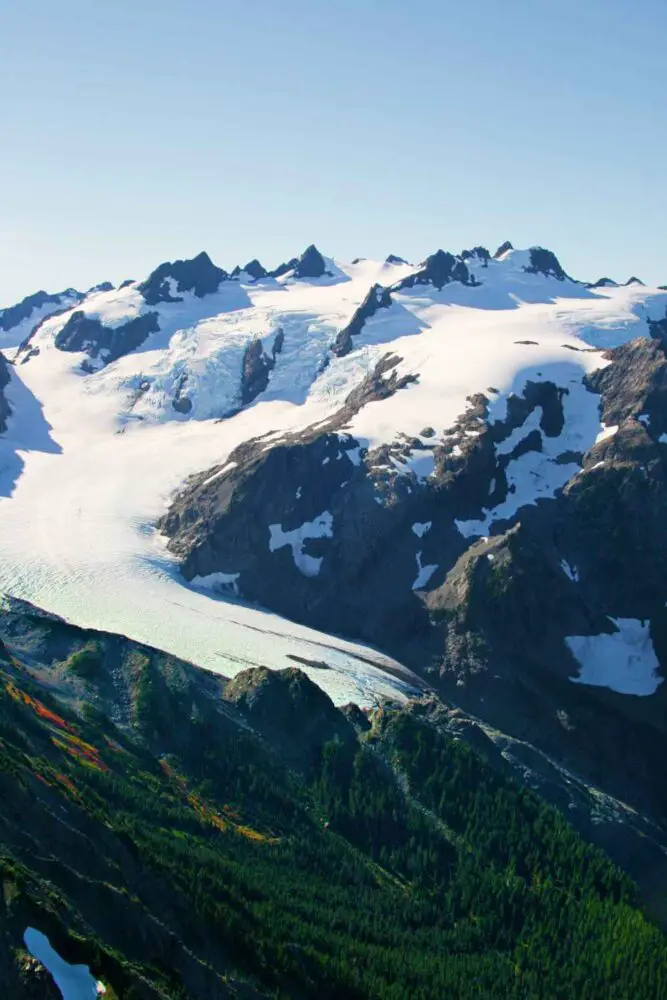
Blue Glacier Hike, Olympic National Park
Image taken by Janis Burger on glacier monitoring fixed wing flight 10-20-10 ca. 1100-1200 hrs
If you’re interested in more than a day hike, it is possible to hike the Hoh River Trail to Blue Glacier at Mount Olympus. This is a multi-day trip that can only be done in summer when the upper trail is passable.
The entire trek is 17.3 miles each way to Glacier Meadows, with an elevation change of 3,700 feet. The last push to see Blue Glacier is an additional 0.9 miles / 700 feet elevation gain to a viewpoint overlooking the glacier. If you’d like to do this, you’ll need to book wilderness camping sites.
There are several campgrounds along the way and booking sites will automatically give you a wilderness camping permit. The campgrounds are:
Mt Tom Creek
Five Mile Island
Happy Four Shelter
Olympus Guard Station
Lewis Meadow
Martin Creek – no open fires
Elk Lake – no open fires
Glacier Meadows – no open fires
Wear layers, take trekking poles for the frequent water crossings, and be prepared for mud.
About 0.25 miles before reaching Glacier Meadows, you’ll need to climb down the Jemrod Gully Ladder – a 100-foot rustic ladder down a very steep gully that is not for the faint-of-heart!
It’s possible to do this hike in 2 days, but 3 or 4 are more comfortable.
If you’d like to do it but are feeling a little intimidated, you can book a guided trip.
Hoh River Trail Backpacking Trip to Blue Glacier
Go with an expert guide on a five-day (4-night) backpacking trip along the Hoh River Trail all the way to Blue Glacier. This is a major trip and going with a guide will definitely make things easier, so you avid the worst of the mud and have help descending the Jemrod Gully Ladder.
There are ticks and bugs, especially in spring and summer. Although I’m not aware of any reports of Lyme Disease, bug spray is a good idea. I’m a fan of DEET-free insect repellent, as it’s better for the environment and your skin. Get some here.
There are a lot of muddy sections in winter, spring and through early summer. Good quality waterproof hiking boots are a must! If you need to get some, take a look at my Guide to Buying the Best Hiking Shoes/ Boots to help you know what to look for and get some recommendations. My top pick is this pair of Salomon Gore-Tex boots.
This is a rain forest, so it can rain a lot. I recommend taking a rain jacket and wearing layers that you can take them off or put them on depending on the weather, which can change throughout the day. If you need one, I like this Columbia rain jacket for men and recommend this Little Donkey Andy rain jacket for women.
The trail is mostly flat, but if it’s been raining or is the wet season, you’ll find trekking poles are a big help for navigating around mud and puddles. I have these Foxelli trekking poles – they are really light weight, adjustable, and have several tips and cork handles. Get them here.
For any hike, you should take water. There is a refill station at the Visitor Center, so you just need a refillable water bottle. I love this hydroflask. It’s easy to carry, keeps temperatures well, and comes in multiple colors.
You will definitely want to take a camera. I lovethe GoPro HERO 12. It’s designed for travel. It’s water resistant and durable and takes photos, video and even does streaming. Check current prices on the GoPro HERO 12 here
To hike the full trail takes 2-4 days. A day hike to Five Mile Island and back typically takes about four hours.
How many miles is the Hoh River Trail?
It’s 17.3 miles each way to Glacier Meadows. It’s five miles each way to Five Mile Island, which is a common place to turn back for a day hike.
Travel Insurance for the Hoh Rainforest Trail
You should definitely get travel insurance before setting out on this hike. It’s not an especially difficult hike (unless you’re going all the way to Blue Glacier), but things can happen. Good travel insurance can protect you against medical and emergency repatriation, as well as cover things like trip cancellation, loss and/ or theft of property, etc.
Do you have any tips for or questions about hiking the Hoh Rain Forest trail? I’d love to hear about them. Join my private Facebook group National Parks Collectors and comment and let me know (you can also pick up extra planning tips, share your photos and stories with other national park lovers and more).
FREE DOWNLOAD Subscribe to regular updates with tips for planning, travel inspiration and trip ideas and get instant access to the free PDF of this Hoh River Trail
If you liked this post, please share the love and Pin It to your Olympic National Park board!
James Ian is a national park, camping and hiking expert.
He has dedicated his life to travel, visiting more than 80 countries, all 7 continents and all of the main national parks in the United States. With over 35 years experience in the travel industry, James has worked on cruise ships, at resorts and hotels, and as a travel planner who’s helped hundreds of people plan successful trips to US national parks.
Based on his experience visiting our national parks multiple times, in-depth research and expertise as a travel planner, James has published detailed itineraries for most of the major national parks in the US. These itineraries, as well as in-depth park guides, comprehensive camping and hiking gear reviews and buying guides, and helpful packing lists and gift guides will help you have your own incredible trip to US national parks without stress and hassle.
As a national park expert, James has contributed to many publications, including Time Business News, Savoteur, Best Trip, and Wired.
Parks Collecting is a participant in the Amazon.com Services LLC Associates Program, an affiliate advertising program designed to provide a means for sites to earn advertising fees by advertising and linking to amazon.com. Amazon and the Amazon logo are trademarks of Amazon.com, Inc. or its affiliates.As an Amazon Associate I earn from qualifying purchases.
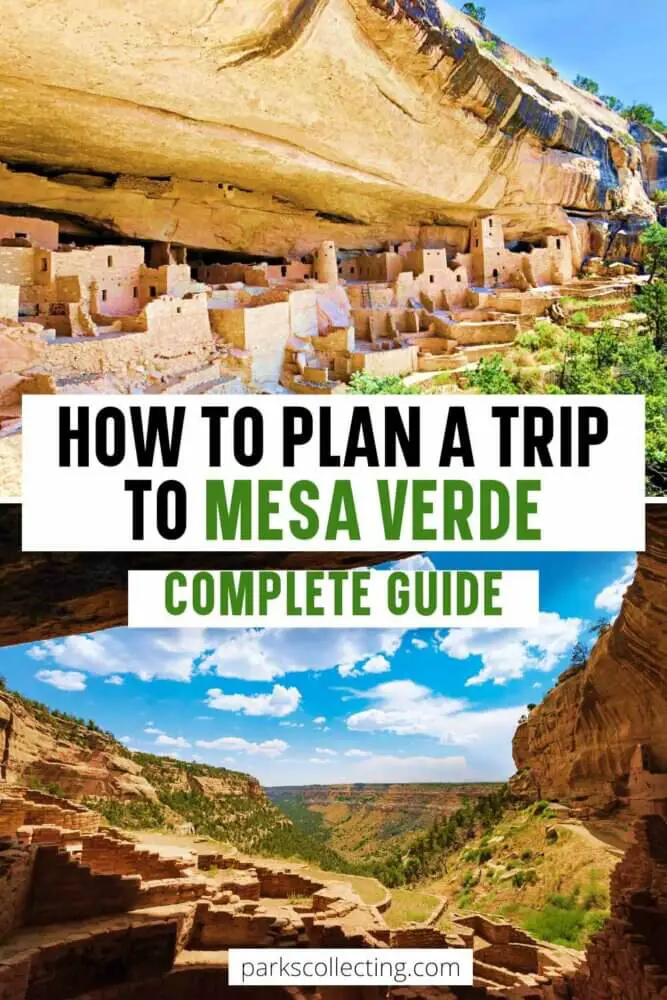
Mesa Verde is not only one of the most incredible National Parks in Colorado, it is the only cultural national park in the US. Imagine seeing circular ceremonial rooms, three-story towers and bricked storage facilities all built in deep alcoves in the side of cliffs, only reached by hand and foot holds carved into the sheer rock face.
These days, there are ladders and chains to help you – and many you can see from overlooks on top of the mesa – but they are no less extraordinary than they were 800 years ago.
However, while visiting Mesa Verde, Colorado is an extraordinary experience, it can be confusing. Which is why I have created this detailed guide with all you need to know to visit Mesa Verde, Colorado.
No time right now to read about How to Visit Mesa Verde National Park, Colorado? Pin It and save it for later:
Please note this post may contain affiliate links, which means we may receive a commission, at zero cost to you, if you make a purchase through a link. Please see our full Disclosure for more information. If you have any questions, please contact me.
FREE DOWNLOAD Subscribe to monthly updates with tips for planning, travel inspiration and trip ideas and get instant access to the free PDF of this How to Visit Mesa Verde National Park
Where is Mesa Verde National Park?
Before we get into too many details, it is helpful to know where is Mesa Verde located. It’s in the southwest corner of Colorado (near the Four Corners intersection of Colorado, New Mexico, Utah and Arizona.
The nearest towns are Cortez and Mancos, though Durango, which is just 45 minutes away, is nicer and has more to do.
What is unique about Mesa Verde National Park?
If you are wondering “Is Mesa Verde worth seeing?” given that it is not super close to any of the other national parks, the answer is a resounding “yes”. The main reason to visit is to see the incredible cliff dwellings and they are fascinating.
How long does it take to see Mesa Verde? While it is possible to see the highlights in just one day, I recommend spending at least a couple of days and nights there. That will give you a chance to explore inside a couple of the cliff dwellings, go on a hike, explore all the mesa-top sites and viewpoints, and include Wetherill Mesa.
However, if you want to fly right in, the closest airport to Mesa Verde, CO is Albuquerque International Sunport (ABQ) in Albuquerque, New Mexico. Although it is the nearest airport to Mesa Verde National Park, it is still four hours away. The other main airport near Mesa Verde National Park is Salt Lake City. It’s six hours away but the road between the two does pass Arches and Canyonlands National Parks, so you can visit them easily too.
Can you tour Mesa Verde on your own? Yes, you can easily see all that the park has to offer by yourself. The Chapin Museum and the Mesa Verde Visitor Center are great sources of information, there are signs at the mesa-top sites and you need to be accompanied by a ranger (or they will be stationed nearby) when visiting the dwellings.
However, for a deeper insight into the area’s history and culture, you can take a half-day tour with a guide. The four-hour tours leave in the morning and afternoon from Far View Lodge and include the major mesa top sites, plus a visit to one of the dwellings.
The cliff dwellings are open from mid-spring to mid-fall. Read my detailed Guide to Visiting the Cliff Dwellings for information on what dwellings you can visit, how to visit them, how to get tickets for Mesa Verde tours of the cliff dwellings, what to expect on each visit and more.
What are the Mesa Verde National Park hours of opening?
The Mesa Verde National Park Visitor Center is open daily:
January 2 – May 27 | 8:30 am to 4:00 pm May 28 – August 12 | 8:30 am to 6:00 pm August 13 – December 31 | 8:30 am to 4:00 pm Closed Thanksgiving, Christmas, and New Year’s Day
The Chapin Museum is open daily:
May 11 – May 27 | 8:30 am to 4:00 pm May 28 – August 12 | 8:30 am to 4:30pm August 13 – December 31 | 8:30 am to 4:00 pm Closed Thanksgiving, Christmas, and New Year’s Day
The Mesa Verde hours for the roads are:
The main road up to Far View Lodge is open all hours all year.
The Mesa Top Loop Road (Chapin Mesa) is open 8:00AM to sunset daily.
The Cliff Palace Loop Road (Chapin Mesa) is open 8:00AM to sunset daily.
The Wetherill Mesa Road is closed each year October 31 (or earlier) to May 2 (or later) and open:
Wetherill Mesa will be closed for the entire 2023 season due to construction.
There is no shuttle in Mesa Verde National Park, so you will need to drive. The national park has three main areas.
1) The bottom of the mesa
First up is the park entrance gate (there is only one entrance to the park). From there, it is a short drive to the Visitor Center and Research Center. Stop off there to check in for back country tours, pick up a map and learn more about the park.
Next up is the Morefield Campground, which is the only camping area inside the park. There is an amphitheater there also, where there are nightly ranger presentations in season.
The last major place at the bottom of the mesa is a large parking area for trailers, just past the campground. Because the road up to the top of the mesa is narrow and winding, you can’t take trailers or towed vehicles, and will need to park them there.
2) Chapin Mesa
There is only one road from the bottom up to the first of the two mesa, Chapin Mesa. The road is narrow and winding. The road to Chapin Mesa is open all year round (weather permitting). There is a tunnel between miles 4 and 5, with a height restriction of 20.5 feet / 6.25 m.
The Mesa Top Loop Road and Cliff Palace Loop Road (Chapin Mesa) are open 8:00AM to sunset daily.
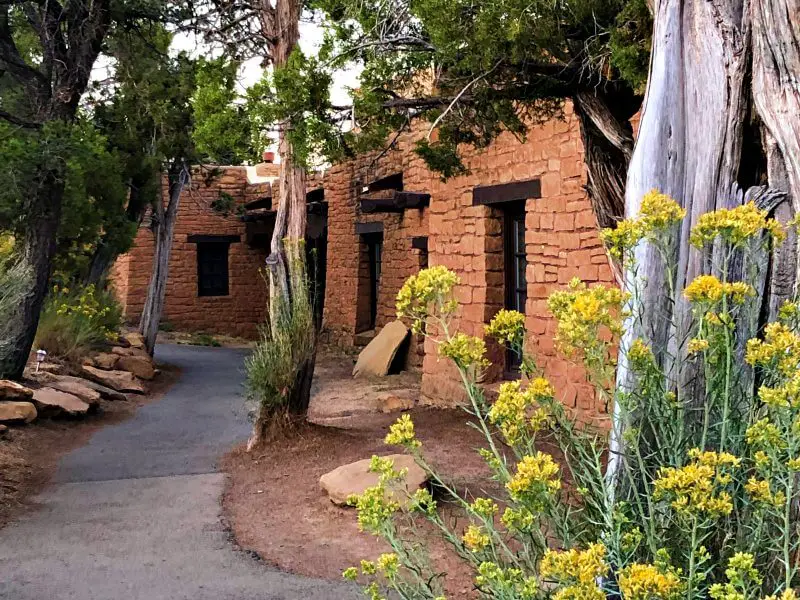
At the top of Chapin Mesa is Far View Lodge, the only lodge/ hotel inside the park. There are also some historic sites nearby, and a café and restaurant.
3) Wetherill Mesa
Between Far View Lodge and the Far View Terrace Café (near Mile 15) is the road, off to the right, to the other mesa in the park, Wetherill Mesa. The 12-mile road to Wetherill Mesa is also steep, narrow and winding.
The road is open early May to late October. Your vehicle must weigh less than 8,000 pounds and be less than 25 feet in length to go on this road.
Wetherill Mesa will be closed for the entire 2023 season due to construction.
Drive times
From
To
Drive Time
Park Entrance (bottom of mesa)
Cliff Palace (Chapin Mesa)
1 hour
Park Entrance (bottom of mesa)
Balcony House (Chapin Mesa)
1 hour
Park Entrance (bottom of mesa)
Long House (Wetherill Mesa)
1.5 hours
Cliff Palace (Chapin Mesa)
Long House (Wetherill Mesa)
1.25 hours
Balcony House (Chapin Mesa)
Long House (Wetherill Mesa)
1.25 hours
When is the best time to visit Mesa Verde National Park?
The park is open all year round, but the road to Wetherill Mesa is not. Nor are the cliff dwellings.
Visiting Mesa Verde in winter
It is possible to visit Mesa Verde in winter, but there are some things you should know.
The road to Wetherill Mesa is closed October 31 (or earlier) to May 2 (or later).
None of the cliff dwellings are open for tours. The dates vary between each dwelling, but there are typically no dwellings open at all from early October to late April – mid-May. However, there are many dwellings that you can see from overlooks (see my Guide to Visiting Mesa Verde’s Cliff Dwellings for more information). There will also be very few people around, and it is very beautiful when the surrounding area is covered in snow.
The lodge and campground inside the park are closed in winter, so you will need to stay nearby.
Where to stay at Mesa Verde National Park
There are a few different options:
Places to stay in Mesa Verde National Park
Far View Lodge Mesa Verde
This is the only lodge inside the national park. It is on Chapin Mesa, 15 miles from the park entrance. It closes in winter and is open April 19 – October 19, 2023.
There is traditional western décor in the lobby and the famous Metate Dining Room, which has wrap around floor-to-ceiling windows.
There are two rooms types – standard (Kiva), which have private balconies, and Kiva Deluxe View rooms, with, naturally, sensational views.
This is the only Mesa Verde National Park camping option inside the park. It is located at the bottom of the mesa, four miles from the park entrance.
All services are open May 15 – October 11, 2023.
There is also is limited off-season camping. Mesa Verde has sites available at this time, but with no services other than comfort stations, October 12 – October 26, 2023.
It closes for the season for season October 27, 2023.
In addition to campsites, there is a gift shop and grocery store, free showers, coin laundry, gas station and RV dumping station. The Morefield Campground Store is open daily:
May 20 – September 6, 2023 | 7:00 am to 7:00 pm, September 7 – October 11, 2023 | 9:00 am to 5:00 pm CLOSED for season October 12, 2023
There is an amphitheater at one end of the campground where there are nightly ranger presentations in season.
Places to stay near Mesa Verde National Park
Campgrounds near Mesa Verde
Mancos State Park is a good option if you are looking for a nearby campground. Mesa Verde is just 13 miles/ 20 minutes away. Reservations can be made here up 6 months in advance.
Hotels near Mesa Verde National Park
Cortez and Mancos are the two main towns near Mesa Verde National Park. Durango is also not too far away (it’s a 45-minute drive) and is more interesting (in my opinion).
If you’d prefer a vacation rental like Airbnb or VRBO, I have an entire post with a shortlist of the best vacation rentals in and near Durango, just 45 minutes away. Read my Guide to The Best Vacation Rentals Near Mesa Verde for reviews, recommendations and photos.
If you prefer to see at a glance where everything, use this map to find Manco and Cortez, CO lodging. It includes hotels, motels and vacation rentals (including options for Airbnb Cortez, CO and Airbnb Mancos, CO).
Where to Eat in Mesa Verde National Park
There are several dining options.
Spruce Tree Terrace Café
Location: Near the Chapin Mesa Archeological Museum and Spruce Tree House
Options/ style: Casual lunch or dinner. Inside, outdoor patio and to go
Opendaily:
May 25 – August 10, 2023 | 9:00 am to 5:30 pm
August 11 – October 1, 2023 | 11:00 am to 4:00 pm
Metate Room Restaurant
Location: Far View Lodge
Options/ style: Formal dinner only
Opendaily:
April 19 – May 24, 2023 | 5:00 pm to 9:00 pm
May 25 – September 7, 2023 | 5:00 pm to 9:30 pm
September 8 – October 18 | 5:00 pm to 9:00 pm
CLOSED for season October 18, 2023
Reservations are strongly recommended
Far View Lounge
Location: Far View Lodge
Options/ style: Lounge with pub fare
Opendaily:
May 11 – May 24, 2023 | 5:00 pm to 9:00 pm
May 25 – September 7, 2023 | 5:00 pm to 9:30 pm
September 8 – September 30 | 5:00 pm to 9:00 pm
CLOSED for season October 1, 2023
Far View Terrace Café
Location: Far View Lodge
Options/ style: Cafe serving breakfast and lunch
Open:
May 25 – September 6, 2023 | 7:00 am to 5:00 pm, DAILY Breakfast: 7:00 am – 10:00 am; Lunch: 11:00 am – 4:00 pm September 7 – October 18, 2023 | 7:00 am to 4:00 pm, DAILY CLOSED for season October 29, 2023
Mesa Mocha Espresso Bar
Location: Far View Lodge
Options/ style: Coffee shop with snacks and ice cream
Open: Early morning to mid-afternoon daily, May – September
Knife Edge Café
Location: Morefield Campground
Options/ style: Cafe open for breakfast. Lunch and dinner grab-and-go is available in the adjacent store
Open daily: May 15 – October 12, 2023 | 7:00 am to 10:00 am
Mesa Verde Map
FREE DOWNLOAD Subscribe to monthly updates with tips for planning, travel inspiration and trip ideas and get instant access to the free PDF of this How to Visit Mesa Verde National Park
Enjoy visitingColorado/ Mesa Verde National Park!
Do you have any questions about visiting Mesa Verde Park? Join my private Facebook group National Parks Collectors and ask away.
If you liked this guide to visiting Mesa Verde, CO, pin it to your Mesa Verde NP or National Parks in CO board!
James Ian is a national park, camping and hiking expert.
He has dedicated his life to travel, visiting more than 80 countries, all 7 continents and all of the main national parks in the United States. With over 35 years experience in the travel industry, James has worked on cruise ships, at resorts and hotels, and as a travel planner who’s helped hundreds of people plan successful trips to US national parks.
Based on his experience visiting our national parks multiple times, in-depth research and expertise as a travel planner, James has published detailed itineraries for most of the major national parks in the US. These itineraries, as well as in-depth park guides, comprehensive camping and hiking gear reviews and buying guides, and helpful packing lists and gift guides will help you have your own incredible trip to US national parks without stress and hassle.
As a national park expert, James has contributed to many publications, including Time Business News, Savoteur, Best Trip, and Wired.
Parks Collecting is a participant in the Amazon.com Services LLC Associates Program, an affiliate advertising program designed to provide a means for sites to earn advertising fees by advertising and linking to amazon.com. Amazon and the Amazon logo are trademarks of Amazon.com, Inc. or its affiliates.As an Amazon Associate I earn from qualifying purchases.
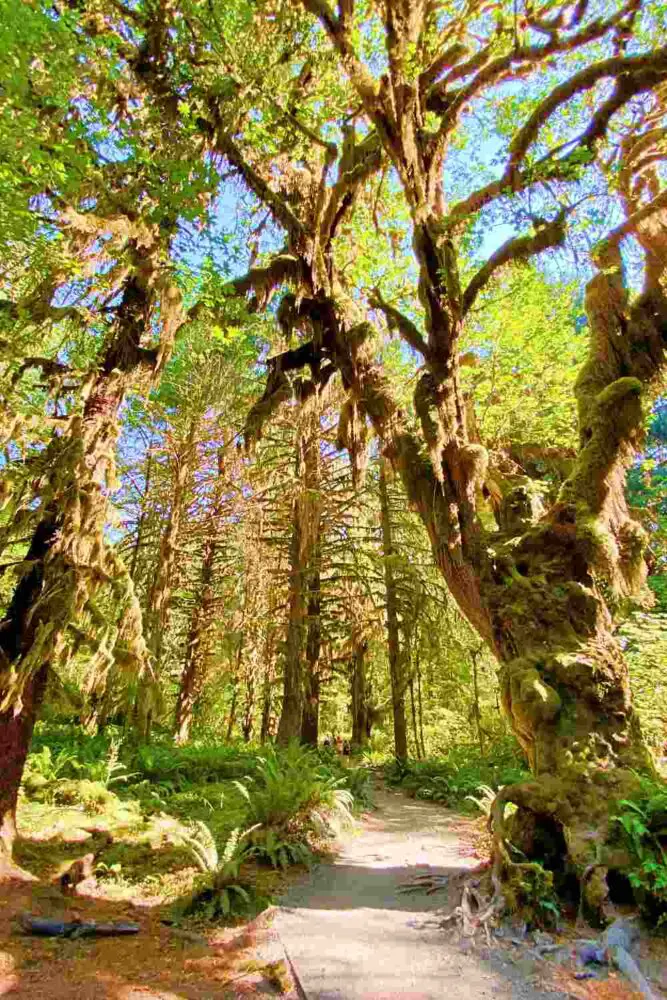
Imagine an enchanted forest that glows softly in the early morning light. Enormous ferns are at your feet. Branches reach out above you, twisting and turning at strange angles. A kaleidoscope of green surrounds you. Moss coats trees and drapes down like fringed curtains.
This otherworldly place is the most famous Olympic National Park rain forest and the most popular trail there, the Hall of Mosses, Hoh Rainforest.
In this detailed guide, I will give you all the trail details, describe the trail so you know exactly what to expect, and share my tips to help you get the most of your trip to the magical place that is the Hall of Mosses.
No time right now to learn about the Hoh Rainforest Hall of Mosses Trail? Pin It and save it for later:
Please note this post may contain affiliate links, which means we may receive a commission, at zero cost to you, if you make a purchase through a link. Please see our full Disclosure for more information. If you have any questions, please contact me.
FREE DOWNLOAD Subscribe to regular updates with tips for planning, travel inspiration and trip ideas and get instant access to the free PDF of this Hall of Mosses Trail Guide
The Hoh Rainforest
There are several rainforests in Olympic National Park, but the Hoh Rainforest is the most famous and most popular.
The word “Hoh” is said to come from the Quileute word “Ohalet” which means “fast-moving water” or “snow water”, describing the river that flows through this valley.
The Hoh is a temperate rainforest – one of the most spectacular in the world. As you would expect from a “rain” forest, it rains a lot. An average of 140 inches (3.55 meters) of precipitation falls each year. Fortunately, though, most of this happens in the winter.
The result is a lush environment, a mix of deciduous trees like the gnarly Bigleaf Maple trees and evergreen coniferous trees like Douglas-fir, western hemlock, spruce and cedar trees. Hundreds of varieties of moss grow on the trees, feeding off the moisture, and enormous ferns grow underfoot.
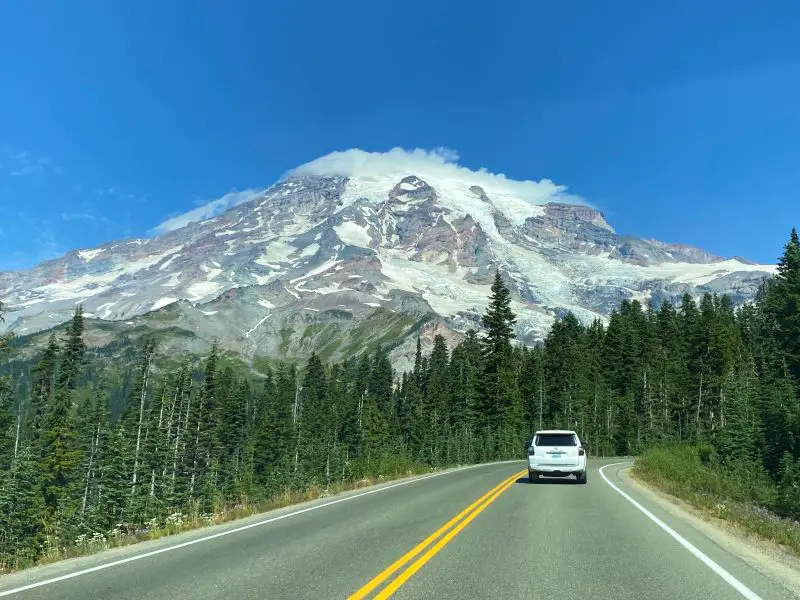
The Hoh is located on the west side of Olympic National Park, and is accessed by the Upper Hoh Road, which you get to from Highway 101. It’s about an hour drive from Forks and two hours from Port Angeles.
Guided Tours of the Hall of Mosses, Olympic National Park – Hoh Rain Forest
Although most people visit the Hoh Rainforest and the Hall of Mosses in their own vehicle, it is possible to visit on a tour. A tour has the advantage of an expert guide to give you information about the ecology and history of the area. Plus, you don’t need to deal with driving and parking, which can be a hassle.
My top tours of Olympic National Park that include the Hall of Mosses are:
A small group tour (maximum 14) that leaves from Port Angeles. In addition to the Hoh Rainforest, you’ll also get to see Rialto Beach and the Hole-in-the-Wall (depending on the tides). At the Hoh Rainforest, you’ll be able to walk the Hall of Mosses and the Spruce Nature Trail.
If you want more flexibility and personalized attention than a group tour can provide, then this private hiking tour is the way to go. It includes time at Ruby and Kalaloch Beaches, as well as the Hoh Rainforest. Because it’s a private tour, you can choose what hike(s) you do. You won’t want to skip the Hall of Mosses, but can add in some other trails as well. Pickup is at Kalaloch Beach 4.
Rather than drive and have the hassle of finding your own accommodations, you can take this three-day tour that leaves from Seattle. One day is spent at Hurricane Ridge, another at Lake Crescent and the Pacific coast, and the third day is in the Hoh Rainforest.
Open: Open year-round, but there can be snow on the trail in winter.
My Tips for Hiking the Hall of Mosses Trail in the Hoh Rainforest, Olympic National Park
Go very early in the morning if you can. Not only will you avoid a wait to get into the national park, early morning is when the light is best for photography. When the early morning sun hits the moss, turning it into a golden glow, it is truly magical.
This is a short easy hike with a wide, easy-to-follow path, so you don’t need special clothing or equipment most of the time. However, it can be muddy in winter and spring. If you’re hiking after it has rained, a good pair of hiking shoes or boots will come in handy. If you need to get some, take a look at my Guide to Buying the Best Hiking Shoes/ Boots to help you know what to look for and get some recommendations.
Because most of the annual precipitation is in winter, the rain forest can be a little dry looking by early fall. There’s not much you can do about this other than to adjust your expectations or the timing of your trip. Though I’ve visited in September, and it’s still stunning.
The Hoh Rain Forest can be very crowded in summer. Get there very early. There is some parking allowed on the side of the road near the Visitor Center in addition to the official parking lot, but when the entire area is at capacity, the rangers hold all traffic at the entrance station and only let one vehicle in when another leaves. The wait time can be more than an hour at peak times. Get there before 8:00AM in summer to avoid having to wait.
Most people hike the Hall of Mosses Trail and the nearby Spruce Nature Trail. If you get there in the morning, most people head to the Hall of Mosses first, so if you go to the Spruce Nature Trail first, you have a better chance of having the rain forest more to yourself. Later in the day, it will make little difference, though.
There are often ranger talks at the Hoh Rain Forest Visitor Center and guided walks nearby, including the Hall of Mosses. These are a great introduction to the temperate rain forest. Check for ranger programs for the dates of your visit.
Hall of Mosses Trail Map
Description of the Hall of Mosses Trail Olympic National Park, Hoh Rainforest
The Hall of Mosses is an easy trail through one of the most spectacular sections of the Hoh Rainforest. It’s a relatively short loop that is suitable for kids and is a great introduction to the temperate rainforest.
The trail starts near the Hoh Rain Forest Visitor Center. There are a lot of paths in this area that all connect with each other. Look for a sign that says “Hall of Mosses”.
At the start of the trail, you’ll cross a small, picturesque creek. It’s worth stopping here and peering into the waters and the surrounding area. In season, you may see salmon and/ or river otters here.
There is moss on the trees from the very start, but the scenery will become even more spectacular the further you get onto the Hall of Mosses.
After a couple of minutes, you’ll come to a small sign indicating the start of the loop. This is one-way loop in a clockwise direction. The path climbs slightly at the beginning but is level for most of the walk.
The trail is wide and easy to follow, though it can be muddy after rain. There are enormous ferns alongside. Keep an eye out for animals in the forest, too. It’s not uncommon to see majestic Roosevelt Elk here.
Look down – if you see something bright yellow, it’s probably a banana slug.
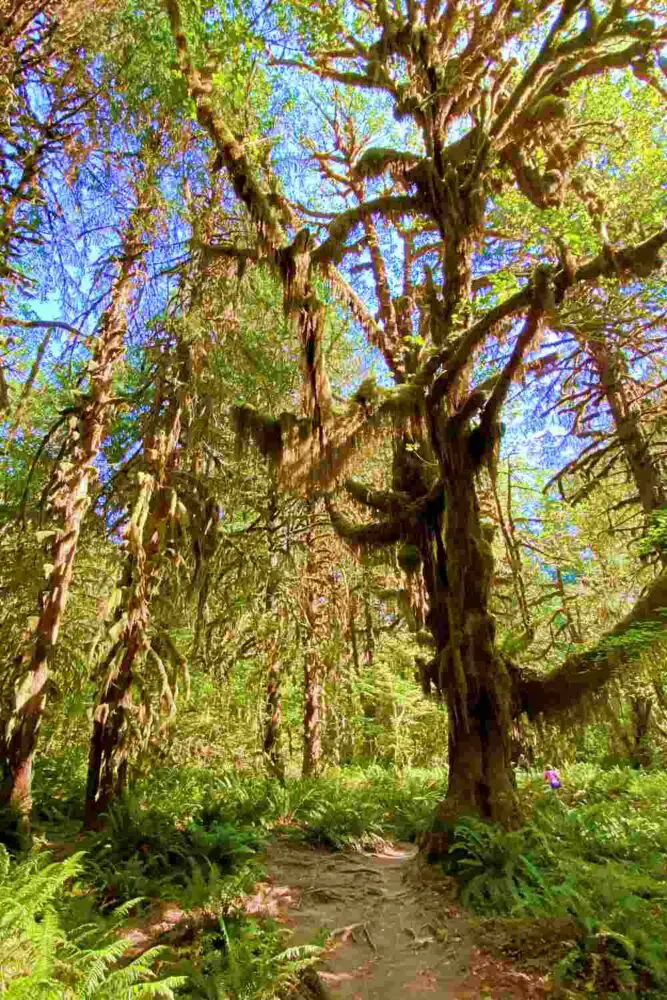
Don’t forget to look up, too. The conifer trees tower far above you. There are Douglas-fir, spruce, hemlock, and cedar trees in the forest.
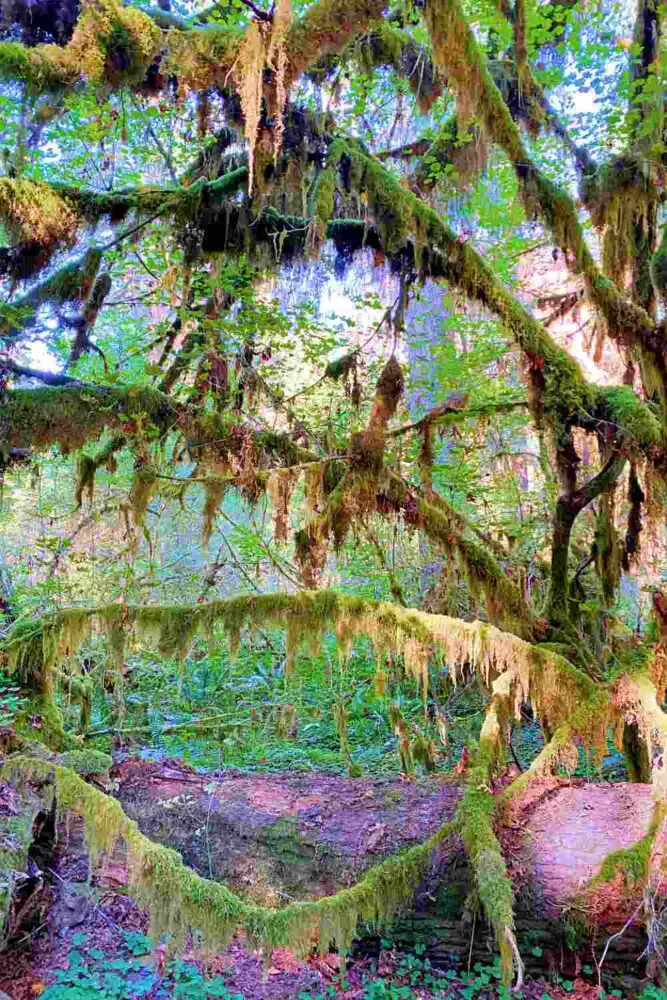
It’s the moss, however, that is the star attraction here. Enormous Bigleaf Maple Trees twist and turn into shapes like something out of a Dr. Seuss book. Their limbs are draped with all kinds of moss.
About five minutes into the hike, you’ll come to a junction, with a side trail going off to the left. Take this. It is an out-and-back spur trail to the most spectacular section of the Hall.
In about a minute, you’ll come to the end of the side trail.
Here are the best views in the Hall of Mosses – a fantastical landscape of mossy trees.
The trail continues under an overhanging branch (trunk).
And through more magical landscape.
It’s hard not to take a million photos here – or just hang out and soak in the views.
Keep an eye out for trees that have a web of roots above the ground. You can clearly see the shape of a log. Trees fall and then other trees grow on top of them, their roots forming around the fallen logs. The logs rot and an interlaced depiction of the former log remains. It’s pretty incredible to see nature at work like this.
The ferns are enormous. You really get a sense of the power of nature here.
After about half an hour, you’ll end the loop and return back along the short start of the trail, crossing back over the creek.
From there, you can head back to the Visitor Center or take one of the other trails in the Hoh Rainforest.
If you want another short and easy trail, take the Spruce Nature Trail loop. If you’re up for a bit of a longer hike and want to get away from the crowds, take the Hoh River Trail as far as you like and return the same way.
What You Need To Take/ Wear on The Hall of Mosses – Washington Rainforest
The trail is wide and easy to follow, but even so, with all that rain comes mud. Good hiking boots or shoes can help make your experience more enjoyable for sure. If you need to get some, take a look at my Guide to Buying the Best Hiking Shoes/ Boots to help you know what to look for and get some recommendations.
You will definitely want to take a camera. I lovethe GoPro HERO 12. It is designed for travel. It’s water resistant and durable and takes photos, video and even does streaming. Check current prices on the GoPro HERO 12 here
What is the difference between the Spruce Nature Trail and the Hall of Mosses?
Spruce Nature Trail vs Hall of Mosses: If you have time, it’s worth hiking both trails. The Hall of Mosses is shorter and the trees are denser, with more moss. The Spruce Nature has more sparse trees and crosses a meadow on the way to the river, before looping back around.
How far is the Hall of Mosses from the Hoh Rainforest Visitor Center?
It’s about a minute’s walk from the Hoh Rain Forest Visitor Center to the start of the Hall of Mosses trail.
What national park is the Hall of Mosses in?
The Hall of Mosses is in Olympic National Park.
How long is the Hall of Moss trail?
The Hall of Mosses is 0.8 miles in total.
Is Hall of Mosses trail dog friendly?
No, pets are not permitted on the Hall of Mosses Trail in order to preserve the fragile environment and ecosystem.
Where is the Hoh Rainforest?
The Hoh is on the west side of Olympic National Park, and is accessed by the Upper Hoh Road, which you get to from Highway 101. It’s about an hour drive from Forks and two hours from Port Angeles.
How to get to Hoh Rainforest?
To get from Seattle to Hoh Rainforest, head west out of town and take the Bainbridge Ferry. Get on WA-3N in Poulsbo from WA-305N and then follow WA-104Q to US-101. This is the main highway that circles around the Olympic Peninsula. After about 2.5 hours, you’ll see the turn off to the Hoh Rainforest on your left. The entire trip takes about 4.5 hours.
To get from Tacoma to Olympic National Park and Hoh Rainforest, get on WA-16W then take WA-3N to US-101 and follow this around until you get to the turn off for the Hoh Rainforest on your left. The trip takes about 4 hours.
What is the best time of year to visit the Hall of Mosses?
The best time of year to visit the Hall of Mosses and the Hoh Rainforest is late spring to early fall. It is most crowded in summer, but this is when there is less rainfall.
When is the best time to visit Hoh Rainforest?
The best time of day to visit Hoh Rain Forest and the Hall of Mosses is early morning, when the light makes the moss glow and you’ll have the best chance of getting a parking spot without having to wait. Late afternoon is also good, to avoid the crowds.
Where to stay near Hoh Rainforest?
There is a campground in Hoh Rainforest. Otherwise, there are plenty of accommodation options in Forks, about an hour away.
What’s thebest rainforest in Olympic National Park?
There are several temperate rain forests in Olympic National Park including Hoh, Queets and Quinault. Hoh Rainforest is the most popular. The highlight is the stunning Hall of Mosses, Forks, Washington.
What’s the most famous Washington rainforest?
Hoh Rainforest is the most famous rainforest in Washington.
FREE DOWNLOAD Subscribe to regular updates with tips for planning, travel inspiration and trip ideas and get instant access to the free PDF of this Hall of Mosses Trail Guide
Travel Insurance for Olympic National Park and the Hoh Rain Forest, Washington
Whether you’re hiking the Hall of Mosses Trail (Washington) or visiting some other part of Olympic National Park, you should definitely get travel insurance. This can protect you not only against medical and emergency repatriation but can also cover things like trip cancellation, loss and/ or theft of property, etc.
Do you have any tips for the Hall of Mosses hike or questions about this beautiful rainforest in Washington State? I’d love to hear about them. Join my private Facebook group National Parks Collectors and comment and let me know (you can also pick up extra planning tips, share your photos and stories with other national park lovers and more).
If you liked this post about the Hall of Mosses, Forks, WA, please share the love and Pin It to your Olympic National Park board!
James Ian is a national park, camping and hiking expert.
He has dedicated his life to travel, visiting more than 80 countries, all 7 continents and all of the main national parks in the United States. With over 35 years experience in the travel industry, James has worked on cruise ships, at resorts and hotels, and as a travel planner who’s helped hundreds of people plan successful trips to US national parks.
Based on his experience visiting our national parks multiple times, in-depth research and expertise as a travel planner, James has published detailed itineraries for most of the major national parks in the US. These itineraries, as well as in-depth park guides, comprehensive camping and hiking gear reviews and buying guides, and helpful packing lists and gift guides will help you have your own incredible trip to US national parks without stress and hassle.
As a national park expert, James has contributed to many publications, including Time Business News, Savoteur, Best Trip, and Wired.
Parks Collecting is a participant in the Amazon.com Services LLC Associates Program, an affiliate advertising program designed to provide a means for sites to earn advertising fees by advertising and linking to amazon.com. Amazon and the Amazon logo are trademarks of Amazon.com, Inc. or its affiliates.As an Amazon Associate I earn from qualifying purchases.
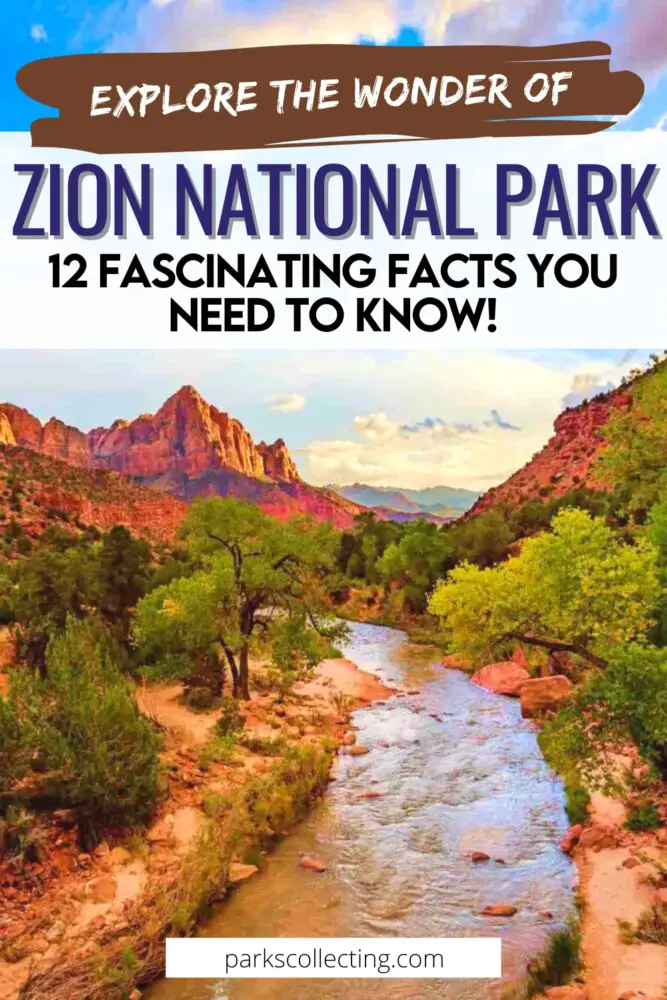
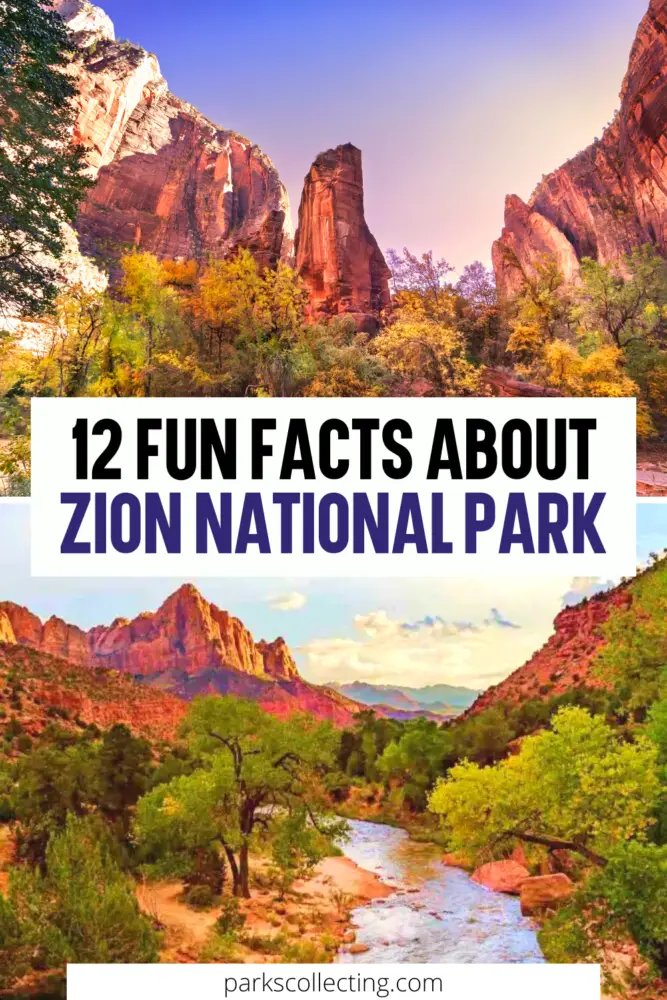
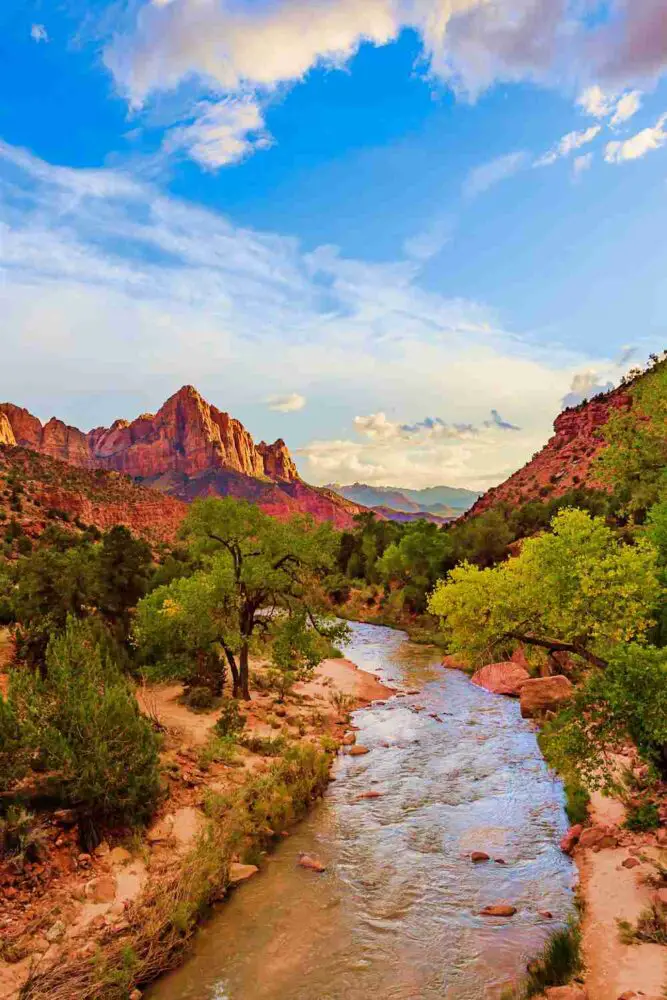
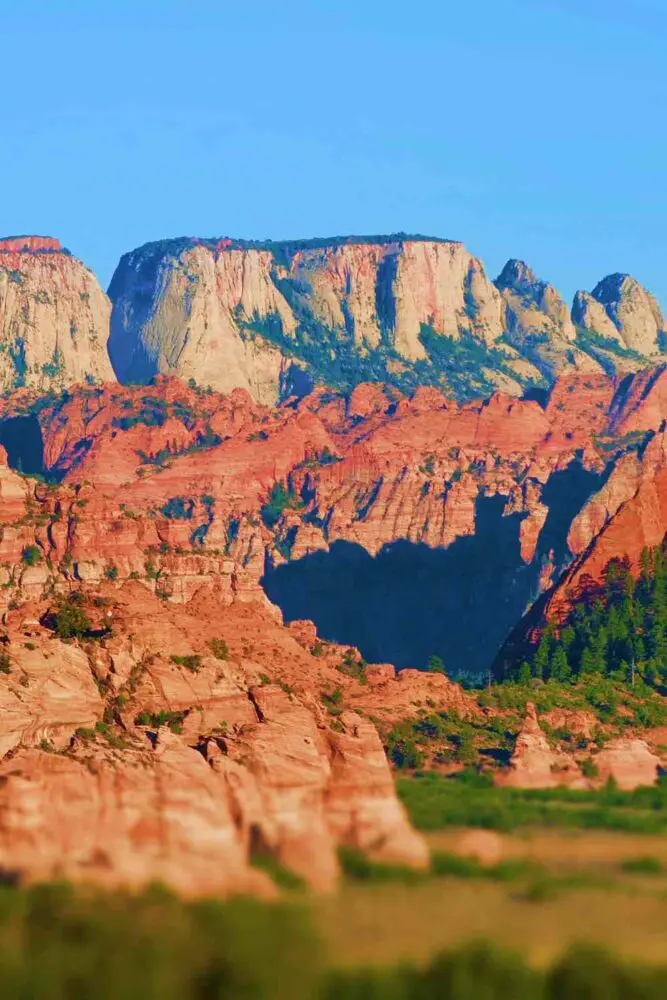
Zion National Park is an incredible place of red rock cliffs, slot canyons, iconic hikes, and much more. But it’s not just beautiful; it’s also fascinating!
Want to learn more about Zion? Let’s take a look at some interesting facts about Zion National Park.
No time right now to read these fun facts about Zion National Park? Pin It and save it for later:
Please note this post may contain affiliate links, which means we may receive a commission, at zero cost to you, if you make a purchase through a link. Please see our full Disclosure for more information. If you have any questions, please contact me.
If you are planning to visit Zion National Park in spring, summer, or fall, make your planning easy and stress free with a detailed itinerary. I have 1-, 2-, and 3-day itineraries for Zion National Parkthat include all the park highlights, give you choices based on your preferred activity level, and take all the stress out of planning your trip.
Number of Visitors each Year: 4,692,417 in 2022, making it the third most popular National Park
Annual Rainfall: The average annual rainfall in Zion National Park is 15.6 inches (1.3 inches/ month)
Highest Elevation: 8,726 feet (the summit of Horse Ranch Mountain)
Lowest Elevation: 4,000 feet
Date it Became a National Park: November 19, 1919
FREE DOWNLOAD Subscribe to regular updates with tips for planning, travel inspiration and trip ideas and get instant access to the free PDF 12 Fun Facts About Zion National Park
12 Fun Facts About Zion National Park
Here are 12 unique things about Zion National Park that you might not know:
1. Zion was Utah’s first National Park
Utah is home to the Mighty Five – five incredible national parks that include Bryce Canyon, Canyonlands, Arches, and Capitol Reef. However, Zion was the first!
The park started out as Mukuntuweap National Monument, which was created by President William Taft in 1909. It changed its name to Zion in 1918 and was then upgraded and became Zion National Park on November 19, 1919, when President Woodrow Wilson signed it into being.
The canyon was originally named “Mukuntuweap” by John Wesley Powell, who surveyed the area in 1872. He named it to honor the Southern Paiute people, who lived there. The name means “straight canyon” or “straight river” in the Paiute language, though the Southern Paiute actually called the canyon “Ioogoon” (“the arrow quiver”).
So, why was it changed to “Zion”? Well, although the park is now one of the most popular national parks in the country, that wasn’t always the case. When it was Mukuntuweap National Monument, very few people visited. The Park Service’s acting director, Horace Albright, felt ‘Mukuntuweap’ was “too difficult to pronounce and really tough to spell” and this deterred prospective visitors.
So, in order to try and attract more visitors, he campaigned for the name to be changed. He succeeded and when more land was added in 1918, the name was changed to Zion National Monument – more about that in fun fact #2.
It worked. In 1914 only 300 people visited Mukuntuweap. but in 1919, the newly designated Zion National Park had 1,814 visitors. Numbers have continued to rise and it’s now the third most popular park in the United States!
READ MORE: Opening Zion: A Scrapbook of the National Park’s First Official Touristsby J Clark and M Clark – a fascinating book based around two albums of photographs and newspaper clippings from1920 that document a trip made by six young women from the University of Utah into the newly formed Zion National Park.
2. Zion was named by an early Mormon settler
So, how was “Zion” chosen as the name for the National Park?
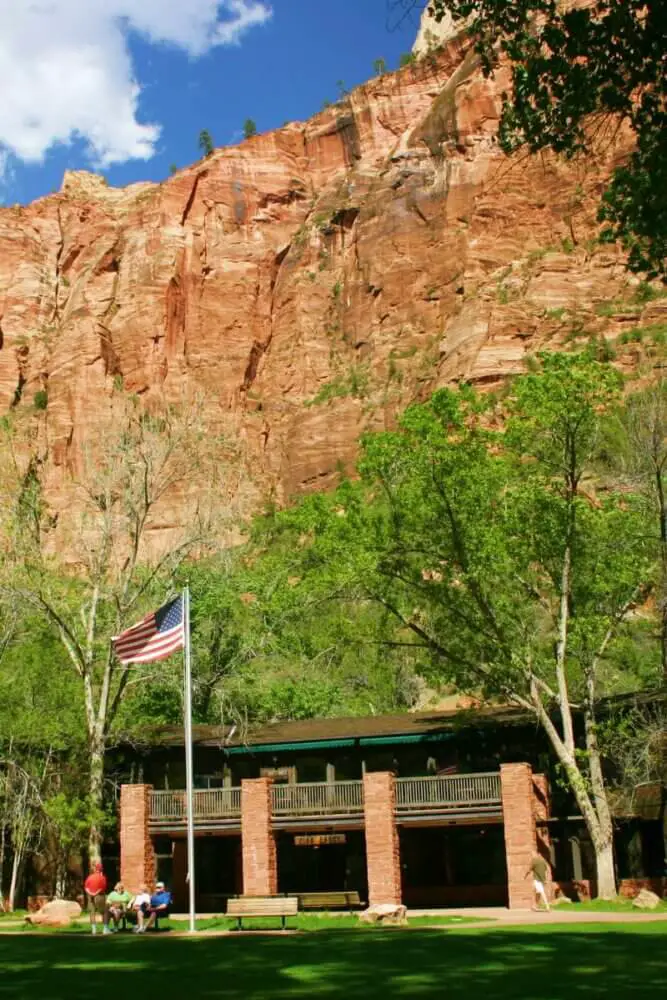
The word “Zion” is often used by Christians to describe a “holy place” or “kingdom of heaven.” This area, like much of Utah, was settled in the 1800’s by Mormon pioneers. One such man was Isaac Behunin who built a tobacco, corn and fruit farm in Zion Canyon in 1863 near today’s Zion Lodge.
As he sat in his yard and gazed at the towering canyon walls around him, he supposedly said, “Here we have natural temples; we can worship as we please. A man can worship God among these great cathedrals as well as he can in any man-made church; this is Zion.” Since Salt Lake City had first been envisioned as the “City of Zion”, he decided to call the canyon “Little Zion.”
He left the area and moved to Kirtland, Ohio soon after but the name stuck and continued to be used by locals. When they were searching for a name to replace “Mukuntuweap”, this local name seemed like a logical choice.
READ MORE: Zion National Park (Images of America)by Tiffany Taylor – an interesting book that focuses on the lives of Zion’s early pioneer settlers and chronicles in photos how the park has changed over the past century
3. There are four main sections in Zion National Park
Checkerboard Mesa
Most people only visit Zion Canyon, which is where the park’s most popular attractions are. However, there are three other sections to the park.
Kolob Canyons is much less visited. It’s about an hour from Zion Canyon and is accessed through a completely different entrance. It’s home to several great hiking trails, a campground and Kolob Arch (see below).
Kolob Terrace lies in the middle of the National Park and is reached by the Kolob Terrace Road. This scenic drive between Virgin and Lava Point has wonderful views and several trails.
The East Mesa lies along the top of the east rim and also contains several great hikes, as well as unique geographic features like Checkerboard Mesa.
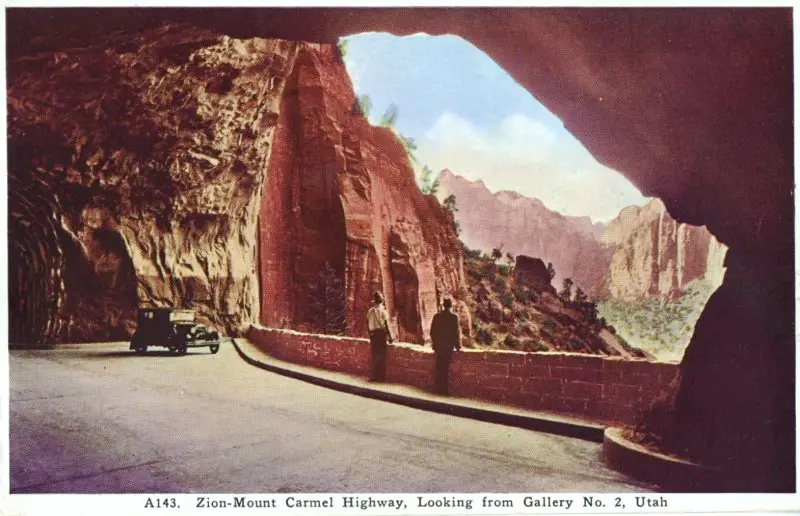
4. One of the greatest engineering feats of all time is found in Zion
Postcard featuring the Zion-Mt. Carmel Tunnel
You never used to be able to drive from the East Mesa into Zion Canyon. But you can now due to one of the world’s most incredible feats of engineering.
The Zion-Mt. Carmel Tunnel was built in 1930 to connect the East Mesa (and Bryce canyon and Grand Canyon) to the floor of Zion Canyon and what is now the main south entrance to the national park. The 25-mile stretch of road includes an incredible 1.1-mile tunnel that was built in the side of Pine Creek Canyon.
If you enter the national park from the east entrance, you will soon go into the tunnel. There are windows off to the right as you descend, that were intentionally built to provide glimpses of the dramatic scenery. After just over a mile, you’ll emerge and prepare to have your breath taken away as the panorama of Zion Canyon is laid out before you.
The construction of the tunnel is one of the most incredible Zion National Park facts. History books talk of how this was started in 1927 and finished in 1930 and at the time was the longest tunnel of its type. The Zion-Mount Carmel Highway, including the tunnel, cost $1,896,000, which was a huge sum of money at the time.
Construction was not easy. The galleries, or windows, that were specially built to provide views of Zion Canyon, ‘involved the construction of rock walls and arched-masonry culverts. Add in the seven switchbacks the tunnel goes through, bridges that needed to be built, and the difficulty of working with the soft sandstone and the risk of landslides, and you can start to appreciate just how incredible it is.
The tunnel wasn’t designed for the large vehicle, like RVs and trailers, that exist today. Consequently, larger vehicles have trouble navigating the narrow lanes and turns in the tunnel. If your vehicle is 11’4″ or taller or 7’10” or wider, you will need to get a special tunnel permit so that rangers can close the tunnel to two-way traffic and you can drive down the middle of the road.
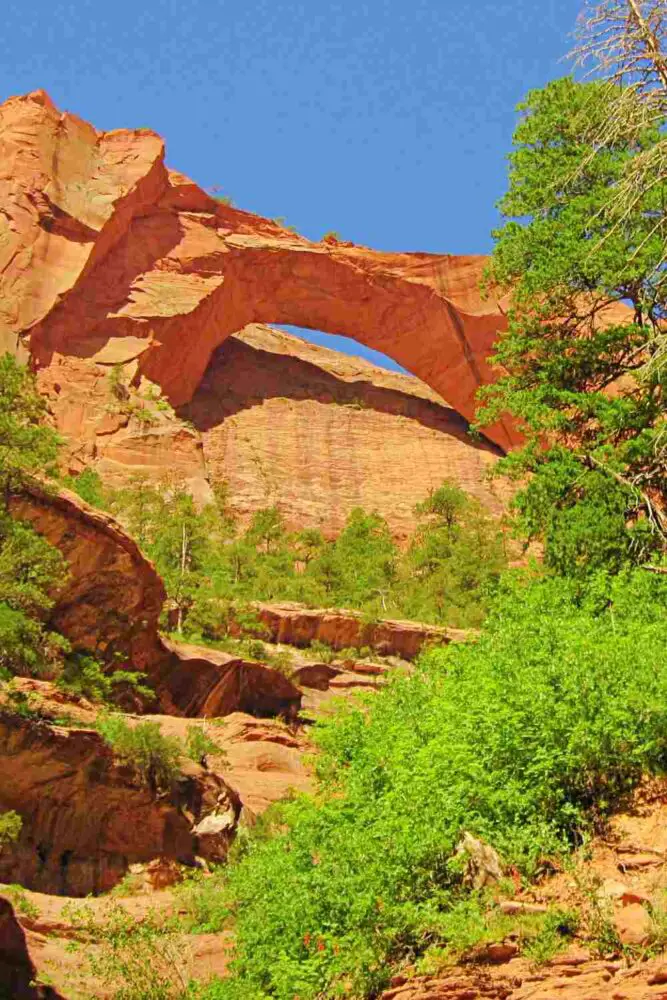
5. Zion contains the fourth largest freestanding arch in the world
Kolob Arch
Arches National Park is the U.S. national park most famous for natural arches, but it’s not the only park that has them. In fact, the fourth largest freestanding natural arch in the entire world is in Zion. The third longest is Landscape Arch in Arches National Park, and the two longest are in China.
The arch in question is Kolob Arch and it’s found in the Kolob Canyons District of the park. Kolob Arch is 287 feet long, which is just three feet shorter than Landscape Arch.
To see it, you’ll need to hike 14 miles roundtrip into the backcountry to a viewpoint. The arch itself is off limits.
READ MORE:Zion Canyon: A Storied Land by G Chesher – written by a park ranger who spent over two decades in the park, this goes over a lot of the history, ecology and geography of the park.
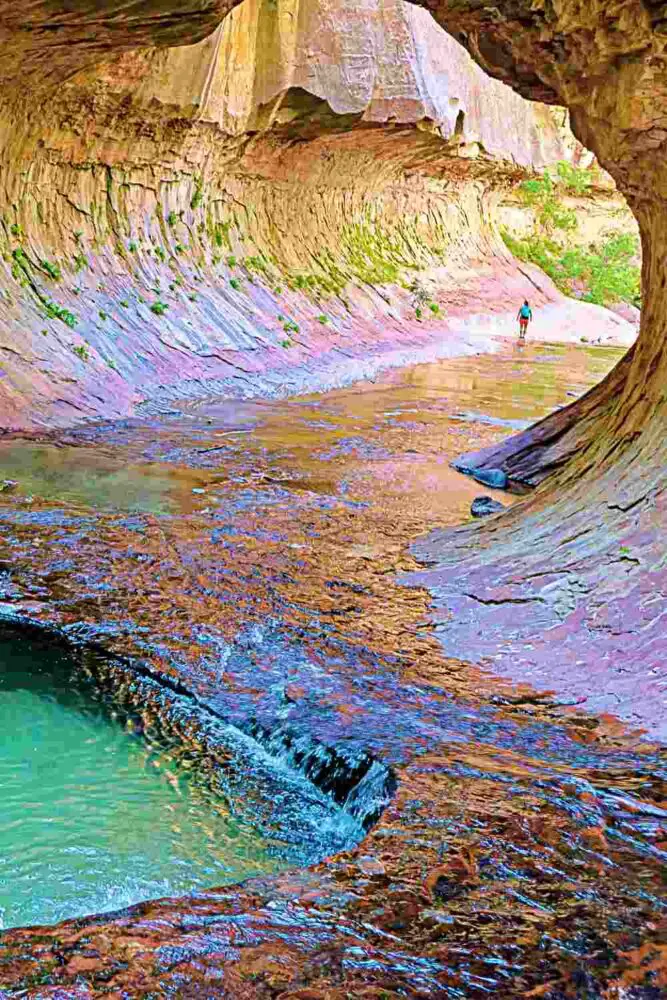
6. Zion National Park has a Subway and Wall Street
The Subway
One of the cool facts about Zion National Park is its connection to New York City – at least in the naming of a couple of famous places in the park. On the surface, this dramatic landscape and a megacity couldn’t be more different, but there are two features that were inspired by famous counterparts in NYC.
At its far end, Zion Canyon narrows into a slot canyon that is appropriately called The Narrows. You can hike this (see Fun Fact #9).
About 3 miles into this slot canyon, it becomes just a few yards wide. The cliffs on both sides tower hundreds of feet above. This stretch reminded people of the skyscrapers of Wall Street, which gave it its name.
Another part of Zion National Park reminded people of the subway tunnels in NYC. The left fork of North Creek slot canyon, or “The Subway” as most people call it, is a rounded, tunnel-shaped slot canyon in the backcountry of the national park.
This is an iconic hike that requires route finding (bottom-up approach) and some rappelling (top-down approach). To get there, you need a special wilderness permit.
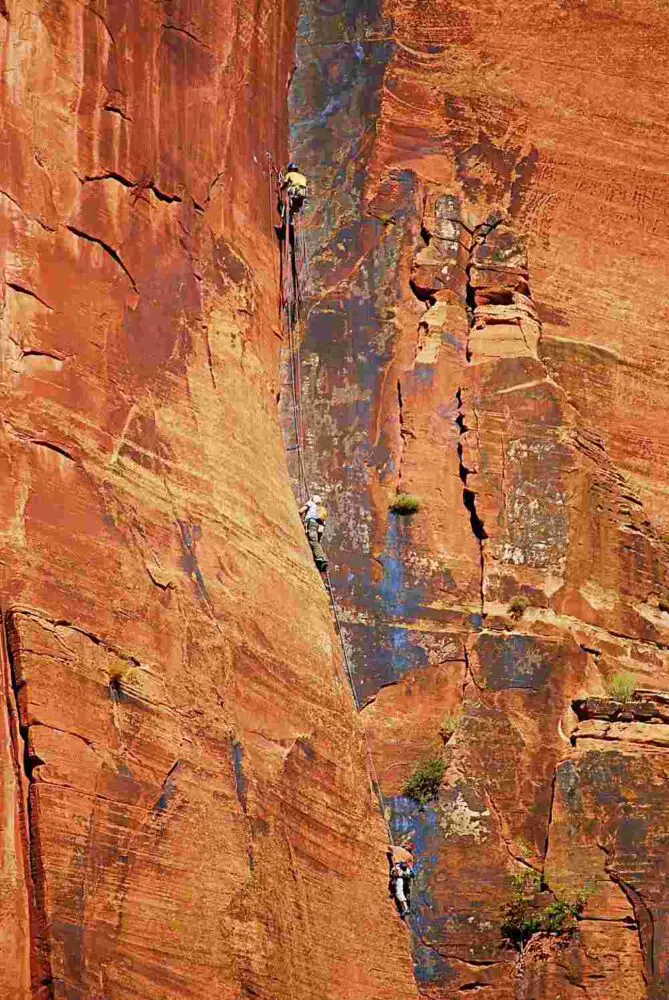
The cliffs and canyons in Zion are Navajo sandstone, which was originally formed from sand dunes that then built up in layers some 110 and 270 million years ago and was subsequently shaped by wind and water.
Today, Zion National Park features enormous 2000-feet sandstone cliffs, including iconic monoliths like the Court of the Patriarchs and Great White Throne, in addition to the canyon walls.
This makes it a great place for climbing! The peak season is March to May and September to November, when climbers come from all over to enjoy a variety of climbing routes. There are climbs for all levels – from beginners to experts.
There are also routes for different kinds of technical climbing, from sports climbing, where climbers use bolts embedded into the rocks, to more challenging traditional climbing with ropes and lots of hand holds.
If this sounds appealing, you’ll need a permit and all the right safety gear. If you’re new to climbing, there are several outfitters in Springdale that offer guided climbs.
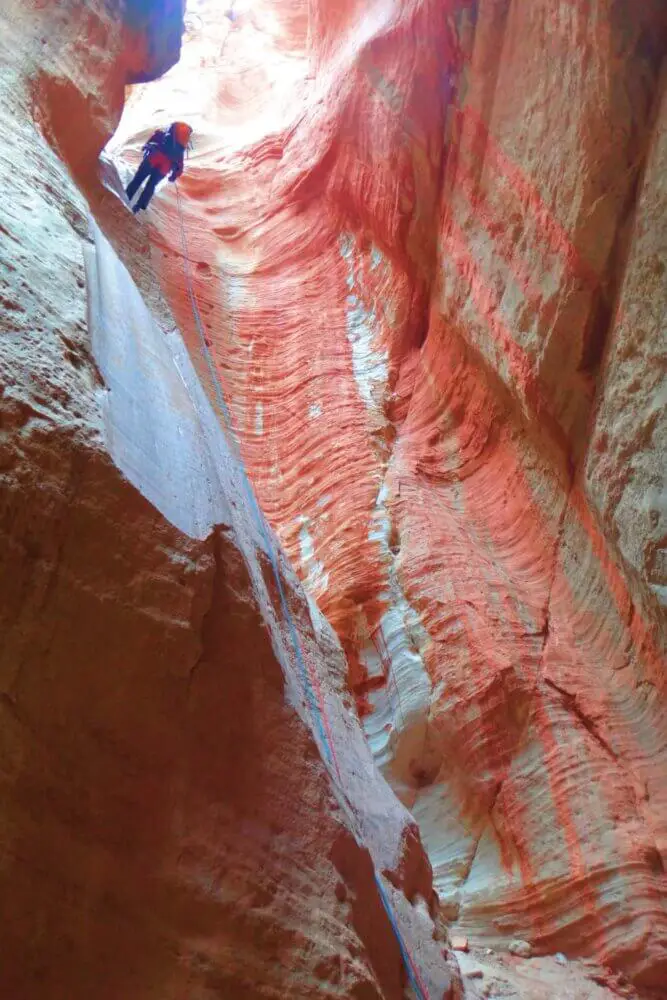
Rappelling into a slot canyon near Zion National Park
In addition to towering cliffs, Zion and the surrounded area is riddled with narrow slot canyons. These extremely narrow canyons are formed over thousands of years by water rushing through soft rock.
There are several places where these canyons descend in ‘steps’, with drops offs ranging from a few feet to a few hundred feet between each layer.
These are the perfect place for rappelling – jumping off the edge of each of these drop-offs down into the next layer of the slot canyon.
Zion Canyon narrows into a slot canyon at it far end, with the Virgin River flowing through it. The hike through the Narrows – most of which is done by wading upstream in the river, is one of the most iconic hikes in the country.
The hike can be done as a through hike (top-down), which is 16 miles and requires camping overnight. However, most people do it as an out-and-back day hike from the Temple of Sinawava (the last stop on the Zion shuttle) to Wall Street, which is 3 miles each way.
This is a unique experience I recommend everyone who is physically able to try. However, since most of the hike is actually in the river, the canyon is closed if the water level is too high or if there is a danger of flash flooding.
10. Zion has one of the most dramatic – and dangerous – hikes in the country
Angels Landing
The Narrows isn’t the only famous hike in Zion. Arguably even more famous – and dangerous – is the bone-chilling hike to Angels Landing.
The hike is 5 miles round trip, and gains 1,500 feet mostly by a series of 21 narrow switchbacks called Walter’s Wiggle. That’s the easy part, though!
It is the last half a mile that makes the trail so legendary. From Scouts Lookout at the top of Walter’s Wiggles to Angel’s Landing, the trail is only about 5 feet wide as it crosses a ridge with sheer drop offs hundreds of feet high on both sides. There is a chain to hold on to, but it’s still a thrilling hike that is definitely not good for those with a fear of hikes.
The rewards at the end are breathtaking views down the length of Zion Canyon.
It’s also not a hike to take lightly. This hike has been described as one of the most dangerous hikes in the world; more than 15 people have fallen to their deaths while attempting this hike!
However, if you are sensible and take basic precautions, it’s perfectly safe. Thousands of people hike it every year without incident.
In fact, the hike became so popular that the National Park Service has implemented a lottery system to limit the number of hikers on the trail at any given time.
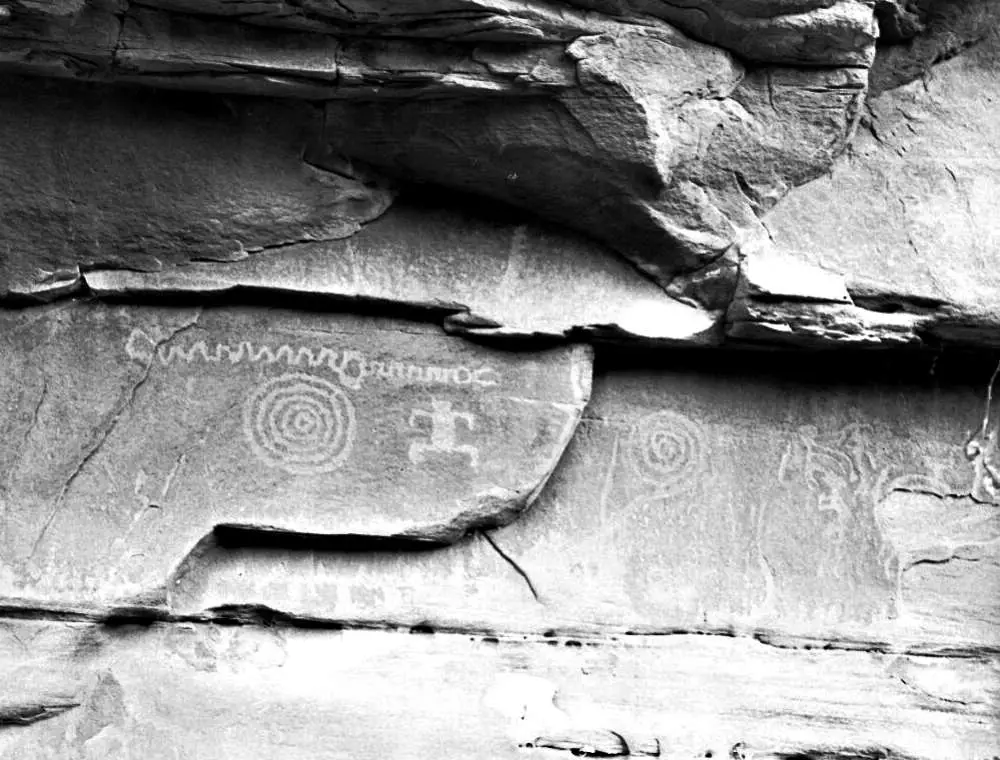
Before Zion became a national park, it was settled by Mormon pioneers in the 1800s. People lived here long before that, however. In fact, the area has been inhabited for more than 10,00 years!
Various small sites in and around the park exist. From petroglyphs (rock carvings) to granaries, the area is filled with evidence of a rich history.
A great way to learn more about this is to visit the Human History Museum, near the main south entrance to the park.
12. Zion National Park is part of an active volcano field
Kolob Terrace
Zion is famous for its canyons, carved by wind and water over thousands of years. However, it is also part of the Santa Clara volcano field. Eruptions in this field typically happen every few 10,000 years. The last was 32,000 years ago (in Snow Canyon State Park), so its due for another – at least in the next 10,000 years or so!
The first major eruption in the area was 1.1 million years ago on the Kolob Plateau near Lava Point in what is now the Kolob Terrace section of the park. This lava flowed all the way down to the Virgin River, possibly damming it and creating a temporary lake.
310,000-220,000 years ago, several eruptions occurred in the Grapevine Wash area. The Kolob Terrace road winds past these lava flows today.
Then 120,000 years ago, Crater Hill erupted just below the West Temple between Rockville and Virgin and the lave again dammed the Virgin River creating a temporary lake.
So, who knows. Maybe the Virgin River will become a lake yet again some time.
Now that you’ve learned all about Zion National Park, are you feeling inspired to visit Zion National Park? Start planning your trip now with these guides:
Do you have any other Zion fun facts to share? I’d love to hear them. Join my private Facebook group National Parks Collectors and comment and let me know (you can also pick up extra planning tips, share your photos and stories with other national park lovers and more).
FREE DOWNLOAD Subscribe to regular updates with tips for planning, travel inspiration and trip ideas and get instant access to the free PDF 12 Fun Facts About Zion National Park
If you liked this post about fun facts: Zion National Park, please share the love and Pin It to your Zion National Park board!
James Ian is a national park, camping and hiking expert.
He has dedicated his life to travel, visiting more than 80 countries, all 7 continents and all of the main national parks in the United States. With over 35 years experience in the travel industry, James has worked on cruise ships, at resorts and hotels, and as a travel planner who’s helped hundreds of people plan successful trips to US national parks.
Based on his experience visiting our national parks multiple times, in-depth research and expertise as a travel planner, James has published detailed itineraries for most of the major national parks in the US. These itineraries, as well as in-depth park guides, comprehensive camping and hiking gear reviews and buying guides, and helpful packing lists and gift guides will help you have your own incredible trip to US national parks without stress and hassle.
As a national park expert, James has contributed to many publications, including Time Business News, Savoteur, Best Trip, and Wired.
Parks Collecting is a participant in the Amazon.com Services LLC Associates Program, an affiliate advertising program designed to provide a means for sites to earn advertising fees by advertising and linking to amazon.com. Amazon and the Amazon logo are trademarks of Amazon.com, Inc. or its affiliates.As an Amazon Associate I earn from qualifying purchases.
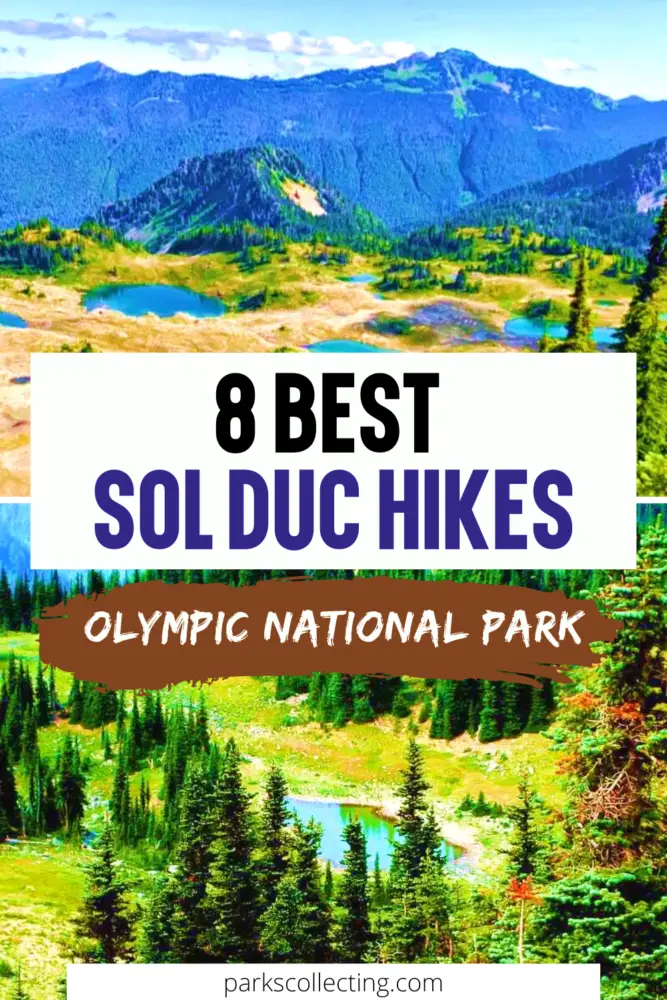
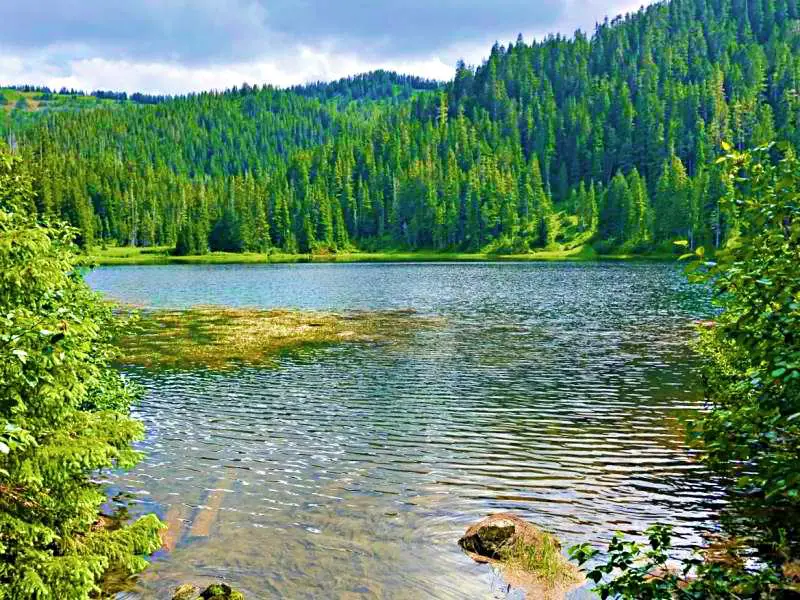
Waterfalls, lakes, old growth forest, jumping salmon … the Sol Duc region in Olympic National Park has them all!
The best way to see these and much more is to get out on the trails. But what trails are there, what do you see on each of them, and which ones should you choose?
To make it easy, here are my picks for the eight best hikes near Sol Duc,Olympic National Park.
No time right now to discover the best Sol Duc hikes? Pin It and save it for later:
Please note this post may contain affiliate links, which means we may receive a commission, at zero cost to you, if you make a purchase through a link. Please see our full Disclosure for more information. If you have any questions, please contact me.
FREE DOWNLOAD Subscribe to regular updates with tips for planning, travel inspiration and trip ideas and get instant access to the free PDF of this guide to the Best Sol Duc Hikes
Table of Contents
Before we look at each of the top Sol Duc hiking trails, here are a few practical things to know:
What to Pack for these Sol Duc Valley Hikes
There is a lot of variety in these hikes. For the short, easy ones, you won’t need anything special. However, for the longer hikes, you’ll need some gear to ensure you’re comfortable and adequately prepared.
Good hiking boots or shoes. Some of these trails are rocky, uneven and/ or have roots across them. You’ll be much more comfortable if you have good quality hiking shoes or boots. If you need to get some, take a look at my Guide to Buying the Best Hiking Shoes/ Boots to help you know what to look for and get some recommendations.
Trekking poles. Some of the longer hikes have significant elevation change and using hiking poles will really help – especially your knees. I have these Foxelli trekking poles – they are really lightweight, adjustable, and have shock absorbent tips and grippy cork handles. Get them here.
A camera. I lovethe GoPro HERO 12. It is designed for travel. It’s water resistant and durable and takes photos, video and even does streaming (when there’s service). Check current prices on the GoPro HERO 12 here
Water. I recommend always taking some water with you when you hike, even for shorter hikes. For the longer hikes, it’s essential – take more than you think you’ll need. I love this hydroflask. It’s easy to carry, keeps temperatures well, and comes in multiple colors.
If you’re hiking in winter or spring, especially on the longer trails that head up into the mountains, you will need a good pair of microspikes to give you traction on snow and ice. I’ve written a whole buying guide to the best microspikes for hiking, which I recommend reading if this is your first time to buy some. Or you can pick up the ones that I use – these Kahtoola Microspikes. They are very easy to put on and are really good quality.
If you’re hiking in summer, you will appreciate having bug spray, as the mosquitoes can be an annoying distraction otherwise. You can get some DEET-free bug spray here if you need some.
On the longer trails, having a handheld GPS is a good idea for peace of mind and to follow your progress and show you where you’re going. Read my Guide to the Best Handheld GPS for Hiking for tips on what to buy and recommendations if you’re looking to get one. My top pick is this Garmin model.
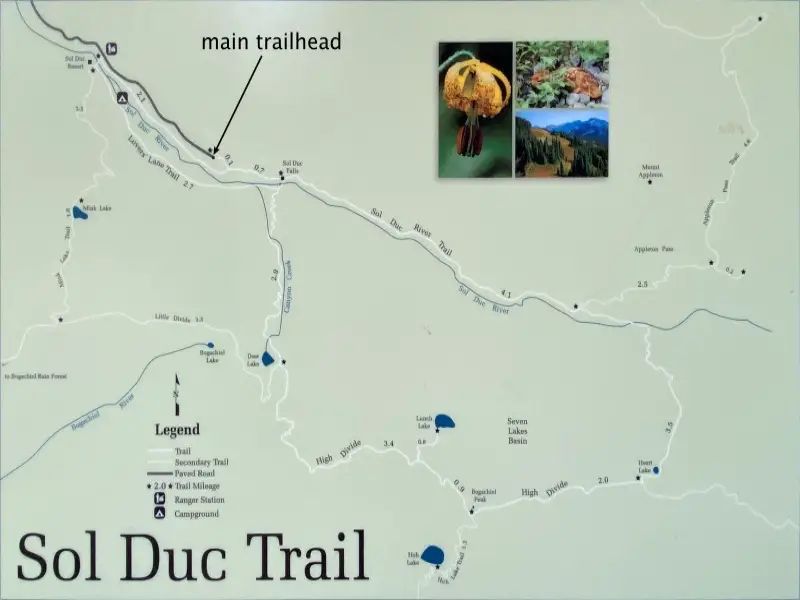
Tips for Hiking Sol Duc Hot Springs and Nearby
Most of these hikes start from the main Sol Duc Trailhead, though some start from Sol Duc Hot Springs, which is a little further down the road, and a couple are found along the road from Highway 101 to the main trailhead. There is a picnic area at the parking area at the main trailhead. This is a surprisingly nice place to have lunch.
You can visit Sol Duc Hot Springs as a day visitor – and soaking in hot mineral water is a great way to unwind after a hike or two.
Get there early to avoid the crowds and get a parking spot, especially in summer, when the park gets extremely busy.
You’ll need to have your own vehicle If you want to do most of these hikes. But there are a couple of tours from Seattle that give you the opportunity to do one or two of them. And having an expert guide can add extra layers to your experience, as they can share information about the area, so you can appreciate it even more.
Private Full-Day Hiking Tour in Olympic National Park
Guided Group Tour to Sol Duc Falls, Hurricane Ridge and Lake Crescent
This tour also goes to these three parts of the national park. You won’t have the same flexibility you would on a private tour, but the Sol Duc hike is to Sol Duc Falls, which is the most popular hike in the area. There are a maximum 14 people.
If doing this 4-day, 3-night hike by yourself seems intimidating, then this guided hike is a great choice. An expert guide will escort you, camping equipment is included, and there are a maximum of five people in the group. It’s a strenuous hike and you’ll need to carry your gear, so you need to be fit, but this is an epic hike into an area of Olympic National park that few people visit.
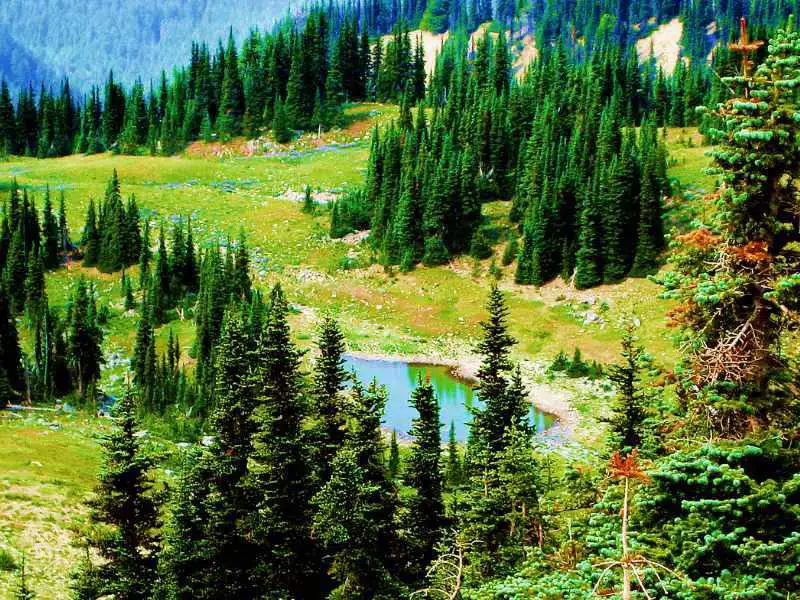
Ranging from a super short and easy stroll to an all-day (or overnight) trek up into the mountains, there are sensational hikes in the Sol Duc area for everyone.
1. Sol Duc Falls Trail, Olympic National Park
Length: 1.6 miles return out-and-back
Difficulty: Easy
Elevation Gain: 200 feet
Trailhead: Sol Duc Trailhead, at end of Sol Duc Hot Springs Road
Description:
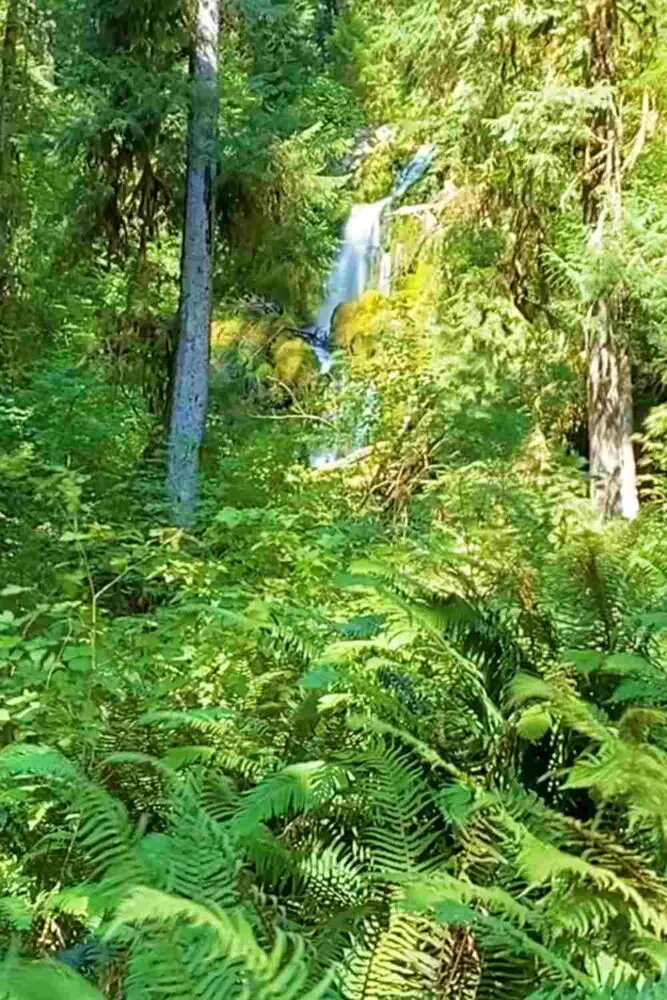
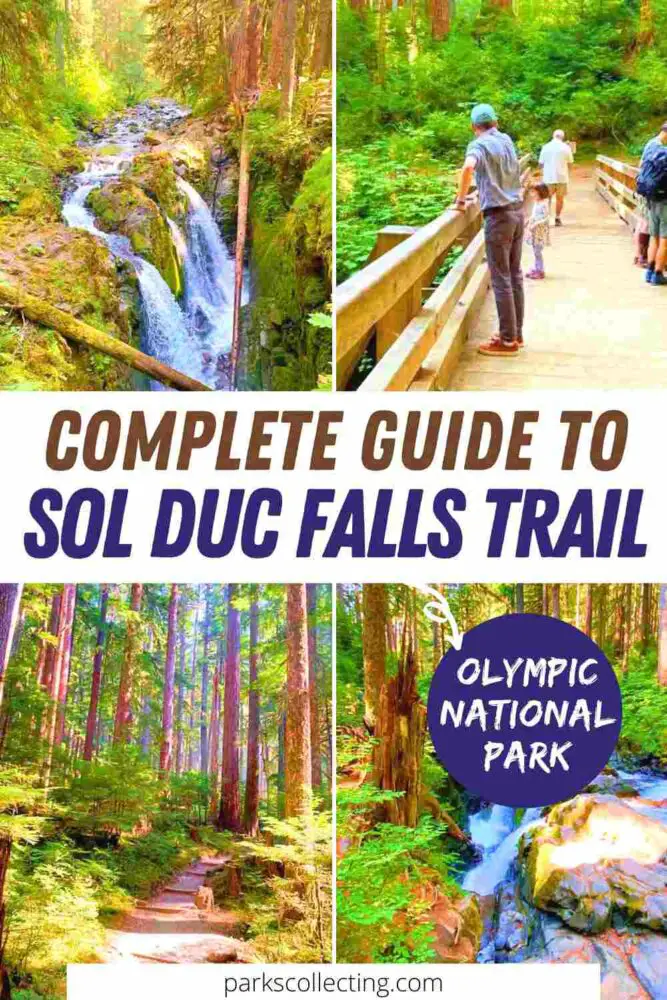
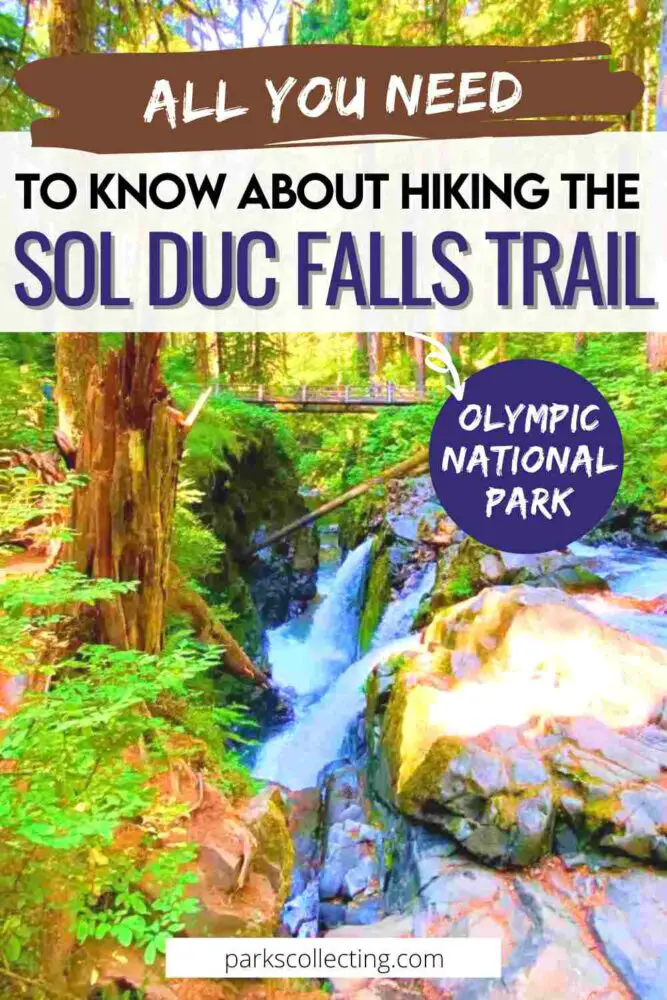
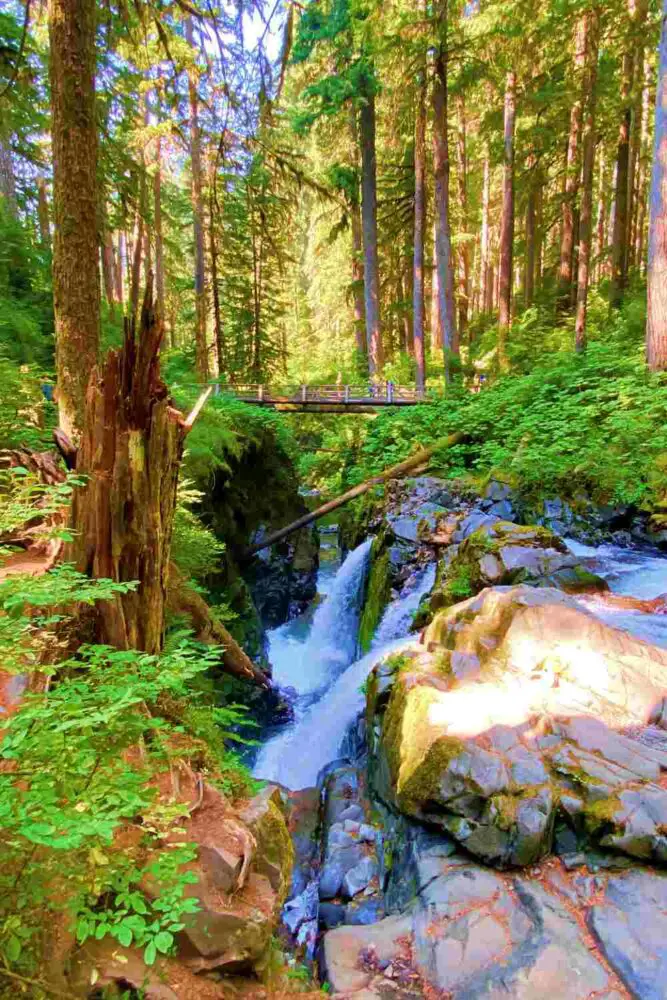
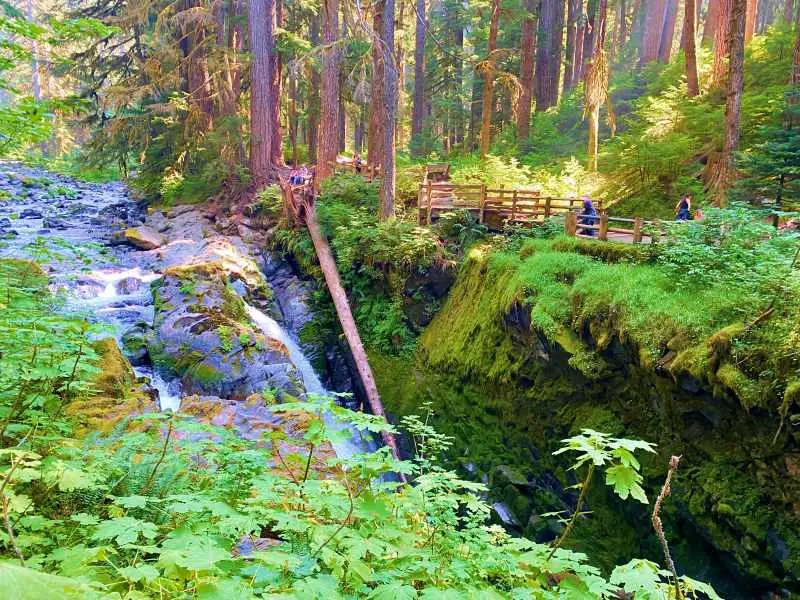
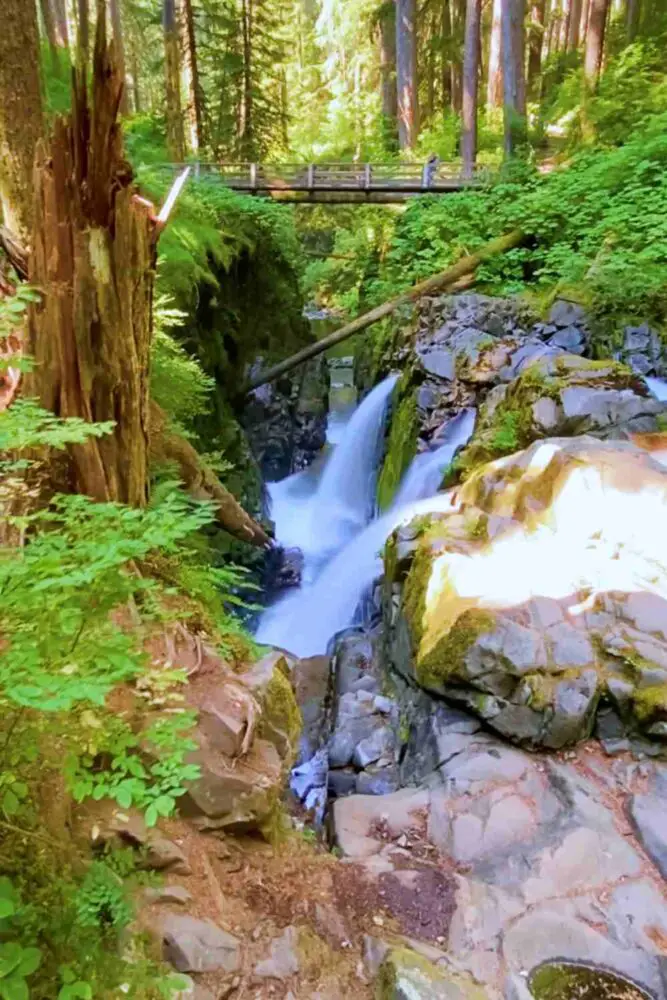
This is the most popular Sol Duc trail. Hiking Sol Duc Falls is seldom a solitary experience, but there’s a reason it’s so popular. Sol Duc Falls are not the biggest falls you’ll ever see but they may also just be the most beautiful.
The Sol Duc River shifts just as it drops into a ravine, creating a 3- or 4-section waterfall that lies parallel to the main direction of the river, rather than across it like normal falls. Add in the narrow ravine at the bottom and the surrounding lush forest and it’s a picture-perfect place.
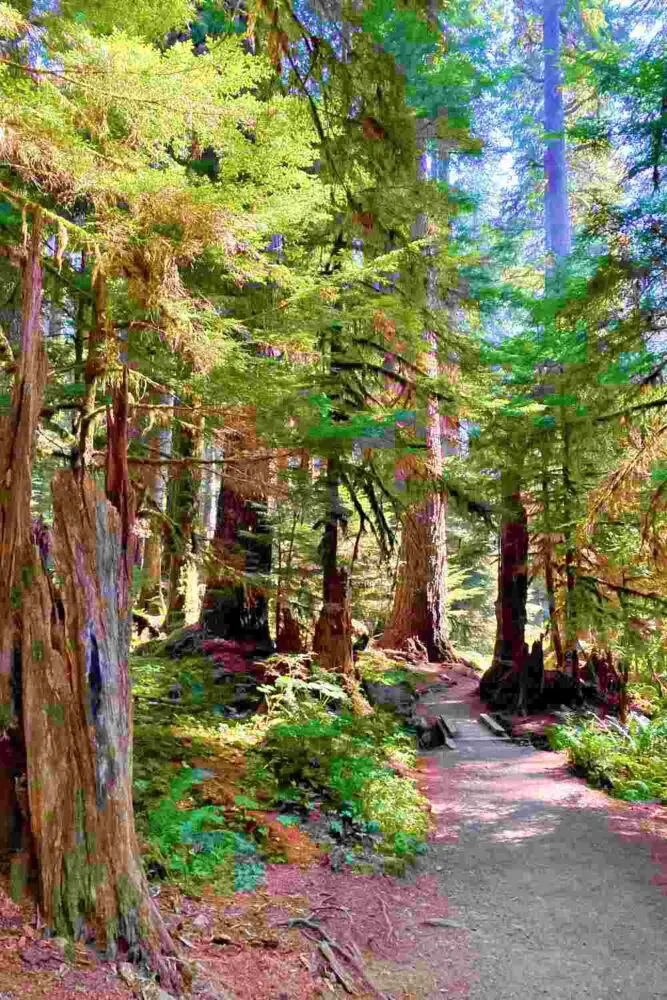
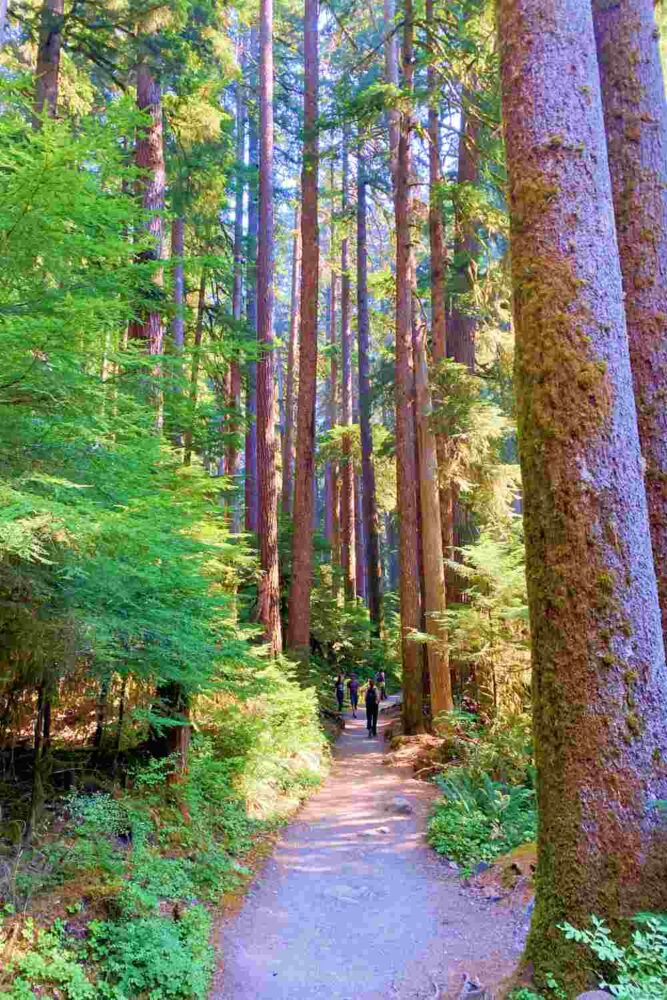
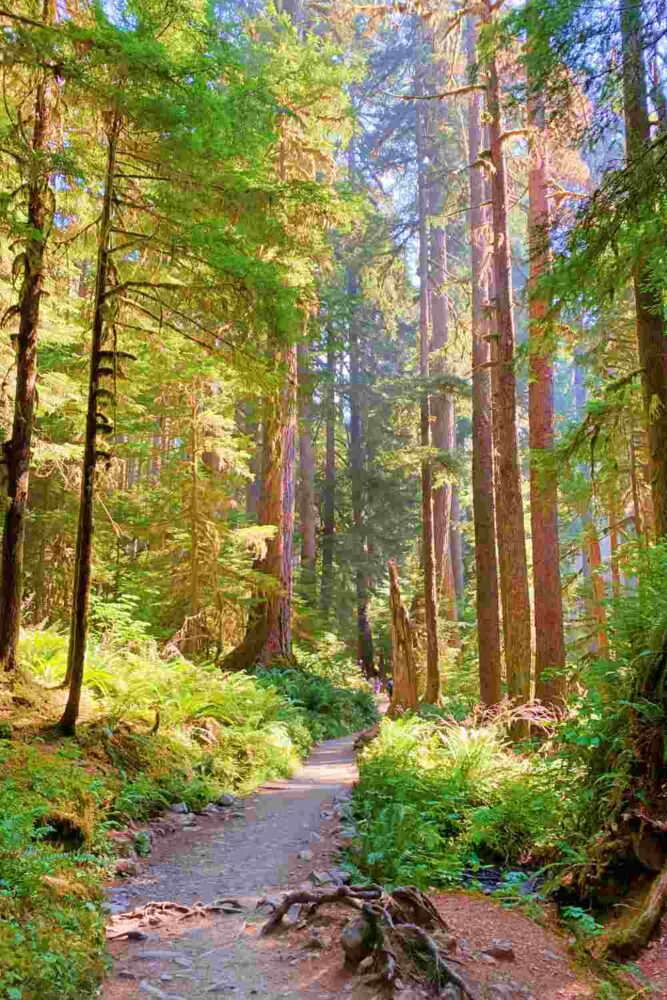
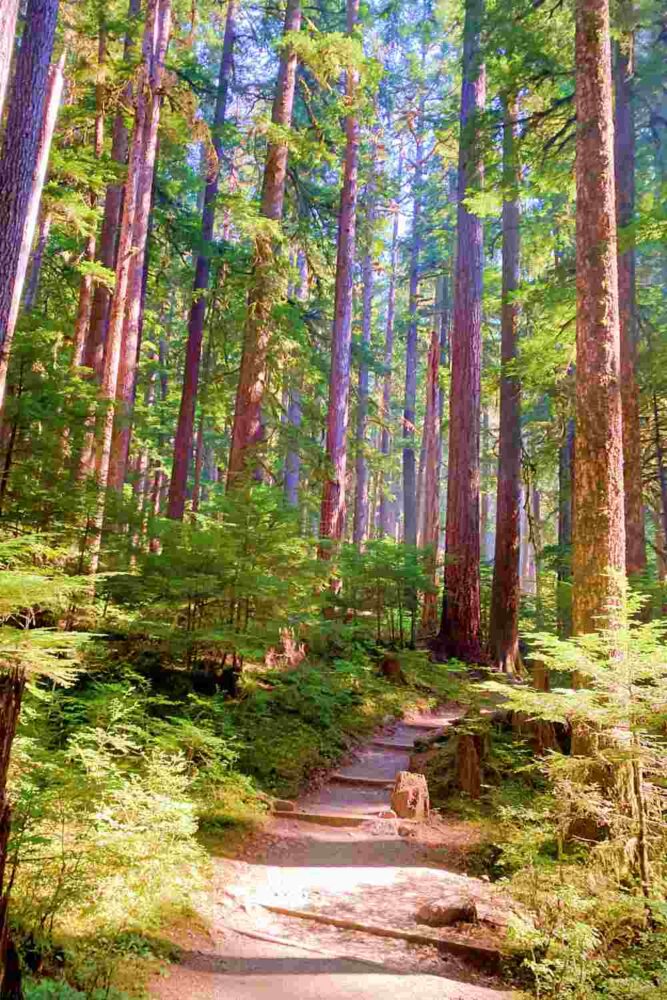
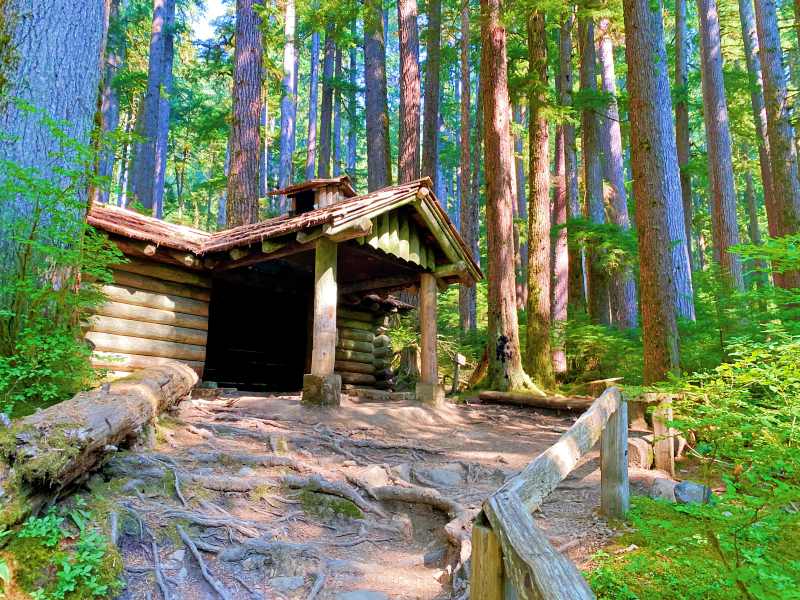
The hike to the falls takes about half an hour on a well-trodden, easy-to-follow trail through beautiful old growth forest, across several tiny streams, past huge ferns, and under towering trees. Near the falls is Canyon Creek Shelter, a rustic historic wooden shelter built in 1939 by the Civilian Conservation Corp (CCC).
Get there early to avoid the crowds and get a parking spot, especially in summer, when the park gets extremely busy.
There is a reasonably-sized parking lot at the trailhead. However, if it’s full and you’re up for a longer hike, you can combine this with the Lover’s Lane Trail by starting at the Sol Duc Hot Springs back down the road or start at the Sol Duc Campground and following a trail from there that connects just after the start of the main Sol Duc Trail. This creates a 6.0-mile loop trail that goes through the campground and down near the river.
If you’re a serious photographer, you’ll want special filters, lenses and a tripod to get a long exposure, which creates that soft flowing look. If you have an iphone, you can create the same look more easily. Take the photo with “live” on, then when you look at the photo, click on the small down arrow next to “live” in the top left corner and choose “long exposure” from the drop-down menu.
The best light for photos of the falls is early morning and late afternoon.
Trailhead: On the side of the Sol Duc Hot Springs Road, about 9 miles from the entrance station. There is a sign and small parking lot/ pullout on the right side of the road.
Description:
This easy Sol Duc hike is a loop through a grove of ancient trees, many more than 750 years old! The undergrowth is covered in moss and the trail crosses several gullies filled with enormous ferns.
This is a great place to see nurse logs, fallen logs with a row of seedlings growing on them; snags, standing trunks of fallen trees that are homes to birds and small forest creatures; and some of the hundreds of varieties of moss that grow in Olympic National Park. You can also see glimpses of the Sol Duc River from the top of a canyon at the edge of the grove.
There are few better places to appreciate the grandeur of nature!
Insider Tips:
If you are driving into Sol Duc Valley from Highway 101, there is a sign. The parking is on your right. However, if you are driving from Sol Duc valley towards Highway 101, there is no sign and it is easy to miss. So, I recommend doing this hike on your way in.
There are two trailheads and two access paths to the main loop. When you come to the second sign that says “Loop”, this is NOT the path you entered in. It can be confusing if you don’t know this.
If the first parking lot you come to is full, drive a little further along the road and you’ll come to another pullout with some additional parking. There is a trail here that also connects to the loop, so you don’t need to walk back to the other parking lot.
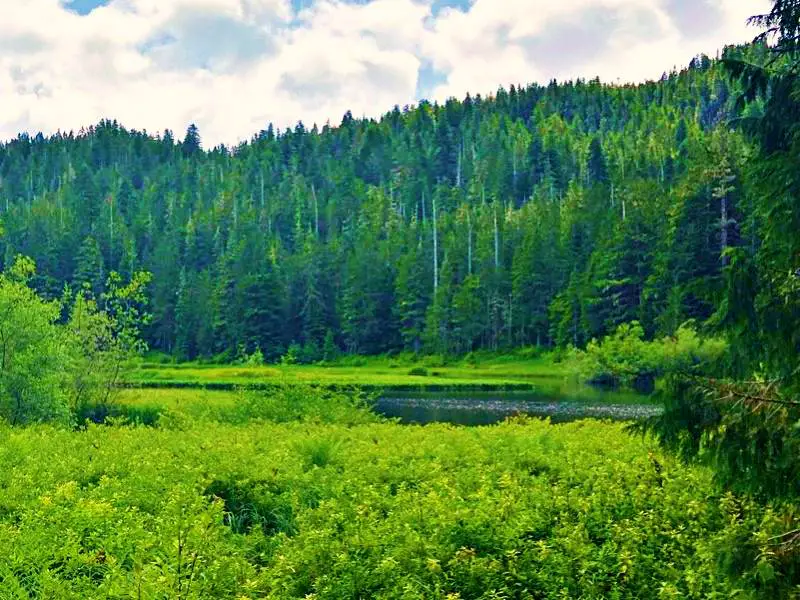
Highlights: Old growth forest; view of Sol Duc River in small canyon
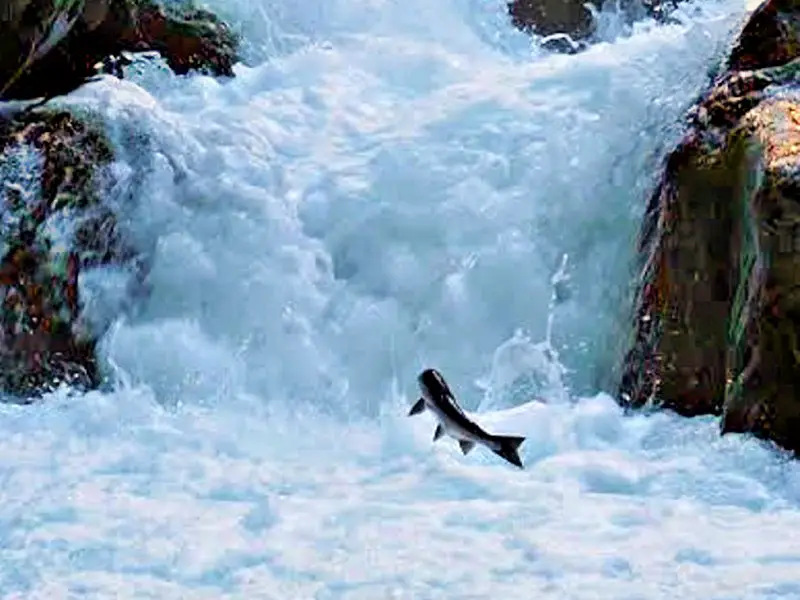
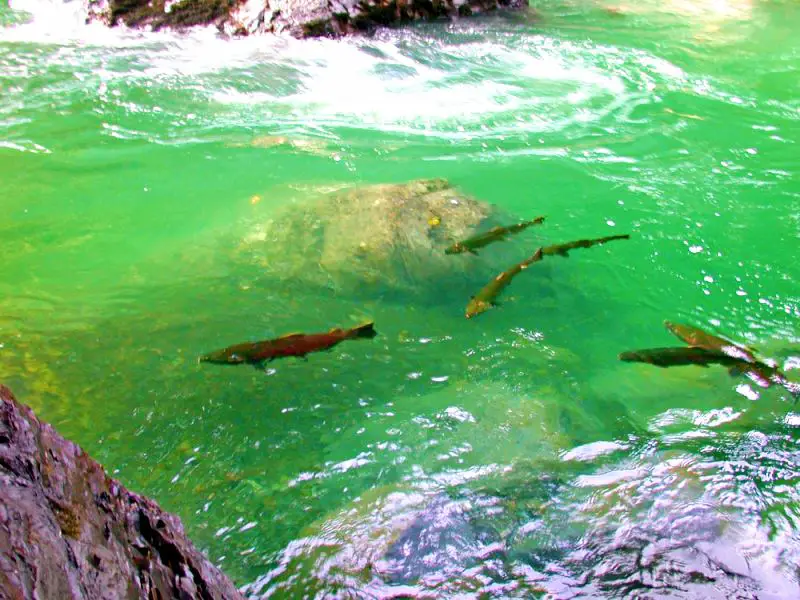
At Salmon Cascades, you can experience a different, but no less incredible, slice of nature. Salmon spawn upriver, then swim to the Pacific Ocean where they spend most of their lives. After a couple of years, they find their way back to the exactly the same place they hatched in order to lay or fertilize their own eggs.
In order to do this, they need to jump up an 11-foot cascading waterfall! The multi-layered falls are beautiful at any time of year, but in spring and fall when the salmon or trout leap up the falls, they are especially amazing.
The trail itself is very short and ends at a viewing platform. You can also walk below the falls where you can often see schools of salmon gathering energy for their leaps of strength.
Insider Tips:
The falls are beautiful all the time, but to have the best chances of seeing the fish jumping, spring and fall are best. Chinook and coho salmon leap up the cascades in the fall (September – early November) and cutthroat trout and steelhead leap up the cascades in spring (March-May).
Take video. It’s very difficult to snap a phot exactly when a fish is mid-air. It’s much easier to take videos so you can catch them in action.
After enjoying the falls, continue along the trail at the rustic shelter rather than turning back. The trail ascends gradually as is passes through an ancient conifer forest. At eye level are ferns, huckleberry bushes and saplings.
Keep an eye out for bears, which are often seen feeding on the bushes here.
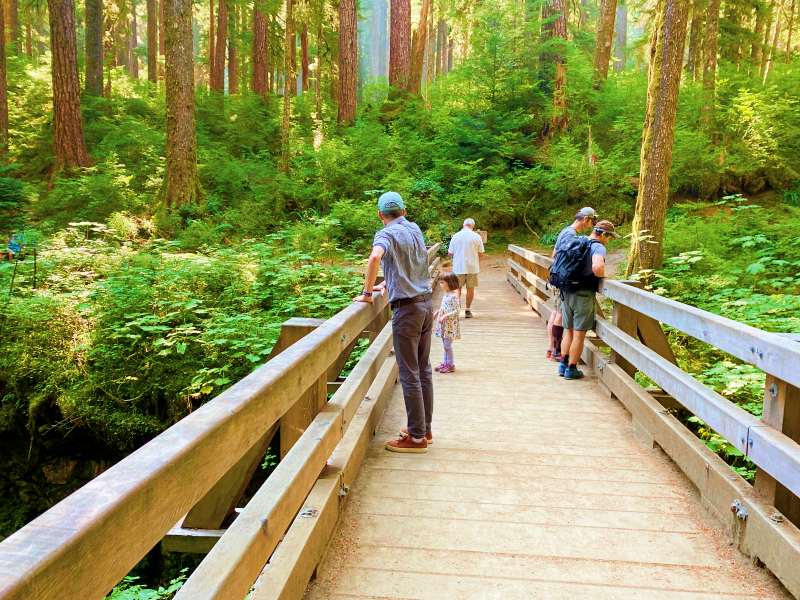
The trail has some elevation change as it follows the river climbing through the valley. There is a lovely twin waterfall and around the five-mile mark, a short way after the junction with the Appleton Pass Trail, you’ll cross the Sol Duc River on a foot log bridge. This is a popular turning back point, but you can continue on deeper into the Olympic Mountains.
The trail ascends more steeply as it moves up to the ridge separating the Sol Duc and Hoh River valleys. It crosses Bridge Creek as around the seven-mile park, reaches Sol Duc Park campground.
A mile further along is the delightful Heart Lake. If you’ve made is this far, you might consider continuing along and finishing the full loop along the High Divide Trail!
Highlights: River; waterfalls; old growth forest
5. Deer Lake Trail, Olympic National Park
Length: 8 miles round trip, out-and-back
Difficulty: Easy, Moderate – Difficult
Elevation Gain: 1,650 feet
Trailhead: Sol Duc Trailhead at end of Sol Duc Hot Springs Road
Description:
The trail starts with the hike to Sol Duc Falls. At the falls, rather than returning back, follow the signs for Deer Lake.
The trail is steadily uphill, running parallel to Canyon Creek. There are several small waterfalls along the way to enjoy.
There are actually two lakes – the bigger Deer Lake and another much smaller one nearby. The lakes are surrounded by woods and are a beautiful spot to relax and enjoy the views. There’s a primitive campsite there, and, of course, you may see deer in the area.
You can either return the way you came or for a truly epic hike, continue up the High Divide Trail and loop back around the Sol Duc River Trail.
Insider Tips:
The lake can be buggy in summer, so if you’re hiking at that time of year, don’t forget the bug spray. You can get some DEET-free bug spray here if you need some.
The hike is uphill the entire way. I recommend using trekking poles, as they can really make life easier both going up and coming down. I have these Foxelli trekking poles – they are really lightweight, adjustable, and have shock absorbent tips, and grippy cork handles. Get them here.
The trail is rocky pretty much the whole way, so you will definitely want to have a very good pair of hiking shoes or boots, with adequate protection for the soles of your feet. If you need to get some, take a look at my Guide to Buying the Best Hiking Shoes/ Boots to help you know what to look for and get some recommendations.
If you’re hiking in spring or even into early summer, the trail is often covered in snow, so you will want microspikes. Otherwise, hiking on snow can be hairy/ scary and dangerous. I use these Kahtoola Microspikes. They are very easy to put on and are really good quality.
There is a vault toilet at the lake.
Highlights: Sol Duc Falls; lovely lake
6. Lovers Lane Trail, Olympic National Park
Length: 5.8 miles loop
Difficulty: Moderate
Elevation Gain: 480 feet
Trailhead: Sol Duc Trailhead at end of Sol Duc Hot Springs Road OR Sol Duc Hot Springs or Sol Duc Campground Loop B
Description:
If you’re staying or parking at the Hot Springs Resort, and are looking for hikes near Sol Duc Hot Springs, this loop is a great way to see Sol Duc Falls.
From the hot springs, the trail follows the Sol Duc River upstream. After about a mile, the trail moves away the river and heads uphill deeper into the forest. Ancient, moss-covered Douglas-fir, Sitka spruce and western hemlock trees tower above and gullies of oversized ferns are all around you.
After viewing the Sol Duc Falls, follow the main Sol Duc Trail back towards the main trailhead, branching off before the trailhead to loop back through Loop B of the Sol Duc Campground, with the river nearby.
End this Sol Duc natural hot springs hike with a soak in the warm waters!
Highlights: Waterfall; river; old growth forest
7. Mink Lake Trail, Olympic National Park
Length: 5.2 miles round trip
Difficulty: Moderate
Elevation Gain: 1,450 feet
Trailhead: The northwest end of the Sol Duc Hot Springs Resort parking area.
Description:
This is the other main Sol Duc Hot Springs trail. Rather than going left on the Lover’s Lane Trail, head right. After about half a mile, you’ll enter old growth forest and immediately notice the difference as the trees shoot up and you can start to feel the age and grandeur of the trees around you.
The trail climbs steadily, the Douglas-firs giving way to western hemlocks, and gullies of lush ferns giving way to subalpine meadows where beautiful wildflowers burst into bloom in early summer.
Mink Lake is not huge, but is surrounded by hemlock and silver fir trees and grassy marshes. Look for orchids, beargrass, and violets around the lake, in season.
You can return the way you came or, for a much longer Sol Duc Hot Springs hike, continue to the Little Divide Trail to Deer Lake, then follow the Deer Lake Trail back to Sol Duc Falls and loop back along the Lover’s Lane Trail to the trailhead.
Insider Tips:
The trail can be covered in snow through June. If you’re hiking that early in the season, wear microspikes to be safe on the snow/ ice. I use these Kahtoola Microspikes. They are very easy to put on and are really good quality.
Mosquitoes love a good lake as much as people do – wear plenty of bug spray in summer. You can get some DEET-free bug spray here if you need some.
Highlights: Lake; old growth forest
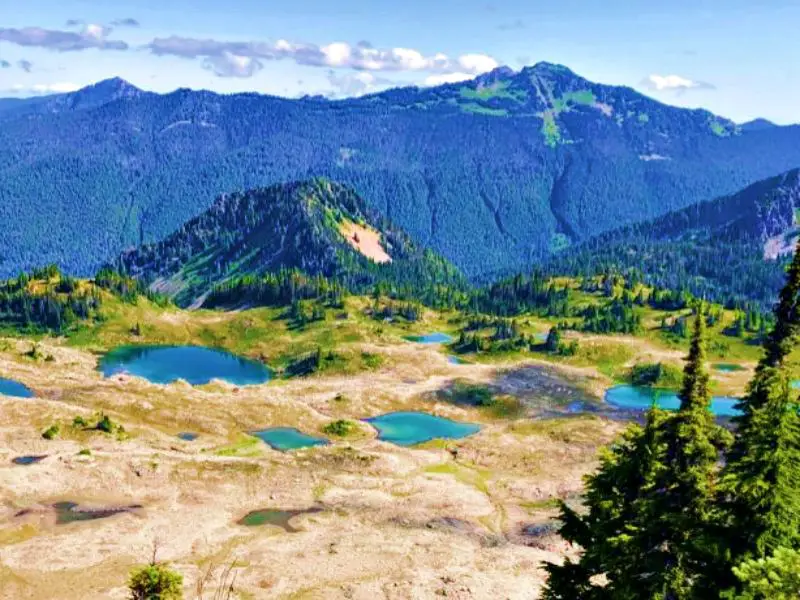
8. High Divide – Seven Lakes Basins – Heart Lake – Sol Duc River Loop, Olympic National Park
Length: 19 miles loop (6-7 hours)
Difficulty: Challenging
Elevation Gain: 4,000 feet
Trailhead: Sol Duc Trailhead at end of Sol Duc Hot Springs Road
Description:
If you are fit and like to hike, this is the granddaddy of Sol Duc trail hikes. It can be done in one day if you set out early, but can also be done as an overnight hike (see tips below).
The hike can be done clockwise or counterclockwise, but this is described counterclockwise.
It starts with the short hike to Sol Duc Falls. From there, follow the signs for Deer Lake, which is described above. The lake is surrounded by woods and – not surprisingly given its name – is a common place to see deer.
From there, the trail climbs up along the High Divide Trail through subalpine meadows of wildflowers that burst into bloom in the early summer. You may spot white mountain goats grazing on the meadows here.
About an hour and a half past Deer Lake, you’ll reach the junction with Lake Lunch. You can take a side trail to the lake or continue on. The views of the Mount Olympus looming 7,000 feet above the river and other surrounding mountains as you traverse the High Divide Trail are stunning.
You’ll reach Bogachiel Peak, then descend into the absolutely mind-blowing Seven Lakes Basin. There are actually eight small, serene subalpine lakes here, all surrounded by mountains. The view will literally take your breath away.
The main trail continues on to the aptly-named small Heart Lake, then loops back around and joins the Sol Duc River Trail.
Most of the remaining eight miles are flatter, as they go through gorgeous old growth forest alongside the river.
This is a long hike, but well worth every single step!
Insider Tips:
You can do this hike as a (very long) day hike or you can camp overnight. If you are doing this as a day hike, leave early – no later than 7:30AM.
If you camping overnight, there are several primitive backcountry campgrounds along the way. You will need a backcountry permit and to book a campsite on the NPS recreation.gov website. Check the NPS Wilderness Backpacking Reservations page for more details. Also be aware that bear canisters are required when camping in this area to store your food. They’re available for loan on a first-come, first-served basis to anyone with a backpacking permit. The most popular camp sites are at Heart Lake, Lunch Lake, and Deer Lake.
There are vault toilets near most campsites that you can also use as a day hiker.
Trekking poles are definitely a good idea on this trail!
A handheld GPS for hiking is also a good idea. My top pick is this Garmin one.
Highlights: Old growth forest; Olympic Mountain views; several stunning lakes
FREE DOWNLOAD Subscribe to regular updates with tips for planning, travel inspiration and trip ideas and get instant access to the free PDF of this guide to the Best Sol Duc Hikes
Travel Insurance for Sol Duc, WA
You should definitely have travel insurance when you travel to Sol Duc Valley, Olympic National Park. Good travel insurance will cover you for trip cancellation, theft or damage of your property when traveling, medical help if you have an accident while hiking in Sol Duc Valley, WA, or medical repatriation if you need to get medi-vaced out.
A great insurance option is Travelex. It has coverage for all you’ll need. You can compare Travel Insurance plans here or get a quote right now:
Do you have any other top picks for the best Sol Duc Hot Springs hiking trails? I’d love to hear about it. Join my private Facebook group National Parks Collectors and comment and let me know (you can also pick up extra planning tips, share your photos and stories with other national park lovers and more).
If you liked this post about all the Sol Duc nature trail options, please share the love and Pin It to your Olympic National Park board!
James Ian is a national park, camping and hiking expert.
He has dedicated his life to travel, visiting more than 80 countries, all 7 continents and all of the main national parks in the United States. With over 35 years experience in the travel industry, James has worked on cruise ships, at resorts and hotels, and as a travel planner who’s helped hundreds of people plan successful trips to US national parks.
Based on his experience visiting our national parks multiple times, in-depth research and expertise as a travel planner, James has published detailed itineraries for most of the major national parks in the US. These itineraries, as well as in-depth park guides, comprehensive camping and hiking gear reviews and buying guides, and helpful packing lists and gift guides will help you have your own incredible trip to US national parks without stress and hassle.
As a national park expert, James has contributed to many publications, including Time Business News, Savoteur, Best Trip, and Wired.
Parks Collecting is a participant in the Amazon.com Services LLC Associates Program, an affiliate advertising program designed to provide a means for sites to earn advertising fees by advertising and linking to amazon.com. Amazon and the Amazon logo are trademarks of Amazon.com, Inc. or its affiliates.As an Amazon Associate I earn from qualifying purchases.
Mount Rainier National Park is one of three national parks in Washington. Expect to see stunning mountain areas, majestic volcanoes, and lush forest areas. And of course, the park is centered around Mt. Rainier, the highest peak in the Cascade Range.
Figuring out how to go to Mount Rainier National Park is an essential part of your planning process. To help you decide how to get to Mount Rainier National Park and to get the most out of your trip, use this guide as you start your travel preparations.
No time right now to discover how to get to Mount Rainier National Park? Pin It and save it for later:
Please note this post may contain affiliate links, which means we may receive a commission, at zero cost to you, if you make a purchase through a link. Please see our full Disclosure for more information. If you have any questions, please contact me.
Mount Rainier National Park lies in the west-central Washington area. It’s located southeast of Seattle and Tacoma and the location of Mount Rainier National Park gives you easy access from these major cities as well as Yakima and Portland in Oregon.
Mount Rainier National Park Entrances
The park has several entrances. All entrances collect fees and/ or check passes for the national park.
Nisqually Entrance – Wilderness Information Center (Longmire), Henry M. Jackson Visitor Center (Paradise)
This southwest entrance is open to park all year round and accessible via State Route 706.
Carbon River – Carbon River Visitor Center
This is the park’s northwest access point you can reach via State Route 165 through Wilkeson.
You need to park your vehicle at the entrance, but it’s open for foot-traffic and cyclists all year round.
Mowich Lake is another entrance at the northwest section but is only open during summer until the middle of October.
Stevens Canyon – Ohanapecosh Visitor Center
This entrance is in the southeast area of the park and can be reached via US Highway 12. It’s also open from the later weeks of May to early October.
White River – Sunrise Visitor Center
This northeast entrance is just off State Route 410 on the Chinook Scenic Byway. However, it only opens in late June or early July and closes in mid-October.
What major city is closest to Mount Rainier?
If you want to include trips to cities near Mount Rainier National Park, Yakima is just an hour and a half from Mount Rainier’s White River entrance.
Tacoma is also a manageable two-hour distance to the Nisqually (Paradise), Sunrise, Carbon River, and Ohanapecosh entrances. It’s ideal if you want to stay in a nearby city and at the same time get to the best attractions in the park.
The cities of Seattle and Portland, Oregon are more or less two hours away from Mount Rainier, so you can make a stopover before or after you visit Mount Rainier.
There are also small towns near Mount Rainier National Park you can stay in or add to your itinerary.
The town of Ashford sits just right outside the park’s Paradise area. This is worth adding to your travel plans, particularly during summer. It’s a good base with lots of trails and a bunch of accommodations and restaurants.
Enumclaw gives you access to the park’s northern Carbon River and Mowich Lake entrances. Hiking trails to scenic falls and lakes, along with great viewpoints of Mount Rainier and roadside views are things you can experience here. This town is also just a short drive to Seattle.
Packwood is also nearby Mount Rainier with access to multiple park locations in Paradise, Ohanapecosh, and Sunrise.
FREE DOWNLOAD Subscribe to regular updates with tips for planning, travel inspiration and trip ideas and get instant access to the free PDF of this guide to How To Get to Mount Rainier National Park
You can get to and around Mount Rainier in several ways. Driving is the most convenient option, either from hoe or from a bus or train station or nearby airport. There are also several tours available, mostly from Seattle, that offer day trips to popular park attractions.
Let’s take a look at your travel options and details on how you can get to Mount Rainier National Park so you can choose what’s best for your trip.
Taking a Tour to Mount Rainier National Park
If you prefer not to drive, since there are no shuttles in Mount Rainier, taking a taxi from a nearby town and a tour are your only options. Tours have the added advantage of an expert guide to accompany you, so you can learn all about the history and geography of the national Park.
Although there are no tours from nearby Tacoma or other small towns around the national park, there are several options for day trips from Seattle. All of them are about 10-12 hours long and include about 2 hours of driving each way to/ from the park. They all go to the Paradise part of Mount Rainier National Park.
The nice thing about a private tour is that you can go at your own pace and you get the guide completely to yourself. The trip includes a professional guide and pickup from Seattle and Sea-Tac hotels. Lunch is not included.
If you like to hike and want to have a chance to get on the trails, then this day trip is for you. The meadows in Paradise are one of the highlights of any trip to Mt Rainier National Park, and you will see them best when you hike the trails. In addition to the regular highlights, you’ll have a chance to hike for a mile each way to a viewpoint to see the glaciers on the side of Mount Rainier up close.
If you like to travel in style, want a little more comfort in your day trip to Mount Rainier, and prefer to have lunch included, then this is your tour. The day trip includes a gourmet picnic lunch with wine. It’s a small group with maximum seven people.
This is a more affordable option. A regular day tour from Seattle to Mount Rainier, taking in the highlights of the Paradise area including Narada Falls and Christine Falls. A professional guide accompanies the tour to give plenty of information and point you to all the highlights.
The easiest way to get from the airport to any Mt. Rainier National Park location is by taking a rental car. Seattle-Tacoma to the White River Ranger Station is 71 miles, while Paradise in Nisqually entrance is 94 miles away.
Though it has more limited flights than Seattle-Tacoma, Yakima Air Terminal is another airport close to Mount Rainier. They offer several commercial and charter flights. The airport is just 75 miles from the White River entrance and about 117 miles from the Nisqually-Paradise entrance.
If you’re looking for a wide range of both domestic and international flights, Portland International Airport is another of the possible airports near Mount Rainier National Park. It will take you about three hours to get to the White River Ranger Station and Paradise entrances from this airport.
Taking the Train toWashington, Mount Rainier National Park
Mount Rainier train routes and services aren’t available directly inside the park. However, if you like to travel by train, you can get to an Amtrak train station fairly close by and pick up a rental car or take a taxi or tour there to get you into the park itself.
Tacoma, Centennial/Lacey, and Centralia stations on the Amtrak Cascades and Coast Starlight routes, while Tukwila is only on the Amtrak Cascades route. Seattle’s King Street Station gives you even more options since it also on the Empire Builder train route in addition to Amtrak Cascades and Coast Starlight.
Tacoma is the nearest Mount Rainier train station. There aren’t any car rentals at the station itself, but there are car rentals like Zipcar, Enterprise, Budget, and Hertz around 6-10 minutes away, so you can take a taxi or Uber to their locations. The Nisqually and Carbon River entrances are the nearest entrances from Tacoma with both less than an hour and a half away.
King Street Station in Seattle is a bit farther away – it’s about an hour and 45-minute drive to the White River and Carbon River entrances. But you can get a Zipcar rental service at the station or nearby Sixt car rental facility. There are other car rental agencies a short taxi or Uber ride away. It’s also the only station that runs tours to Mount Rainier.
Amtrak’s Tukwila station is another option for the White River entrance. An Enterprise car rental agency is about 5 minutes from this station.
The other two stations, Centralia and Centennial/Lacey are around the same distance to the Paradise area, though the latter is also closer to the Carbon River and Lake Morwich entrances. There’s an Enterprise rental car office located 4 minutes away from Centralia. Centennial/Lacey also has a few car rental agencies nearby, including Enterprise and AVIS.
Taking a Bus to Washington State Mount Rainier National Park
There are no direct bus routes into Mount Rainier National Park, so taking the bus is not really the most convenient way to get to the park. But if you want to take the bus from Seattle to Mount Rainier National Park, there are nearby towns and cities where you can get a tour or rental car.
If you’re flying to Sea-Tac Airport, King County Metro, and Sound Transit Express Bus 578 are available at the airport bound for Enumclaw. Both offer routes from Seattle to Auburn Transit Center. From the center, the DART Route 915 takes you to Enumclaw’s School District Road and McDougall Avenue.
Enumclaw is the nearest city to the park’s Carbon River or White River entrances, but there are no car rental agencies there. Your option would be to take a taxi or Uber from the city to get you to the park. However, unless you’re really planning to visit Enumclaw, you’d be better off taking a car rental service from the airport to get you straight to the Carbon River or White River entrances.
Greyhound is another bus line that can get you to cities near Mount Rainier like Seattle, Tacoma, and Yakima.
From Seattle main bus station on Royal Brougham Way, several car rental agencies like Budget, SIXT, Enterprise, AVIS, Hertz, and Zipcar are all around 3 to 8 minutes away.
Greyhound’s Tacoma bus station also has Zipcar, Budget, and Enterprise car rental offices just 3-5 minutes away. Hertz is about 8 minutes from the bus station.
Another alternative is getting off Tall Men’s Supermarket at Yakima’s South 5th Avenue. You can pick up a car rental at Enterprise, just 4 minutes away from the station, or get a Budget rental car 8 minutes away.
Driving to Mount Rainier National Park
You’ll need different driving directions to Mount Rainier National Park depending on which entrance you’ll access. If you’re planning a Mount Rainier National Park drive during the winter, note that some entrances will be closed due to weather conditions.
If you’re planning a road trip from Olympic National Park to Mount Rainier National Park, a direct trip by car takes more or less about 5 hours, though you can also make several stops in Seattle, Tacoma, and/ or Olympia.
Driving Directions to Mount Rainier National Park
For driving routes from Seattle, Tacoma, Yakima, and Portland to different Mount Rainier entrances, here are the basic details
Driving from Seattle to Mount Rainier National Park
How to get to Mount Rainier from Seattle:
To Nisqually Entrance
How far is Mt Rainier from Seattle? The distance from Seattle to Mount Rainier National Park (Nisqually Entrance) is 86 miles. From Seatac to Mount Rainier National Parkis 75 miles. Travel Time: 1 hour 45 minutes Driving Directions: To drive from Seattle to Mount Rainier National Park, head south on I-5 and take exit 127 on SR 512. Head east on SR 512 until you reach south on SR 7. From there, drive east on SR 706 through Ashford until you reach the entrance.
To White River/Sunrise/Ohanapecosh Areas
Distance: 80 miles Travel Time: 1 hour and 35 minutes Driving Directions: For Mount Rainier National Park directions going to the northeast entrances, head south to I-5 and take exit 154a on I-405. Continue east on I-405 and then south on SR 167. From there drive east on SR 410 to get to the White River entrance. To get from Seattle to Mt Rainier National Park’s Ohanapecosh entrance, continue south past Stevens Canyon Road on SR 410 up to SR123.
Driving from Tacoma to Mount Rainier National Park
To Nisqually Entrance
Distance: 60 miles Travel Time: 1 hour and 15 minutes Driving Directions: From Tacoma to Mt Rainier National Park via Nisqually entrance, go east on SR 512 to south on SR 7. Take SR 706 going to Elbe, then go east on SR 706 straight to Ashford. You’ll reach the entrance from there.
To White River/Sunrise/Ohanapecosh Areas
Distance: 68 miles Travel Time: 1 hour and 25 minutes Driving Directions: If you’re taking the White River/Sunrise entrance to Mount Rainer from Tacoma, drive east on SR 512 going to SR 167. Head north on SR 167 towards SR 410. Drive east on SR 410 until you get to the White River entrance.
For the driving route to Ohanapecosh, go south on I-5 and take exit 68 on Highway 12. Go east on the highway and pass through Morton, Randle, and Packwood. Head north on SR 123 until you reach Mount Rainier National Park’s Ohanapecosh area.
Driving from Yakima to Mount Rainier National Park
To Nisqually Entrance
Distance: 137 miles Travel Time: 2 hours and 45 minutes Driving Directions: Access to routes from Yakima to the Nisqually entrance will depend if you’re visiting during the summer or winter season.
During the summer season, you can take the west of US 12 to SR 123. From north of SR 123, they can follow Stevens Canyon Road and head west to Paradise and Longmire. In winter months, the route starts west on US 12 going to SR 7 in Morton. From there, head north to Elbe from SR 7. You’ll reach the Nisqually Entrance and Longmire/Paradise coming from the east on SR 706.
To White River/Sunrise/Ohanapecosh Areas
Distance: 75 miles Travel Time: 1 hour and 30 minutes Driving Directions: To access the east White River side of Mount Rainier National Park, drive west on Highway 12 going to SR 410. Head west from there via the Chinook and Cayuse Pass to get to the entrance. If you’re heading to the Ohanapecosh area, go west on US 12 until you reach SR 123. Turn right from SR 123 and head north to the park’s entrance to get to Ohanapecosh.
Driving from Portland to Mt. Rainier National Park
To Nisqually Entrance
Distance: 138 miles Travel Time: 2 hours and 25 minutes Driving Directions: From Portland Oregon to Mount Rainier Washington, drive north on I-5 and take exit 68 on Highway 12. Go east on Highway 12 until you get to Morton via SR 7. Drive north on SR 7 and head to Elbe’s SR 706. Drive east from there until you reach the Nisqually entrance.
To White River/Sunrise/Ohanapecosh Areas
Distance: 203 miles Travel Time: 3 hours and 30 minutes Driving Directions: To get to the White River/Sunrise entrance, head north on I-5 to SR 512 east. Drive towards SR 167 and take exit 135 in Tacoma. Head east from SR 167 going to SR 410. Continue driving east on SR 410 and you’ll get to the entrance.
To reach the Ohanapecosh area, drive north to US 12 via I-5 and take exit 68. Head east from US 12 until SR 123. Go north on SR 123 to the Ohanapecosh area.
Carbon River Entrance
The park’s Carbon River northwest entrance is accessible via SR 165 through Wilkeson. It’s open all year, though vehicles aren’t allowed beyond the park entrance. The Lake Mowich entrance is 5.5 miles from the Ranger Station in Carbon River and is open to the public during summer until the middle of October.
How do you get to Mt. Rainier National Park without a car?
If you prefer not to drive, getting a tour from Seattle is your best choice. You can get to Seattle via plane, train or bus. (See sections above).
For the less-visited northern section of the park, where tours do not go, you can get a taxi or Uber from Enumclaw, which you can get to by bus.
FAQs about Getting to Mount Rainier National Park
What airport do you fly into for Mount Rainier National Park?
The best airport you can fly to for Mount Rainier National Park is Seattle-Tacoma International Airport. Check my guide to the Closest Airports to Mount Rainier National Park for other options.
Can you get to Mt Rainier without a car?
Yes, if you prefer not to drive, you can take a tour from Seattle to get you around the park.
What is the best way to enter Mount Rainier National Park?
The best way to enter the park is via the Nisqually entrance. It’s open all year-round and you’ll have access to Paradise, Mount Rainier’s most popular area.
What city is Mt Rainier closest to?
The closest cities to Mount Rainier are Tacoma and Seattle.
Is there a train from Seattle to Mt Rainier?
There aren’t any train services from Seattle to Mount Rainier but there are train stations close to the park. See the Train Section above for full details.
Which Mt Rainier entrance is closest to Seattle?
From Seattle, the closest park entrance is the southwest Nisqually entrance.
Is there a shuttle to Mt Rainier?
Shuttle services are not available inside the park, so the best way to get around is by driving your own vehicle.
Is there public transportation to Mt Rainier?
No. Although you can access public transportation services from nearby cities like Tacoma and Seattle, you still need a car or take a tour to get around the park itself.
How far is Mount Rainier National Park from Seattle?
Seattle – Mount Rainier National Park is around 90 miles and takes about an hour and 45 minutes to 2 hours.
Travel Insurance for Mount Rainier
You should definitely have travel insurance when you travel to Mount Rainier. Good travel insurance will cover you for trip cancellation, theft or damage of your property when traveling, medical help if you have an accident in or while visiting Mount Rainier National Park, WA, or medical repatriation if you need to get medi-vaced out.
Did you decide how to visit Mount Rainier National Park, Washington, USA? Join my private Facebook group National Parks Collectors and comment and let me know (you can also pick up extra planning tips, share your photos and stories with other National Park lovers and more).
FREE DOWNLOAD Subscribe to regular updates with tips for planning, travel inspiration and trip ideas and get instant access to the free PDF of this guide to How To Get to Mount Rainier National Park
If you liked this post about travel from Mount Rainier National Park to Seattle (and vice versa / directions to Mt Rainier National Park), please share the love and Pin It to your Mount Rainier National Park board!
James Ian is a national park, camping and hiking expert.
He has dedicated his life to travel, visiting more than 80 countries, all 7 continents and all of the main national parks in the United States. With over 35 years experience in the travel industry, James has worked on cruise ships, at resorts and hotels, and as a travel planner who’s helped hundreds of people plan successful trips to US national parks.
Based on his experience visiting our national parks multiple times, in-depth research and expertise as a travel planner, James has published detailed itineraries for most of the major national parks in the US. These itineraries, as well as in-depth park guides, comprehensive camping and hiking gear reviews and buying guides, and helpful packing lists and gift guides will help you have your own incredible trip to US national parks without stress and hassle.
As a national park expert, James has contributed to many publications, including Time Business News, Savoteur, Best Trip, and Wired.
Parks Collecting is a participant in the Amazon.com Services LLC Associates Program, an affiliate advertising program designed to provide a means for sites to earn advertising fees by advertising and linking to amazon.com. Amazon and the Amazon logo are trademarks of Amazon.com, Inc. or its affiliates.As an Amazon Associate I earn from qualifying purchases.
Did you know that you can see salmon jumping up a waterfall in Olympic National Park? It’s very cool!
This detailed guide has all the information you need to see the salmon run. Olympic National Park is one of the few places in the world where this happens several times a year! Find out when, where, and why.
No time right now to read all about the Sol Duc Salmon Cascades, Olympic National Park? Pin It and save it for later:
Please note this post may contain affiliate links, which means we may receive a commission, at zero cost to you, if you make a purchase through a link. Please see our full Disclosure for more information. If you have any questions, please contact me.
FREE DOWNLOAD Subscribe to regular updates with tips for planning, travel inspiration and trip ideas and get instant access to the free PDF of this Guide to Sol Duc Salmon Cascades
This trail and the falls are not included on standard group tours, so if you are taking a tour to Olympic National Park, the best way to see them is on a private tour.
This private tour includes hikes in the Sol Duc Valley (read Best Sol Duc Hikes to see options), as well as Hurricane Ridge (read Best Hikes in Hurricane Ridge to see options) and Lake Crescent (read Best Hikes in Lake Crescent). You can easily ask your guide to include a stop off at Salmon Cascades on the way to Sol Duc Falls.
When: The trail is open (and the falls are lovely) year-round, but to see the fish jump, March-May and September – October (see below for more details).
Although Sol Duc Road is officially open year-round, this is “weather permitting”, and the reality is that it’s often closed in winter due to snow and ice. The campground and hot springs are open late March to late October and this gives some indication of the period in which the road may be closed too. Check the NPS website for current road conditions.
Salmon Cascades, Olympic National Park
The Salmon Cascades are beautiful; the waterfall tumbles over several layers in a narrow crevice in the river. There is a small pool between tiers, but the flow of the river is fierce.
Whenever you visit Olympic National Park, it is worth a quick stop on your way to Sol Duc Falls to see them. But they are most fascinating when the salmon leap up this 11-foot waterfall!
Coho salmon in Olympic National Park are fascinating. These anadromous fish (meaning they live in both fresh and salt water) are born in gravelly river beds in the Sol Duc River, above the cascades. As soon as they are able, the juvenile salmon swim 70 miles down the river to the sea, memorizing their route along the way.
They spend most of the lives (up to two years) roaming hundreds of miles along the Pacific Northwest coast, from Oregon to British Columbia in Canada.
When they are ready to spawn, they somehow find their way back to the mouth of the Sol Duc River using the temperature of the ocean, the salinity of the waters, the angle of the sun, and magnetic fields to guide them.
Each season, about 1,000 coho salmon then use river scents to return to their birthplace just below Sol Duc Falls. They start their journey in July when the water level is low and it’s possible to navigate the cascades. From late summer to early fall, they leap up the 11-foot waterfall to get back ‘home’.
They spawn there. The female builds a nest in the gravel called a redd with her tail. The male swims close by to fertilize the thousands of eggs she lays. They die several days later and their decomposing carcasses provide essential nutrients to the river system and the surrounding forest.
When can you see salmon jumping at Salmon Cascades?
The Sol Duc River is one of the few places in the world where the salmon run throughout the year. Chinook and coho salmon leap up the cascades in late summer/ early fall (September – early November) and cutthroat trout and steelhead leap up the cascades in spring (March-May).
Salmon Cascades Trail Details
There’s a small parking lot for just nine vehicles at a pullout on the side of the road. There’s a small picnic area and restrooms at the parking area.
From there, the trail is very wide and easy to follow.
It heads through the trees for just over 100 feet and ends at a wooden viewing platform.
The viewing platform looks down in to the falls from above.
The views here are OK, but the view from below gives a much nicer view of the falls.
However, there is no trail down to the area below the falls – you need to clamber over some rocks and around and over tree roots. These rocks can be slippery, especially when wet. This is not an official trail and if you decide to do this, it is at your own risk.
From the bottom, you can more easily see the layers of the cascades. If you look carefully, you can often see salmon milling around in the small pool of water between the tiers of the falls as they recover from their first leap and prepare for the next.
At the bottom, there is a large calm pool of water and this often serves as a staging area, with dozens of salmon milling around as they gather their strength for the big jumps.
It is not guaranteed that you will see salmon here, of course, even in season. They tend to be more active after rain.
Fishing is not allowed near Salmon Cascades.
Tips for Visiting the Salmon Cascades Overlook
If you decide to head down below the falls form the viewing platform, you will want to wear good shoes with good grip. If you need to get some hiking boots, take a look at my Guide to Buying the Best Hiking Shoes/ Boots to help you know what to look for and get some recommendations.
Take video. I usually just taking photos, but it’s very difficult to snap a phot exactly when a fish is mid-air. It’s much easier to take videos so you can catch them in action. I used my phone as I’d forgotten to take my camera, and as soon as I saw a fish leap, I ended the video and then started filming another one, so that I ended up with several short video clips rather than one really long one. This way, too, I knew that the fish was near the end of the video and could more easily edit out the beginning part, when there were no fish.
If you want a step up from using a cell phone (which I recommend!), a great option is the GoPro HERO 12. It is designed for travel. It’s water resistant and durable and takes photos, video and even does streaming. Check current prices on the GoPro HERO 12 here.
Salmon Cascades is in Sol Duc Valley in Olympic National Park. It’s 5 miles up Sol Duc Hot Springs Road from Highway 101, on the right side.
FAQS about Salmon Cascades, Olympic National Park
Where can I see salmon in Olympic National Park?
There are two places. You can see sockeye in the Quinault River in November and December in tributaries and in the river and coho and chinook at Salmon Cascades in September to early November. You can also see cutthroat trout and steelhead at Salmon Cascades in March – May.
What time of year do salmon run in Washington?
The peak season is mid-September to mid-October, though you may see some earlier and later. Chinook typically arrive first and Coho a little later.
What are the Salmon Cascades in Olympic National Park?
Salmon Cascades is a tiered waterfall on the Sol Duc River where you can see salmon swimming upstream – and leaping up the waterfall – to spawn in the river.
When is the best time to visit Salmon Cascades?
The best time to see salmon at the Cascades is typically between September and early November and March to May, when the fish are migrating upstream to spawn. However, the waterfalls and rapids are beautiful to see year-round.
How do I get to Salmon Cascades?
Salmon Cascades are located in Olympic National Park, near the Sol Duc Hot Springs Resort. There is a small parking area nearby.
Can I fish for salmon at Salmon Cascades?
No, fishing is not allowed in the Sol Duc River near the Salmon Cascades. This is to protect the spawning salmon and ensure their population continues to thrive.
What other activities can I do in the area around Salmon Cascades?
The area around the cascades is great for hiking, with several trails including Sol Duc Falls. You can also soak in the hot springs at the nearby Sol Duc Hot Springs Resort.
Is there an admission fee to visit Salmon Cascades?
There is no fee to visit Salmon Cascades, but you will need to pay the entrance fee for Olympic National Park if you do not have an annual pass. Buy it online or, if you are planning to visit more than just Olympic National Park this year, it can be great value to purchase anAmerica The Beautiful pass.
FREE DOWNLOAD Subscribe to regular updates with tips for planning, travel inspiration and trip ideas and get instant access to the free PDF of this Sol Duc Salmon Cascades Guide
Travel Insurance for Olympic National Park
You should definitely get travel insurance whenever you travel. This can protect you against medical and emergency repatriation, as well as cover things like trip cancellation, loss and/ or theft of property, etc.
Do you have any other tips for visiting Salmon Cascades or questions about this or anywhere else in the Sol Duc valley? I’d love to hear about them. Join my private Facebook group National Parks Collectors and comment and let me know (you can also pick up extra planning tips, share your photos and stories with other national park lovers and more).
If you liked this post, please share the love and Pin It to your Olympic National Park board!
James Ian is a national park, camping and hiking expert.
He has dedicated his life to travel, visiting more than 80 countries, all 7 continents and all of the main national parks in the United States. With over 35 years experience in the travel industry, James has worked on cruise ships, at resorts and hotels, and as a travel planner who’s helped hundreds of people plan successful trips to US national parks.
Based on his experience visiting our national parks multiple times, in-depth research and expertise as a travel planner, James has published detailed itineraries for most of the major national parks in the US. These itineraries, as well as in-depth park guides, comprehensive camping and hiking gear reviews and buying guides, and helpful packing lists and gift guides will help you have your own incredible trip to US national parks without stress and hassle.
As a national park expert, James has contributed to many publications, including Time Business News, Savoteur, Best Trip, and Wired.
Parks Collecting is a participant in the Amazon.com Services LLC Associates Program, an affiliate advertising program designed to provide a means for sites to earn advertising fees by advertising and linking to amazon.com. Amazon and the Amazon logo are trademarks of Amazon.com, Inc. or its affiliates.As an Amazon Associate I earn from qualifying purchases.
I love beach camping. Falling asleep to the sound of crashing waves and waking up to the sunrise over the water is a magical experience. However, the unique environmental conditions make it a challenging place to camp.
So, where do you start when you want to find the best tent for beach camping? Well, I am a national park expert and spend a lot of time in the great outdoors.
I’ve been on many beach camping trips and have tried out a range of tents – from a simple, lightweight pop up tent for short trips to a sturdier, more weather-resistant tent for longer stays.
I’ve described what I’ve found and made some recommendations for the best tents for beach camping based on my experiences and additional research.
No time right now to read about the best tent for beach camping? Pin It and save it for later:
Please note this post may contain affiliate links, which means we may receive a commission, at zero cost to you, if you make a purchase through a link. Please see our full Disclosure for more information. If you have any questions, please contact me.
Trying out a beach tent on a beach camping trip in Olympic National Park
Please note this post may contain affiliate links, which means we may receive a commission, at zero cost to you, if you make a purchase through a link. Please see our full Disclosure for more information. If you have any questions, please contact me.
The Kazoo family-sized cabin tent offers more space, is surprisingly simple to set up and has great weatherproofing.
Its sand resistance, ease of setup, water and wind resistance, ventilation, sun protection, and size make it an ideal choice for any beach camper.
I highly recommend this tent to anyone looking for a reliable and comfortable camping experience at the beach. For anything other than a short overnight trip in clear weather, it out performed all other tents we used on our beach camping trips.
However, if this is all new, let’s take a deep dive into exactly what you need to look for.
What’s the difference between a beach camping tent and a regular tent?
First of all, let’s take a look at the difference between a beach tent and a camping tent.
Beach tents are designed mostly to be used for a day at the beach to provide shade and sun protection and ventilation. However, they’re not super waterproof and aren’t designed for more heavy-duty use. They’re also on the small side.
Camping tents are designed for more heavy-duty use including protection from heavy rains. However, they can get really hot and stuffy during the day when they’re in the sun and they aren’t specifically designed to be put up in sand.
So, what do you use for camping on the beach?
When choosing beach camping tents, you’ll want to find either a beach tent that is hardy enough for overnight camping or a camping tent that contains as many of the unique features that beach tents have as possible.
There are several features that are more suitable for beach tent camping.
Sand-resistant
A beach camping tent should be designed to keep sand out of the tent as much as possible. This can be achieved through a design that minimizes the amount of exposed mesh or other materials that sand can stick to.
In additional, sand is less stable than grass or solid dirt, so a specially designed beach tent may have sand pockets to help anchor it down. Regular camping tents won’t have this, and the stakes won’t work in sand. So, you will want to buy some special sand stakes.
Water-resistant
You may also require protection from sea spray, or want to be able to look out over the ocean, so the best beach tents are made from water-resistant, but often less-durable fabrics than regular camping tents. This is especially true of the floor, so that you stay dry. So unless you are only taking a short trip and or expecting heavy rainfall, a camping tent is best. But If you’re just overnighting in an area that is unlikely to have heavy rain, then a beach tent can do the trick – especially if there are only one or two of you. I’d go for a larger model, though, so you have some room for storing gear.
Fabric
Beach tents tend to be made of very thin, less durable lightweight fabric that provides UV protection, which is fine for a short trip.
Camping tents usually have thicker fabrics. Avoid heavier fabrics like canvas. They are not practical at the beach. But here are still plenty of camping tents that are pretty lightweight but at the same time provide the protection you will need from the rain and other elements.
Small size
Beach tents are small, in general, as they are designed mostly for day use. Camping tents tend to be bigger, which will give you more room for storing gear you will have while camping, as well as providing more space if you need to hang out on a rainy day. However, larger tents tend to be more cumbersome, so you will want to balance your need for size with the ease of setup.
Easy Setup
A good tent for sand is typically easy to set up and take down. This is important because the beach can be a challenging environment to work in, and setting up a tent can be difficult if the design is complicated. Beach tents are usually very easy to set up and take down. Some camping tents – especially larger ones – can be more complicated. So when choosing a camping tent for the beach, you need to find one that is easy to set up.
Wind-resistant
It’s also often windier by the coast, so a top beach tent is designed with these features in mind. A beach camping tent should be sturdy and able to withstand strong winds that are common on the beach. A good beach camping tent should have sturdy poles and a strong frame to hold up against strong winds.
Beach tents are designed with plenty of ventilation. When choosing a camping tent for the beach, you will want to get one that has several ‘windows’, or vents that you can keep open to create ventilation.
Ventilation
Beach camping tents usually have more ventilation than regular tents to help keep the interior cool and comfortable. This is because the beach can be hot and humid, and good ventilation can prevent the tent from becoming stuffy and uncomfortable.
Sun Protection
Beach tents are designed to protect you from the sun and have UV protection. Camping tents tend not to have as much UV protection. A good beach camping tent should have a UV-resistant fly and walls to protect campers from the sun’s harmful rays. Beach tents keep you cool in the shade in the sun, whereas regular camping tents may bake you instead.
Conclusion
If you’re just overnighting in an area that is unlikely to have heavy rain, then a beach tent can do the trick – especially if there are only one or two of you. I’d go for a larger model, though, so you have some room for storing gear.
For longer trips and larger parties, or for trips to places with potential bad weather, using a camping tent at the beach will be better.
Camping tents are designed for more heavy-duty use including protection from heavy rains. However, they can get really hot and stuffy during the day when they’re in the sun and they aren’t specifically designed to be put up in sand. In this case, the best option is usually to have both – a camping tent to sleep in overnight and store your gear and a beach tent or shade canopy to use during the day. That way you get the best of both worlds.
The best tent for beach camping depends on your specific needs and preferences, such as the number of people in your group, the weather conditions, and your budget. So, we’ll take a look at a few key categories to help you find the best one for you.
This kind is the easiest beach tent to put up, leaving you with more time to relax. It should take mere seconds to set up.
Pop up tents are a great choice for beach camping because they are designed to be set up quickly and easily, often in a matter of seconds. This can be very convenient for beach camping, where you may want to set up and take down your tent quickly.
Pop-up tents are usually best for short-term camping, such as overnight stays or weekend trips because they aren’t as durable as traditional tents and don’t always hold up as well in harsh weather conditions.
Pop-up tents are not typically designed for harsh weather conditions, so they are best for camping in good weather conditions, such as during the summer when the weather is warm and sunny.
They’re also a good option if you have limited storage space in your vehicle or backpack, because they are lightweight and take up less space than traditional tents.
Pop-up tents are typically small, so they can be a good choice if you’re camping alone or with one or two other people.
When you go tent camping on the beach, you will often have to carry your tent along with other camping gear. A portable, packable beach tent makes it easier to carry everything you need and allows you to set up camp in a variety of locations.
A portable camping beach tent also allows you to move your camping spot around the beach as needed, depending on factors such as the tides, wind direction, and sunlight. This flexibility can make your camping experience more enjoyable and comfortable.
Plus, a portable tent makes it easier to quickly pack up and move to a safer location if the weather suddenly turns nasty or there is some other emergency.
Some things to looks for when choosing the best tent for the beach that’s portable include weight and size. A portable beach camping tent is generally lightweight and compact when packed so it easily fit into a backpack or a small bag and is therefore easy to carry.
A portable beach camping tent is also easy to put up and take down.
My picks in this category have been selected as they are some of the lightest and most portable tents around.
If you need the best large beach tent for a number of people, check out the choices included in this category.
One of the main factors to consider when choosing a big tent for beach camping is size. You’ll need to make sure that it’s big enough to accommodate your family comfortably. Consider the number of people who will be sleeping in the tent, as well as the gear you will be bringing along. This will also depend on how long you’re camping for, but you will want to make sure you have enough storage space for all your gear, including pockets and loops for hanging gear, so you can keep everything organized and within reach.
Look for a tent that is made from durable, waterproof materials that can withstand the elements. Consider the tent’s ventilation as well to ensure it remains comfortable even in hot weather.
You’ll also need to balance size with ease of set up. Larger tents can often be kind of cumbersome to set up and take down, but the best camping tents for the beach are easy to set up.
I’ve included the best beach tents for wind as separate category because some beaches are often exposed to strong winds that can quickly and easily pick up and move lightweight camping equipment. A tent that is not wind-resistant can collapse or blow away.
The best beach tent for windy conditions has features such as sturdy frames, reinforced poles, and durable materials.
Some other things that can help make a tent the best tent for windy beach camping include the shape. Tents with a low, rounded shape are generally more wind-resistant than tall, boxy tents that catch more wind. A dome or tunnel shape can help deflect wind and minimize the risk of the tent collapsing or blowing away.
Another thing is ventilation. While it may seem counterintuitive, good ventilation can actually help make a tent more wind-resistant because when wind blows against a well-ventilated tent, pressure that can cause it to collapse or blow away can be released through vents or mesh panels instead.
The type of fabric used in the tent can also play a role in its wind resistance. Look for tents made from durable, ripstop nylon or polyester that can withstand strong winds without tearing or stretching.
The best beach camping tents also have guy lines. Guy lines are ropes or cords that can be attached to the tent and anchored to the ground with stakes or sandbags. If you use stakes, there are special stakes that can be used with sand. This helps provide additional stability and can prevent the tent from tipping or collapsing in high winds.
A portable beach cabana tent is not the best choice for tent camping at the beach. They’re shade tents that are designed to provide shade and shelter from the sun while you’re at the beach for the day.
However, I’ve include them here because beach shade tents are a useful supplement to your main tent on longer camping trips. You can hang out in a beach shade tent during the day. It can help protect you from harmful UV rays and make it more comfortable to spend time at the beach without getting too hot.
A beach tent shade can also offer protection from the wind if you’re hanging out on the beach on a windy day and don’t want to huddle in your main tent.
These are sun shelters rather than tents, but can also be used for camping under the stars with a roof over your head in clear weather.
Beach canopies are also a useful alternative for shelter from the sun and wind during the day. They can make your life more pleasant if you’re visiting the beach just for the day or for beach camping trips where you don’t have to carry your gear very far, but will be spending days hanging out on the beach.
The best beach tent stakes have special features that provide a secure hold in loose, sandy soil, which can be more challenging than setting up a tent on firmer ground. By using the right kind of tent stakes for the conditions you’re camping in, you can help ensure that your tent stays in place and your camping experience is a safe and comfortable one.
Good tent stakes for sand are designed with a specific shape that allows them to anchor more securely in sand. They are longer and have a wider, flatter head that helps to hold them in place. They also have a spiral or corkscrew shape that allows them to twist into the sand more easily and securely, which helps to increase their holding power in sandy conditions.
They are also made from lightweight materials that are strong enough to hold up in sandy conditions.
Tent stakes for sand are often brightly colored to make them easier to see in the sand. This can help you avoid tripping over them and make them easier to locate when it’s time to pack up camp.
Although this is a beach tent, not a camping tent, and is most often used for a day at the beach, it is also good for overnight beach camping if the weather is not bad.
Because it’s a beach tent, easy setup is a key feature. I was able to set up the tent in under five minutes, without any tools or assistance. This feature makes it ideal for those who are new to camping or if the beach is windy and you want to set the tent up quickly.
However, this is one of the best pop up tents for the beach not only for its easy setup.
One of the standout features of this tent is its portability. It comes with a carrying bag that makes it easy to transport and store.
The tent is lightweight and compact, which is ideal for beach camping where you need to carry all your gear from your vehicle to the campsite. The compact size also makes it easy to fit into any trunk or storage compartment.
Like most beach tents, it’s actually a half tent that is usually left open at the one side, with a large flap that you can lie on and keep the sand away. This does fold up, so you can use it as an overnight tent, but it reduces the overall size.
So, although it’s described as a 4-person tent, it’s best used for two people for an overnight trip, so you have room some room for your gear. Even with some basic gear only, I found it kind of tight for two people when closed up at night. But it was fine for one night.
A definite bonus is the tent’s UPF 50+ material provides excellent sun protection, which is essential when camping on the beach and the ventilation system in this tent is also well-designed, with several windows that provide excellent airflow and help regulate the temperature inside the tent. I liked it a lot during the day, especially.
The tent’s water resistance and wind resistance features are also impressive. It comes with a waterproof rainfly that keeps water out of the tent, and the sturdy frame and anchored guy lines kept it secure even when the wind picked up overnight on our trip.
However, I wouldn’t want to camp in this pop up beach tent in heavy rains. I tried it out by giving it a really good soak at home and it definitely got damp inside.
Considering its size, this tent is an incredibly easy beach tent to put up. The pop-up design that allows it to set up in seconds, without any tools or assistance. I was able to set up the tent in just a few minutes.
Taking it down is a little more complicated, but if you follow the instructions carefully, it’s easy enough. I recommend trying it at home before you get to the beach.
This is my pick as the best pop up tent for the beach for larger groups. Considering it’s a pop up tent, it comfortably fit four people and our gear without feeling cramped. You could squeeze six, in, but it would be tight. The tent has a vestibule that we used for extra storage space for our gear, keeping the living area of the tent clutter-free.
The tent’s ventilation system is also well-designed, with several windows and mesh panels that provide excellent airflow, and a double layer prevented condensation buildup inside the tent. The fabric of the tent is made from high-quality materials, which is both waterproof and UV-resistant, providing protection from the elements.
Sometimes in a pop up tent, beach conditions can make it unsuitable. But the water resistance and wind resistance features of this tent are also impressive, with a waterproof rainfly that keeps water out of the tent, and a sturdy frame that keeps it secure in windy conditions. There were gusts of around 15 mph when we tired it out and it stayed very secure the whole time.
Lastly, it’s very easy to carry, making it ideal for beach camping where you need to carry all your gear from your vehicle to the campsite.
The tent is designed for 6 people, so it’s perfect for a big family or a group of friends. There is also a vestibule that provides additional space for gear storage or shelter from the sun.
The tent is made of double-layer waterproof material that can keep you dry in case of rain. This is especially important for beach camping, where the weather can be unpredictable.
The tent has multiple windows and a mesh roof that allows for proper ventilation and keeps the interior cool and comfortable.
Cons:
The tent’s poles and zippers are not as durable as I would like.
The pop-up design of the tent makes it susceptible to strong winds. If you’re camping on a windy beach, I recommend using additional stakes and guy lines to secure the tent.
It weighs around 13 pounds, which could be a problem if you have to carry it long distances to get to the beach.
This tent is perfect for …
Longer camping trips with larger groups to beaches with challenging conditions where the easy pop up design will be a life saver
Because it’s specifically designed to offer protection from the sun, wind, and rain, I found it was great for a short overnight trip I took. The beach was about a five-mile hike away from my car, so I was looking for something that was light and easy to carry, and this was great.
Not only does it only weigh four pounds, setting it up was easy, and it only took a few minutes. It comes with stakes that are easy to use and keep the tent in place.
The tent’s durability is another plus. It is made of breathable 210T fabric and has a 3,000mm waterproof rating, so it’s more weather resistant than most beach tents.
In addition to stakes, it also has six sand pockets that provide additional stability on windy days, making it ideal for beach camping.
The tent’s design is well thought out, with plenty of ventilation to ensure proper airflow. The awning provides more shade from the sun, while two large mesh windows allow for free air flow and let you enjoy the beautiful ocean view while free of bugs like sand flies.
The anti-UV material used in the construction of the tent is also a major plus. It offers UPF 50+ sun protection, which is essential for camping in hot and sunny conditions.
Overall, this is a good option if you’re looking for a reliable and comfortable tent for overnight beach camping. Its lightweight and easy-to-set-up design, combined with its durability, ventilation, and anti-UV protection, make it a standout choice.
This is a great tent for one or two people an overnight camping trip where you need to hike to the beach. It weighs just 3.9 pounds, which makes it very easy to carry.
The tent is made of 20D nylon and has a silicone coating, which makes it water-resistant and durable. This is a must-have feature for beach camping, where you may encounter sudden rain showers or high humidity.
Additionally, the tent has a vestibule that provides additional storage space for gear or a shelter from the sun.
Setting up the Naturehike Mongar was a breeze. It has a free-standing design, which means you don’t need to stake it to the ground to keep it upright. The tent also has color-coded poles and clips, which makes it easy to identify which parts go where. Though to keep it blowing away, you’ll need good quality sand stakes, of course.
The ventilation of this tent is excellent, thanks to its mesh walls and roof. This feature allows air to circulate freely, which keeps the interior cool and comfortable, even on hot and humid nights. It also provides good UV protection, which is obviously important when camping on the beach, where you may be in the sun a lot of the time.
The Naturehike Mongar’s lightweight, water-resistant, and easy-to-set-up design make it an excellent choice for an overnight beach trip.
The tent is lightweight and easy to carry, making it perfect for backpacking and other outdoor activities.
The fabric is water-resistant, which is important for camping in wet conditions.
The tent is made of durable materials, which ensures that it will last for many camping trips.
The tent has a free-standing design and color-coded poles, making it easy to set up even for first-time users.
The tent has a mesh design that provides excellent ventilation, which keeps the interior cool and comfortable.
Cons:
Although it is designed for 2 people, it’s tight with little storage space. It would be more comfortable for one person.
It’s low, so you can’t stand up – or even sit up much.
The tent’s vestibule is kind of small, so there isn’t a lot of extra storage space, making this a good tent for shorter trips when you’ll have less gear with you.
This tent is perfect for …
Short camping trips for 1-2 people where you have to hike to the beach
I tested the Columbia Mammoth Creek tent on a recent 3-day beach camping trip.
One of the key features that make these tents ideal for beach camping is their excellent ventilation. The tent’s mesh windows and doors allow for a steady flow of air, which kept the interior cool and comfortable, even on hot days. The tents are also well designed with large doors that make entering and exiting the tent hassle-free.
The Columbia Mammoth Creek tents are water-resistant with an Omni-Shield coating, which keeps the inside of the tent dry and comfortable in most conditions. However, it didn’t rain much during my trip, but if you were in heavy or sustained rain, I’d still want to apply some waterproofing spray to be on the safe side.
Furthermore, these tents are resistant to wind, which is essential when camping on the beach, where winds can be strong. It was pretty windy on our trip and the sturdy poles kept the tent firmly in place the whole time.
If you want a pop up beach tent in a large size, this is the next best thing. While it’s not, strictly speaking a pop up tent, for a tent this size, it was surprisingly easy to set up. The tents come with color-coded poles and easy-to-follow instructions, and it only took me 10 minutes to set it up by myself.
In terms of durability, the Columbia Mammoth Creek tents are built to last. The high-quality materials and construction ensure that the tents can withstand the wear and tear of outdoor camping.
The tents also offer sun (UV) protection, which is essential when camping on the beach, where exposure to harmful UV rays is high. The tent’s material is designed to block out harmful UV rays, protecting campers from sunburn and other related health issues.
Overall, I would highly recommend the Columbia Mammoth Creek cabin tents for overnight beach camping. Their spacious design, excellent ventilation, water resistance, wind resistance, ease of setting up, durability, and sun (UV) protection make them an excellent choice for any beach camper.
It’s a great choice of you looking for a beach tent for 6 persons or more. It comes in three sizes: 6-person, 8-person, and 10-person.
This tent is incredibly easy to set up. It has a simple three-pole design that I managed to assemble by myself in less than 10 minutes even though it was windy on the beach at the time.
The tent’s design is also very thoughtful. The Skydome shape maximizes headroom, and the dark room technology blocks out 90% of sunlight, allowing for a peaceful sleep even when the sun is shining brightly outside. This, combined with the ventilation helps keep the interior cool during the day.
The tent is also durable and water-resistant, with its WeatherTec system keeping the interior dry even during heavy rain. It’s also wind resistant. During my test, we experienced strong winds blowing in from the ocean, but the tent remained stable and didn’t budge.
In terms of space, I tried the 4-person model, and it was roomy enough for four people, with enough space for gear storage as well. If you’re looking for a 6 person beach tent or even bigger, they also have models for 6, 8, and 10 people.
Although I wouldn’t want to carry it long distances, its weight for its size is good, coming in at just 15.6 pounds. It also comes with a carrying bag and it was not an issue for our trip, though we didn’t have to carry it too far.
Overall, its ease of setup, thoughtful design, sun protection, water and wind resistance, durability, ventilation, and portability make it a top choice.
The tent has a simple three-pole design that can be assembled by one person in under 10 minutes.
The Skydome shape maximizes headroom, and the dark room technology blocks out 90% of sunlight, allowing for a peaceful sleep even when the sun is shining brightly outside. Additionally, the tent is well ventilated, which helps keep the interior cool during the day.
The tent’s WeatherTec system keeps the interior dry even during heavy rain, and the tent remains stable and doesn’t budge even during strong winds.
The tent is roomy enough for four people, with ample space for gear storage but also comes in 6, 8 or 10 person sizes.
The tent weighs just 15.6 pounds and comes with a carrying bag, making transportation relatively easy.
Cons:
While the tent is durable, the zippers and poles are kind of flimsy and have the potential to break over time.
While the tent is generally well-ventilated, it can still get hot and stuffy inside on particularly warm days. I recommend having a sun shelter or simple beach cabana tent to sue during the day to stay cool.
This tent is a sturdier and more waterproof than the average beach tent, so it’s a good option for windy or wet weather.
In terms of water resistance, this tent performed exceptionally well during my stay at the beach. The rainfly is made from a high-quality 210T ripstop polyester that kept us dry during a sudden rain shower. Additionally, the tent’s sealed seams helped to keep moisture from entering the tent.
The KAZOO Outdoor Camping Tent also held up well against wind, which is a common concern when camping at the beach. The tent’s sturdy poles and well-anchored guy lines kept the tent in place during gusts of wind, making it a safe and comfortable place to sleep.
Ventilation is crucial when camping, especially in warmer climates. The KAZOO Outdoor Camping Tent features dual zippered doors plus two mesh windows and ceiling vents that provided excellent airflow and helped to regulate temperature inside the tent.
Setting up this tent is a breeze, with a quick and easy two-step process that takes just a few minutes to complete. The tent’s poles are color-coded, making it easy to know which pole goes where. Once the poles are in place, the tent simply snaps into place, and you’re ready to go.
One of the most impressive features of this tent is its sand resistance. It comes with a groundsheet that keeps sand and debris out of the tent, making it easy to keep clean and comfortable during your stay. Additionally, the tent’s floor is made from a durable and waterproof material that helps to keep moisture and sand from entering.
Lastly, this tent provides excellent sun protection with its UV-resistant material, making it a great choice for camping during sunny days at the beach. The tent’s size is perfect for a small group of 2-4 people, and it provides ample space for sleeping and storing gear.
First and foremost, the tent’s ease of setup is unmatched. It truly takes just 60 seconds to set up, and the pre-attached poles make the process a breeze. This is especially useful when setting up camp on the beach, where conditions can be challenging.
The downside is that it does not fold up small. In fact, it’s big when not set up, so it takes up a lot of storage space and is not very portable.
The tent comfortably sleeps four people and has enough room for gear storage as well – but this is the 6-person model. The four-person model would be more comfortable for two people with gear. It also has a room divider for added privacy, which can be a nice feature when sharing the tent with others.
It’s made from heavy-duty 150D polyester, which provides excellent durability and water resistance. The tent’s wind resistance is also impressive. During my test trip, we experienced some light rain with some strong gusts of wind, and the tent remained dry inside and stable.
Additionally, the tent’s ventilation is top-notch. The large windows and ground vent provide excellent airflow, which keeps the interior cool and comfortable even on warm nights.
The design of the tent is also well thought out, with the cabin-style providing ample headroom and a comfortable interior space. The tent also has a built-in awning, which provides additional shade and sun protection during the day.
Overall, this is an excellent option for beach camping trips. Its ease of setup, spacious interior, durable fabric, ventilation, design, sun protection, and wind resistance make it a top choice for any camping enthusiast.
The tent can be set up in just 60 seconds, making it ideal for those who want to spend less time setting up camp and more time enjoying the beach.
The tent is made from heavy-duty 150D polyester, which provides excellent durability and water resistance.
The large windows and ground vent provide excellent airflow, which keeps the interior cool and comfortable even on warm nights.
The tent has a built-in awning, which provides additional shade and sun protection during the day.
The tent is also wind-resistant and remains stable even during strong gusts.
Cons:
While the built-in awning provides some sun protection, the tent doesn’t have a full rainfly or dark room technology to block out the sun.
The tent is not ideal if you need a lot of additional storage space – get the bigger size.
The tent’s instant setup feature means that it comes with pre-attached poles, which can make packing it up and transporting it slightly bulkier than other camping tents. It takes up a lots of storage space in your vehicle and is not very portable, so it’s best suited for trips where you can park near the beach – and if you have a larger vehicle.
This tent is perfect for …
Longer trips for up to 4 people to windy beaches that you can park your vehicle nearby
If you want a beach canopy tent with sand pockets built in, then you should take a look at the Easthills canopy beach tent. Accommodating four seated and two for sleeping, it’s another of those beach tents that could also be used for overnight use.
It offers integral sand bags for holding it down, plus stakes and guy ropes. Storage pockets can be found on the inside, and it comes complete with a carry bag.
This is an easy beach shelter to erect. It has a dark interior, which offers improved sun protection by day and blocks out the light that could wake you up at night. It also has great ventilation to keep you cool.
This Pacific Breeze beach beach shelter tent is a canopy style that’s ideal for beach camping during fine weather. It’s easy to set up and offers SPF 50+ UV protection.
Inside, there are handy hooks for hanging up items as well as internal pockets for storage. 5 sand pockets also come supplied for pinning it down.
A 1-year warranty is provided, and there are three big windows for improved ventilation. The extending floor is also useful by day, and doubles up as a zippered wall by night.
This is not really a tent, more of a sunshade. That said, it makes the ideal canopy to use during the day or for those who want to camp out on the sand beneath the stars, but with the benefit of a little protection against the weather.
If you want daytime shelter, this large canopy is 7 feet high, so you can stand up when under it. Should you wish to curl up beneath the canopy at night, its 9 by 9 feet size gives enough space for two.
This Neso beach tent is lightweight, very portable, water repellent and offers sun protection. It also comes with corner bags for stones or sand to keep it in place. 20 colors or patterns are also available.
Again, our second cabana pick is a sun canopy rather than a tent, so it’s perfect for day use or those who want to sleep out in the open air during summer.
It comes in 4 shades of sea blues and greens, and you can also pick a 7.5 by 7.5 foot option or a larger one measuring 10 by 10 feet.
The water-resistant fabric offers SPF 50+ as well as some protection from light rain showers. It’s also simple to set up, with poles and sand pockets for stability.
Another item you may need – particularly with the larger family and more weatherproof tents – is a set of tent stakes that are designed for sand.
As you might imagine, it’s not as easy to secure a tent in sand as it is on grass. While most of the tents listed here have sandbags, some don’t. Adding these also provides extra protection, especially for very lightweight tents.
I’ve recommend the Orange Screw, U.S.-made anchors because I’ve found that they can cope with even a large beach camping tent and strong winds.
Choosing the best beach tent for camping – Frequently Asked Questions
How do you secure a beach tent for camping?
If you do use a regular tent, a set of sand stakes is a must. We’ve listed a product right at the bottom of this guide for that purpose. It’s a good idea to add these, even if your chosen tent comes with sandbags. You could also fill the sand pockets with stones, but beware the risk of tearing, especially if the stones are sharp.
Which is the best beach camping tent for you?
Whether you wanted a luxury beach tent for daytime use as a couple or a large family tent for beach camping, we hope this guide has been helpful. If you are staying overnight, don’t forget to take some tent stakes that can cope with sand, such as our recommended pick listed immediately above.
Happy camping!
Do you have another pick for the best beach camping tent? I’d love to know what it is. Join my private Facebook group National Parks Collectors and comment and let me know. (you can also pick up extra planning tips, share your photos and stories with other national park lovers and more).
If you found this review of the best generator for camping helpful but are not quite ready to buy yet, Pin It so you can find it easily!
Reviews of other items you may need for your camping trip:
James Ian is a national park, camping and hiking expert.
He has dedicated his life to travel, visiting more than 80 countries, all 7 continents and all of the main national parks in the United States. With over 35 years experience in the travel industry, James has worked on cruise ships, at resorts and hotels, and as a travel planner who’s helped hundreds of people plan successful trips to US national parks.
Based on his experience visiting our national parks multiple times, in-depth research and expertise as a travel planner, James has published detailed itineraries for most of the major national parks in the US. These itineraries, as well as in-depth park guides, comprehensive camping and hiking gear reviews and buying guides, and helpful packing lists and gift guides will help you have your own incredible trip to US national parks without stress and hassle.
As a national park expert, James has contributed to many publications, including Time Business News, Savoteur, Best Trip, and Wired.
Parks Collecting is a participant in the Amazon.com Services LLC Associates Program, an affiliate advertising program designed to provide a means for sites to earn advertising fees by advertising and linking to amazon.com. Amazon and the Amazon logo are trademarks of Amazon.com, Inc. or its affiliates.As an Amazon Associate I earn from qualifying purchases.
Parks Collecting is a participant in the Amazon.com Services LLC Associates Program, an affiliate advertising program designed to provide a means for sites to earn advertising fees by advertising and linking to amazon.com. Amazon and the Amazon logo are trademarks of Amazon.com, Inc. or its affiliates.As an Amazon Associate I earn from qualifying purchases.
A visit to Olympic National Park would not be complete without seeing its most spectacular waterfall, Sol Duc Falls. The falls can only be seen by hiking for about a mile (along an easy trail) through stunning old growth forest. There are several other Sol Duc hikes you can connect the trail to for longer hikes, if you prefer.
Before you set out, you will want to read this comprehensive trail guide so you know exactly what to expect, and how to ensure you have the best time.
No time right now to read about the Sol Duc Falls Trail, Olympic National Park? Pin It and save it for later:
Please note this post may contain affiliate links, which means we may receive a commission, at zero cost to you, if you make a purchase through a link. Please see our full Disclosure for more information. If you have any questions, please contact me.
FREE DOWNLOAD Subscribe to regular updates with tips for planning, travel inspiration and trip ideas and get instant access to the free PDF of this Sol Duc Falls Trail Guide
Guided Tours ofThe Sol Duc Falls Hike
There are plenty of tours into Olympic National Park from Seattle or Port Angeles. However, the national park is huge and has several distinct areas, and none of the tours go to all of them.
Two tours that include Sol Duc are listed here. You won’t have time to explore all the Sol Duc hiking trails, but both these tours include a guided hike to Sol Duc Falls!
If you like to hike, then this is for you. An experienced guide will take you on hikes at Hurricane Ridge (read Best Hikes in Hurricane Ridge to see options) and Lake Crescent (read Best Hikes in Lake Crescent) AND this hike to Sol Duc Falls. This is a private tour, so you get the guide all to yourself – and can choose the hikes you like (as long as you can fit them in the schedule, of course).
This tour also goes to these three parts of the national park. There are maximum 14 people, so it’s still a small group. It includes this hike to Sol Duc Falls, plus a 3-mile hike at Hurricane Ridge and time at Lake Crescent (with a possible hike to Marymere Falls, too).
Sol Duc Trailhead: Sol Duc Trailhead, at end of Sol Duc Road. You can also combine this with the Lover’s Lane Trail by starting at the Sol Duc Hot Springs or start at the Sol Duc Campground and follow a trail from there that connects just after the start of the main Sol Duc Trail.
Fun Fact: Between 1912 and 1920, the five-star Sol Duc Hotel and Resort stood where the current hot springs and resort are now. Like so many hotels of the day, it was destroyed by fire in 1920.
Open: The trail is open all year, but Sol Duc Road is not. It’s officially open year-round, but this is weather permitting and the reality is that it is often closed in winter due to snow and ice. The campground and hot springs are open late March to late October and this gives some indication of the period in which the road may be closed too. Check the NPS website for current road conditions.
Tips for Hiking the Sol Duc Trail
Sol Doc trailhead parking and picnic area
There is a picnic area at the parking area. This is a surprisingly nice place to have lunch.
Parking: Where do you park for Sol Duc Falls trail?
There are a couple of options. The most convenient is the main parking lot at the Sol Duc Trailhead, which is at the end of Sol Duc Road. If this is full, you could also park at the Hot Springs Resort further down the road and hike along the Lover’s Lane Trail. You can combine this with the trail through the campground for a 6.0-mile loop.
Get there early to avoid the crowds and get a parking spot, especially in summer, when the park gets extremely busy.
The waterfall flows all year, but is most impressive March – July when the water volume is greatest.
If you’re a serious photographer, you’ll want special filters, lenses and a tripod to get a long exposure, which creates that soft flowing look.
If you have an iphone, you can create the same look more easily. Take the photo with “live” on, then when you look at the photo, click on the small down arrow next to “live” in the top left corner and choose “long exposure” from the drop-down menu. That’s how this photo was taken:
Sol Duc Falls
The Sol Duc Trail Description
The trail is straight forward and easy to follow. There is a board with a map of the Sol Duc trails and some basic information at the trailhead.
There’s also a large sign indicating other trails in the area. Trails continue past the falls to Deer Lake, Lunch Lake, Heart Lake, Hoh Lake and Soleduck Park via the Sol Duc River Trail.
You’ll notice that the sign has the spelling “Soleduck”. This was the accepted spelling up until 1992 when the spelling was officially changed to “Sol Duc” by the State of Washington Board on Geographic Names.
The trail is wide and easy to follow. You’ll pass by enormous ferns and towering conifer trees. The lowland old growth forest has trees that are more than 200 years old!
0.1 miles into the hike, you’ll pass a junction with the B Loop trail that leads back towards the Sol Duc Campground. This is a way to complete a loop that includes the Lover’s Lane Trail (6.0 miles; recommended).
It also gives you access to the river where you can often see salmon spawning. Salmon, born here, swim down river to the Pacific Ocean, where they spend most of their lives. They swim back up river (jumping up Salmon Cascades) and spawn in the shallow river beds around the campgrounds. They then die, their nutrients added to the rich river ecosystem.
Continuing along the trail, as you gaze up and around, you’ll notice Douglas-fir, western hemlock, red cedar and Sitka spruce trees, frequently covered in moss.
At eye level are many downed trees – some forming nurse logs on which rows of trees have grown in the nourishment of the rotting wood. In fall especially, you’ll notice the colorful huckleberry, red elderberry, and Oregon grape bushes.
The National Park Service does a good job of keeping the trail clear, but you’ll frequently pass by logs that fell across the trail and had to be cut.
The trail climbs about 100 feet from 0.1 miles to 0.4 miles, and then flattens out.
You’ll cross several small creeks and brooks on small wooden footbridges. These run in spring especially and feed into the Sol Duc River. By late summer/ fall, all you might see is a dry creek bed.
After about half an hour, a small sign indicates a short trail off the left to an historic shelter. This is the Canyon Creek Shelter, sometimes also called the Sol Duc Falls Shelter.
In 1939, the year after Olympic became a National Park, the Civilian Conservation Corp (CCC) built three rustic shelters for hikers – at Hoh Lake, Moose Lake, and Sol Duc Falls. This is the only one that has survived and was listed on the National Register of Historic Places on July 13, 2007. Today, you can go up to it and shelter on the front porch.
Less than a minute later, you’ll arrive at Sol Duc Falls. You’ll first come to a large bridge that spans a small ravine that the Sol Duc River drops down into.
There is a great view of the falls from the bridge. The falls are 48 feet high.
You can see the ravine and fenced walkways off to the left after the bridge that are across from Sol Duc Falls.
There is a bench you can sit on to relax if needed.
The walkways provide various perspectives and angles from which to see the falls. Unlike most other waterfalls on the Peninsula, you can actually view it from various angles, including the brink as it falls into the narrow ravine below.
The falls are an interesting, unique shape. There is a sharp bend in the river just before the drop, so the falls are actually perpendicular to the river, rather than running across it, as is usual. Rocky formations divide the falls into three or four different channels, depending on the volume of water.
There are often enormous tree trunks jammed across the ravine.
In the other direction, you see the narrow ravine, which then opens up into a calmer river, where the salmon spawn.
When you’ve had your fill of the falls, you can return the way you came, or continue in a loop along Lover’s Lane or on to Deer Lake or the Sol Duc River Trail.
Sol Duc Falls Trail Map
Here is the part of the Sol Duc Trail map that includes the hike to Sol Duc Falls.
What You Need To Take/ Wear on the hike to Sol Duc Falls, Olympic National Park, Washington
You won’t need a lot of special clothing or equipment for this easy hike; however, there are some basics that are always a good idea to have with you when you hike. These include:
Good hiking boots or shoes. The trail is easy to follow, but it does have uneven sections with rocks and roots across the trail, and you’ll be much more comfortable if you have good quality hiking shoes or boots. If you need to get some, take a look at my Guide to Buying the Best Hiking Shoes/ Boots to help you know what to look for and get some recommendations.
Trekking poles. These are not strictly necessary, but the trail does have some elevation change and I find using hiking poles makes the uneven terrain and ups and down much easier on my knees. I have these Foxelli trekking poles – they are really lightweight, adjustable, and have several tips and comfortable handles. Get them here.
A camera. I lovethe GoPro HERO 12. It is designed for travel. It’s water resistant and durable and takes photos, video and even does streaming (if you have service). Check current prices on the GoPro HERO 12 here
Water. I recommend always taking some water with you when you hike, even for shorter likes this one. I love this hydroflask. It’s easy to carry, keeps temperatures well, and comes in multiple colors.
Sol Duc Falls are located in the Sol Duc Valley region of Olympic National Park at the far end of Sol Duc Hot Springs Road. Always check the road conditions or call the recorded Road & Weather line for updates at 360-565-3131.
Directions to Sol Duc Falls
Here are some basic directions from major areas to the Sol Duc Trailhead.
Port Angeles to Sol Duc Falls
Head west on Highway 101. Past Lake Crescent, after about 29 miles, you’ll see a sign for Sol Duc on your left. Take the Sol Duc Hot Springs Road for another 13.5 miles until you get to the end of the road. The entire trip takes a little over an hour.
Lake Crescent to Sol Duc Falls
It’s about 23 miles/ 40 minutes from Lake Crescent Lodge to Sol Duc Trailhead. Head west on Highway 101 and after 9 miles, turn left on to Sol Duc Hot Springs Road. The trailhead for this hike is at the end of the road.
Forks to Sol Duc Hot Springs and the Sold Falls Trailhead
From Forks, head east on Highway 101. After 27.5 miles/ 30 minutes, turn right on to Sol Duc Hot Springs Road and continue for another 13.5 miles until you arrive at the parking lot at the end of the road. This is the trailhead for the Sol Duc Trail.
Sol Duc to Hoh Rainforest
It takes almost two hours to drive between these two parts of Olympic National Park. From Sol Duc, head back to Highway 101, then turn left/ west. Keep driving through Forks. You’ll be on Highway 101 for 40 miles until you see the sign for the Hoh Rainforest. Turn left and follow the Hoh Valley Road for about 20 miles until the end of the line.
Sol Duc Lodging
There are several Sol Duc Falls lodging options, including a resort and campground nearby, and hotels, vacation rentals and campgrounds in nearby Port Angeles and Forks.
Sol Duc Cabins
If you want to stay right nearby and don’t want to camp, then Sol Duc Hot Springs Resort is your only option. The Sol Duc Resort should probably be named “Sol Duc Hot Springs Cabins” because other than one large house, there are only rustic cabins here and it might not be exactly what you expect when you hear ‘resort’. Nonetheless, if you want to relax in the hot springs and do some hiking in the area, it makes a good base.
You can also visit the hot springs as a day visitor if you just want to spend a few hours relaxing in the natural hot water.
Sol Duc Camping
The hot springs resort also runs the nearby Sol Duc Campground and RV Park. There are 82 sites including an RV park and two loops for tent camping. It’s open late March to late October. Primitive camping (no water) is also available off season when the road is open.
Hotels near Sol Duc Falls
I personally find that staying in Port Angeles or Forks is more convenient because you can access other areas of the national park more easily from those towns as well as Sol Duc. Sol Duc is basically the same distance for Forks and Port Angeles (both are about an hour away), so either makes a good base.
Accommodations in Port Angeles
My top picks for places to stay in Port Angeles are:
A lovely lodge with a landscaped garden with a waterfall, plus an outdoor swimming pool, whirlpool, and fitness center. Free WiFi and parking. Breakfast is included in the rates. Rooms have two Queens or one King sized bed.
Let’s call this ‘rustic luxury’. A rustic feel with all wood interiors, this tree house is a wonderfully unique place to stay – 20 feet high in the air. The two-bedroom options come with kitchen, air conditioning and have lovely views. Recommend as long as you are OK climbing stairs.
A basic but clean motel with air conditioning, flat screen TVS, free WiFi, and free Parking. Some rooms have balconies. There is a variety of rooms including one Queen, one King, two Queen, and one Queen with a foldout sofa.
Cute, spacious cabins, each with a kitchen, private bathroom and patio. There are several rooms types including two Queens, a King with a sofa bed, a King with two bunk beds, and a King with two twin beds. This is a great option for families and couples who want to save a little money on eating out all the time. Free parking and WiFi.
A lovely property with suites that all have a porch with views of the nearby Quillayute River. There are one- and two-bedroom suites with several bed types available. Free parking and WiFi.
Sol Duc means “sparkling waters” in English. It comes from the Quileute name for the area.
What’s special about Sol Duc Falls in Olympic National Park?
Sol Duc Falls are generally considered the most beautiful waterfalls in Olympic National Park. The waterfalls are just after a 90-degree bend in the river and fall sideways into a narrow ravine. They split into 3 or 4 channels. So, they are an unusual shape and can be seen from many more different angles than most waterfalls.
What else is there to do in Sol Duc, Olympic National Park?
Top things to do in Sol Duc Valley include: 1. There are several other wonderful hikes in Sol Duc Valley. 2. You can also soak in hot mineral springs or swim in the pool or get a massage at Sol Duc Hot Springs Resort. You can buy a Sol Duc Hot Springs day use pass without needing to stay at the resort. 3. Several times a year, you can see salmon jumping up a waterfall at Salmon Cascades.
How long is the trail to Sol Duc Falls, WA?
The Sol Duc Falls nature trail is 0.8 miles in each direction, out and back. It’s a total 1.6-mile hike.
Is Sol Duc Falls worth seeing?
Yes, the Sol Duc Falls are definitely worth seeing. They are widely considered the most beautiful waterfall in Olympic National Park.
Do you need a pass for Sol Duc Falls?
There no special pass needed to see Sol Duc Falls. However, you do need to pay the Olympic National Park entrance fee to get into Sol Duc, Washington, which is checked near the beginning of Sol Duc Hot Springs Road. You can get it at the park or buy it online in advance. If you are planning to visit more than just Olympic National Park this year (Mount Rainier National Park and North Cascades National Park are both close), it can be great value to purchase an America The Beautiful Pass. The one-year pass includes standard entrance at all sites managed by the National Park Service, Forest Service, Fish and Wildlife Service, Bureau of Land Management, Bureau of Reclamation, and Army Corps of Engineers. The pass covers the entrance fee for a driver and all passengers in a personal vehicle or up to 4 adults at sites that charge per person. Get an America The Beautiful pass here.
Can you swim in Sol Duc Falls?
No, swimming is not permitted at SolDuck Falls. If you want to go swimming, the nearby Sol Duc Hot Springs Resort has a swimming pool.
How to see Sol Duc Hot Springs?
The only way to see the SoleDuck Falls is to hike there. It’s a fairly easy 1.6-mile round trip hike through old growth forest that is a highlight of any trip to Olympic National Park.
FREE DOWNLOAD Subscribe to regular updates with tips for planning, travel inspiration and trip ideas and get instant access to the free PDF of this Sol Duc Falls Trail Guide
Travel Insurance for Sol Duc Falls, Washington State
You should definitely get travel insurance for your trip to Olympic National Park. This can protect you against medical and emergency repatriation, as well as things like trip cancellation, loss and/ or theft of property, etc.
Do you have any additional tips for hiking to Sol Duc Waterfall or questions about this or any other Sol Duc Valley hikes? I’d love to hear about them. Join my private Facebook group National Parks Collectors and comment and let me know (you can also pick up extra planning tips, share your photos and stories with other national park lovers and more).
If you liked this post about Sol Duc Falls, Port Angeles, WA, please share the love and Pin It to your Olympic National Park board!
James Ian is a national park, camping and hiking expert.
He has dedicated his life to travel, visiting more than 80 countries, all 7 continents and all of the main national parks in the United States. With over 35 years experience in the travel industry, James has worked on cruise ships, at resorts and hotels, and as a travel planner who’s helped hundreds of people plan successful trips to US national parks.
Based on his experience visiting our national parks multiple times, in-depth research and expertise as a travel planner, James has published detailed itineraries for most of the major national parks in the US. These itineraries, as well as in-depth park guides, comprehensive camping and hiking gear reviews and buying guides, and helpful packing lists and gift guides will help you have your own incredible trip to US national parks without stress and hassle.
As a national park expert, James has contributed to many publications, including Time Business News, Savoteur, Best Trip, and Wired.
Parks Collecting is a participant in the Amazon.com Services LLC Associates Program, an affiliate advertising program designed to provide a means for sites to earn advertising fees by advertising and linking to amazon.com. Amazon and the Amazon logo are trademarks of Amazon.com, Inc. or its affiliates.As an Amazon Associate I earn from qualifying purchases.
Acadia National Park is an incredible national park in Maine, in the far northeastern corner of the country. Spread over a large part of Mount Desert Island, the nearby Schoodic Peninsula, the tiny Isle Au Haut, and several other tiny islands in the area, it’s famous for its pink granite coast, wooded hills, and sparkling seas.
With miles of hiking trails, historic carriage roads, and scenic drives, it is easy to see why this is considered one of the richest jewels in the National Park system.
Want to learn more about Acadia? Let’s take a look at some interesting facts about Acadia National Park.
No time right now to read these fun facts about Acadia National Park? Pin It and save it for later:
Please note this post may contain affiliate links, which means we may receive a commission, at zero cost to you, if you make a purchase through a link. Please see our full Disclosure for more information. If you have any questions, please contact me.
If you are planning to visit Acadia National Park in spring, summer or fall, make your planning easy and stress free with a detailed itinerary. I have 1-, 2-, 3-, and 4-day itineraries for Acadia National Parkthat include all the park highlights, give you choices based on your preferred activity level, and take all the stress out of planning your trip.
Size: Acadia National Park encompasses more than 48,000 acres on Mount Desert Island, Schoodic Peninsula, Isle Au Haut, and many smaller coastal islands.
Number of Visitors each Year: Acadia had 3,970,260 visitors in 2022
Annual Rainfall: Annual rainfall in Acadia is 48 inches
Highest Elevation: The highest peak in Acadia is Cadillac Mountain (1,528 feet above sea level)
Lowest Elevation: The lowest elevation is sea level (0 feet)
When was Acadia National Park established? In 1919, President Wilson signed the act establishing Lafayette National Park. Before this, it was Sieur de Monts National Monument (established July 8, 1916). Its name was changed to Acadia National Park on January 19, 1929 when the Schoodic Peninsula was added to the park.
FREE DOWNLOAD Subscribe to regular updates with tips for planning, travel inspiration and trip ideas and get instant access to the free PDF of these Fun Facts About Acadia National Park
Fun Facts About Acadia National Park
1. Acadia National Park was the first National Park created entirely by private donations
We can thank three rich men for Acadia National Park: George B. Dorr, Charles W. ELiot, and John D. Rockefeller.
George Dorr is widely considered the “father of Acadia”. He grew up in a wealthy Boston family and traveled widely as a young man. In 1869, he visited Mount Desert Island and fell in love with the natural beauty of the area. He decided to move there, but wanted to do much more than that.
Charles W. Eliot, the President of Harvard and our second hero, together with Dorr and others, created the Hancock County Trustees of Public Reservations for the purpose of “…acquiring, owning and holding lands and other property in Hancock County for free public use.” Charles W. Eliot called the first meeting.
Dorr bought up land and donated his own land and encouraged others to do the same – or to donate money to the Hancock County Trustees of Public Reservations so they could buy land with it.
After winning a fight with the Maine state government, he realized that he needed additional measures to ensure the safety of the land in the area, so in 1916, he presented 5,000 acres of land to the federal government. President Woodrow Wilson used this land to create the Sieur de Monts National Monument. Dorr was appointed superintendent of the national monument.
Three years later, in 1919, after Dorr managed to donate even more land, President Wilson changed the area’s status and created Lafayette National Park. Dorr became the national park’s first superintendent.
Enter the third rich man in our story, John D. Rockefeller Jr., the only son of the founder of Standard Oil and one of the richest men in the world at the time.
Rockefeller also fell in love with this area and in 1910 bought a summer home in nearby Seal Harbor. Between 1913 and 1945, Rockefeller purchased land and designed a comprehensive system of carriage roads. He donated more than 11,000 acres to the park.
2. You can find Rockefeller’s Teeth in Acadia National Park
Rockefeller not only donated land to Acadia National Park, as a summer resident and aficionado of the area, he was very aware of the potential impact of traffic and the need for organized transportation in the area. To that end, with the help of the famous landscape architect Frederick Law Olmsted Jr. (who designed Central Park in NYC), he designed and arranged to have built 45 miles of carriage roads.
Construction started in 1927 and, while it was funded by Rockefeller, much of the hard labor was done by the Civilian Conservation Corps (CCC).
As part of the carriage road system, Rockefeller built 16 bridges (a 17th was added by the NPS in 1941). The first – and perhaps the most famous – is the Cobblestone Bridge, built, as the name suggests, of rounded river stones.
So, how does all this connect to Rockefeller’s Teeth? Well, large coping stones were added along the carriage roads to serve as guardrails. These huge, irregular-shaped granite rocks are nicknamed “Rockefeller’s Teeth” because of their shape.
These roads still exist today, and are popular ways to hike, bike and ride through the park.
If you’d like to read more about Rockefeller’s carriage roads, pick up a copy of Acadia’s Carriage Roads by Robert A. Thayer
3. You can see the first sunrise in the U.S.A. from the highest peak on the east coast in Acadia National Park
Cadillac Mountain is not only the highest mountain in Acadia National Park, at 1,532 feet, it is the highest peak on the east coast of the U.S. At the top are stunning views over the surrounding area, and it’s a great place for bird watching.
From mid-April to late November, you can drive up to the summit (there are also hiking trails). The road is closed from December to mid-April. Reservations are required from late May to late October.
A fun fact: Between the second week in October and the first week of March, the summit of Cadillac Mountain is where you’ll see the first sunrise in the United States (the rest of the year, that honor goes to Mars Hill, a 1,748-foot mountain near the Canadian border). Even if you aren’t here for the first sun in the U.S., the sunrises are still spectacular throughout the year.
Another fun fact: Cadillac Mountain is named after French explorer Antoine de La Mothe, sieur de Cadillac, who was a Governor of Louisiana and founded the city of Detroit!
4. Acadia National Park has more than 150 miles of hiking trails
The hiking trails in Acadia National Park are legendary. Perhaps most famous are the ‘iron rung’ trails.
These are steep trails that involve climbing up iron rungs that have been embedded into the side of the mountains, as well as clambering up the occasional ladder, scrambling over rocks, and walking along narrow ledges with steep drop-offs on one side. Definitely not for the faint-of-heart, but a thrill, for sure.
At the top are spectacular views over the wooded hills and surrounding island-dotted seas. Some of the most famous are the Beehive and the Precipice Trails.
Many of these summits do have easier trails to the same point for those with a fear of heights. There are also flat and easy trails like the iconic Ocean Path and flat Jordan Pond Loop.
6. Acadia was the first National Park east of the Mississippi River and is the only national park in the Northeast of the U.S.
When was Acadia National Park founded?
Acadia National Park started as Sieur de Monts National Monument in 1916. 3 years later, it became the first national east of the Mississippi River when it was upgraded to Lafayette National Park. It gained the Schoodic Peninsula and took on its current name ten years later on January 19, 1929.
In all this time, it has remained the only National Park in the northeast!
Acadia National Park is named after the parts of North America that are historically associated with the lands and culture of the former colony of New France, Acadie, namely New Brunswick, Nova Scotia, the Magdalen Islands and Prince Edward Island in Canada, and Maine in the U.S.
Fun Fact: Did you know that the word cajun in Louisiana was a (mispronounced) version of Acadian even though they are not technically Acadians, but a separate group of French Americans?
Another fun fact: The name Acadia comes from either the Arcadia district in Greece, which means “refuge” or “idyllic place” OR after the indigenous Canadian Miꞌkmaq language word for “fertile land”, Cadie. Whichever is correct, Acadia National Park is definitely an idyllic refuge and a fertile land. 😊
8. Acadia National Park has one of the most photographed lighthouses in the U.S.
Bass Harbor Head Light Station is found in the southwest corner of Mount Desert Island. Sitting on the edge of a rocky cliff, it is extremely picturesque anytime of the day, but is most specular at sunset.
The lighthouse, which dates from 1858, served as a Coast Guard residence from 1974 until 2012. The site includes an original Keeper’s Dwelling, an 1897 Bell House, a 1900’s Oil House, and a 1905 garage.
You can’t go inside, but there are two paths to explore. The short path to the right of the parking lot takes you to the lighthouse itself. To get the classic photo, you’ll need to take the longer path to the left of the parking lot and then climb over rocks – which can be slippery and dangerous when wet.
Bear in mind that the parking area at the lighthouse is very small, so if you plan to be there for sunset photography, get there very early.
9. Acadia Is the 5th smallest National Park in the U.S. – and the 5th most popular!
Although it is spread over almost half of Mount Desert Island, the Schoodic Peninsula, Isle au Haut, and several other small islands, Acadia National Park is only 49,000 acres (35,332 acres owned by the NPS and 12,416 acres of privately owned land protected by the national park designation). This makes it the fifth smallest national park in the US.
However, don’t be fooled by its size. With miles of hiking trails, rugged coastlines, scenic drives, and historic carriage roads, it packs a punch! Come here for sailing, bird watching, hiking, eating popovers, sailing, kayaking, or just relaxing on the beach. There is truly something for everyone. And because it is small, it is very accessible.
Which is why it’s also the 5th most popular national park in the US! Around four million people visit it each year.
10. Acadia National Park is a birds-of-prey-watcher’s paradise
Acadia National Park is a bird watcher’s paradise. In fall (approximately late August to mid-October), thousands of birds of prey fly over Cadillac Mountain on their annual migration. You can participate in the Cadillac Mountain Hawkwatch and help with counting and logging them.
More than 71,000 birds of prey have been recorded in the past 25 years. Keep an eye out for eagles, vultures, owls, falcons, and osprey.
Just a few decades ago, peregrine falcons and bald eagles were almost extinct, victim of commercial pesticides that softened their eggs. The last known nesting pair of peregrine falcons in the park was reported in 1956. In 1984, Acadia began taking part in a falcon restoration program (and since, pesticides have changed). Today, the bald eagle and the peregrine falcon are no longer considered endangered, though they are still protected species.
To protect the birds during their nesting season, any hiking trails near a nesting pair of peregrine falcons are closed from March to August. These typically include the Jordan Cliffs Trail, Precipice Trail, Valley Cove Trail, and part of the Orange & Black Path.
11. James Bond (yes, 007) has a connection to the birds of Acadia
Did you know that the famous fictional spy is named after a real person? Ian Fleming, who wrote the James Bond books that the movies are based on, was searching for a “natural-sounding name” for his protagonist when he recalled reading a book Birds of the West Indies, written in 1936 by an ornithologist called James Bond. He liked the author’s name so much that he stole his name for his hero.
The Acadia connection? James Bond (the ornithologist who wrote about birds of the feathered kind, not the womanizing secret agent interested in other kinds of ‘birds’) spent summers on Mount Desert Island with his uncle, and the area inspired him to become an ornithologist! So, without Acadia National Park to inspire him to study birds and write a book that Ian Fleming read and was in turn inspired by his name, 007 may have been called … David Smith??? John White??? Mike Jones???
To strengthen his connection even more, James Bond also wrote The Birds of Mt. Desert Island, Acadia National Park, Maine with Carroll Tyson.
On October 17, 1947, a fire started in a nearby cranberry bog and quickly took hold. It grew into a blazing inferno that consumed almost the entire eastern side of Mount Desert Island.
A total of 17,188 acres were burned, including more than 10,000 in Acadia National Park. Five people died and more than $23 million (in 1947!) of property was destroyed, including many of the enormous ‘cottages’ that were summer homes for the wealthy ‘elite’.
But Acadia National Park rose like a phoenix from the ashes! The forest now has greater diversity – the ubiquitous fir and spruce trees have been partially replaced by sun-loving aspen, birch and maple trees (helping make the fall colors especially stunning).
And the mansions on Millionaires’ Row were replaced in part with motels, helping make the area more accessible to the millions of middle-class Americans and international visitors who still enjoy it today.
Do you have any other Acadia National Park Fun Facts to share? I’d love to hear them. Join my private Facebook group National Parks Collectors and comment and let me know (you can also pick up extra planning tips, share your photos and stories with other national park lovers and more)
FREE DOWNLOAD Subscribe to regular updates with tips for planning, travel inspiration and trip ideas and get instant access to the free PDF Fun Facts About Acadia National Park
If you liked this post, please share the love and Pin It to your Acadia National Park board!
James Ian is a national park, camping and hiking expert.
He has dedicated his life to travel, visiting more than 80 countries, all 7 continents and all of the main national parks in the United States. With over 35 years experience in the travel industry, James has worked on cruise ships, at resorts and hotels, and as a travel planner who’s helped hundreds of people plan successful trips to US national parks.
Based on his experience visiting our national parks multiple times, in-depth research and expertise as a travel planner, James has published detailed itineraries for most of the major national parks in the US. These itineraries, as well as in-depth park guides, comprehensive camping and hiking gear reviews and buying guides, and helpful packing lists and gift guides will help you have your own incredible trip to US national parks without stress and hassle.
As a national park expert, James has contributed to many publications, including Time Business News, Savoteur, Best Trip, and Wired.
Parks Collecting is a participant in the Amazon.com Services LLC Associates Program, an affiliate advertising program designed to provide a means for sites to earn advertising fees by advertising and linking to amazon.com. Amazon and the Amazon logo are trademarks of Amazon.com, Inc. or its affiliates.As an Amazon Associate I earn from qualifying purchases.