How To Get To Zion National Park: Complete Guide

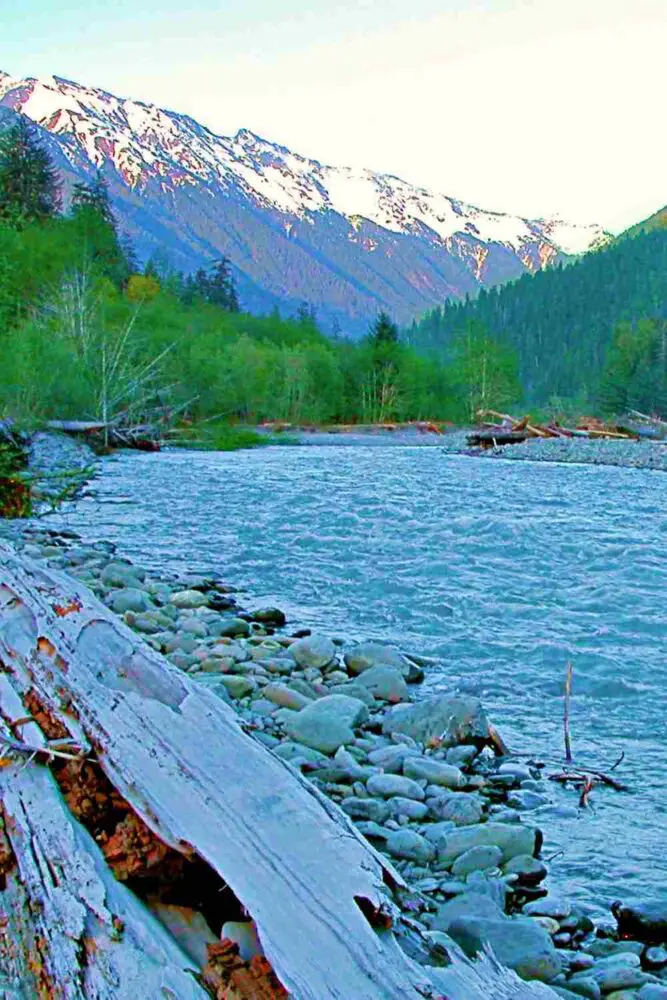
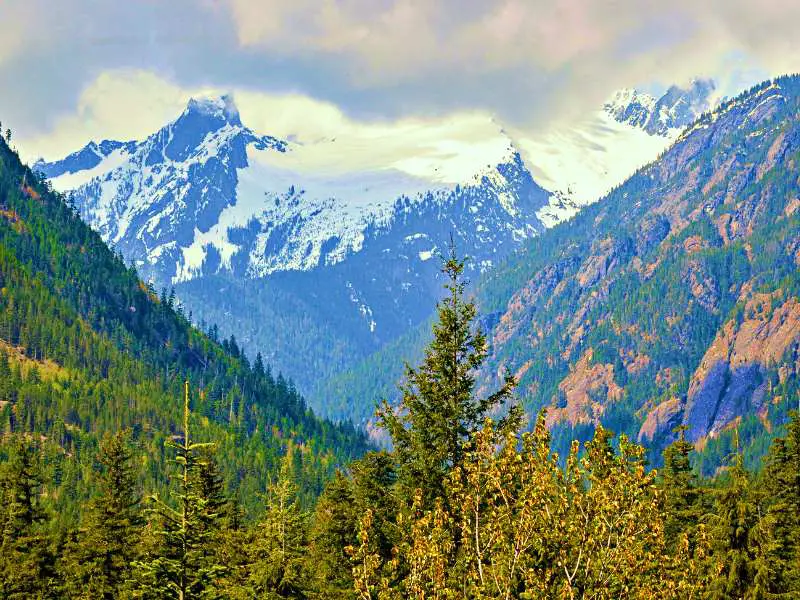
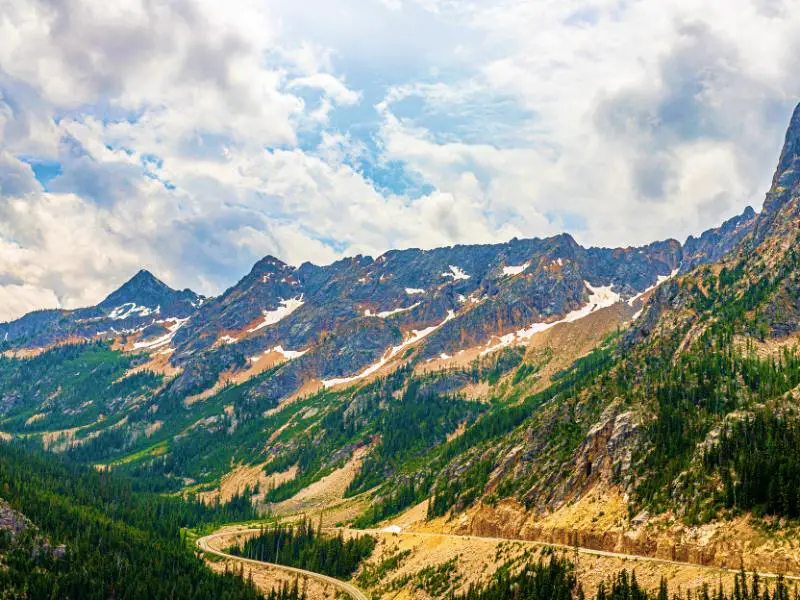
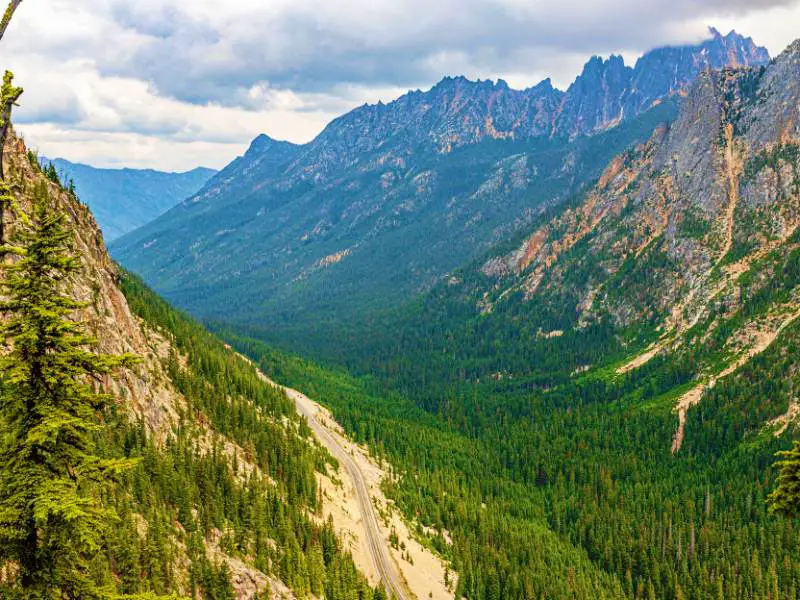
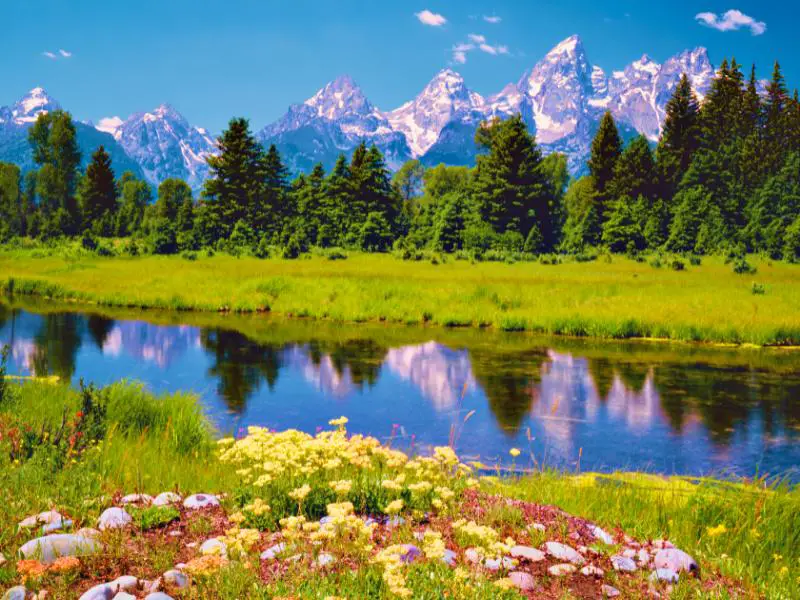
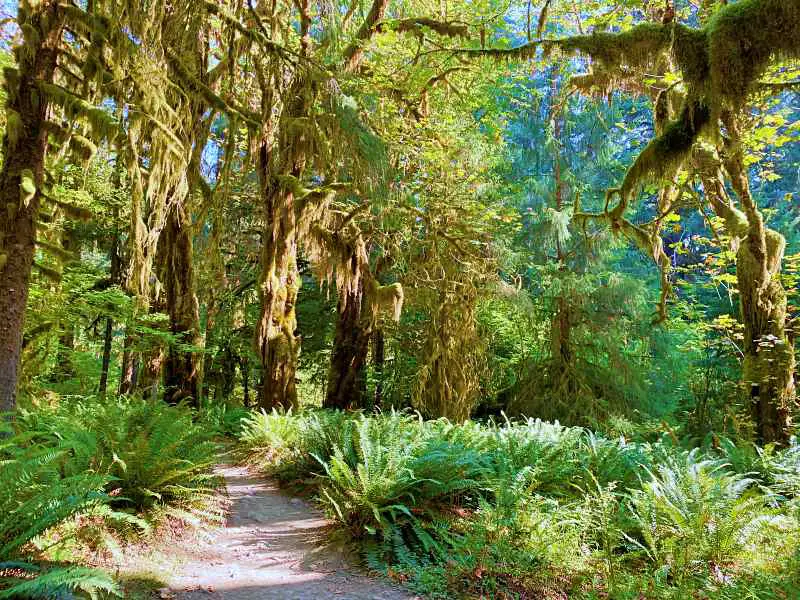
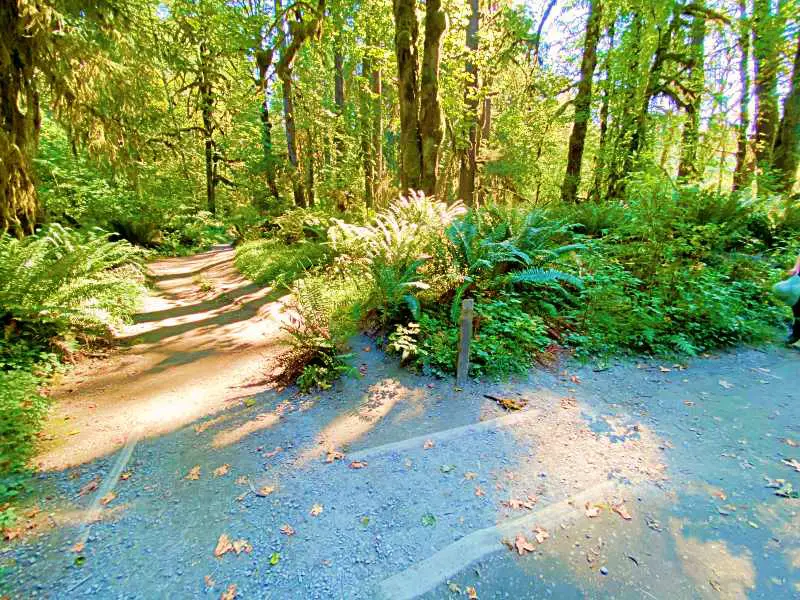
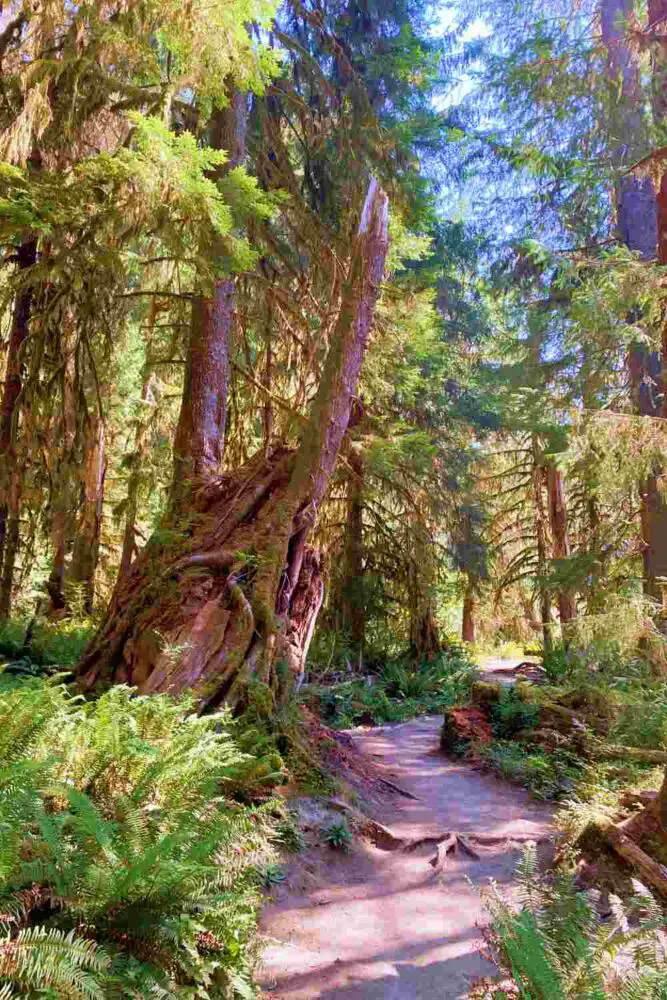
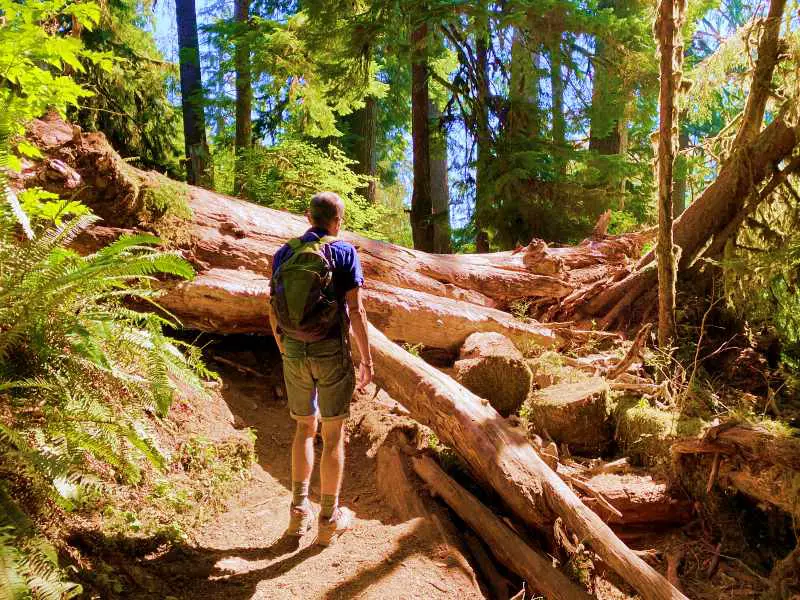
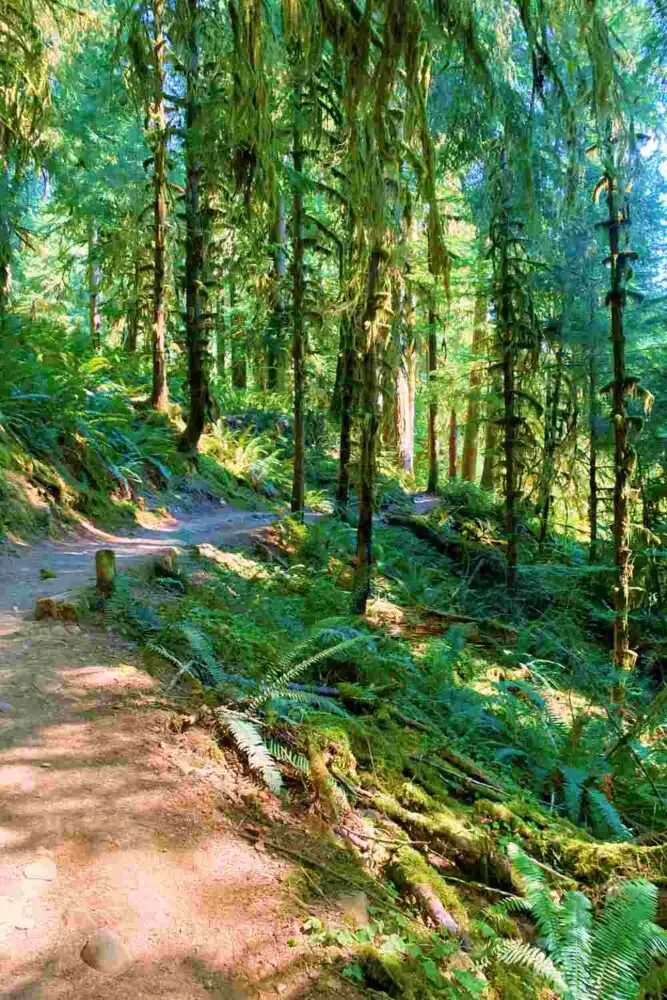
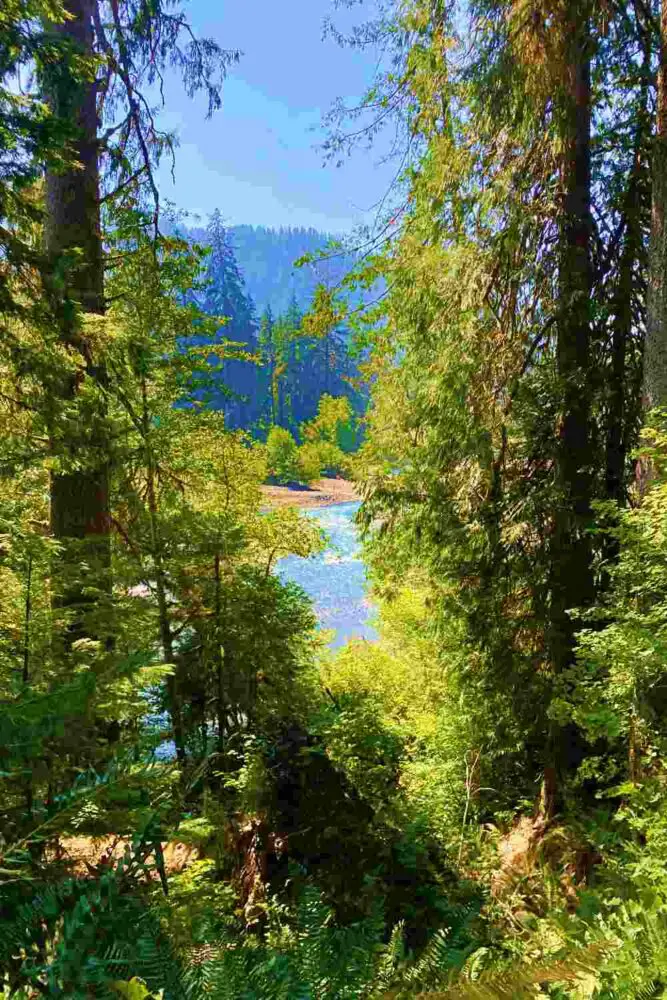
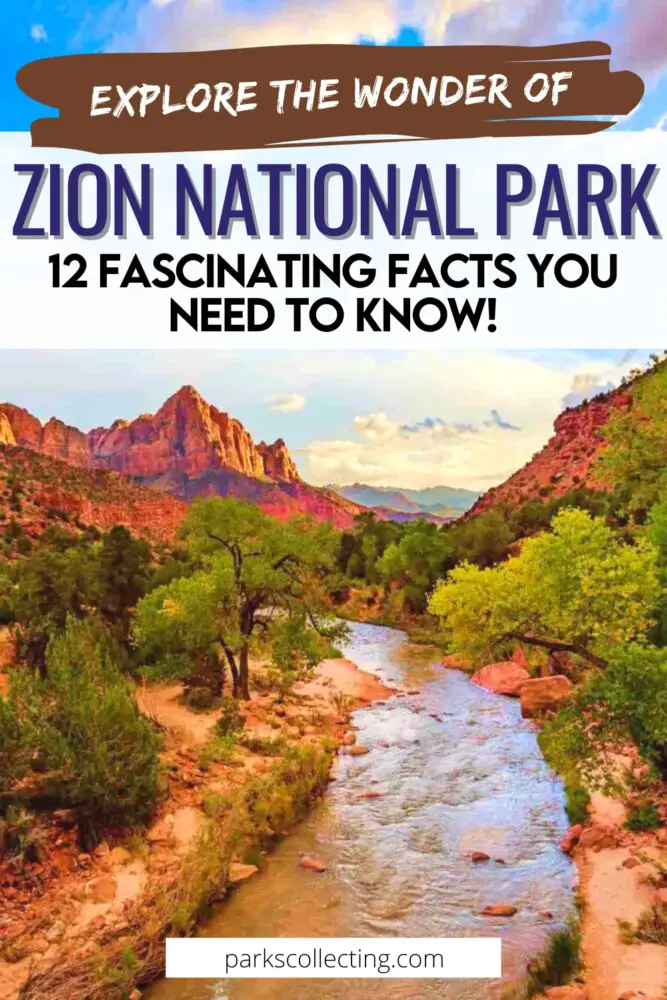
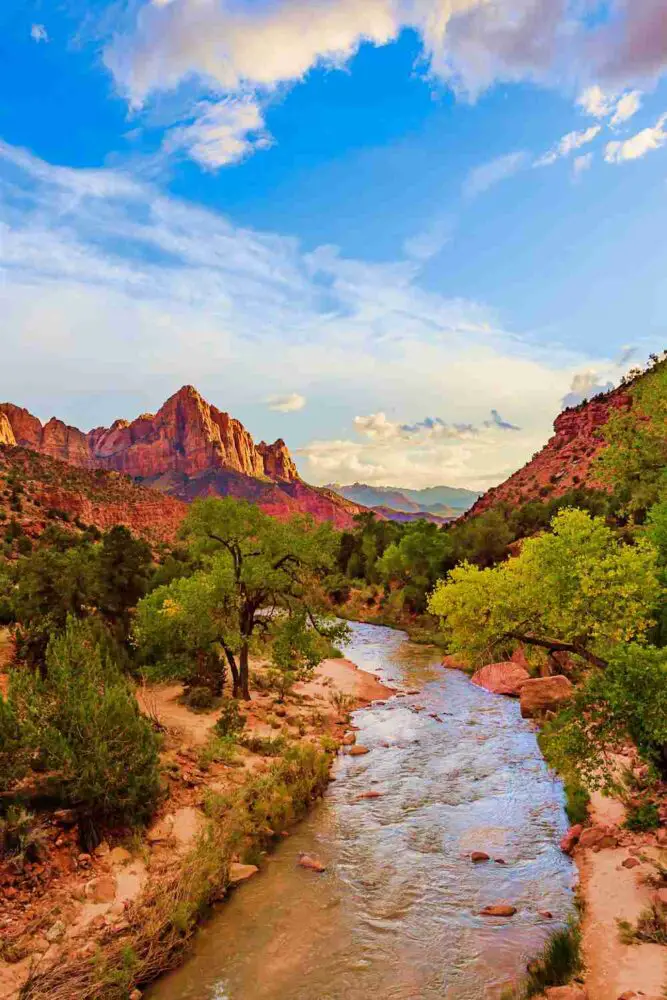
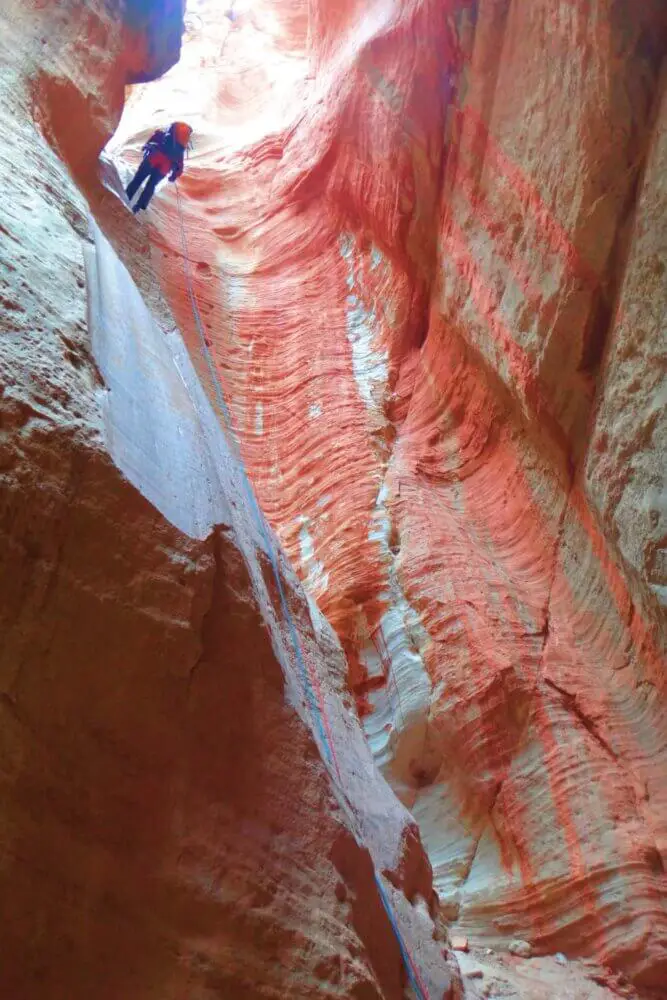
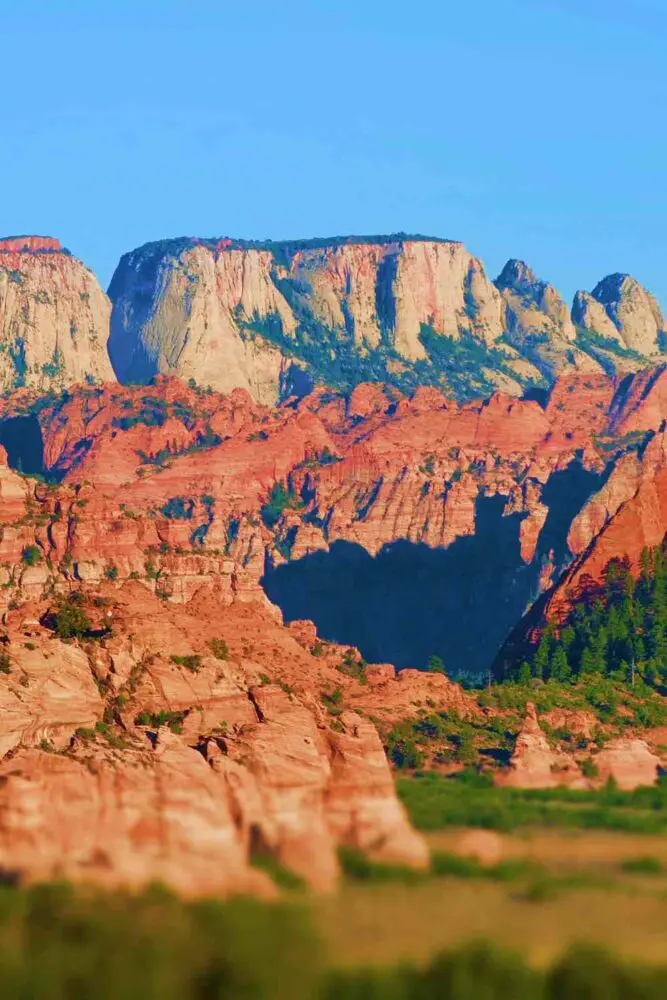
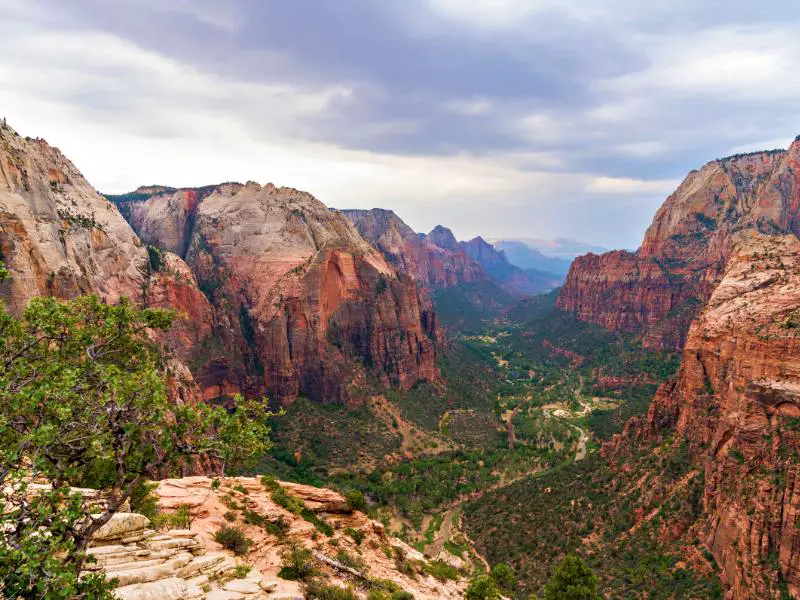
One of Utah’s ‘Mighty 5’ national parks and the first national park in the state, Zion National Park offers remarkable views of huge sandstone cliffs and stunning canyons as well as some of the most iconic hiking trails in the country.

As a result, it’s one of the most popular national parks and planning a trip there can be overwhelming. If you’re going to Zion National Park and starting to plan your trip, this guide will help you figure out the best way to get to Zion National Park. 

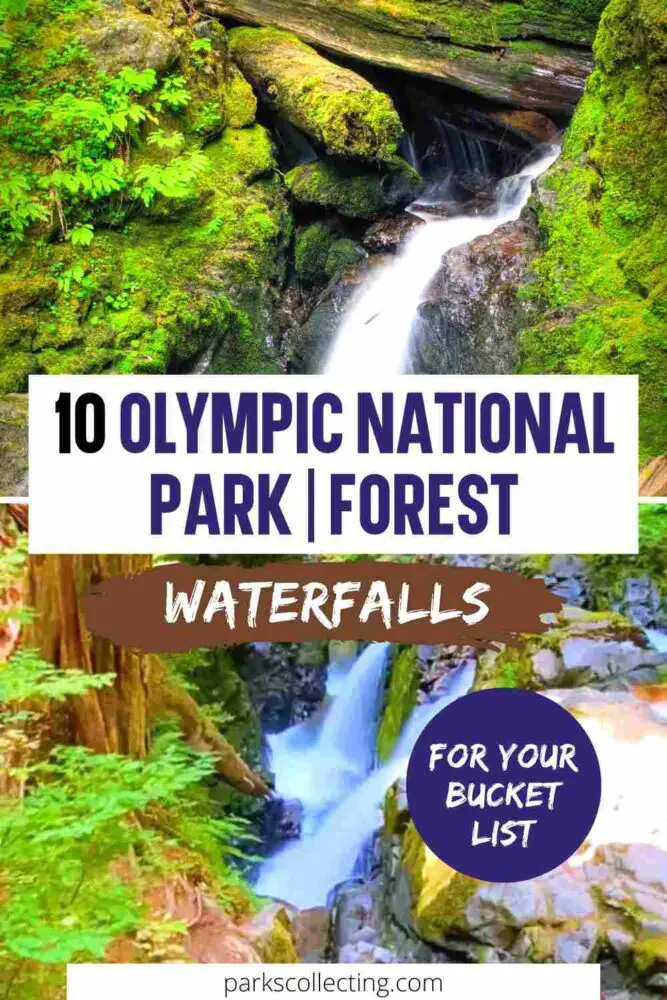
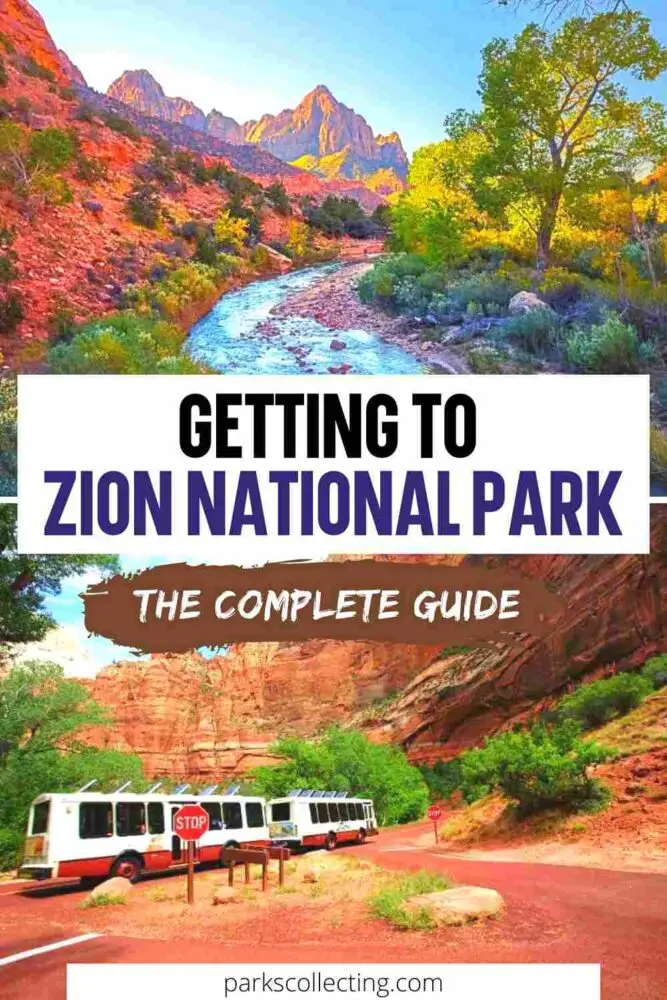
No time right now to learn about how to get to Zion National Park? Pin It and save it for later:

Please note this post may contain affiliate links, which means we may receive a commission, at zero cost to you, if you make a purchase through a link. Please see our full Disclosure for more information. If you have any questions, please contact me.

If you are planning to visit Zion National Park in spring, summer or fall, make your planning easy and stress free with a detailed itinerary. I have 1-, 2-, and 3-day itineraries for Zion that include all the park highlights, give you choices based on your preferred activity level, and take all the stress out of planning your trip.

Check out the three Zion itinerary options

You might also like to read:

FREE DOWNLOAD
Subscribe to regular updates with tips for planning, travel inspiration and trip ideas and get instant access to the free PDF of this guide to
How To Get To Zion National Park

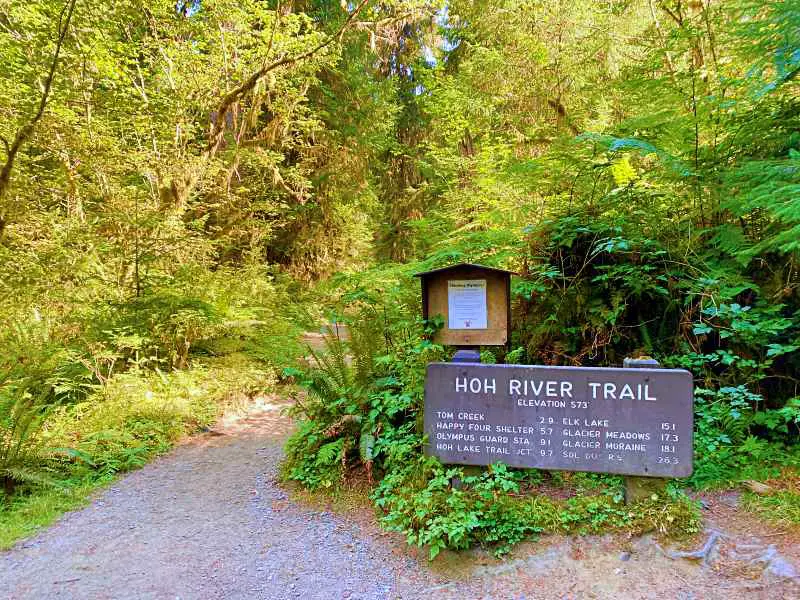
Zion National Park Entrances

There are several distinct areas in Zion National Park, each with their own entrance(s).
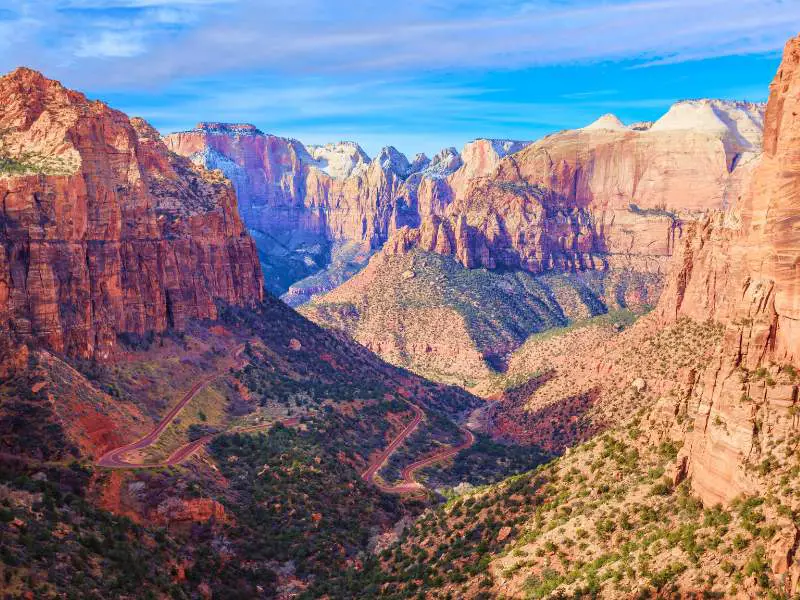
Zion Canyon

This is the main section of the national park and most people only visit this area.  There are two entrances:

South Entrance (Main Entrance).  This entrance is accessed via Utah’s State Route 9, just off the exit from Springdale. 

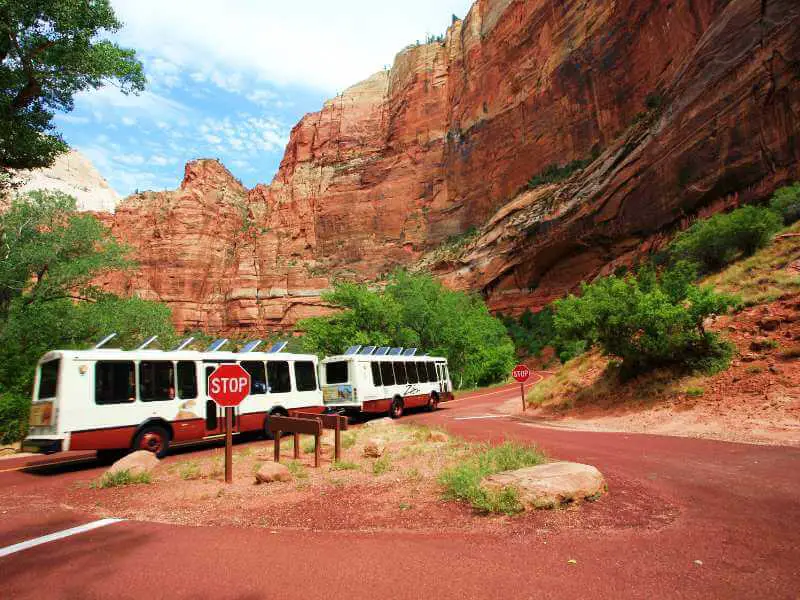
From March to November, you’re required to ride the free shuttles provided by the National Park Service to visit the main part of Zion Canyon. Check the details on How to Take a Bus to Zion National Park below.  However, you can drive between the South Entrance at Springdale and the East Entrance near Kanab at any time. 

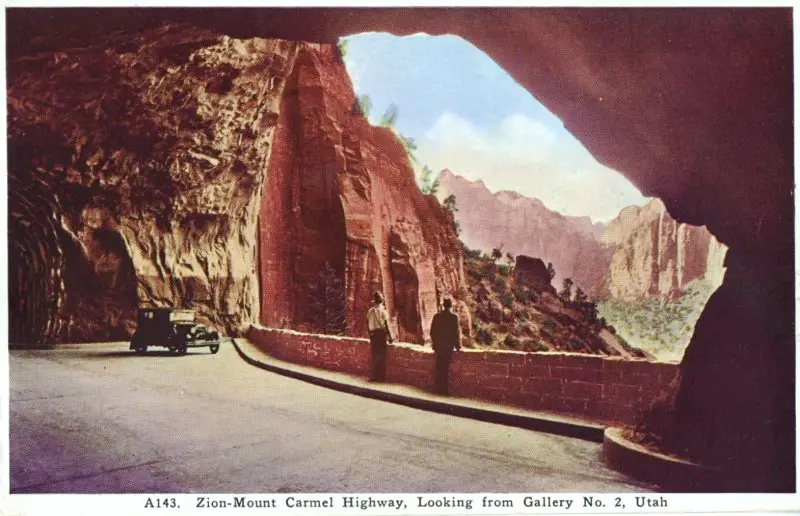
East Entrance (Zion-Mount Carmel Road).  If you’re coming from (or going to) Bryce Canyon, the North Rim of Grand Canyon or Kanab, you will most likely use the park’s East Entrance. Note that the road goes through the Zion – Mt. Carmel Tunnel and there are restrictions on size.  Check the NPS website for details.

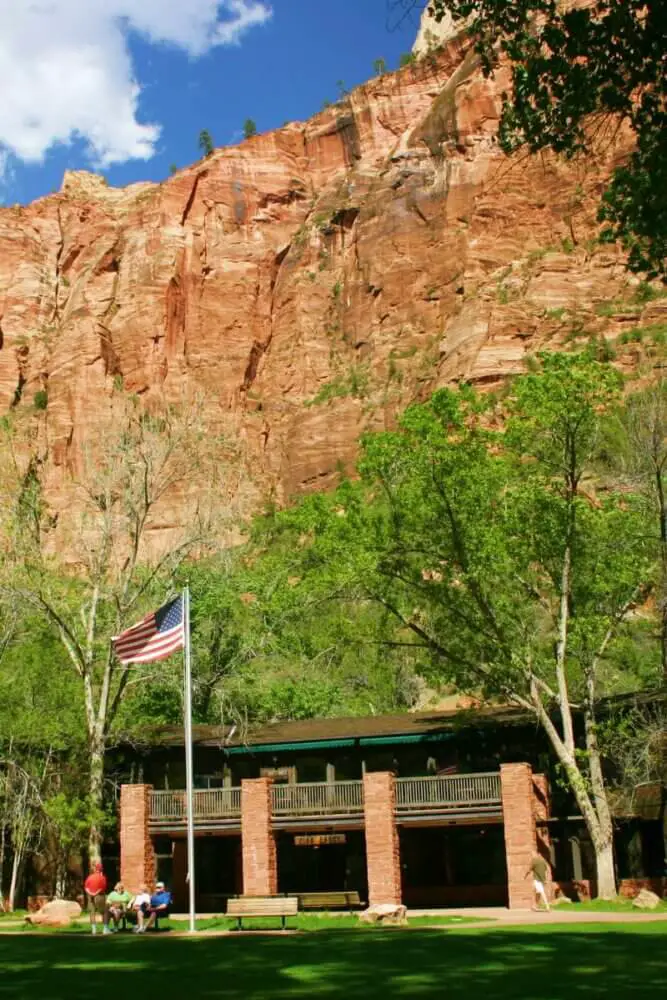
Visitor Centers: Zion Canyon Visitor Center and Zion Human History Museum 

Kolob Canyons

This entrance only gives access to Kolob Canyons in the park’s northwest section and can be accessed via I-15. 

Visitor Center: Kolob Canyon Visitor Center

Kolob Terrace 

This entrance is near Virgin on Utah’s State Route 9. The road is seasonal only and closed to larger vehicles all year.


Where’s Zion National Park?

Angels Landing Zion

Zion National Park sits at Utah’s southwest corner near Springdale and Kanab. The large park is close to the Arizona-Nevada borders at the edge of the Colorado Plateau. 

The park is just three hours from Las Vegas, which gives easy access. You can also take an adventurous “Grand Circle Tour” of national parks that include Bryce Canyon National Park, Grand Canyon National Park, and Zion National Park.

What’s the nearest town to Zion National Park

There are several scenic towns and major cities near Zion National Park t stay in and explore.

Towns near South Entrance (Zion Canyon)

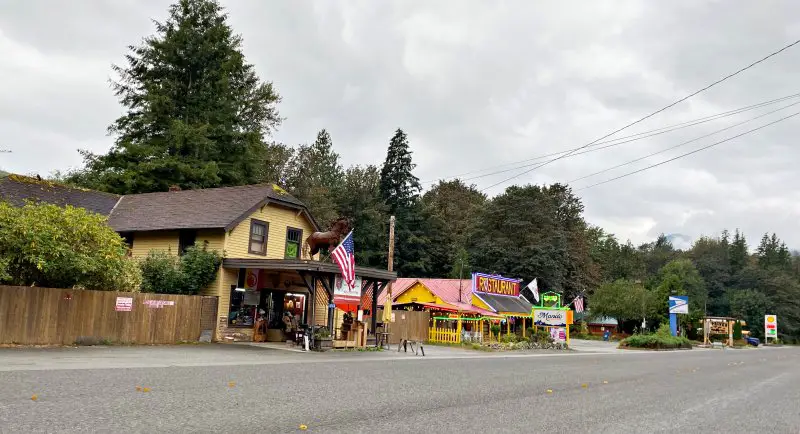
The closest town to Zion National Park is Springdale. It lies just outside the park near main (south) entrance to Zion Canyon. 

Springdale is a very convenient place to stay.  It has plenty of options for hotels, shops, and restaurants, plus a free shuttle service to the national park’s entrance, which connects to the free shuttle that runs inside the park. 

Rockville is the next nearest town near Zion National Park located along the Virgin River, just 5 miles from the south entrance. This town, along with La Verkin which is located on the Route 9 and 17 intersection, offers more affordable hotels, inns, and bed-and-breakfasts. La Verkin is only 20 miles from the south entrance. 

Virgin is also nearby, on State Route 9.  From here, you’re closer to the remote Kolob Terrace Road area. It has a couple of shops, restaurants, hotels, and glamping accommodations available.

Hurricane lies south of La Verkin and is a good base if you’re heading to or from Las Vegas. You can find a wide range of budget-friendly hotels, restaurants, and golf courses in town. From here, you can access either the Zion Visitor Center or the less crowded Kolob Canyons Visitor Center in about 30 minutes. 

Towns Near the East Entrance

The closest main town to the park’s East Entrance is Orderville, stretching along US Route 89 near Mount Carmel and Mount Carmel Junction. From Mount Carmel Junction, the east entrance is around 15 miles while the visitor center is about 25 miles. You can also take a scenic drive on State Route 9 going to Zion-Mount Carmel Highway. 

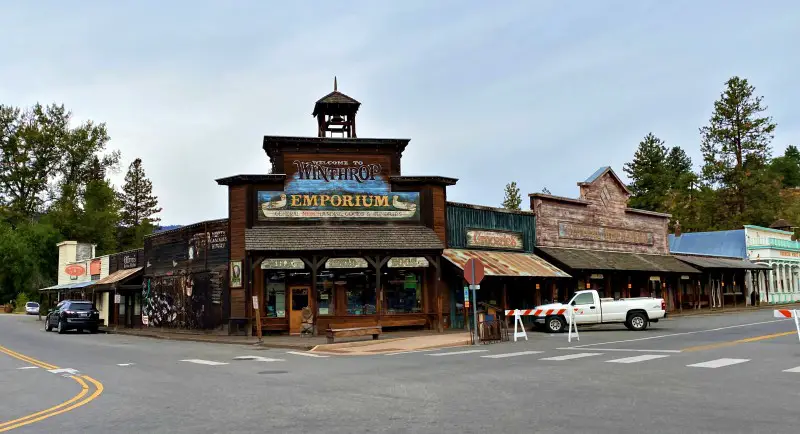
Kanab is another town not far from the East Entrance.  This is a lovely town with several accommodation options and make a great base if you are also visiting the North Rim of the Grand Canyon or want one central place to visit both Zion and Bryce Canyon.  It’s a 35-minute drive to Zion’s East Entrance. 

Cities near the South and Northwest Entrance (Zion Canyon and Kolob Canyons)

If you’re looking for a bigger place (a city vs. a town) to stay in, the city closest to Zion National Park’s South Entrance and Kolob Canyons is St. George. It’s the largest city near the park and has a small airport in case you’ll travel by plane. 

St. George also has more options for modern hotels, resorts, shops, and restaurants, and offers many outdoor activities. The city is around 35 miles from the Kolob Canyons section and 40 miles east of the Zion National Park’s main South Entrance. 

Cedar City is somewhat smaller, but is just a 20-minute drive to the Kolob Canyons entrance, so this is the most convenient place to stay for that section of the park.  It’s less convenient (an hour’s drive) to Springdale if you’re taking the south entrance.

If you’re looking for a larger place with better air connections and more to do, the closest city to Zion National Park is Las Vegas.  This is the most common place to fly into/ out of when visiting Zion.  It takes around two and a half hours to get to and from the Zion Canyon Main Entrance.

Salt Lake City is also fairly close to the park and is a popular start/ end point for people visiting all Utah’s ‘Mighty Five’ national parks. The Kolob Canyons entrance is 4 hours and the Springdale South Entrance is 4 hours 45 minutes from Salt Lake City. 


How To Get to Zion National Park

Zion Canyon Bridge Zion

Your best options to and around Zion National Park depends on which section(s) of the park you’ll visit, which entrance(s) you’ll use, and what season you’re planning to be there. 

Taking a Tour to Zion National Park

If you have less time or prefer to go with a guide, there are several tours you can take to Zion National Park. 

In addition to the general tours listed here, there are also private tours to specific park attractions and different experiences like UTVs, horseback rides, or helicopter tours. 

CHECK OUT THE TOP 20 TOURS TO ZION NATIONAL PARK

Zion National Park Small Group Tour with 6 Hours Explore Time

If you have just one day and want to spend as much time as possible in the national park, then this is the tour for you.  It’s a long day (with a 5:30AM start), but gives you about six hours inside the park. This is enough time to hike Angel’s Landing or the Narrows!

BOOK A ONE-DAY TOUR TO ZION FROM LAS VEGAS

Small Group Tour from Las Vegas to Zion and Bryce Canyon National Parks

Visit two national parks on a full-day tour. You’ll get to see the stunning desert landscapes, mesas, canyons, sandstone cliffs, and hoodoos. Visit Virgin River Gorge and St. George. Lunch and snacks are included, along with round-trip transfers to Las Vegas hotels. 

BOOK FULL-DAY TOUR FROM LAS VEGAS TO ZION AND BRYCE CANYON

3-Day Tour to Zion, Bryce Canyon, Grand Canyon and Monument Valley

OK, this is one helluva tour!  These are four of the top attractions in the entire country. If you prefer not to drive, then this tour out of Las Vegas is the way to go.  It includes transport by air-conditioned minibus, choice of camping or lodging accommodations, camping equipment, park entrance fees and a Jeep tour in Monument Valley, plus an optional scenic helicopter flight over the Grand Canyon.

BOOK 3-DAY TOUR TO ZION, BRYCE CANYON, GRAND CANYON & MONUMENT VALLEY


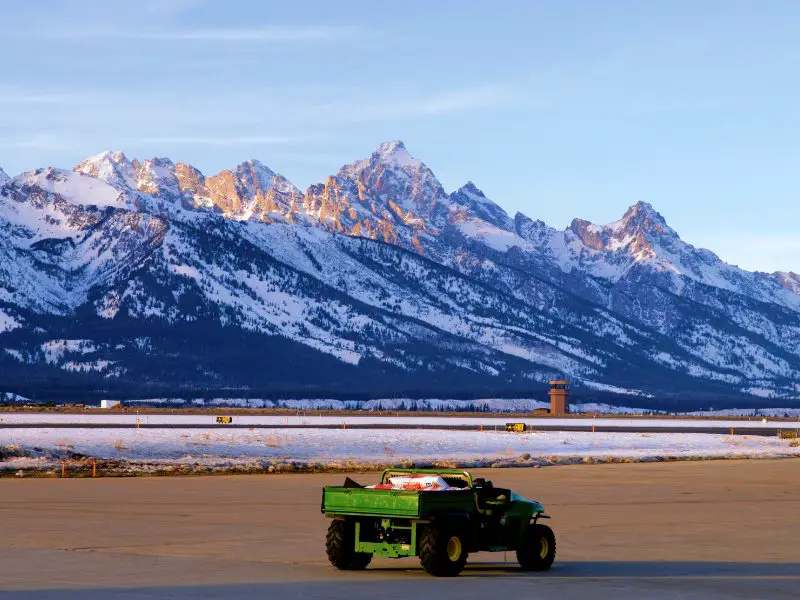
Flying to Zion National Park

Observation Point Zion

There are several options for flying to Zion. 

St. George Regional Airport is technically the nearest airport to Zion National Park. It’s a small airport near Springdale and offers very limited commercial flights, but is a good option if you want to minimize your driving time. You can pick up a rental car, drive to Springdale, then ride the shuttle service, or travel around the park’s northwest section via the Kolob entrance. 

Cedar City Regional Airport is also a small airport with only a few flights daily, but it’s just 30 minutes from Zion’s Kolob Canyons area and an hour from Springdale. Bryce Canyon is also not far from there, so if you’re visiting both parks, this can make a good start/ end point. 

However, most people fly into Las Vegas Harry Reid International Airport in Nevada which is about 170 miles, or Salt Lake International Airport, located 300 miles from Zion National Park, as they both have a lot more flight options. 

For more information about where to fly to get to Zion National Park, read my guide to the best airports for Zion National Park

Check prices on flights to Zion National Park here


Taking the Train to Zion National Park

Canyon Overlook Zion

There’s no direct train service on Amtrak to Zion National Park. However, if you like train travel, it’s possible to get somewhat close and then pick up a rental car or take a bus for the last leg to the park.  The two nearest stations are Flagstaff and Salt Lake City. 

The Southwest Chief route is available via the Flagstaff station. If you want a more relaxing trip, you can book a large deluxe room with ensuite bathroom on this luxury train to Zion National Park. 

From the Flagstaff station, the AVIS car rental agency is about 3 minutes away. You can also book an Enterprise or Budget rental car and make arrangements to have them pick you up at the station. Both car rental services are 5 minutes away from the station. If you prefer Hertz, there’s also one about 11 minutes from there. 

The nearest park entrance from the station is the east entrance via Zion-Mount Carmel Road, which is about a four-hour drive. 

The Salt Lake City Amtrak station on the California Zephyr route is another option. Enterprise Rent-A-Car, Budget, Hertz, and AVIS rental agencies are just 3-5 minutes away from the station. From Salt Lake City, you’ll reach Zion National Park’s Kolob Canyons entrance on a 4 ½ hour drive via I-15 South.  


Taking a Bus to Zion National Park

Zion shuttle

There is one direct shuttle bus from Las Vegas to Zion National Park daily on National Park Express

Another option for taking the bus from Vegas to Zion National Park is to transfer in St George.  You can take a St. George Shuttle or a Greyhound bus from Las Vegas (Greyhound has several buses daily from the airport or the Strip) and then transfer in St George to the shuttle bus to Zion National Park/ Springdale. There are five buses from St George to Springdale daily. 

St. George Shuttle and Greyhound also have buses from Salt Lake City to St George, where you can connect with a shuttle to Springdale. 

Getting Around Zion National Park on the Shuttle Service 

From Springdale you can ride the free national park service shuttle to the park entrance, with connections to the other free shuttle service inside the park.  This free shuttle operates from March to November and around the end of December during the holiday season. 

You don’t have to get a reservation or ticket to ride the bus.  There are two routes. The Springdale Line shuttle takes you around the town of Springdale with nine pick up and drop off points within the town.

The Zion Canyon Line shuttle offers routes from the Zion Canyon Visitor Center to the Temple of Sinawava with stops at Zion Lodge and starting points for trails to Angels Landing, West Rim Trail, Emerald Pools, and the Narrows. 


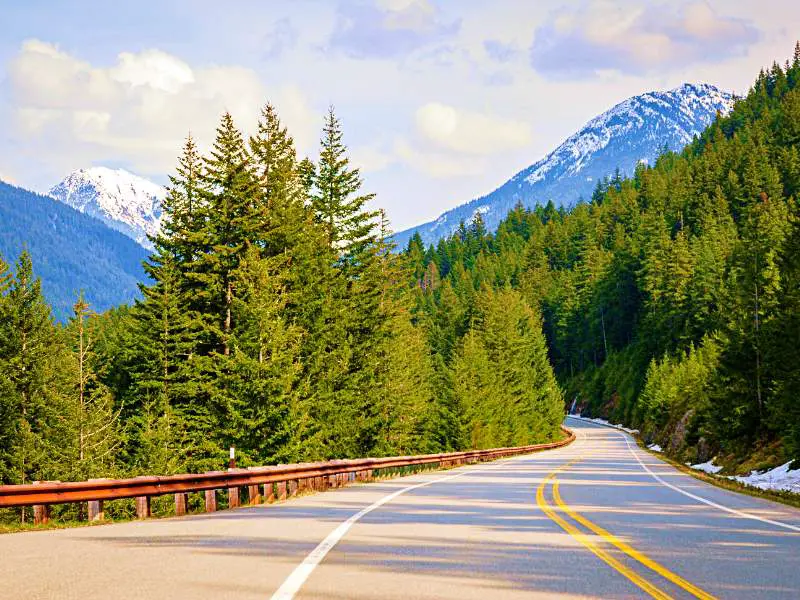
How to Drive to Zion National Park

If you’re driving to Zion National Park from Bryce Canyon, Grand Canyon’s North Rim, or Page AZ, you’ll enter through the park’s East Entrance.  If you’re coming from Las Vegas, Salt Lake City, Cedar City or St George, the South Entrance is closest.  

Driving to the Main (South) Entrance of Zion National Park

If you’re coming from Las Vegas or Mesquita in Nevada or Saint George, Utah, you can take I-15 North, then drive to State Route 9 on Exit 16. Stay on State Route 9 until you reach La Verkin, Utah. You’ll get to Zion National Park from State Route 9 East with the Zion Canyon Visitor Center just a few minutes ahead. Las Vegas is 163 miles from this entrance while Mesquita is 80 miles from there. Saint George is only around 40 miles from Zion Canyon. 

From Salt Lake City and Cedar City areas, you can start by driving to I-15 South. Take Exit 27 by going left on State Route 17 South. Drive left on State Route 9 East when you get to La Verkin and stay on State Route 9 East to reach the visitor center. From Salt Lake City to the entrance is 307 miles, and Cedar City is around 57 miles. 

Driving to the East Entrance of Zion National Park

If you’re driving from Page or Kanab, take US Route 89 North. Head left on State Route 9 West on Utah’s Mount Carmel Junction. Keep driving on State Route 9 West until you get to Zion National Park. From Page, Arizona, it’s about 118 miles, and it’s a 45-mile drive if you’re coming from Kanab. 

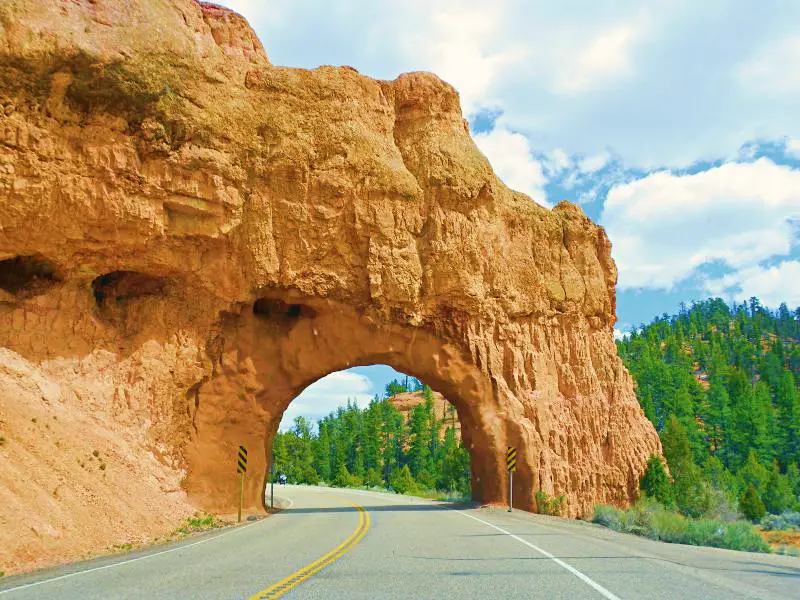
You can also visit the nearby Bryce Canyon National Park which is about 86 miles from the Zion Canyon entrance. To get there, drive along State Route 63 North. Turn left on State Route 12 West and left towards US Route 89 South. Head right on State Route 9 West going to Mount Carmel Junction. Continue on State Route 9 West to the entrance. 

Driving to the Kolob Canyons Entrance 

From Kanab to the Kolob Canyons entrance, you can either take the AZ-389 W route or the US-89 N and UT-14 W route. If you’re taking the first route, drive from AZ-389 W going to State Highway 59 N until you get to Washington County’s I-15 N. From there, drive to Exit 40 and continue on East Kolob Canyon Road. From Kanab to the entrance area is about 83 miles and willtake you an hour and a half to drive. 

The US-89 N and UT-14 W route is longer, and takes just under two hours, but it serves as an alternate route. Follow US-89 N going to UT-14 W, then drive along I-15 S in Cedar City from there. Follow I-15 S until you reach Washington County, then take Exit 40 from I-15 S. Continue driving along Kolob Canyon Road to get inside the park. 

Salt Lake City is also closer to this section, which is about 270 miles. You can drive to the entrance in around 4 hours from the city. From Salt Lake, get on I-15 S/I-80 E. Follow I-15 S until you get to Washington County, then take Exit 40 from there. You’ll get inside the park as you drive along Kolob Canyon Road.  


FAQs about Getting to Zion National Park

What city is closest to Zion National Park?

Saint George is the closest city to the park’s main south entrance. Cedar City is closest to the Kolob Canyons entrance. If you’re coming from the eastern area, Kanab is the closest city to the east entrance. 
The nearest big city with a major international airport is Las Vegas, about a 2.5-hour drive away.

What is the best way to get to Zion National Park?

The best way to get to Zion National Park if you have less time to travel is by flying to St. George Regional Airport. You’re only 45 minutes away from the park.

What airport do you fly into to get to Zion National Park?

For international airports, you can fly to Las Vegas Harry Reid International Airport in Nevada or Salt Lake International Airport. For regional airports, St. George Regional Airport and Cedar City Regional Airport are both smaller but are closer to Zion National Park. Both regional airports offer limited commercial flight services.

Can you get to Zion National Park without a car?

Yes, there are two ways to get to Zion National Park without a car.  One way is to take a tour.  There are plenty of one-, two- and multi-day tours from Las Vegas and Salt Lake City.
You can also get to the park’s south entrance in Springdale by bus from Las Vegas or Salt Lake City via St. George.  You can then take the free NPS shuttle into the park.

How far is Las Vegas from Zion National Park?

The distance Las Vegas to Zion National Park is only 160 miles via I-15. It takes about a two-and-a-half-hour drive to get there.


Travel Insurance for Zion National Park

In addition to deciding how to go to Zion National Park, you will also need get travel insurance for your trip.  Whether it is for unexpected trip cancelation, emergency repatriation or medical help, or to replace something lost or stolen, having travel insurance will give you piece of mind and help you when you need it.  

A great insurance option is Travelex.  It has coverage for all you’ll need. You can choose the best travel insurance plan for your trip here or get a quote right now:

728x90 Get Quote

Enjoy Zion! 

Did you decide how to travel to Zion National Park? I’d love to hear.  Join my private Facebook group National Parks Collectors and comment and let me know (you can also pick up extra planning tips, share your photos and stories with other national park lovers and more).

FREE DOWNLOAD
Subscribe to regular updates with tips for planning, travel inspiration and trip ideas and get instant access to the free PDF of this guide to
How To Get To Zion National Park

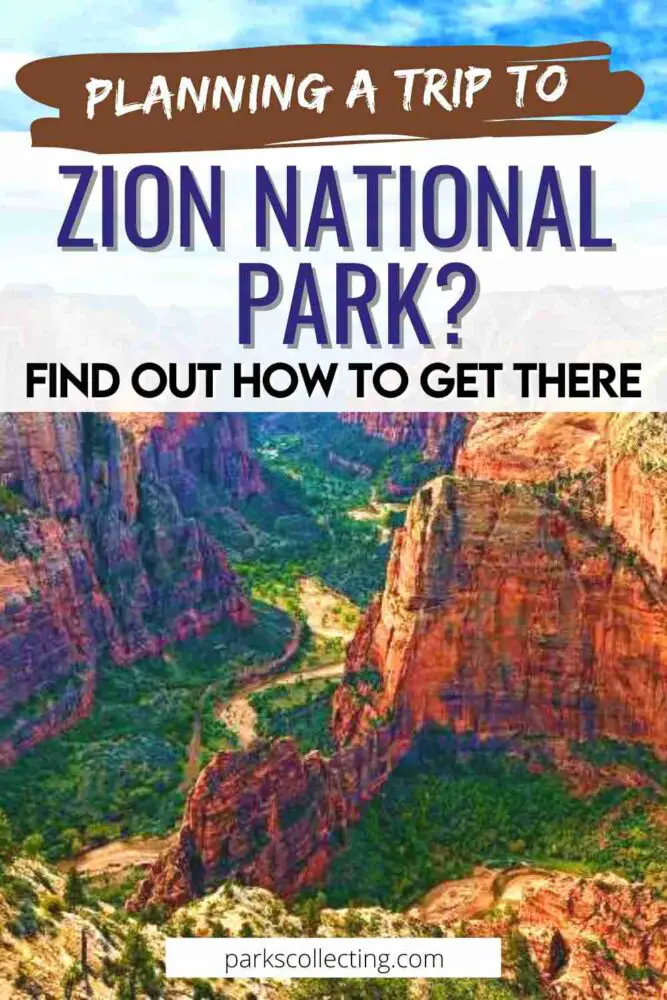
If you liked this post about getting to Zion National Park, please share the love and Pin It to your Zion National Park board!

WHERE ARE YOU IN YOUR PLANNING PROCESS?

Are you just starting to think about taking a national parks trip? Get Inspiration
Are you starting to plan a trip to Zion National Park? Read my Guide to Zion National Park and Get an Itinerary for Zion National Park
Are you looking for a place to stay near Zion National Park? Find a vacation rental near Zion National Park
Are you ready to book your trip? Use these Planning and Booking Resources

About the Author

James Ian Yosemite

James Ian is a national park, camping and hiking expert.

He has dedicated his life to travel, visiting more than 80 countries, all 7 continents and all of the main national parks in the United States. With over 35 years experience in the travel industry, James has worked on cruise ships, at resorts and hotels, and as a travel planner who’s helped hundreds of people plan successful trips to US national parks. 

Based on his experience visiting our national parks multiple times, in-depth research and expertise as a travel planner, James has published detailed itineraries for most of the major national parks in the US. These itineraries, as well as in-depth park guides, comprehensive camping and hiking gear reviews and buying guides, and helpful packing lists and gift guides will help you have your own incredible trip to US national parks without stress and hassle.

As a national park expert, James has contributed to many publications, including Time Business News, Savoteur, Best Trip, and Wired.

Read more…


Parks Collecting is a participant in the Amazon.com Services LLC Associates Program, an affiliate advertising program designed to provide a means for sites to earn advertising fees by advertising and linking to amazon.com. Amazon and the Amazon logo are trademarks of Amazon.com, Inc. or its affiliates. As an Amazon Associate I earn from qualifying purchases.

10 Fun Facts About Bryce Canyon National Park

Bryce Canyon is an other-wordly landscape of orange, red and pink sandstone hoodoos, spires, towers, rock windows, and natural arches. 

This national park is not just beautiful – it’s an interesting place too!

Do you want to learn more about Bryce Canyon? Let’s take a look at some fun and fascinatingly Bryce Canyon National Park facts.

No time right now to discover these fun facts about Bryce Canyon National Park? Pin It and save it for later:

Please note this post may contain affiliate links, which means we may receive a commission, at zero cost to you, if you make a purchase through a link. Please see our full Disclosure for more information. If you have any questions, please contact me.

If you are planning to visit Bryce Canyon National Park in spring, summer or fall, make your planning easy and stress free with a detailed itinerary. I have 1-, and 2-day itineraries for Bryce Canyon National Park that include all the park highlights, give you choices based on your preferred activity level, and take all the stress out of planning your trip. 

Check out the two Bryce Canyon itinerary options

Single huge rock formation and behind are trees surrounding rock formations in Bryce Canyon National Park

Basic Bryce Canyon Facts

Location: Southern Utah
Size: 35,835 acres
Number of Visitors each Year: 2,354,660 people visited in 2022
Annual Rainfall: An average of 15.57 inches each year
Highest Elevation: 9,100 feet Rainbow Point
Lowest Elevation: 6,620 feet Yellow Creek
Date it Became a National Park: Bryce Canyon National Monument was established in 1923. A year later, its name was changed to Utah National Park and then on February 25, 1928 its name was changed again to Bryce Canyon National Park. It was enlarged in 1931 and 1942.

FREE DOWNLOAD
Subscribe to regular updates with tips for planning, travel inspiration and trip ideas and get instant access to the free PDF of these
Fun Facts About Bryce Canyon National Park

 10 Fun Facts About Bryce Canyon National Park

1. Bryce Canyon not actually a canyon

Huge red rock formations in Bryce Canyon National Park

Why is Bryce Canyon not really a canyon?

A canyon is technically formed by water flowing through it and slowly eroding the soil. Bryce, however, was not formed by flowing water – so it is not technically a canyon at all.

How was Bryce Canyon formed?

Bryce Canyon is a series of bowl-like natural amphitheaters that lie along the eastern edge of Paunsaugunt Plateau. The ‘canyon’ was formed by the weather, not water.

It started with layers of sediment forming the rocks and then tectonic plates shifting upwards, taking those layers of rock to a level where temperatures fall below freezing at night. Enter the weather. 

The main force that created the canyon is called “ice wedging”.  Water from rain or melted snow seeps into cracks in rocks.  Then the temperatures fall below freezing at night and the ice expands, creating pressure that forces the rocks apart.  This creates walls and windows that when exposed to wind and more water, erode into free-standing columns called hoodoos. 

These processes continue today.  Areas like Fairyland have younger hoodoos that aren’t so distinct, while the main Bryce Amphitheater has really well-developed hoodoos. In just a few million years (a microsecond in terms of geology), the hoodoos will all be gone.  So now is a good time to see them 🙂

READ MORE: Learn more about Bryce’s creation in SHADOWS OF TIME: The Geology of Bryce Canyon National Park by F Decourten, J Telford and H Hinchman


2. Bryce Canyon has the largest concentration of hoodoos in the world

Aerial view of a huge red rock formation surrounded by trees in Bryce Canyon National Park

As we now know, Bryce Canyon is made up of about a dozen amphitheaters along the edge of Paunsaugunt Plateau. The Bryce Canyon hoodoos – columns or spires of weathered sandstone – are everywhere. In fact, in just one of these amphitheaters, there are more hoodoos than in any other place on earth!  

Bryce Amphitheater, often called the Silent City, has literally thousands of these oddly shaped spires.  There are four major viewpoints around the rim of Bryce Amphitheater (Bryce Point, Inspiration Point, Sunset Point and Sunrise Point) and all of them provide sensational views. 

So, if you have a hankering to see a hoodoo, Bryce Canyon is the place to go.

READ MORE

The 10 Best Bryce Canyon Viewpoints
For a photo book of the hoodoos, check out Bryce Canyon: Home of the HooDoos: From the Galleries of jlGillphotos by J.L. Gill


3. People have been enjoying (or not) Bryce Canyon’s hoodoos for more than 10,000 years

A black and white photo of a two-person sitting in the ground and behind them are wickiup
Paiute Indian Village, Bryce Canyon

Some of the more interesting facts about Bryce Canyon National Park are about the people who first saw the hoodoos. 

The earliest known inhabitants in this area were the Fremont and Anasazi peoples. Fremont people lived in northwest part of the Colorado Plateau from around 200 A.D. until 1200 and visited the area around Bryce canyon seasonally.  At the same time, the Anasazi people occupied the southeast portion of the Colorado Plateau, and also visited the Bryce Canyon area in the warmer months. 

Then around 1200 AD, the Paiute Indians moved into the area permanently.

The Paiute people believe that before there were humans, there were To-when-an-ung-wa or Legend People.  The Legend People weren’t human – they were actually birds, lizards, or animals who looked human. 

According to Paiute beliefs, the Legend People who lived in the area did something bad (fought or stole something) so Coyote, the God of Mischief, turned them into rocks.  

The area is called “Angka-ku-wass-a-wits” (red-painted faces) and if you look closely at the hoodoos, you can see the faces of the bad Legend People in the rocks as they looked just before they were turned to stone. 

READ MORE: Learn more about the history of Bryce Canyon in Bryce Canyon: The Story Behind the Scenery by G Bezy, C Madison and KC DenDooven


4. Bryce Canyon is named after a Mormon pioneer

Aerial view of a huge red rock formation surrounded by trees in Bryce Canyon National Park

Here are some Bryce Canyon fun facts about later inhabitants: 

The first white people to see Bryce Canyon were most likely Silvestra Velez de Escalante and Francisco Atanasio Dominguez, two Spanish explorers who found themselves in the area in 1776.

It wasn’t until almost a century later, however, that white people moved permanently into the area.

Enter the Mormon pioneers. Between 1826 and 1874, several pioneers passed through, but then in 1869, the small town of Clifton was established near the junction of the Paria River and Henrieville Creek.

A year later, our well-known pioneer Ebeneezer Bryce arrived in Clifton and soon after moved upstream to Henderson Valley (New Clifton).  He helped build a seven-mile irrigation ditch from Paria Creek and then added a road that ended at a large amphitheater filled with hoodoos. This soon became known as Bryce’s Canyon. 

Ebeneezer moved on and out of the area in 1880, but the name stuck.

In addition to providing the name of a national park, Ebeneezer Bryce is perhaps most famous for proclaiming that the maze of columns and spires was “a helluva place to lose a cow”!

READ MORE: Learn more about Ebeneezer Bryce in Ebenezer Bryce: Bryce Canyon National Park’s Namesake by H Bryce


5. You can find Thor’s Hammer and Queen Victoria in Bryce Canyon

Huge reddish rocks surrounding by trees in Bryce Canyon National Park
Thor’s Hammer

Here are some fun Bryce Canyon facts for kids: Many of the hoodoos have names. 

The most famous hoodoo is probably Thor’s Hammer, named after the Norse God of Thunder’s famous tool.  Another fun fact: His hammer is called “Mjölnir” and always comes back to him (but you probably knew that already from the Marvel movies).

The hoodoo is found near Sunrise Point but is best seen on the Two Bridges section of the Navajo Loop Trail.

Another famous hoodoo is Queen Victoria, which gives the Queen’s Garden Trail its named.  Fortunately, the NPS have kindly posted a sign nearby with a photo of a standing Queen Victoria in profile to help you identify the right hoodoo.  

Also worth keeping an eye out for are the Sinking Ship, Tower Bridge and Chinese Wall, all on the Fairyland Loop Trail.

On the Bryce Canyon scenic drive, you can see the Poodle at Rainbow Point and the Rabbit at Agua Canyon.

Now some of the hoodoos, like Thor’s Hammer, actually do look kind of like the things they’re named after.  Others, however, may at one time have looked like their name, but erosion has taken its toll and it can be difficult to see what whoever named them was thinking  (I’m talking about you Hunter and Backpacker).

Erosion takes its toll in other ways, too, and eventually the hoodoos do fall.  A few years back the iconic Sentinel retired from guard duty and toppled over. 

READ MORE

The Best Hikes In Bryce Canyon National Park


6. Bryce Canyon Lodge was built where Ruby’s Inn used to be

Black and white photo of a wooded tourist building surrounded by trees in Bryce Canyon National Park
Tourist’s Rest

When you visit Bryce Canyon National Park, it’s hard to miss Ruby’s Inn.  They own most of Bryce Canyon City, which lies just outside the park’s only entrance.  Today, in addition to a motel and campground, they have stores, restaurants, tours and even a Virtual Reality show.

This legendary establishment has been around for over a century, but it had humble beginnings. 

In the early 1900s, Union Pacific Railroad expanded service and by 1919, tourists from Salt Lake City had started to visit the area. 

A pioneer rancher Reuben (Ruby) Syrett and his wife Clara (Minnie) had already moved into the area in 1916.  Seeing an opportunity, they erected tents and supplied meals for overnight guests near Sunset Point, where Bryce Canyon Lodge is today. Then in 1920, they built Tourist’s Rest, a 30- x 71-foot lodge with a cabins nearby and an open-air dance floor. 

In 1923, the same year that Bryce Canyon National Monument was formed, the Union Pacific Railroad bought the Tourist’s Rest land, buildings and water rights from the Syretts.  Ruby and Minnie then established Ruby’s Inn on their ranch just outside the park, where it still is today.

Bryce Canyon Lodge was then built on the site of Tourist’s Rest.  The main building was finished in 1925 and the cabins were built by 1929.

READ MORE: Ruby’s Inn at Bryce Canyon (Images of America) by AJ Seiler


7.  Bryce Canon has appeared in several movies

Five cover images of the movies shot in Bryce Canyon National Park

As you would probably expect for such a photogenic spot, several movies have been filmed here over the years.

It started a century ago when The Deadwood Coach (1924) became the first Hollywood movie filmed in Utah.  Then in 1945, Thunderhead-Son Of Flicka was filmed with many scenes using Bryce Canyon as a scenic location. 

Jump forward another couple of decades, and Sergeants 3 (1962), a film starring Frank Sinatra and Dean Martin, was shot in part in Bryce. The film was the complete opposite of a box office smash, but nonetheless, the scenery was spectacular. 

In the 21st Century, Bryce Canyon has continued to be a popular filming location, featuring in movies like Outlaw Trail: The Treasure of Butch Cassidy and Bonneville (both 2006).

So, who knows, maybe the next time you’re at the movies you’ll see some familiar orange spires in the background. 


8. Bryce Canyon packs a (tiny) punch

Aerial view of a huge red rock formation surrounded by trees in Bryce Canyon National Park

When it comes to things to do and see in Bryce Canyon, size does NOT matter.  At just 35,835 acres / 56 square miles, the national park is the smallest of Utah’s Mighty 5 and the 12th smallest national park in the United States. However, it’s the 15th most popular.

The most common activities are taking the scenic drive, viewing Bryce Amphitheater from the four iconic viewpoints, and hiking down into the canyon. 

READ MORE: Bryce Canyon National Park Guide


9. Bryce Canyon is a great place to see stars

Huge reddish rock formation under the blue skies with stars at night in Bryce Canyon National Park

Bryce Canyon National Park is an official International Dark Sky Park. This designation is an official recognition of something that will be instantly obvious to you if you visit on a clear night – it’s dark there. The absence of light pollution means that you can clearly see thousands of stars and the Milky Way.

Bryce Canyon was one of the first national parks to have a ranger-led astronomy program.  These were first offered more than 50 years ago, and still happen today. The park’s Astronomy Rangers hold frequent forays into the dark, armed with telescopes and plenty of Bryce Canyon information to share.  Check the NPS’s Astronomy Programs webpage for more details. 

If you’re visiting during a full moon, sign up for a Full Moon Hike led by an Astronomy Ranger.

The national park also hosts an annual Astronomy Festival.  Usually held in June, this annual event hosts talk, stories, family-friendly activities and, of course, plenty of star gazing. 

READ MORE

Starry Sky Adventures Utah: Hike, Paddle, and Explore under Night Skies by C White
17 Best Things To Do In Bryce Canyon National Park


10. Bryce Canyon is only 72 miles from Zion National Park

A concrete road passes through huge red rocks in Bryce Canyon National Park, and behind are mountains of trees.

There is a reason that most people visit Bryce Canyon and Zion on the same visit.  They are only 72 miles apart!

Despite the short distance, getting between the parks was not easy, short or quick until 1930.  This is when the 1.1-mile Zion-Mt. Carmel Tunnel was completed. An engineering marvel, the tunnel effectively tied Bryce canyon, Zion and Grand Canyon’s North Rim together. 

Now it takes less than 1.5 hours to drive from one park to the other. 

READ MORE

Hiking Zion and Bryce Canyon National Parks: A Guide to Southwestern Utah’s Greatest Hikes by E Molvar

Zion National Park Guide


Read more Fun Facts about other US National Parks


More Information About Bryce Canyon National Park

Are you feeling inspired to visit Bryce Canyon National Park?  Start planning your trip now with these guides:


Do you have any other Bryce Canyon National Park fun facts to share?  I’d love to hear them.  Join my private Facebook group National Parks Collectors and comment and let me know (you can also pick up extra planning tips, share your photos and stories with other national park lovers and more). 

FREE DOWNLOAD
Subscribe to regular updates with tips for planning, travel inspiration and trip ideas and get instant access to the free PDF
Fun Facts About Bryce Canyon National Park

If you liked this list of Bryce Canyon National Park fun facts, please share the love and Pin It to your Bryce Canyon National Park board!

WHERE ARE YOU IN YOUR PLANNING PROCESS?

Are you just starting to think about taking a national parks trip? Get Inspiration
Are you starting to plan a trip to Bryce Canyon National Park? Read my Guide to Bryce Canyon National Park and Get an Itinerary for Bryce Canyon National Park
Are you ready to book your trip? Use these Planning and Booking Resources

About the Author

James Ian Yosemite

James Ian is a national park, camping and hiking expert.

He has dedicated his life to travel, visiting more than 80 countries, all 7 continents and all of the main national parks in the United States. With over 35 years experience in the travel industry, James has worked on cruise ships, at resorts and hotels, and as a travel planner who’s helped hundreds of people plan successful trips to US national parks. 

Based on his experience visiting our national parks multiple times, in-depth research and expertise as a travel planner, James has published detailed itineraries for most of the major national parks in the US. These itineraries, as well as in-depth park guides, comprehensive camping and hiking gear reviews and buying guides, and helpful packing lists and gift guides will help you have your own incredible trip to US national parks without stress and hassle.

As a national park expert, James has contributed to many publications, including Time Business News, Savoteur, Best Trip, and Wired.

Read more…


Parks Collecting is a participant in the Amazon.com Services LLC Associates Program, an affiliate advertising program designed to provide a means for sites to earn advertising fees by advertising and linking to amazon.com. Amazon and the Amazon logo are trademarks of Amazon.com, Inc. or its affiliates. As an Amazon Associate I earn from qualifying purchases.

10 Best Waterfalls in Olympic National Park | Forest

Nestled in the heart of the Pacific Northwest lies one of the most beautiful national parks in the United States: Olympic National Park. Home to windswept beaches, temperate rainforests, snow-capped mountain peaks, subalpine lakes – and beautiful waterfalls.

In this guide, we’ll take a look at the best waterfalls Olympic National Park has to offer.  

Join me as we take a journey through the best waterfalls in Olympic National Park and the adjacent Olympic National Forest and discover the magic of these breathtaking natural wonders.

TOP TOUR: Book a tour in Olympic now
TOP HOTEL IN NEARBY FORKS: Check availability now
TOP HOTEL IN PORT ANGELES: Check availability now
FIND THE CHEAPEST CAR RENTAL: Search Discover Cars for the best deals
FIND THE CHEAPEST FLIGHTS: Search Skyscanner for the best deals
GET TRAVEL INSURANCE: Get insured with Travelex before you go

No time right now to discover the best waterfalls in Olympic National Park & Forest? Pin It and save it for later:

Please note this post may contain affiliate links, which means we may receive a commission, at zero cost to you, if you make a purchase through a link. Please see our full Disclosure for more information. If you have any questions, please contact me.

FREE DOWNLOAD
Subscribe to regular updates with tips for planning, travel inspiration and trip ideas and get instant access to the free PDF of this guide to the
Best Waterfalls in Olympic National Park

The 10 Best Waterfalls in Olympic National Park | Forest

The waterfalls included here are all on the Olympic Peninsula.  Most are inside Olympic National Park, but a few of them are in Olympic National Forest. 

1. Sol Duc Falls

A wooden bridge above the river surrounded by rocks, trees, and various plants in Sol Duc Falls Olympic National Park

Height: 48 feet

Location: Olympic National Park, Sol Duc area

Sol Duc Falls is a triple waterfall that’s surrounded by towering trees, cascading waterways, and snowcapped peaks, making it the most popular waterfall in Olympic national park.

The hike there is also one of the best waterfall hikes in Olympic National Park. The 0.8-mile (each way) trail is relatively easy and takes visitors through a lush temperate forest before reaching a bridge that offers a great view of the falls.

The falls’ unique shape with three (or four after very heavy rains) streams, angled across the ravine they fall into, makes them a must-see attraction in the park. 

Best Time to Visit:

The best time to visit Sol Duc Falls is during the spring and early summer months when the snow melt creates a more powerful flow and the surrounding foliage is especially lush and green. However, the falls can also be enjoyed year-round and are also really beautiful during the fall when the leaves change color.

READ MORE: Sol Duc Falls Guide


2. Marymere Falls

Three people beside the wooden railing surrounded by trees and other plants, and behind are waterfalls in Olympic National Park

Height: 90 feet

Location: Olympic National Park, Lake Crescent Lodge/ Storm King Ranger Station area

The short (1.7 miles round trip) trail to this beautiful waterfall is a very popular Olympic National Park waterfall hike.  

The falls are situated in a lush forest, surrounded by towering trees, ferns, and moss-covered rocks. The waterfall is fed by a small stream that drops 90 feet into a small pool at the base of the falls.

There are two viewing areas – the lower viewing area has the clearest view, and the upper viewing area peers through the trees where you can see the lower viewing area as well as the waterfall.

Best Time to Visit: 

The falls are particularly beautiful in the spring and early summer when the surrounding foliage is lush and green, and the flow of water is at its strongest. However, the falls flow year-round.

READ MORE: Marymere Falls Guide


3. Salmon Cascades

A close photo of waterfalls in Sol Duc Salmon Cascades, Olympic National Park

Height: 13 feet

Location: Olympic National Park, Sol Duc area (about 5 miles from the Sol Duc Hot Springs Resort)

Salmon Cascades is not the biggest waterfall in Olympic National Park but it’s a unique waterfall in that it’s primarily known for the salmon that swim up it, rather than the waterfall itself.

The set of small cascading waterfalls is a popular spot to watch salmon swimming upstream to spawn. A very short trail leads from a small parking area to a viewing platform that’s located above the falls. In season, you can see salmon jumping up this gushing waterfall as they return to the place they were born to lay or fertilize their own eggs.

It’s also possible to climb down nearby rocks to a pool just below the falls (do so at your own risk and take great care if you decide to do this).  There is a clear view of the falls from below and you can also see a large pool of calm water where schools of salmon hang out as they gather energy for the big push. 

While the falls are relatively small, the sight of the determined fish leaping up the cascades is truly awe-inspiring.

Best Time to Visit:

The best time to visit Salmon Cascades is during the late summer and early fall when the salmon are making their way upstream or in March-April when trout do the same thing.

READ MORE: Salmon Cascades Guide


4. Madison Falls (Madison Creek Falls)

Waterfalls in Olympic National Park and surrounded by trees and plants, and below are rocks and tree logs.

Height: 45 feet

Location: Olympic National Park, Elwha Valley area 

Madison Falls is a picturesque waterfall located in Elwha, Olympic National Park.  

The falls, which are reached by a very short (0.1-mile round trip) walk from the parking lot, drop almost 50 feet and are surrounded by lush greenery and towering trees.

While not the most spectacular waterfall Olympic National Park has, it’s a great destination if you who want to experience the beauty of Olympic National Park without having to go on a strenuous hike. It’s a great option for families with young children or anyone who has difficulty with hiking.

Best Time to Visit:

The best time to visit Madison Falls is during the spring and early summer when the flow of water is at its strongest, and the surrounding foliage is lush and green.


5. Mineral Creek Falls

Trees, ferns, and other plants, and behind is a waterfall in Olympic National Park

Height: 66 feet

Location: Olympic National Park, Hoh Rainforest area

Mineral Creek Falls is one of the most-visited Hoh Rainforest waterfalls.  The falls are nestled in the middle of the Hoh Rain Forest, surrounded by ferns, enormous evergreen trees, and moss-covered maples.  They are reached by hiking for 2.7 miles (each way) along the Hoh River Trail from the Hoh Rain Forest Visitor Center. 

The falls are not the most spectacular waterfalls you’ll ever see – but the hike to get there and the surrounding temperate rainforest are nothing short of breathtaking. 

When you get to the falls, there is a poorly marked side trail that climbs up to the falls themselves, though the slightly more distant views from below, on the main trail, are almost as good.

Best Time to Visit:

The falls are their fullest in spring and early summer, though the trail there can be muddy at that of year.

READ MORE: Hoh River Trail Guide


6. Bunch Creek Falls

Rocks, trees, and other plants surround waterfalls in Olympic National Park.

Height: 60 feet

Location: Olympic National Park, Lake Quinault area

Bunch Creek Falls is a beautiful waterfall located in the Quinault Rain Forest, just inside the national park.  It’s one of two Lake Quinault waterfalls on the Lake Quinault scenic loop drive. 

The 60-foot waterfalls drops over several levels into a small pool of water that you can walk up to.  There are moss and ferns surrounding the falls and large boulders around the pool.

If you’re driving the Lake Quinault loop clockwise, the falls are just after the bridge as you start back on the South Shore Road.  It’s very near the road on the left (heading towards Lake Quinault Lodge) but is easy to miss.  Park on the side of the road with care. 

The falls are among the most photographed water features in the area due to their accessibility; however, the rocks can be slippery, so if you venture closer to the falls than the road, be sure to wear sturdy shoes and be careful when exploring the area.

Best Time to Visit:

As with all these waterfalls, they are their fullest in late spring and early summer.  Keep in mind that the scenic loop drive is partly unpaved, so be careful after rain. The falls are beautiful year-round.

READ MORE: Lake Quinault Scenic Loop Drive


7. Merriman Falls

Waterfalls surrounded by trees and rocks in Olympic National Park

Height: 40 feet

Location: Olympic National Forest, Lake Quinault area

The waterfall is not that big, but its setting is hard to beat.  It’s also located along the Lake Quinault scenic loop drive, on the South Shore Road, inside Olympic National Forest.  

Keep a careful eye out for the falls as you are driving the loop, as they are easy to miss.  You need to park along either side of the road.

You can see the waterfall from the road, but there is a better view if you walk a few yards into the forest to the bottom of the waterfall.  

It’s a horsetail waterfall, meaning that the water maintains contact with the bedrock as it flows over the edge. This creates a stunning, fan-like effect that is lovely to see in person.

Best Time to Visit:

The best time to visit Merriman Falls is during the spring and early summer months, when the snowmelt causes the waterfall to flow at its fullest. However, the falls are beautiful year-round.

READ MORE: Lake Quinault Scenic Loop Drive


8. Murhut Falls

Green plants surround waterfall, and below are tree logs and rocks in Olympic National Park

Height: 153 feet

Location: Olympic National Forest, Duckabush River area (eastern side of Olympic Peninsula)

Located on the drier eastern side, Murhut Falls are a surprise because they are some of the most spectacular waterfalls Olympic Peninsula has to see.

This stunning waterfall is located in the Olympic National Forest. To get to Murhut Falls, you need to take the Murhut Creek Road off of Highway 101, which is approximately 2 miles north of the Hamma Hamma Recreation Area. There is a small parking lot.  From there, a 0.8-mile trail goes through second growth forest before arriving at the falls, which are surrounded by enormous old growth trees. 

The 153-foot falls plunge over a cliff in several tiers into a pool below, changing direction half-way down.  This multi-layered effect, surrounded by lush greenery and often semi-blocked by enormous tree trunks, is very dramatic. 

Best Time to Visit:

Late spring and early summer.  The road is open year-round, but this is weather dependent. 


9. Rocky Brook Falls

Water flowing in rocks from above surrounded by trees in Olympic National Park

Height: 345 feet

Location: Olympic National Forest, Hood Canal Ranger District

Rocky Brook Falls is 345 feet in total, but this happens over four tiers.  The upper three tiers aren’t visible because of the shape of the gorge and because they are on private property so you can’t climb to them.  

However, the 239-foot lowest tier is awesome.  It’s a veiling horsetail fall – meaning that it clings to the rock face the whole way and fans out into a veil of water as it descends into a large pool at its base.

The falls are reached by a short 200-yard walk from a small parking area.

Best Time to Visit:

Summer is a great time to visit because, unlike the other falls listed here, you can swim in the pool at the base of the falls.  This is a great spot to cool off on a hot summer day.  Plus, Rocky Brook is semi-diverted for hydroelectricity, so, although the falls do get bigger after rains, the effect is not as significant as it is for other waterfalls on the Olympic Peninsula. 


10. Wynoochee Falls

Waterfalls in the middle of the huge rocks surrounded by trees, and below is a wide plunge pool of waterfall in Olympic National Park

Height: 38 feet

Location: Olympic National Forest, Hood Canal Ranger District

The falls drop in two main tiers, changing direction between tiers.  The upper tier is 26 feet and the lower tier 12 feet.  The falls end in a large pool. 

Enormous tree trunks often get wedged in the rocks around the falls, changing the shape of the falls.  Heavy rains can dislodge them, so you never know exactly what you’ll find when you visit. 

To get to the falls, drive along an old road to the former Wynoochee Falls campground and then hike 0.25 miles each way on a wide trail.  You’ll need to climb down a narrower trail to a wide gravel bar at the base of the falls that makes a perfect spot for a picnic. 

Best Time to Visit:

Late spring to early summer.  The falls are fullest in spring.  By late in summer, the flow can be so small that the upper tier becomes difficult to see. However, the pool at the bottom is a nice spot to wade and bathe, so early summer is a nice time to take advantage of this. 


Olympic National Park Waterfalls Map


Tips for Visiting Waterfalls

Visiting waterfalls is a popular activity in Olympic National Park. Here are some tips to help make your experience safe and enjoyable:

Best Time to Visit

The best time to visit waterfalls in Olympic National Park is during the spring and early summer months when the water flow is at its highest. However, this can also be the busiest time of year, so plan accordingly. If you prefer to avoid crowds, consider visiting in the fall or winter when there are fewer visitors.

Safety Precautions

Waterfalls can be dangerous, so it’s important to take precautions to ensure your safety:

  • Stay on designated trails and obey all warning signs.
  • Do not climb on rocks or get too close to the edge of the falls.
  • Wear appropriate footwear with good traction and bring rain gear.
  • Be aware of changing weather conditions and flash floods.
  • Do not swim in the pools at the base of the falls.

FAQS about Olympic National Park Waterfalls

What are the best waterfalls to visit in Olympic National Park?

Olympic National Park has many beautiful waterfalls to see, but some of the most popular ones include:
– Sol Duc Falls 
– Marymere Falls
– Madison Creek Falls
– Salmon Cascades 
Each waterfall has its own unique beauty and charm, so it’s worth visiting as many as you can while you’re in the park.

How do I get to the waterfalls?

Most of the waterfalls in Olympic National Park can be accessed by hiking.
Some waterfalls, like Madison Falls, are easily accessible a short walk from the parking lot and others like Bunch Falls and Merriman Falls can be seen from the road side.
However, others, like Sol Duc Falls, require a longer hike to reach.
Make sure to check the trail conditions and difficulty level before embarking on any hikes.

When is the best time to visit the waterfalls in Olympic National Park?

The best time to visit the waterfalls in Olympic National Park is in the spring and early summer when the snow is melting and the water levels are high. However, none of the falls dry up completely, so they can be enjoyed year round.

Are there any safety precautions I should take when visiting the waterfalls?

Yes, it’s important to always stay on designated trails and follow posted signs and warnings. The rocks around the waterfalls can be slippery and dangerous, so it’s important to exercise caution and wear appropriate footwear.


Travel Insurance for Olympic National Park

No matter which waterfalls you choose to see, you should definitely get travel insurance for your trip.  This can protect you not only against medical and emergency repatriation, but can also cover things like trip cancellation, loss and/ or theft of property, etc.  

A great insurance option is Travelex.  It has coverage for all you’ll need. You can choose the best travel insurance plan for your trip here or get a quote right now:

728x90 Get Quote

Enjoy these waterfalls!

FREE DOWNLOAD
Subscribe to regular updates with tips for planning, travel inspiration and trip ideas and get instant access to the free PDF of this guide to the
Best Waterfalls in Olympic National Park

You might also like


What are your favorite waterfalls or waterfall hikes: Olympic National Park?  Are there any other waterfall hikes >> Olympic Peninsula << not listed here?  I’d love to hear about them.  Join my private Facebook group National Parks Collectors and comment and let me know (you can also pick up extra planning tips, share your photos and stories with other national park lovers and more). 

If you liked this post about the best Olympic Park waterfalls, please share the love and Pin It to your Olympic National Park board!

WHERE ARE YOU IN YOUR PLANNING PROCESS?

Are you just starting to think about taking a national parks trip? Get Inspiration
Are you starting to plan a trip to Olympic National Park? Read my Guide to Olympic National Park
Are you looking for a place to stay? Seach accommodation guides
Are you ready to book your trip? Use these Planning and Booking Resources
Do you want to read a book about national parks? Check out my Recommended Reading List

About the Author

James Ian Yosemite

James Ian is a national park, camping and hiking expert.

He has dedicated his life to travel, visiting more than 80 countries, all 7 continents and all of the main national parks in the United States. With over 35 years experience in the travel industry, James has worked on cruise ships, at resorts and hotels, and as a travel planner who’s helped hundreds of people plan successful trips to US national parks. 

Based on his experience visiting our national parks multiple times, in-depth research and expertise as a travel planner, James has published detailed itineraries for most of the major national parks in the US. These itineraries, as well as in-depth park guides, comprehensive camping and hiking gear reviews and buying guides, and helpful packing lists and gift guides will help you have your own incredible trip to US national parks without stress and hassle.

As a national park expert, James has contributed to many publications, including Time Business News, Savoteur, Best Trip, and Wired.

Read more…


Parks Collecting is a participant in the Amazon.com Services LLC Associates Program, an affiliate advertising program designed to provide a means for sites to earn advertising fees by advertising and linking to amazon.com. Amazon and the Amazon logo are trademarks of Amazon.com, Inc. or its affiliates. As an Amazon Associate I earn from qualifying purchases.

5 Best Hoh Rainforest Hikes

The Hoh Rainforest in Olympic National Park is some of the most spectacular temperate rain forest in the world.  It’s a magical land of moss-covered maples, shoulder-high ferns, and ancient conifer trees. 

The best way to see it is to hike the Hoh Rain Forest trails.

So, if you’re looking for things to do in Hoh Rainforest, I’ve included my choice for the 5 best Hoh Rainforest hikes – ranging from easy walks the whole family can do to longer hikes that will take you deeper into the forest and far away from the crowds.

TOP TOUR: Book a small group tour now
TOP HOTEL PICK in PORT ANGELES: Check availability now
TOP HOTEL PICK in FORKS: Check availability now
FIND THE CHEAPEST CAR RENTAL: Search Discover Cars for the best deals
FIND THE CHEAPEST FLIGHTS: Search Skyscanner for the best deals
GET TRAVEL INSURANCE: Get insured with Travelex before you go

No time right now to discover the best Hoh Rainforest hikes? Pin It and save it for later:

Please note this post may contain affiliate links, which means we may receive a commission, at zero cost to you, if you make a purchase through a link. Please see our full Disclosure for more information. If you have any questions, please contact me.

FREE DOWNLOAD
Subscribe to regular updates with tips for planning, travel inspiration and trip ideas and get instant access to the free PDF of this guide to the
Best Hoh Rainforest Hikes

Guided Hoh Rain Forest Hikes

Although you can definitely hike all of these trails by yourself, going with a guide has advantages.  An expert guide can give you a lot more information about the geology, ecology and history of the area around you, which can really add a lot to your experience. Plus, they will take care of all the logistics and keep you on the trail – and you won’t have to stress about parking. 

If you’re interested in taking a Hoh Rainforest tour, here are my top picks:

Small Group Tour to Hoh Rainforest and Kalaloch Beaches

This small group (maximum eight people) leaves from the Kalaloch Campground, so you get to spend more time in the park and less time in the bus.  In addition to the Tree of Life and Ruby Beach, you’ll get to hike 2 miles each way along the Hoh River Trail.

BOOK THIS SMALL GROUP TOUR TO HOH RAINFOREST AND KALALOCH BEACHES

Group Tour to Hoh Rainforest and Rialto Beach

A small group tour (maximum 14) that leaves from Port Angeles.  In addition to the Hoh Rainforest, you will also get to see Rialto Beach and the Hole-in-the-Wall (depending on the tides). At the Hoh Rainforest, you’ll be able to walk the Hall of Mosses and the Spruce Nature Trail.

BOOK THIS SMALL GROUP TOUR TO HOH RAINFOREST AND RIALTO BEACH

Private Hiking Tour to Hoh Rainforest and Kalaloch Beaches

A private tour means you get the guide all to yourself – and have more flexibility in what you do.  An expert naturalist guide can point out all the features of what you’re seeing and give you extra information that will enhance your hikes. You get picked up at Kalaloch Beach 4 and spend some time at Ruby Beach as well as the Hoh Rainforest.  Choose this hike in the Hoh and you won’t be disappointed!

BOOK THIS PRIVATE TOUR TO HOH RAINFOREST AND KALALOCH BEACHES

3-Day Tour to Olympic National Park

Rather than drive and have the hassle of finding your own accommodations, you can take this three-day tour from Seattle. One day is spent at Hurricane Ridge, another at Lake Crescent and the Pacific coast, and the third day is in the Hoh Rainforest.

BOOK A 3-DAY TOUR TO OLYMPIC NATIONAL PARK

Small road surrounded by mossy trees and ferns in Hoh River Trail Olympic National Park

Best Hoh Rainforest Hikes

Here are the five hikes near Hoh Rainforest that I recommend:

1. Hoh River Trail

Two people walking through a small road surrounded by mossy trees and ferns in Hoh River Trail Olympic National Park

Type: Out-and-back 

Length:

  • First River Access: 0.9 miles each way | 1.8 miles total
  • Mineral Creek Falls: 2.7 miles each way | 5.4 miles total
  • Cedar Grove: 4.0 miles each way | 8.0 miles total
  • Five Mile Island: 5 miles each way | 10.0 miles return
  • Glacier Meadows: 17.3 miles each way | 34.6 miles return

Time: 4-5 hours to Five Mile Island and back

Difficulty: Moderate to Five Mile Island, due to its length, not elevation gain, as it mostly flat. Easy if you turn back sooner.

Elevation change: 300 feet

Trailhead: Hoh Rain Forest Visitor Center

This is the main Hoh Rain Forest hike.  The Hoh River goes through the entire length of the Hoh Valley and you can hike a mile or 35 miles!  There are several popular places along the way and as a day trip, most people turn back at Mineral Creek Falls, Five Mile Island or sooner.

The trail sets off from the Visitor Center and passes through several groves of gigantic trees, enormous ferns, and moss.  After just under a mile, you can take a side trail to see the Hoh River or continue on to the small but lovely Mineral Creek Falls.  The waterfalls are nestled up the hill in the middle of lush forest.  

Even further along is Five Mile Island.  There are restrooms and a grassy area that is an ideal spot for lunch or a snack.

If you’re up for something even more adventurous, you can continue about 18 miles to the end of the trail at Glacier Meadows and then a final push to an overlook with stunning views of Blue Glacier on the side of Mount Olympus.  This is a multi-day trip that requires backpacking and camping along the way.  If this sounds interesting but intimidating, I recommend a five-day guided hiking/ camping trip.  Having a guide takes a lot of the stress away – though you’ll still need a reasonable level of fitness. 

BOOK 5-DAY HOH RIVER HIKING TRIP TO BLUE GLACIER

My Tip:  

You’ll sometimes come to splits in the trail.  Heading out from the Visitor Center, take the left trails.  The ones to the right sometimes rejoin the trail, but sometimes they dead end at the river.

Highlights

Temperate rain forest; moss; waterfall; river views

READ MORE: Hoh River Trail Guide


2. Hall of Mosses

Hoh Rainforest Hikes small road surrounded by mossy trees and other plants

Type: Lollipop/ lasso loop

Length: 0.8 miles

Time: 30 minutes

Difficulty: Easy

Elevation change: 100 feet

Trailhead: Hoh Rain Forest Visitor Center

This is the most iconic Hoh Rainforest trail.  It’s an easy loop through a grove of Bigleaf maple trees.  These trees arch and angle in odd directions as they seek the sun in any way they can.  The result is like something in a fantasy movie.  Making them even more magical are the hundreds of varieties of moss and lichen that coat the trunks and drape from branches.  

There is a short side trail to the most spectacular section about half way along.  

My Tips:  

  • The light is best for photography early in the morning.  When the early morning sun hits the moss, turning it into a golden glow, it is truly magical.
  • Keep an eye out at the creek at the start/ end of the hike.  You may see river otters and/ or salmon here in season.

Highlights

Temperate rain forest; moss

READ MORE: Hall of Mosses Trail Guide


3. Spruce Nature Trail

An image of a blue river surrounded by small stones, trees and grasses in Hoh Rainforest Olympic National Park

Type: Lollipop/ lasso loop

Length: 1.2 miles

Time: 30 minutes

Difficulty:  Easy

Elevation change: 230 feet

Trailhead: Hoh Rain Forest Visitor Center

This is the second of the two most popular Hoh Rain Forest day hikes.  There is less moss than in the Hall of Mosses, but this trail has a greater variety of trees spread throughout new and old growth forest.  And it’s even flatter than the Hall of Mosses.  

At the far end of the loop is the trail highlight – a lovely view of the Hoh River. There are several interpretative signs along the way explaining some of the features of the forest like nurse logs.  

Roosevelt elks are often seen on this trail.

My Tips:  

The Spruce Nature Trail and the nearby Hall of Mosses Trail are by far the two most popular hiking trails in Hoh Rainforest.  If you get there in the morning, most people go to the Hall of Mosses first, so if you head to the Spruce Nature Trail instead, you have a better chance of having the rain forest more to yourself.  Later in the day, it will make little difference, though.

Highlights

Old growth temperate rain forest; view of Hoh River


4. Hoh Lake Trail

Lake surrounded by trees and rocky cliffs in Hoh Rainforest Olympic National Park

Type: Out-and-back

Length: 14.9 miles from Hoh trailhead. It can also be reached from Sol Duc trailhead (9.7 miles)

Time: 13-14 hours

Difficulty: Challenging

Elevation change: 3,500-foot gain then 800-foot loss from High Divide

Trailhead: Hoh Rain Forest Visitor Center. It can also be reached from Sol Duc trailhead

This Hoh Rain Forest trail starts along the Hoh River Trail for 9.7 miles. About half a mile after the Olympus Guard Station, you’ll see a side trail to the left.  Take this.

This is when it starts to get challenging. The trail soon starts to climb a series of 22 switchbacks up to Bogachiel Peak, which lies between the Hoh and Sol Duc Valleys. There are incredible views of the Olympic Mountains and good chances of seeing Roosevelt Elk, bears and snowy mountain goats.  The goats are cute – but dangerous, especially if they get accustomed to interacting with humans, so keep a safe distance from them. 

The trail then descends about 800 feet down to a beautiful subalpine lake. 

Insider Tips:  

  • If you plan to do this in one day, get a very early start and take plenty of water.
  • This is a very long day hike, but makes a great overnight hike. Be sure to get a Wilderness Permit/ book a wilderness campsite for each night you’ll be on the trail.
  • If you do decide to do this as an overnight hike and you are traveling with two or more people (and have two vehicles), a great option is combine two epic Olympic National Park Rainforest hikes.  Park one vehicle at Sol Duc and then drive to the Hoh River Trailhead and hike one way, ending up at your other vehicle at the Sol Duc Trailhead. It takes almost 2 hours to drive between Sol Duc and Hoh trailheads.

Highlights

Temperate rain forest; Hoh River; subalpine meadows; mountain views; lake; wildlife

READ MORE: If you’re also going to be hiking in Sol Duc, check out some great Sol Duc hikes.


5. South Fork Hoh River Trail

An image of river and trees during sunrise in Hoh Rainforest Olympic National Park

Type: Out-and-back

Length: 7 miles round-trip

Time: 2.5-3 hours

Difficulty: Moderate

Elevation change: 150 feet

Trailhead: South Fork Hoh Trailhead

This Hoh Rainforest hike starts just outside the national park’s boundaries, so you first go through a second-growth Sitka spruce grove.  After about half a mile, you’ll cross the park’s border and immediately notice the difference as you enter the old growth forest. Here you’ll find western hemlock and enormous Douglas-fir trees. 

After about a mile, you’ll come to the river and the large area called Big Flat. There are groves of breathtaking spruce trees and halls of moss-draped Bigleaf Maple trees. 

At 2.8 miles, you’ll reach a small meadow.  0.2 miles later, the trail ends where the river washed away the rest of an earlier and longer trail.  

This is one of the best trails Hoh Rainforest has to get away from the crowds and has a landscape just as – if not more – beautiful than the main Hoh trails. 

My Tips:  

  • The trail does not start at the main Hoh Rainforest trailhead near the Hoh Rainforest Visitor Center!  It actually starts outside the national park, so you’ll need a Washington State Park’s Discover Pass to park at the South Fork Hoh River Trailhead.
  • To get there, if you’re coming from Forks, as you’re driving along Highway 101, you’ll pass the turn off to the main Hoh Rainforest area / Visitor Center.  After another 2.5 miles/ about three minutes, turn left on to Hoh Mainline.  Then take a left on to Maple Creek Road and then at the fork, turn right on to H-1000.  You’ll pass the South Fork Hoh Campground.  The trailhead is at the end of the road, about half an hour from Highway 101.
  • The road is open all year, but can be closed for weather or if a tree falls across the road.  Check with DNR for road conditions before setting out: (360)-374-2800
  • There are no restrooms at the trailhead.  The nearest are at the campground.

Highlights

Old growth rain forest; river views; few people


Hoh Rain Forest Trail Map

Use this Hoh Rainforest hiking map or buy a National geographic topographical map of the hiking trails in Olympic National Park, including the best trails in Hoh Rainforest, if you’re planning to do several hikes.

Black and white image of a map of Hoh Rainforest Olympic National Park

Here is a map of the Hoh River and Hoh Lake Trails:

Black and white image of a map of Hoh River Map

Directions to Hoh Rainforest

See above for directions to the South Fork.  Here are the main Hoh Rainforest directions from major nearby places:

Seattle to Hoh Rain Forest

There are two ways to go from Seattle – Hoh Rainforest. The shorter route heads south from Seattle via Tacoma, Olympia and Quinault, then north on Highway 101.  This takes about 4 hours.  The slightly longer route (4.5 hours) heads west from Seattle via the Bainbridge Ferry, Port Angeles and Forks. 

Lake Quinault to Hoh Rainforest 

The drive from Lake Quinault Lodge to Hoh Rainforest takes about 1.5 hours. From the lodge, drive 2.2 miles to Highway 101, then turn right and keep going straight for 52 miles.  Then turn right on to Upper Hoh Road.  The national park entrance station is a short distance after the turnoff.

Olympia to Hoh Rainforest

This takes about 3 hours 15 minutes.  Turn on to Highway 101 North from Highway 5 north or south at Tumwater and follow this all the way to the Upper Hoh Road turnoff. 

Sol Duc to Hoh Rainforest

Although these two river valleys are separated by just one mountain ridge, to drive between them takes almost two hours. From Sol Duc, head back to Highway 101, then turn left and follow the main Olympic Peninsula road for abut 50 minutes, driving through Forks, before you come to the Upper Hoh Road.  Turn left here to pass through the national park entrance station.

La Push to Hoh Rainforest

From La Push, head along 110 until you get to Highway 101 in Forks.  Turn right and follow 101 until you get to the Upper Hoh Road on your left.  This trip typically takes about 1 hour 15 minutes without traffic.

Ruby Beach to Hoh Rainforest

From Ruby beach Road, head back to Highway 101 and turn left, then after about 20 minutes, turn right on Upper Hoh Road.  The trip takes about 50 minutes on a good day.

River and besides are stones and logs surrounded by trees and behind is a snow-capped mountain in

What to Pack for Hoh Rain Forest Hiking

  1. Some parts of the longer trails are overgrown, so if you hike those trails and don’t like brushing against leaves, you’ll want to wear long pants.
    If you need some, get some hiking pants for men here or some hiking pants for women here. This isn’t necessary for the short hikes.
  2. There are ticks and bugs, especially in spring and summer.  I’m not aware of any reports of Lyme Disease, but bug spray is nonetheless a good idea.
    I’m a fan of DEET-free insect repellent, as it’s better for the environment and your skin.  Get some here
  3. There can be muddy sections in winter, spring and through early summer – even on the shorter trails.  Good quality waterproof hiking boots will really make a difference!
    If you need to get some, take a look at my Guide to Buying the Best Hiking Shoes/ Boots to help you know what to look for and get some recommendations.  My top pick is this pair of Salomon Gore-Tex boots.
  4. This is a rain forest, so it can rain a lot.  I recommend taking a rain jacket and wearing layers that you can take off or put on depending on the weather, which can change throughout the day.
    If you need one, I like this Columbia rain jacket for men and this Little Donkey Andy rain jacket for women.
  5. Trekking poles are a big help for navigating around mud and puddles and up hills – especially for the longer trails. I have these Foxelli trekking poles – they are really light weight, adjustable, and have several tips and cork handles.  Get them here.
  6. For any hike, you should take water.  There is a refill station at the Visitor Center, so you just need a refillable water bottle for the hikes that leave from there.
    I love this hydroflask. It’s easy to carry, keeps temperatures well, and comes in multiple colors.
  7. You will definitely want to take a camera.
    I love the GoPro HERO 12. It is designed for travel.  It’s water resistant and durable and takes photos, video and even does streaming.  Check current prices on the GoPro HERO 12 here 
  8. Check my list of essential things to take and wear on a day hike to make sure you have everything you need.
Hoh Rainforest Hikes small road surrounded by mossy trees and other plants

Tips for Hiking the Hoh Rainforest Trails

  1. Get to the Hoh Rain Forest before 8:00AM if you’re visiting in the busy summer months.  This is a very popular part of the park and when there is no more parking available, the rangers hold traffic at the entrance station and only let a vehicle enter when another one leaves. 
  2. If you find yourself stuck waiting to get into the park, there is a restroom just before the entrance that most people don’t know about.  If you need to go, walk along the side of the road from your vehicle.  There are also restrooms at the Visitor Center. 
  3. There’s a parking lot for four of these hikes right next to the trailhead and Visitor Center, which is where you should try to park. If it’s full, there are other lots around the campsite area where you can park. You are also permitted to park on the side of the road in the vicinity of the Visitor Center.
  4. The trails can be muddy in spring.  If you’re hiking then, or after it has rained, a good pair of hiking shoes or boots will come in handy. If you need to get some, take a look at my Guide to Buying the Best Hiking Shoes/ Boots to help you know what to look for and get some recommendations.  
  5. The trails can be snowy in winter.  Microspikes may not be necessary if there is only a little snow, but will make you safer.  Read my guides to The Best Microspikes for Hiking and The Best Snowshoes for Beginners if you need to buy some.
  6. Because most of the annual precipitation is in winter, the rain forest can be a little dry looking by early fall.  There’s not much you can do about this other than to adjust your expectations or the timing of your trip.  Though I’ve been there in September, and it was still stunning. 
  7. The Hoh Rain Forest can be very crowded in summer. However, if you take the longer trails, you’ll soon leave the crowds behind.
  8. Check current road conditions before you set out. Trees sometimes fall down and block the road for a few hours.
  9. There are often ranger talks at the Hoh Rain Forest Visitor Center and guided walks.  These are a great introduction to the temperate rain forest.  Check for ranger programs for the dates of your visit.
  10. Keep an eye out for animals. Banana slugs are around, but may be hidden if it’s been dry.  Roosevelt elk and deer are often seen in this area.  It’s also bear country, so stay aware. 
An image of Hoh Rainforest animals fun facts

Visiting the Hoh Rainforest: FAQs

What’s the best time to visit Hoh Rainforest?

The best time of day to visit Hoh Rainforest is early morning. Parking near the trailhead for four of these hikes often fills as early as 8:00AM in summer.
Plus, the early morning light makes the moss especially beautiful.  And you’ll have a better chance of seeing wildlife than later in the day.

Is there a fee for the Hoh Rainforest?

While there is no Hoh Rainforest fee per se, you do need to pay the Olympic National Park entrance fee
You can buy it online or, if you are planning to visit more than just Olympic National Park this year (Mount Rainier National Park and North Cascades National Park are both close), it can be great value to purchase an America The Beautiful pass.   
For the South Fork Hoh River Trail, there isn’t a place to pay the national park entrance fee; however, you’ll need a Washington State Park’s Discover Pass to park at the trailhead since the trail starts in the state park.

What are the Hoh Rainforest lodging options?

Hoh Rain Forest lodging options are limited. There is a campground near the Visitor Center (book it on recreation.gov) but for other types of accommodations, your best options are in Forks about 45 minutes away.

What is the Hoh Rainforest parking situation?

There is a parking lot next to the Hoh Rain Forest Visitor Center. There is also some parking at the nearby campground. Park rangers also permit parking on the side of the road near the Visitor Center. 
However, when all these spaces are full, traffic is held at the entrance station near Highway 101 and a vehicle is only allowed to enter the national park when another vehicle leaves. Get there before 8:00AM in summer, if possible, to avoid waiting.

Where is the Hoh Rainforest?

The Hoh Rainforest is in Olympic National Park, on the west side of Olympic Peninsula.  It’s about 2 hours from Port Angeles and less than an hour from Forks.

FREE DOWNLOAD
Subscribe to regular updates with tips for planning, travel inspiration and trip ideas and get instant access to the free PDF of this guide to the
Best Hoh Rainforest Hikes

Travel Insurance for Hiking Hoh Rainforest

You should definitely have travel insurance when you travel to Olympic National Park – Hoh Rain Forest.  Good travel insurance will cover you for trip cancellation, theft or damage if your property when traveling, medical help if you have an accident while you’re on any of these Hoh Rainforest day hikes or medical repatriation if you need to get medi-vaced out.  

A great insurance option is Travelex.  It has coverage for all you’ll need. You can compare Travel Insurance plans here or get a quote right now:

728x90 Get Quote

Enjoy these Hoh Rainforest hiking trails!

Do you have any other top picks for the best hikes in the Hoh Rainforest?  I’d love to hear what you think are the best rainforest hikes in Olympic National ParkJoin my private Facebook group National Parks Collectors and comment and let me know (you can also pick up extra planning tips, share your photos and stories with other national park lovers and more).  

If you liked this guide to the best hikes >> Hoh Rainforest <<, please share the love and Pin It to your Olympic National Park – Hoh Rainforest – Washington boards!

WHERE ARE YOU IN YOUR PLANNING PROCESS?

Are you just starting to think about taking a national parks trip? Get Inspiration
Are you starting to plan a trip to Olympic National Park? Read my Guide to Olympic National Park
Are you looking for a place to stay? Seach accommodation guides
Are you ready to book your trip? Use these Planning and Booking Resources
Do you want to read a book about national parks? Check out my Recommended Reading List

About the Author

James Ian Yosemite

James Ian is a national park, camping and hiking expert.

He has dedicated his life to travel, visiting more than 80 countries, all 7 continents and all of the main national parks in the United States. With over 35 years experience in the travel industry, James has worked on cruise ships, at resorts and hotels, and as a travel planner who’s helped hundreds of people plan successful trips to US national parks. 

Based on his experience visiting our national parks multiple times, in-depth research and expertise as a travel planner, James has published detailed itineraries for most of the major national parks in the US. These itineraries, as well as in-depth park guides, comprehensive camping and hiking gear reviews and buying guides, and helpful packing lists and gift guides will help you have your own incredible trip to US national parks without stress and hassle.

As a national park expert, James has contributed to many publications, including Time Business News, Savoteur, Best Trip, and Wired.

Read more…


Parks Collecting is a participant in the Amazon.com Services LLC Associates Program, an affiliate advertising program designed to provide a means for sites to earn advertising fees by advertising and linking to amazon.com. Amazon and the Amazon logo are trademarks of Amazon.com, Inc. or its affiliates. As an Amazon Associate I earn from qualifying purchases.

How To Get to North Cascades National Park: Complete Guide

North Cascades National Park in Washington has amazing views of the Cascade Mountain Range.  North Cascades’ location is a bit remote compared to Washington’s two other national parks, but it offers spectacular views of the rugged Cascade Mountains, Ross Lake, and Diablo Lake, plus plenty of scenic trails. 

If you’re visiting North Cascades National Park, you’ll soon discover that planning a trip there can be a bit confusing. This guide is here to help you by telling you everything you need to know about how to get to the park. 

No time right now to discover how to get to North Cascades National Park? Pin It and save it for later:

Please note this post may contain affiliate links, which means we may receive a commission, at zero cost to you, if you make a purchase through a link. Please see our full Disclosure for more information. If you have any questions, please contact me.

You might also like to read:

FREE DOWNLOAD
Subscribe to regular updates with tips for planning, travel inspiration and trip ideas and get instant access to the free PDF of this guide to
How To Get to North Cascades National Park

Where is North Cascades National Park located?

View of snow-capped mountains, trees and other plants in North Cascade National Park

So where is the North Cascades National Park located? The park lies in the north of Washington state on and close to the Canada-US border. You can drive from Vancouver, BC or Seattle to Cascades National Park, depending on which section of the park you plan to visit. 

Access to the park is free. You can get details on directions to North Cascades National Park in the Driving to the Park section of this guide.  

North Cascades National Park Sections 

North Cascades National Park has four separate sections which include the North Cascades National Park’s northern section; the Ross Lake National Recreational Area; the North Cascades National Park’s southern section; and the Chelan Lake National Recreational Area further down south. 

Here are the sections and stations at the park complex: 

North Cascades National Park – Northern Unit

The Hozomeen, Mount Shuksan, and Copper Ridge areas are in the northern sections of the park and are reached via Silver-Skagit Road and State Route 542. 

Hozomeen is near the Canadian border and is accessed from Canada. The Silver-Skagit Road is the only vehicle access going to Hozomeen. The 39-mile route starts from Highway 1 less than 2 miles west of Hope, BC on exit 168. 

Visitor Centers:
Glacier Public Service Center
Forest Info Center with HQ Administration Building

Ross Lake National Recreation Area

This area is what technically divides the north and south units of North Cascades National Park.

It’s lies on either side of Highway 20, which is also called the North Cascades Highway. This section is the main part of the North Cascades’ scenic drive and is the most visited area of the park. It includes the park’s main entrance on Highway 20’s west side. The North Cascades Highway connects with several routes to Burlington, Okanogan, and Twisp.

Visitor Centers:
North Cascades Visitor Center
Skagit Information Center

North Cascades National Park – Southern Unit 

The south unit is more remote compared to other sections of the park. You can check for road conditions at the Wilderness Information Center located in Marblemount or the NPS website.

You can get to the park’s southern trails via the winding Cascade River Road leading you to the Cascade Pass Trail. You can also access other trails like Bridge Creek Trail and the Park Creek Pass, which is a popular stop for hikers during summer. 

Lake Chelan National Recreation Area 

This is the southeast section of the North Cascades National Park location and includes the Stehekin community. There is no vehicle access to Stehekin but you can drive or take a bus to Chelan and a passenger ferry from there. 

Visitor Center:
Golden West Visitor Center

boat dock on lake surrounded by mountains at Stehelin in North Cascades National Park
Stehekin

What is the closest town to North Cascades National Park?

There are several cities and towns near North Cascades National Park that make convenient access points. Deciding on how to get to the park will also depend on which city or town you’ll be staying in and what section(s) of the park you want to see. 

Towns and Cities Near the Park’s West Side

On the west side of the park, you can access Newhalem, Marblemount, and Concrete. 

Newhalem is a town near North Cascades National Park just about 25 minutes away from the North Cascades Visitor Center. You’ll also enjoy a visit to the Skagit Information Center near Ladder Creek Falls Trail and the scenic views at the Trail of the Cedars. 

Marblemount lets you enjoy more adventurous activities on the Skagit Wild and Scenic River System like river rafting, fishing, and viewing wildlife or birdwatching. 

yellow buildings on side of road in Marblemount near North Cascades National Park

Concrete gives you more of a small-town charm with lots of local restaurants and shops.

If you’re coming from Seattle, Marblemount and Concrete are both less than two hours away from the city, but Marblemount is closer to the park entrance. 

If you prefer staying in larger cities near North Cascades National Park, Bellingham is just an hour and a half away from the north section of the park through Cascade Loop.  You can also take a scenic drive to the famous Mount Baker Highway.

Both Seattle and Vancouver, BC are two to three hours away from North Cascades National Park, so you can make a stopover before or after you visit the park. It’s also possible to visit North Cascades as a day trip from Seattle, though this will limit your time in the park itself.

Towns and Cities Near the Park’s East Side

If you’re looking for the closest town to North Cascades National Park’s east side, the most popular access towns are Winthrop and Mazama. 

Winthrop is an interesting town to visit because the entire town is built to look and feel like something from the old wild west. It’s close to several park attractions like the Washington Pass Overlook, Maple Pass, and Blue Lake. It’s about a 25-30-minute drive to these locations. 

old western style buildings in Winthrop near North Cascades National Park
Winthrop

Mazama is even closer to the park and offers plenty of beautiful scenery, though it has few facilities other than some scattered accommodations compared to Winthrop. 

Stehekin is located on the northern shore of Lake Chelan. There are no roads to the town, so the only ways to get there are by boat from Chekan on the lake’s southern shore or by seaplane from Seattle on NW Seaplanes.

Convenient access towns include Wenatchee, Cashmere, and Leavenworth, which are all more or less an hour from Chelan. You can take a bus (Link Transit has several routes) or rental car to Chelan, and then take a 2.5-hour – 4-hour boat trip (depending on the boat) by the Lady of the Lake boat company or the Stehekin Ferry Service from Chelan to Stehekin.


Flights to North Cascades National Park

Snow-capped mountains and below are trees and a blue lake in North Cascade National Park

The closest airport to North Cascades National Park is Bellingham International Airport. This airport is only 77 miles from the national park’s main entrance, so it’ll only take you an hour and a half to get there, though it does have fewer flights than the larger airports. 

Seattle-Tacoma International Airport is about two hours from the park’s main west entrance. To get from Seattle airport to North Cascades National Park, you can pick up a rental car and drive approximately 120 miles to the North Cascades Visitor Center. From the Chelan area of North Cascades National Park to Seattle and vice versa, is around 190 miles/ a three-and-a-half-hour drive.

Vancouver International Airport is another option – this is about three hours away and requires an international border crossing, but is a convenient option for the park’s northern Hozomeen area, which is about 130 to 135 miles away. You have plenty of car rental options at this airport. 

For North Cascades National Park airport services near the park’s southeast section, Pangborn Memorial Airport offers limited commercial service to Wenatchee and Chelan. NW Seaplanes along with Kenmore Air Harbor provides floatplane services from Chelan to Stehekin and the Lake Chelan National Recreation Area. 

For more information about flying to North Cascades, read my guide to the best airports for North Cascades National Park

Check prices on flights to Seattle Airport here


Taking the Train to North Cascades National Park

Aerial view of snow-capped mountains, trees, and road under cloudy sky in North Cascade National Park

Train routes and services directly inside North Cascades National Park aren’t available. But if you prefer getting to the park by train, you have options for Amtrak and VIA Rail services to and from nearby towns and locations. You can then get a rental car from these areas to inside the park. 

Train route to towns near North Cascades National Park’s North Unit 

It’s more convenient to access the North Unit from Canada. VIA’s Canadian offers trips three times a week between Toronto and Vancouver via Hope, Abbotsford, and Chilliwack. Hope station doesn’t have car rental services nearby, so the best routes to reach the North Cascades National Park are via Chilliwack, Abbotsford, or Vancouver, where you can pick up a rental car. 

Train route to Ross Lake National Recreation Area and North Cascades National Park’s South Unit 

Amtrak Cascades has daily routes from Seattle and Vancouver, BC via Mount Vernon station. There aren’t any car rental services inside this station, but there’s an Enterprise car rental just 5 minutes from there. It’s about an hour’s drive to the North Cascades National Park entrance from Mount Vernon. 

You can also get off the train at Bellingham station. Zipcar and Enterprise Rent-A-Car services are around 6-10 minutes away from the station. 

Train route to towns near Lake Chelan National Recreation Area  

Amtrak’s Empire Builder train routes also run daily from Minneapolis-St. Paul going to Seattle via Spokane.  

To get to the park’s Lake Chelan National Recreation Area, you can get off at the Wenatchee station and pick up an Enterprise car rental, which is 4 minutes away from the station. Though there’s another Amtrak station at Leavenworth, there’s no car rental service near this station, so it’s much better to get off at Wenatchee instead.  In Wenatchee, you can take a bus or drive to Chelan and then take a ferry to Lake Chelan Recreation Area.


Taking a Bus to North Cascades National Park

Long and bent road with red railings surrounded by trees and behind are snow-capped mountains in North Cascades National Park

North Cascades National Park doesn’t have NPS shuttle buses available to get you around the park. However, several bus routes can take you to towns and cities close to the park.

Bus routes to the west side of North Cascades National Park

If you’re taking a bus from Seattle to North Cascades National Park, you can get a Greyhound bus at Seattle-Tacoma International Airport, Amtrak’s Seattle King Street station, and the Greyhound bus terminal. 

Greyhound buses have routes to several towns close to the national park including Mount Vernon and Bellingham on Highway 99. From these stops, there are plenty of car rental agencies to pick up a vehicle that you’ll need to get you in and around the park itself. 

There are two other bus services with routes on the west section of the park. Whatcom Transportation Authority has limited routes to Bellingham and the State Route 542 areas. 

Another option is taking the Skagit Transit with fixed routes to communities along State Route 20 including Sedro-Woolley, Concrete, Mount Vernon, Skagit, and occasionally to Marblemount. Mount Vernon station is your best option to get a rental car, with an Enterprise car rental located a few minutes from the bus stop. 

Bus routes to the east side of North Cascades National Park 

To get to the park’s east section, you can take Greyhound buses with stops to Leavenworth or Wenatchee first. A better option would be to get off in Wenatchee since Leavenworth doesn’t have any car rental services nearby. There’s an Enterprise car rental 3 minutes away from the Wenatchee bus station. 

Another option to get you from Wenatchee to Chelan is via Link Transit bus on the Entiat-Chelan-Manson route. It takes about an hour. From there, you can access the ferry to the Lake Chelan Recreation Area.


Getting to North Cascades National Park by Boat/ Ferry

Ross Lake

There are two areas near and within North Cascades National Park that you can only reach by boat – the Ross Lake Resort and Stehekin. 

The Ross Lake Resort is a National Park Service authorized concessioner that offers cabin rentals along with water taxis and portage services at the marina. They can make ferry reservations for you on the Diablo/Seattle City Light Ferry, which has routes twice a day. 

Your other option to reach the resort is to take a 2.5-mile hike at the Ross Lake/Dam trailhead, passing across the dam and around the resort area. 

If you’re heading for Stehekin, you can choose from two ferry services, Lake Chelan Boat Company, and Stehekin Ferry. Lake Chelan Boat Company offers routes to and from Chelan and Stehekin with scheduled stops at Lucerne and Fields Point, while Stehekin Ferry provides round-trip services from Fields Point to Stehekin, and vice versa. 

The other option is the Lady of the Lake boat company, which has fast boats so you can visit Stehekin as a day trip if you prefer not to stay overnight.


Driving to North Cascades National Park, Washington State

Aerial view of mountains, trees, and road in the middle of North Cascade National Park

Driving the North Cascades Loop

If you’re up for a fun road trip, take the North Cascades Loop for lots of great scenery. This will make your drive from Seattle to North Cascades National Park an especially memorable experience. 

The North Cascades drive starts from Everett just north of Seattle.  It can be done either clockwise or counterclockwise.  

For a counterclockwise trip, start by heading east to Leavenworth, Wenatchee, and Chelan. Pass through farmlands at Methow and Skagit Valleys, and head to the west towards Stevens Pass Greenway and North Cascades National Park on highway 20. 

Complete the full stretch of your trip from Anacortes by traveling south to Clinton, and back to Everett. 

Be sure to check my Road Trip Essentials Checklist before setting out to make sure you have everything you need.

Driving Directions from Key Destinations

If you’re coming from major cities, below are North Cascades National Park directions and details to help you plan. 

Driving from Seattle to North Cascades National Park – Ross Lake Area

Distance: 107 miles
Travel time: more or less 2 hours 
Driving directions: 
From Seattle’s 4th Avenue get on I-5 N. Follow I-5 N until you get to WA-530 E or State Route 530 Northeast in Snohomish County. Continue driving along the highway until you reach Rockport’s State Route 20 East. Turn right to State Route 20 East to reach the park entrance. 

Driving from Bellingham to North Cascades National Park– Ross Lake Area

Distance: 71 miles 
Travel time: 1 hour and 25 minutes
Driving directions: 
To drive from Bellingham WA to North Cascades National Park, take I-5 South from West Magnolia Street and Lakeway Drive. Continue along I-5 South until you reach Cook Road in Skagit County. From I-5 South, take the exit at 232. Follow Cook Road and head towards Borseth Street in Sedro-Woolley. Then, drive to State Route 20 East which leads you to the park entrance. 

Driving from Vancouver to North Cascades National Park – Ross Lake Area

Distance: 125 miles
Travel time: 2 hours and 30 minutes
Driving directions: 
From Vancouver, drive northeast on Hornby Street going to West Georgia Street/BC-1A/BC-99 N. Continue on BC-99 South, then take I-5 South going to Cook Road in Skagit County, US. Take Exit 232 from I-5 S, then drive to State Route 20 East. You’ll reach the park entrance from there. 

Driving from Burlington WA to North Cascades National Park – Ross Lake Area

Distance:  50 miles 
Travel time: 1 hour
Driving directions:
Drive from Burlington by heading east on East Fairhaven Avenue going towards South Anacortes Street. Make a left turn at the 1st cross street going to North Anacortes Street. Turn right to get to Cascade Highway, and make another right turn to State Route 20 East. When you reach the traffic route, drive straight to Borseth Street. Continue driving until you get to West Moore Street, and head towards State Route 20 East after the roundabout. 

Driving from Spokane to North Cascades via Chelan 

Distance: 152 miles 
Travel time: 3 hours
Driving directions:
The nearest access from Spokane is through the east side of the park so you’ll only drive until Chelan. Your route starts from North Monroe Street going to I-90 West. Take U.S. Route 2 West and head towards WA-172 East in Douglas County. Continue driving along WA-172 East until you get to McNeil Canyon Road and reach US-97 North. Make a right turn on US-97 North and continue on WA-150. Then, take East Johnson Avenue in Chelan. From Chelan, take the ferry service to Lake Chelan Recreation Area. 

Driving from North Cascades to Olympic National Park 

Distance:  166 miles 
Travel time: 4 hours
Driving directions:
It’s possible to visit Olympic National Park after North Cascades. The route starts as you drive west on State Route 20 W going to NF-1060. Drive along State Route 530 Northeast until you get to WA-530 W/WA-9 South in Snohomish County. From there, take I-5 South and WA-104 West going to Edmonds – Kingston Ferry in Edmonds. Take the Edmonds – Kingston Ferry going to Kingston. Drive along WA-104 West and US-101 North. Continue driving until you get to North Race Street in Port Angeles. Then, follow North Race Street going to Mt. Angeles Road until you reach the park entrance. 

Rent a car at the Seattle Airport here


FAQs about How to Get to North Cascades National Park

How do you get to North Cascades National Park without a car?

You can get to North Cascades National Park by flying to the nearest airports or traveling via bus and train services to nearby towns and cities. It depends on what section of the park you’re heading to. You can get a ferry from Chelan to Stehekin (or fly there direct from Seattle).
However, to get into the other areas of North Cascades National Park, you will need to rent a car, as there are no shuttles or tours into the park.

Where do you fly into for North Cascades National Park?

Seattle-Tacoma International Airport, Vancouver International Airport, and Bellingham International Airport are the closest airports to North Cascades National Park.

What is the closest town to North Cascades National Park?

On the west side of the North Cascades National Park, the nearest towns include Newhalem, Marblemount, and Concrete, while Winthrop and Mazama are close to the park’s east section. The nearest major city is Seattle.

Is North Cascades a day trip from Seattle?

Yes, you can easily get to North Cascades from Seattle for a day trip, though a weekend will give you more time to enjoy the park.

How long does it take to drive the North Cascade Loop?

You can drive the complete 440-mile loop in one day, but it will be very rushed.  I recommend a minimum of two days, but to really enjoy the trip and give yourself time to do some hikes and enjoy the scenery to its fullest, four to five days are best.


Travel Insurance for North Cascades

You should definitely have travel insurance when you travel to North Cascades.  Good travel insurance will cover you for trip cancellation, theft or damage of your property when traveling, medical help if you have an accident in or while visiting North Cascades National Park, or medical repatriation if you need to get medi-vaced out.  

A great insurance option is Travelex.  It has coverage for all you’ll need. You can choose the best travel insurance plan for your trip here or get a quote right now:

728x90 Get Quote

Enjoy North Cascades National Park!

Did you decide how to visit North Cascades National Park?  Join my private Facebook group National Parks Collectors and comment and let me know (you can also pick up extra planning tips, share your photos and stories with other national park lovers and more). 

FREE DOWNLOAD
Subscribe to regular updates with tips for planning, travel inspiration and trip ideas and get instant access to the free PDF of this guide to
How To Get to North Cascades National Park

If you liked this post about North Cascades National Park Washington USA, please share the love and Pin It to your North Cascades National Park board!

WHERE ARE YOU IN YOUR PLANNING PROCESS?

Are you just starting to think about taking a national parks trip? Get Inspiration
Are you starting to plan a trip to North Cascades National Park? Read my Guide to North Cascades National Park
Are you ready to book your trip? Use these Planning and Booking Resources
Do you want to read a book about US National Parks? Check out my Recommended Reading Lists

About the Author

James Ian Yosemite

James Ian is a national park, camping and hiking expert.

He has dedicated his life to travel, visiting more than 80 countries, all 7 continents and all of the main national parks in the United States. With over 35 years experience in the travel industry, James has worked on cruise ships, at resorts and hotels, and as a travel planner who’s helped hundreds of people plan successful trips to US national parks. 

Based on his experience visiting our national parks multiple times, in-depth research and expertise as a travel planner, James has published detailed itineraries for most of the major national parks in the US. These itineraries, as well as in-depth park guides, comprehensive camping and hiking gear reviews and buying guides, and helpful packing lists and gift guides will help you have your own incredible trip to US national parks without stress and hassle.

As a national park expert, James has contributed to many publications, including Time Business News, Savoteur, Best Trip, and Wired.

Read more…


Parks Collecting is a participant in the Amazon.com Services LLC Associates Program, an affiliate advertising program designed to provide a means for sites to earn advertising fees by advertising and linking to amazon.com. Amazon and the Amazon logo are trademarks of Amazon.com, Inc. or its affiliates. As an Amazon Associate I earn from qualifying purchases.

12 Fun Facts about Grand Teton National Park

A dramatic mountain range rising straight up out of the valley floor, a chain of lakes scattered like jewels at its feet, and a scenic river snaking its way in front – this is the breathtaking Grand Teton National Park.

Want to learn more about this incredible place? Let’s take a look at some interesting facts about Grand Teton National Park.

No time right now to read these fun facts about Grand Teton National Park? Pin It and save it for later:

Please note this post may contain affiliate links, which means we may receive a commission, at zero cost to you, if you make a purchase through a link. Please see our full Disclosure for more information. If you have any questions, please contact me.

If you are planning to visit Grand Teton National Park in spring, summer or fall, make your planning easy and stress free with a detailed itinerary. I have 1-, 2-, and 3-day itineraries for Grand Teton National Park that include all the park highlights, give you choices based on your preferred activity level, and take all the stress out of planning your trip. 

Check out the three Grand Teton itinerary options


Basic Grand Teton National Park Facts

Location: Wyoming
Size: 485 square miles
Number of Visitors each Year: 3,885,230 in 2021, its busiest year
Annual Rainfall: An average of 21 inches of precipitation each year, but half of that is snow in winter.
Highest Elevation: Grand Teton (13,775 feet)
Lowest Elevation: Fish Creek at the south boundary (6,320 feet)
Date it Became a National Park: Grand Teton National Park was established in 1929.  Jackson Hole National Monument was created in 1943. The two were combined to become the current Grand Teton National Park in 1950.

FREE DOWNLOAD
Subscribe to regular updates with tips for planning, travel inspiration and trip ideas and get instant access to the free PDF of these
Fun Facts about Grand Teton National Park

12 Fun Facts about Grand Teton National Park

Here are some interesting things that you may not know about this beautiful national park.

1. The Grand Teton Mountains are the youngest range in the Rocky Mountains  

Trees surrounding the lake and behind are a snow-capped mountain range

The main focus in Grand Teton National Park is the 40-mile Teton Range.  Unlike most mountain ranges, there are no foothills.  This is in part because of the way the range formed.  

The mountains were created by a series of earthquakes along a fault line.  Over a period of about 13 million years, a series of earthquakes caused the land on the west side (the Teton Range) to slide up and the east side (Jackson Hole valley) to slide down. 

This happened about 775 million years ago – which seems a long time.  But in fact, the Tetons are still the youngest range in the Rocky Mountains – and some of the youngest mountains in the world. 

READ MORE: Learn more about this incredible landscape in Geology of Grand Teton National Park by C Craigshead and H Holdsworth


2. Grand Teton has some of the oldest rocks on the planet

An image of Gneiss rock, and one of the fun facts about Grand Teton National Park.
Gneiss rock in Grand Teton National Park

Although it’s one of the youngest mountain ranges in the world, that doesn’t mean that the rock itself is young.  In fact, the rock in the Tetons is some of the oldest rock on the planet! 

A quick geology lesson: metamorphic rock is a kind of rock formed from another kind of rock that transforms as a result of heat, pressure, or some other force.

A lot of the Tetons are made of a Precambrian metamorphic rock called gneiss. This rock, sometimes called ‘basement rock’ because it’s so old that it forms the foundation of the American continent, is about 2.7 billion years old!  That means that the rocks you see as you gaze at the Tetons has been there for about 7/8 of the entire existence of our planet!  Now THAT is old!

READ MORE: Learn more about the geology of this entire region in Interpreting the Landscape: Recent and Ongoing Geology of Grand Teton and Yellowstone National Parks by J. M. M. Good


3. Grand Teton National Park has been occupied for about 11,000 years

Painting of three American Indians on Horses in Grand Teton National Park

Humans first started living in this area about 11,000 years ago.  There is evidence that they were nomadic people who lived there in the warmer months (spring to fall), hunting, fishing and gathering seasonal fruits and berries. 

They were part of a group of Nomadic Paleo-Indians who spoke the Athabaskan language.  There is evidence of fire pits, tipi rings and fishing tools along the shores of Jackson Lake.

What there is no evidence of is why they left.  This is a mystery that’s never been solved, but a likely reason is that were forced out of the area by a newer – and stronger – group.

Enter the Shoshonean-speaking people.  It’s thought that they moved there in the 1500s and 1600s and basically pushed the Athabaskan-speaking people out.

By the time Europeans arrived, multiple tribes visited the area for hunting and fishing, including the Shoshone, Grow, Gros Ventre, Bannock, Blackfoot and Nez Perce peoples. 

READ MORE: Along the Ramparts of the Tetons: The Saga of Jackson Hole, Wyoming by R.B. Betts for a fascinating history of Jackson Hole


4. America’s first Mountain Man “discovered” the Tetons

Small ships on the ocean and besides are trees and behind is a snow-capped mountain
Colter Bay

As we know, native Americans lived in the region for thousands of years, so the mountains were ‘discovered’ many centuries ago.  But the first person of European descent to reach this area is widely considered America’s first “Mountain Man”.

His name was John Colter – yes, the same Colter who has a bay on Jackson Lake named after him.

Before he came to the Tetons, Colter was a member of the famous Lewis & Clark Expedition in 1806.

However, it was in 1807-8 that he became the first white person to enter the area that is now Yellowstone and Grand Teton National parks – and entered history in the process.

Like the disappearance of the first Indians, Colter’s disappearance is also a mystery.  No one knows what happened to him – his body has never been found.  No one knows either, where exactly he went on his explorations of the area.  One possibility is that he went via the Togowtee Pass.

However, in 1933, a rhyolite stone carved in the shape of a human head was found Tetonia, Idaho.  The stone is engraved with “John Colter” on one side and “1808” on the other.  This suggests that Colter actually traveled through the Teton Pass instead.

Although Colter’s Stone is on display in a museum in Grand Teton National Park, the stone has never been authenticated, so it’s still conjecture. 

READ MORE: The Mystery of John Colter: The Man Who Discovered Yellowstone by R Anglin & L Morris


5. Yes, the mountains are named after women’s breast

Lake surrounded by trees and behind is a snow-capped mountain under a cloudy and blue sky

Although Colter was the first Mountain Man, he wasn’t the last. The “Mountain Men’ were French-Canadian trappers who moved into the region around the Grand Tetons to trap and kill beaver, whose fur was very fashionable in Europe at the time.  

When the trappers were mapping the area in the late 1700s, with a vivid imagination and perhaps a degree of isolation, they were inspired by the shape of the mountains to name them “tetons” which means “breasts” in French.  “Grand” is French for “big”, so …. you get it.  The Tetons were the Dolly Parton of the day. 

Looking at the mountains today, it’s not really very easy to see the shapes as they saw them, but they were the ones drew the maps and their name for the mountains somehow stuck.


6. The first documented ascent of Grand Teton was in 1898  

An image of the peak of snow-capped mountains
Grand Teton

While Jackson Hole was used for fishing, hunting, gathering and trapping, the mountain peaks themselves were left unreached until the end of the 19th century.

It’s possible that there were undocumented earlier ascents – either by native Americans or Europeans, but the first documented ascent of Grand Teton, the highest peak in the Teton Range, was by Franklin Spencer Spalding and his party in 1898.  

It took Spalding, Petersen, and Shive 11 hours, but they made it – and documented it by building a cairn and chiseling their names in a boulder at the summit, ensuring their place in the history books. 

Now, it you were Nathaniel P. Langford and James Stevenson, who claim they reached the summit 26 years earlier in 1872, you might have something to say about that.


7. J.D. Rockefeller secretly helped create Grand Teton National Park

Grand Teton spring flowers

John D. Rockefeller, Jr., one of the richest men in the world at the time, visited Wyoming and fell in love with the area. 

He decided to buy up land in Jackson Hole. In order to do so, he created the Snake River Land Company and over the next two decades bought 35,000 acres of land in their name.  This way people didn’t know it was him buying the land so they didn’t jack up the price for him and didn’t balk at selling land to him.

When locals discovered that Rockefeller has bought all that land with the intention of giving it to the government, they weren’t happy, as it would mean a decrease in local tax revenue if the federal government owned the land instead of a private person or company.

Fortunately, they didn’t manage to stop him (though it did take a Congressional hearing to resolve).

Grand Teton National Park came into being in several instalments.

Grand Teton National Park was established in 1929, but this only included the actual mountain range and a few lakes at the base of the mountains. 

In 1943, some of the land in the nearby valley became Jackson Hole National Monument.

Then in 1949, John D. Rockefeller, Jr. Was managed to successfully donate the land that the Snake River Land Company had purchased to the government.

A year later, in 1950, the original park, the national monument, and the Rockefeller lands were combined into what is Grand Teton National Park today.

Then in 1972, the John D. Rockefeller, Jr. Memorial Parkway was created in honor Rockefeller’s philanthropy and commitment to the National Park System to connect Grand Teton and Yellowstone National Parks.

Another fun fact: JD Rockefeller kept a 3,100-acre area of land that used to be a dude ranch called the JY Ranch. The Rockefellers used this as a family retreat until Laurance S. Rockefeller donated the final 1,100 acres in 2001 to create the Laurance S. Rockefeller (LSR) Preserve, which lies next to the National Park on the Moose-Wilson Road.

READ MORE: Crucible for Conservation by R Righter provides a fascinating insight into the struggle over these lands between cowboys, farmers, forest rangers, National Park Service, Wyoming officials, New Dealers, Easterners, and more. 


8. Grand Teton National Park is the only national park with an airport inside it

Jackson Hole airport grand teton
Jackson Hole Airport

Jackson Hole Airport is the only commercial airport in the United States that is located entirely inside a National Park.

This airport was established in the 1930s and when the area all around it became designated as the Jackson Hole National Monument in 1943, the airport was allowed to remain.  

So, when you land at Jackson Hole Airport, you have flown right into the national park!

READ MORE: All the main airports near (and in) Grand Teton National Park


9. There are several famous buildings in Grand Teton National Park

Wooden cabin covered with snow surrounded by snow-capped mountains
The Shane Cabin

The two most photographed barns in America are in Grand Teton National Park.  Between 1896 and 1937 a group of Mormon settlers built a community of farms, homesteads, barns and irrigations ditches in what is known today as Mormon Row.  

Two picturesque barns – the John Moulton Barn and the TA Moulton Barn – make for great photographs, with the Teton mountains behind them, and today, they are the most photographed barns in the country. 

The dramatic scenery isn’t only perfect for photos and postcards, though.  This scenery is what movies are made of – and many movies have taken advantage of the dramatic peaks as a backdrop for their scenes.

Classic movies that have been filmed here include The Big Trail (1930)- John Wayne’s debut feature; The Big Sky (1952); Shane (1953); Spencer’s Mountain (1963); Rocky IV (1985); and Brokeback Mountain (2005).

If you’re a fan of Shane (1953), then you might want to try and find the Ernie Wright Cabin – or “The Shane Cabin” as it was called in the film.  The cabin is still standing (barely) and is tricky to find, but the Luther Taylor Cabi and Homestead as it is really called is located nearby Kelly.  Head north from Kelly about a mile, then turn right and about a mile along you can see the cabin on your left. 

If you’re still in the mood for old cabins, there is one more to visit.  The J.P. Cunningham Cabin was built in 1888, and in 1892 was the site of a full-on gun fight. It’s located on Highway 191, part of the scenic loop drive through the national park.

READ MORE: Guide to the 42-Mile Scenic Loop Drive Through Grand Teton National Park


10. Grand Teton National Park has the fastest land mammal in the western hemisphere

An image of light brown pronghorn
Pronghorn

Did you know that the fastest land mammal in the western hemisphere is the pronghorn?  They can run as fast as 70 mph! (Apparently, they don’t like to jump fences, so I guess they have to rely on running away instead of jumping to safety.)

Pronghorns may be the fastest, but they are by no means the only animals you can find in Grand Teton national park.  In addition to the spectacular mountain scenery and scenic lakes and river, this is a great place to see wildlife. 

You can often see bison on Antelope Flats; moose in the rivers and lakes (Moose Pond and Schwabacher’s Landing are good places to see them); and black bears foraging in the bushes around lakes and near trails. You may also see grizzly bears, elk, wolves, coyotes, bighorn sheep yellow marmots and beavers.  

READ MORE: Get a copy of A Field Guide to Yellowstone and Grand Teton National Parks by K.F. Johnson to help you identify the animals you see while visiting the park


11. The park also has the smallest bird in North America  

An image of a small calliope hummingbird on a small branch
Calliope hummingbird

Grand Teton National Park doesn’t just have animals – there is also an incredible variety of birds.  Including the smallest bird in North America, the calliope hummingbird

Weighing less than one a tenth of an ounce, they aren’t the easiest bird to see.  Keep a careful eye out and you may see them zipping around willow shrubs or drinking nectar from scarlet gilia flowers. 

A little easier to see are the largest waterfowl in North America – also found in Grand Teton National Park.  Trumpeter swans can often be seen at Oxbow Bend; the appropriately-named Swan Lake; and Flat Creek in the National Elk Refuge.

READ MORE: If you’re into bird watching, pick up a copy of Birds of Wyoming Field Guide: Includes Yellowstone & Grand Teton National Parks (Bird Identification Guides) by S Tekiela to help you identify the birds you’re seeing


12. In Grand Teton / Jackson Hole, you can see elk, eat elk, buy elk antlers, and even hunt elk 

Elk antlers on the ground
Elk antler auction at Elk Fest in Jackson

One of the more unusual Grand Teton National Park facts involves elk – and there is something for every season.

The Jackson elk herd is the largest elk herd in North America. Thousands of elk spend the colder months in what is designated as the National Elk Refuge.  In winter, you can take a sleigh ride through the elk refuge to see these majestic animals.

BOOK A FULL-DAY WINTER ADVENTURE INCLUDING A SLEIGH RIDE IN THE NATIONAL ELK REFUGE

In the early spring, male elk shed their antlers (they grow a whole new – and larger – pair each year).  This leaves thousands of antlers strewn across the valley near Grand Teton National Park.  These are collected and sold at the annual elk antler auction in the Jackson Town Square.  This is a key event in the annual Elk Fest that happens each May. 

You can also eat elk meat at many of the restaurants in Jackson throughout summer.  They are harvested – and hunted.  

And if you have a park permit and a valid Wyoming elk hunting license, you can join in the annual elk reduction program in late fall each year.  This is managed by the national park service and is an intentional effort to maintain the Jackson Elk Herd at 11,000 so that they remain sustainable in the area.

READ MORE: Homesteading With the Elk by B.C. Gilette, a fascinating story of frontier life in Jackson Hole


Read more Fun Facts about other US National Parks

More Information About Grand Teton National Park

Now that you’ve learned at least 10 facts about Grand Teton National Park, are you feeling inspired to visit Grand Teton National Park?  Start planning your trip now with these guides:


Do you have any other Grand Teton National Park interesting facts to share?  I’d love to hear them. Join my private Facebook group National Parks Collectors and comment and let me know (you can also pick up extra planning tips, share your photos and stories with other national park lovers and more). 

FREE DOWNLOAD
Subscribe to regular updates with tips for planning, travel inspiration and trip ideas and get instant access to the free PDF
Fun Facts about Grand Teton National Park

If you liked these facts about the Grand Tetons, please share the love and pin this post to your Grand Teton National Park board!

WHERE ARE YOU IN YOUR PLANNING PROCESS?

Are you just starting to think about taking a national parks trip? Get Inspiration
Are you starting to plan a trip to Grand Teton National Park? Read my Guide to Grand Teton National Park
Are you looking for a place to stay near Grand Teton National Park? Find an Airbnb near Grand Teton National Park
Are you ready to book your trip? Use these Planning and Booking Resources
Do you want to read a book about Grand Teton National Park? Check out my Recommended Reading List for Grand Teton National Park

About the Author

James Ian Yosemite

James Ian is a national park, camping and hiking expert.

He has dedicated his life to travel, visiting more than 80 countries, all 7 continents and all of the main national parks in the United States. With over 35 years experience in the travel industry, James has worked on cruise ships, at resorts and hotels, and as a travel planner who’s helped hundreds of people plan successful trips to US national parks. 

Based on his experience visiting our national parks multiple times, in-depth research and expertise as a travel planner, James has published detailed itineraries for most of the major national parks in the US. These itineraries, as well as in-depth park guides, comprehensive camping and hiking gear reviews and buying guides, and helpful packing lists and gift guides will help you have your own incredible trip to US national parks without stress and hassle.

As a national park expert, James has contributed to many publications, including Time Business News, Savoteur, Best Trip, and Wired.

Read more…


Parks Collecting is a participant in the Amazon.com Services LLC Associates Program, an affiliate advertising program designed to provide a means for sites to earn advertising fees by advertising and linking to amazon.com. Amazon and the Amazon logo are trademarks of Amazon.com, Inc. or its affiliates. As an Amazon Associate I earn from qualifying purchases.

Hiking the Hoh River Trail, Olympic National Park: Complete Guide

Moss. Towering trees. Ferns. Elk. River views. Check, check, and check. The Hoh River has it all! In fact, it’s my favorite hike in Hoh Rainforest.  

This guide to the Hoh River Trail in Olympic National Park has everything you need to know before setting out on this trail for a day hike. It includes full trail details, a detailed description, tips, a map, what to take and wear, and more.

TOP TOUR: Book a small group tour now
TOP HOTEL IN NEARBY FORKS: Check availability now
TOP HOTEL IN PORT ANGELES: Check availability now
FIND THE CHEAPEST CAR RENTAL: Search Discover Cars for the best deals
FIND THE CHEAPEST FLIGHTS: Search Skyscanner for the best deals
GET TRAVEL INSURANCE: Get insured with Travelex before you go

No time right now to read about hiking the Hoh River Trail? Pin It and save it for later:

Please note this post may contain affiliate links, which means we may receive a commission, at zero cost to you, if you make a purchase through a link. Please see our full Disclosure for more information. If you have any questions, please contact me.

FREE DOWNLOAD
Subscribe to regular updates with tips for planning, travel inspiration and trip ideas and get instant access to the free PDF of this
Hoh River Trail

 Guided Tours of the Hoh River Trail 

You can definitely do this hike by yourself, but if you’re not able to drive or if you just want an expert guide to share tips and information about the area with you, there are a couple of day tours that include this hike.

Small Group Tour to Hoh Rainforest and Kalaloch Beaches

This small group (maximum eight people) leaves from the Kalaloch Campground, so you get to spend more time in the park and less time in the bus.  In addition to the Tree of Life and Ruby Beach, you’ll hike 2 miles each way along the Hoh River Trail.

BOOK THIS SMALL GROUP TOUR TO HOH RAINFOREST AND KALALOCH BEACHES

Private Hiking Tour to Hoh Rainforest and Kalaloch Beaches

A private tour means you get the guide all to yourself – and have more flexibility in what you do.  An expert naturalist guide can point out all the features of what you’re seeing and give you extra information that will enhance your hikes.

You get picked up at Kalaloch Beach 4 and spend some time at Ruby Beach as well as the Hoh Rainforest.  Choose this hike in the Hoh and you won’t be disappointed!

BOOK THIS PRIVATE TOUR TO HOH RAINFOREST AND KALALOCH BEACHES


Hoh River Trail Details

Distance:

  • First River Access: 0.9 miles each way | 1.8 miles total
  • Mineral Creek Falls: 2.7 miles each way | 5.4 miles total
  • Cedar Grove: 4.0 miles each way | 8.0 miles total
  • Five Mile Island: 5 miles each way | 10.0 miles return
  • Glacier Meadows: 17.3 miles each way | 34.6 miles return

Type: Out-and-back

Elevation change: 300 feet

Time: 4-5 hours to Five Mile Island and back

Difficulty: Moderate to Five Mile Island, due to its length, not elevation gain, as it mostly flat. Easy if you turn back sooner.

Hoh River Trailhead: Hoh Rain Forest Visitor Center

Highlights: Temperate rain forest; moss; waterfall; river views

Fee: There is no special trail fee but you do need to pay the Olympic National Park entrance fee.
Buy it online or, if you are planning to visit more than just Olympic National Park this year (Mount Rainier National Park and North Cascades National Park are both close), it can be great value to purchase an America The Beautiful pass.

Open: Open year-round, but there can be snow on the trail in winter.


Hoh River Trail Map

Use this map of Hoh River Trail or buy a National geographic topographical map of the hiking trails in Olympic National Park if you’re planning to do several hikes. 


My Tips for Hiking the Hoh River trail Day Hike

  1. Get to the Hoh Rain Forest before 8:00AM if you’re visiting in the busy summer months.  This is a very popular part of the park and when there is no more parking available, the rangers hold traffic at the entrance station and only let a vehicle enter when another one leaves. 
  2. If you find yourself stuck at the entrance, there is a restroom just before the entrance, so if you need to go, you can walk along the side of the road from your vehicle.  There are also restrooms at the Visitor Center and a basic drop toilet at Five Mile Island (and other campgrounds along the trail if you’re hiking farther). 
  3. There’s a parking lot right next to the trailhead and Visitor Center, which is where you should try to park. If it’s full, there are other lots around the campsite area where you can park. You are also permitted to park on the side of the road in the vicinity of the Visitor Center.
  4. The light is best for photography early in the morning.  When the early morning sun hits the moss, turning it into a golden glow, it is truly magical. 
  5. The trail can be muddy in spring.  If you’re hiking then, or after it has rained, a good pair of hiking shoes or boots will come in handy. If you need to get some, take a look at my Guide to Buying the Best Hiking Shoes/ Boots to help you know what to look for and get some recommendations.  
  6. The trail can be snowy in winter.  Microspikes may not be strictly necessary, but will make you safer.  Read my guides to The Best Microspikes for Hiking and The Best Snowshoes for Beginners if you need to buy some.
  7. Because most of the annual precipitation is in winter, the rain forest can be a little dry looking by early fall.  There’s not much you can do about this other than to adjust your expectations or the timing of your trip.  Though even in September, it’s stunning. 
  8. The Hoh Rain Forest can be very crowded in summer. However, the further you go along the trail, the fewer people you’ll encounter. 
  9. You’ll sometimes come to splits in the trail.  Heading out from the Visitor Center, take the left trails.  The ones to the right sometimes rejoin the trail, but sometimes they dead end at the river.
  10. Check current road conditions before you set out. Trees sometimes fall down and block the road for a few hours.
  11. There are often ranger talks at the Hoh Rain Forest Visitor Center and guided walks.  These are a great introduction to the temperate rain forest.  Check for ranger programs for the dates of your visit.

Description of the Hoh River Trail to 5 Mile Island

The Hoh River trail follows the river as it flows through the Hoh River Valley.

There are several common places to turn back, so this hike can be as short or as long as you want.  In fact, you can hike over 18 miles (each way) to see Blue Glacier, though what I’m focusing on here is the Hoh River day hike options. Typically, the farthest place to turn back on a day hike is Five Mile camp.

Hoh River Trail to First River Access

0.9 miles each way | 1.8 miles total

The trail starts at the Visitor Center. There are several trails all winding around the area, but there are also plenty of signs.  You’ll see the main trail notice board and a wide trail beyond.

You’ll soon see a small bridge off to your right.  Go over the bridge.

Keep following the signs for the Hoh River Trail.

Look down into the creek.  You may see salmon and/ or river otters in season.

You’ll pass a sign for the Spruce Nature Trail to the right – stay on the main trail.

Then soon after is another small sign and then the main sign indicating that you are now on the Hoh River Trail. The sign shows distances to key places on the trail, though these are mostly relevant for hikers doing a multi-day trek to Blue Glacier, not day hikers. 

The trail heads straight into a series of groves of fern-covered trees with enormous ferns immediately around you.

The further you go, the fewer people you’ll see and you may soon find yourself alone in the magic forest.

Many of these giant trees are over 200 feet tall. The conifer trees are a mix of Douglas-fir, western hemlock, cedar, and Sitka spruce trees.  

There are literally hundreds of different varieties of moss in the Hoh Rain Forest. Moss is interesting – unlike the ferns that you’ll also see growing everywhere along this trail, moss doesn’t have leaves, stems or roots!

Not all moss is actually moss.  Most of the ‘hanging’ moss is actually lichen, which are a combination of fungi and green algae.  They have a symbiotic relationship, as the fungus provides the structure and the algae uses photosynthesis to provide nutrition. 

Many of these gnarly tress, wrapped in strange shapes and covered in moss, look like something from a Dr. Seuss book.

Keep an eye for snags.  They are the broken stumps of trees that have fallen over.  They are a source of food for bears that search for bugs in the soft wood, and homes for birds and small mammals. 

About half an hour after you set out, you’ll come to a path off to your right.  This is the first point on the trail that you can get access to see the Hoh River.  

If this is as far as you’ll be going, then take this side trail and enjoy the views of the river.  If you’re going further, you’ll have more opportunities to see the river, so you can choose to go straight ahead if you want to shave off a little bit of hiking.

Hoh River Trail to Mineral Creek Falls

2.7 miles each way | 5.4 miles total

The trail continues through the rain forest. 

While the National Park Service does a great job of maintaining trails, you may come to a section where a tree has fallen across the path and the NPS haven’t cleared it yet. It’s generally possible to climb over, but if this is too challenging, then you will need to turn around at this point.

The trail is mostly flat, but there is some up and down and at one point the trail skirts along the top rim of a gully, with the river below. 

Keep an eye out on your right for glimpses of the Hoh River through the trees. 

After about an hour and a half, you’ll cross a wooden footbridge that spans Mineral Creek. 

Mineral Creek Falls is to the left and uphill.  You’ll catch glimpses through the trees.

This is a particularly lush area and a common turning back point. 

It definitely makes a great place to stop and have a snack.

There is a short primitive side trail off to the left that goes up to the falls.  This is steep and narrow and only take it if you feel very confident.  It gets you closer to the falls, though the distant view from the main trail is good enough if you don’t want to do this. 

Hoh River Trail to Cedar Grove

4.0 miles each way | 8.0 miles total

Another 0.2 miles past the falls, you’ll come to Mt Tom Creek.  There is a basic campground here. This is another place you can turn back, or keep going to Cedar Grove.

It’s a little hard to know when you’ve arrived at Cedar Grove – there are cedar trees the whole way, but keep an eye out for a grove of trees that look very similar.  If you miss it, the worst that can happen is you end up at Five Mile Creek 😊. 

Hoh River Trail to Five Mile Island

5 miles each way | 10.0 miles return

The trail continues through the woods until you arrive at Five Mile Island/ 5 Mile Camp. There is an open grassy section here, with access to the river.  There’s also a campground here, with toilets that day hikers can use (BYO toilet paper). You can see the top of Bogachiel Peak peaking over top of the nearer hills.

You may well see deer, Roosevelt Elk or black bears anywhere along this trail, but Five Mile Island is a particularly good spot to see them, as deer and elk often graze in the area and go down to the river to drink, and bears forage for food in the area. 

This is a great spot for lunch and to relax and enjoy the views before heading back.  Most day hikers turn back here, though the trail does continue on for many more miles to Blue Glacier. 

Blue Glacier Hike, Olympic National Park

Snow-capped mountains and below are mountains of green trees in Blue Glacier
Image taken by Janis Burger on glacier monitoring fixed wing flight 10-20-10 ca. 1100-1200 hrs

If you’re interested in more than a day hike, it is possible to hike the Hoh River Trail to Blue Glacier at Mount Olympus. This is a multi-day trip that can only be done in summer when the upper trail is passable. 

The entire trek is 17.3 miles each way to Glacier Meadows, with an elevation change of 3,700 feet.  The last push to see Blue Glacier is an additional 0.9 miles / 700 feet elevation gain to a viewpoint overlooking the glacier. If you’d like to do this, you’ll need to book wilderness camping sites.  

There are several campgrounds along the way and booking sites will automatically give you a wilderness camping permit. The campgrounds are:

  • Mt Tom Creek 
  • Five Mile Island 
  • Happy Four Shelter
  • Olympus Guard Station 
  • Lewis Meadow 
  • Martin Creek – no open fires 
  • Elk Lake – no open fires 
  • Glacier Meadows – no open fires

Wear layers, take trekking poles for the frequent water crossings, and be prepared for mud.

About 0.25 miles before reaching Glacier Meadows, you’ll need to climb down the Jemrod Gully Ladder – a 100-foot rustic ladder down a very steep gully that is not for the faint-of-heart!

It’s possible to do this hike in 2 days, but 3 or 4 are more comfortable.

If you’d like to do it but are feeling a little intimidated, you can book a guided trip.

Hoh River Trail Backpacking Trip to Blue Glacier

Go with an expert guide on a five-day (4-night) backpacking trip along the Hoh River Trail all the way to Blue Glacier. This is a major trip and going with a guide will definitely make things easier, so you avid the worst of the mud and have help descending the Jemrod Gully Ladder.

BOOK 5-DAY HOH RIVER HIKING TRIP TO BLUE GLACIER


What You Need To Take/ Wear on The Hoh River Hike

Some parts of the trail, especially beyond Mineral Creek Falls, are overgrown, so if you don’t like brushing against leaves, wear long pants.
If you need some, get some hiking pants for men here or some hiking pants for women here.

There are ticks and bugs, especially in spring and summer.  Although I’m not aware of any reports of Lyme Disease, bug spray is a good idea. I’m a fan of DEET-free insect repellent, as it’s better for the environment and your skin.  Get some here

There are a lot of muddy sections in winter, spring and through early summer.  Good quality waterproof hiking boots are a must!
If you need to get some, take a look at my Guide to Buying the Best Hiking Shoes/ Boots to help you know what to look for and get some recommendations.  My top pick is this pair of Salomon Gore-Tex boots.

This is a rain forest, so it can rain a lot.  I recommend taking a rain jacket and wearing layers that you can take them off or put them on depending on the weather, which can change throughout the day.
If you need one, I like this Columbia rain jacket for men and recommend this Little Donkey Andy rain jacket for women.

The trail is mostly flat, but if it’s been raining or is the wet season, you’ll find trekking poles are a big help for navigating around mud and puddles. I have these Foxelli trekking poles – they are really light weight, adjustable, and have several tips and cork handles.  Get them here.

For any hike, you should take water.  There is a refill station at the Visitor Center, so you just need a refillable water bottle. I love this hydroflask. It’s easy to carry, keeps temperatures well, and comes in multiple colors.

You will definitely want to take a camera.  I love the GoPro HERO 12.  It’s designed for travel.  It’s water resistant and durable and takes photos, video and even does streaming.  Check current prices on the GoPro HERO 12 here 

Check my list of essential things to take and wear on a day hike to make sure you have everything you need.


FAQS about Hoh River Trail

How long does it take to do the Hoh River Trail?

To hike the full trail takes 2-4 days.  A day hike to Five Mile Island and back typically takes about four hours.

How many miles is the Hoh River Trail?

It’s 17.3 miles each way to Glacier Meadows.  It’s five miles each way to Five Mile Island, which is a common place to turn back for a day hike.


Travel Insurance for the Hoh Rainforest Trail

You should definitely get travel insurance before setting out on this hike.  It’s not an especially difficult hike (unless you’re going all the way to Blue Glacier), but things can happen.  Good travel insurance can protect you against medical and emergency repatriation, as well as cover things like trip cancellation, loss and/ or theft of property, etc.  

A great insurance option is Travelex.  It has coverage for all you’ll need. You can choose the best travel insurance plan for your trip here or get a quote right now:

728x90 Get Quote

Enjoy the Hoh River Rainforest Trail!

You might also like: 


Do you have any tips for or questions about hiking the Hoh Rain Forest trail?  I’d love to hear about them.  Join my private Facebook group National Parks Collectors and comment and let me know (you can also pick up extra planning tips, share your photos and stories with other national park lovers and more). 

FREE DOWNLOAD
Subscribe to regular updates with tips for planning, travel inspiration and trip ideas and get instant access to the free PDF of this
Hoh River Trail

If you liked this post, please share the love and Pin It to your Olympic National Park board!

WHERE ARE YOU IN YOUR PLANNING PROCESS?

Are you just starting to think about taking a national parks trip? Get Inspiration
Are you starting to plan a trip to Olympic National Park? Read my Guide to Olympic National Park
Are you looking for a place to stay? Seach accommodation guides
Are you ready to book your trip? Use these Planning and Booking Resources
Do you want to read a book about national parks? Check out my Recommended Reading List

About the Author

James Ian Yosemite

James Ian is a national park, camping and hiking expert.

He has dedicated his life to travel, visiting more than 80 countries, all 7 continents and all of the main national parks in the United States. With over 35 years experience in the travel industry, James has worked on cruise ships, at resorts and hotels, and as a travel planner who’s helped hundreds of people plan successful trips to US national parks. 

Based on his experience visiting our national parks multiple times, in-depth research and expertise as a travel planner, James has published detailed itineraries for most of the major national parks in the US. These itineraries, as well as in-depth park guides, comprehensive camping and hiking gear reviews and buying guides, and helpful packing lists and gift guides will help you have your own incredible trip to US national parks without stress and hassle.

As a national park expert, James has contributed to many publications, including Time Business News, Savoteur, Best Trip, and Wired.

Read more…


Parks Collecting is a participant in the Amazon.com Services LLC Associates Program, an affiliate advertising program designed to provide a means for sites to earn advertising fees by advertising and linking to amazon.com. Amazon and the Amazon logo are trademarks of Amazon.com, Inc. or its affiliates. As an Amazon Associate I earn from qualifying purchases.

Hoh Rainforest Hall of Mosses Trail Guide

Imagine an enchanted forest that glows softly in the early morning light.  Enormous ferns are at your feet.  Branches reach out above you, twisting and turning at strange angles. A kaleidoscope of green surrounds you.  Moss coats trees and drapes down like fringed curtains.  

This otherworldly place is the most famous Olympic National Park rain forest and the most popular trail there, the Hall of Mosses, Hoh Rainforest.

In this detailed guide, I will give you all the trail details, describe the trail so you know exactly what to expect, and share my tips to help you get the most of your trip to the magical place that is the Hall of Mosses. 

TOP TOUR OF HALL OF MOSSESBook a full-day tour now
TOP HOTEL IN NEARBY FORKS: Check availability now
TOP HOTEL IN PORT ANGELES: Check availability now 
FIND THE CHEAPEST CAR RENTAL: Search Discover Cars for the best deals
FIND THE CHEAPEST FLIGHTS: Search Skyscanner for the best deals
GET TRAVEL INSURANCE: Get insured with Travelex before you go

No time right now to learn about the Hoh Rainforest Hall of Mosses Trail? Pin It and save it for later:

Please note this post may contain affiliate links, which means we may receive a commission, at zero cost to you, if you make a purchase through a link. Please see our full Disclosure for more information. If you have any questions, please contact me.

FREE DOWNLOAD
Subscribe to regular updates with tips for planning, travel inspiration and trip ideas and get instant access to the free PDF of this
Hall of Mosses Trail Guide

The Hoh Rainforest

There are several rainforests in Olympic National Park, but the Hoh Rainforest is the most famous and most popular.

The word “Hoh” is said to come from the Quileute word “Ohalet” which means “fast-moving water” or “snow water”, describing the river that flows through this valley.

The Hoh is a temperate rainforest – one of the most spectacular in the world.  As you would expect from a “rain” forest, it rains a lot.  An average of 140 inches (3.55 meters) of precipitation falls each year. Fortunately, though, most of this happens in the winter.

The result is a lush environment, a mix of deciduous trees like the gnarly Bigleaf Maple trees and evergreen coniferous trees like Douglas-fir, western hemlock, spruce and cedar trees. Hundreds of varieties of moss grow on the trees, feeding off the moisture, and enormous ferns grow underfoot. 

The area is so spectacular that UNESCO has officially designated Olympic National Park as a World Heritage Site and Biosphere Reserve.

The Hoh is located on the west side of Olympic National Park, and is accessed by the Upper Hoh Road, which you get to from Highway 101.  It’s about an hour drive from Forks and two hours from Port Angeles. 

Small road in Hall of Mosses Olympic National Park surrounded by trees covered with mosses and other plants.

Guided Tours of the Hall of Mosses, Olympic National Park – Hoh Rain Forest

Although most people visit the Hoh Rainforest and the Hall of Mosses in their own vehicle, it is possible to visit on a tour.  A tour has the advantage of an expert guide to give you information about the ecology and history of the area.  Plus, you don’t need to deal with driving and parking, which can be a hassle. 

My top tours of Olympic National Park that include the Hall of Mosses are:

Group Tour to Hoh Rainforest and Rialto Beach

A small group tour (maximum 14) that leaves from Port Angeles.  In addition to the Hoh Rainforest, you’ll also get to see Rialto Beach and the Hole-in-the-Wall (depending on the tides). At the Hoh Rainforest, you’ll be able to walk the Hall of Mosses and the Spruce Nature Trail.

BOOK THIS SMALL GROUP TOUR TO HOH RAINFOREST AND RIALTO BEACH

Private Hiking tour to Hoh and Kalaloch Beaches

If you want more flexibility and personalized attention than a group tour can provide, then this private hiking tour is the way to go.  It includes time at Ruby and Kalaloch Beaches, as well as the Hoh Rainforest.  Because it’s a private tour, you can choose what hike(s) you do.  You won’t want to skip the Hall of Mosses, but can add in some other trails as well. Pickup is at Kalaloch Beach 4.

BOOK A PRIVATE HIKING TOUR TO THE KALILOCH BEACHES AND HOH RAINFOREST

3-Day Tour to Olympic National Park

Rather than drive and have the hassle of finding your own accommodations, you can take this three-day tour that leaves from Seattle. One day is spent at Hurricane Ridge, another at Lake Crescent and the Pacific coast, and the third day is in the Hoh Rainforest.

BOOK A 3-DAY TOUR TO OLYMPIC NATIONAL PARK

Trees covered with moss surrounded by ferns and other plants in Hall of Mosses Olympic National Park

Hoh Rainforest Hall of Mosses Trail Details

Distance: 0.8 miles

Type: lollipop/ lasso loop

Elevation change: 100 feet

Time: 30 minutes

Difficulty: Easy

Trailhead: Hoh Rain Forest Visitor Center

Highlights: Temperate rainforest; moss

Fee: There is no special trail fee but you do need to pay the Olympic National Park entrance fee
Buy it online or, if you are planning to visit more than just Olympic National Park this year (Mount Rainier National Park and North Cascades National Park are both close), it can be great value to purchase an America The Beautiful pass.    

Open: Open year-round, but there can be snow on the trail in winter.

Branches of trees covered with mosses in Hall of Mosses Olympic National Park

My Tips for Hiking the Hall of Mosses Trail in the Hoh Rainforest, Olympic National Park

  1. Go very early in the morning if you can.  Not only will you avoid a wait to get into the national park, early morning is when the light is best for photography.  When the early morning sun hits the moss, turning it into a golden glow, it is truly magical. 
  2. This is a short easy hike with a wide, easy-to-follow path, so you don’t need special clothing or equipment most of the time.  However, it can be muddy in winter and spring
    If you’re hiking after it has rained, a good pair of hiking shoes or boots will come in handy. If you need to get some, take a look at my Guide to Buying the Best Hiking Shoes/ Boots to help you know what to look for and get some recommendations.  
  3. The trail can be snowy in winter.  Microspikes may not be necessary, but will make you safer.
    Read my guides to The Best Microspikes for Hiking and The Best Snowshoes for Beginners if you need to buy some.
  4. Because most of the annual precipitation is in winter, the rain forest can be a little dry looking by early fall.  There’s not much you can do about this other than to adjust your expectations or the timing of your trip.  Though I’ve visited in September, and it’s still stunning. 
  5. The Hoh Rain Forest can be very crowded in summer. Get there very early.
    There is some parking allowed on the side of the road near the Visitor Center in addition to the official parking lot, but when the entire area is at capacity, the rangers hold all traffic at the entrance station and only let one vehicle in when another leaves.  The wait time can be more than an hour at peak times.  Get there before 8:00AM in summer to avoid having to wait.
  6. Check current road conditions before you set out. Trees sometimes fall down and block the road for a few hours.
  7. Most people hike the Hall of Mosses Trail and the nearby Spruce Nature Trail. If you get there in the morning, most people head to the Hall of Mosses first, so if you go to the Spruce Nature Trail first, you have a better chance of having the rain forest more to yourself.  Later in the day, it will make little difference, though. 
  8. There are often ranger talks at the Hoh Rain Forest Visitor Center and guided walks nearby, including the Hall of Mosses.  These are a great introduction to the temperate rain forest.  Check for ranger programs for the dates of your visit.
Tree logs, mossy trees and ferns in the Hoh Rainforest Hall of Mosses Olympic National Park

 Hall of Mosses Trail Map

Black and white image of a map of Hoh Rainforest Olympic National Park

Description of the Hall of Mosses Trail Olympic National Park, Hoh Rainforest

The Hall of Mosses is an easy trail through one of the most spectacular sections of the Hoh Rainforest.  It’s a relatively short loop that is suitable for kids and is a great introduction to the temperate rainforest.

The trail starts near the Hoh Rain Forest Visitor Center.  There are a lot of paths in this area that all connect with each other.  Look for a sign that says “Hall of Mosses”.

Sign indicating Hall of Mosses Trail in Olympic National Park beside the road and surrounded by ferns and other plants

At the start of the trail, you’ll cross a small, picturesque creek.  It’s worth stopping here and peering into the waters and the surrounding area.  In season, you may see salmon and/ or river otters here. 

Small green creeks surrounded by trees in Hoh Rainforest Hall of Mosses Olympic National Park

There is moss on the trees from the very start, but the scenery will become even more spectacular the further you get onto the Hall of Mosses. 

Creek filled with plants and surrounded by trees in Hoh Rainforest Hall of Mosses Olympic National Park

After a couple of minutes, you’ll come to a small sign indicating the start of the loop.  This is one-way loop in a clockwise direction.  The path climbs slightly at the beginning but is level for most of the walk.

A panel board and a signage that says ONE WAY surrounded by ferns and other plants in Hoh Rainforest Hall of Mosses Trail in Olympic National Park

The trail is wide and easy to follow, though it can be muddy after rain.  There are enormous ferns alongside. Keep an eye out for animals in the forest, too.  It’s not uncommon to see majestic Roosevelt Elk here.  

Small road in the middle of the trees, ferns, and other plants in Hoh Rainforest Hall of Mosses Olympic National Park

Look down – if you see something bright yellow, it’s probably a banana slug. 

Don’t forget to look up, too.  The conifer trees tower far above you. There are Douglas-fir, spruce, hemlock, and cedar trees in the forest.

Tall trees surrounded by other plants in Hoh Rainforest Hall of Mosses Trail Olympic National Park

It’s the moss, however, that is the star attraction here.  Enormous Bigleaf Maple Trees twist and turn into shapes like something out of a Dr. Seuss book.  Their limbs are draped with all kinds of moss.  

Mossy branches hanging over the road in the Hoh Rainforest Hall of Mosses Olympic National Park

About five minutes into the hike, you’ll come to a junction, with a side trail going off to the left.  Take this.  It is an out-and-back spur trail to the most spectacular section of the Hall.

A man standing in a junction surrounded by two wooden benches, trees, ferns, and other plants in the Hoh Rainforest Hall of Mosses Olympic National Park

In about a minute, you’ll come to the end of the side trail.  

Four people standing surrounded by wooded railings and different trees and plants in the Hoh Rainforest Hall of Mosses Olympic National Park

Here are the best views in the Hall of Mosses – a fantastical landscape of mossy trees.

Ferns and other plants under the trees covered with mosses in Hoh Rainforest Hall of Mosses Olympic National Park

The trail continues under an overhanging branch (trunk).

Tree trunk over the road and ahead is a man standing surrounded by trees and ferns in Hoh Rainforest Hall of Mosses Olympic National Park

And through more magical landscape.

Small road surrounded by trees covered with mosses and other plants in Hoh Rainforest Hall of Mosses Olympic National Park

It’s hard not to take a million photos here – or just hang out and soak in the views.

Mossy trees surrounded by ferns and other plants in Hoh Rainforest Hall of Mosses Olympic National Park

Keep an eye out for trees that have a web of roots above the ground.  You can clearly see the shape of a log.  Trees fall and then other trees grow on top of them, their roots forming around the fallen logs.  The logs rot and an interlaced depiction of the former log remains.  It’s pretty incredible to see nature at work like this. 

Trees growing over log in Hoh Rainforest Hall of Mosses Olympic National Park

The ferns are enormous.  You really get a sense of the power of nature here. 

Small road surrounded by ferns and trees covered with moss in Hoh Rainforest Hall of Mosses Olympic National Park

After about half an hour, you’ll end the loop and return back along the short start of the trail, crossing back over the creek.

Tree logs above the creek and surrounded by trees and plants in Hoh Rainforest Hall of Mosses Olympic National Park

From there, you can head back to the Visitor Center or take one of the other trails in the Hoh Rainforest. 

If you want another short and easy trail, take the Spruce Nature Trail loop.  If you’re up for a bit of a longer hike and want to get away from the crowds, take the Hoh River Trail as far as you like and return the same way.


What You Need To Take/ Wear on The Hall of Mosses – Washington Rainforest

  1. This is a rain forest and even though most of the rain falls in winter, it can be wet and rainy at any time of the year.  I recommend taking a rain jacket with you.
    If you need one, I like this Columbia rain jacket for men and this Little Donkey Andy rain jacket for women.
  2. The trail is wide and easy to follow, but even so, with all that rain comes mud. Good hiking boots or shoes can help make your experience more enjoyable for sure.
    If you need to get some, take a look at my Guide to Buying the Best Hiking Shoes/ Boots to help you know what to look for and get some recommendations.
  3. You will definitely want to take a camera.
    I love the GoPro HERO 12.  It is designed for travel.  It’s water resistant and durable and takes photos, video and even does streaming.  Check current prices on the GoPro HERO 12 here 
  4. Check my list of essential things to take and wear on a day hike to make sure you have everything you need.
Small road in Hall of Mosses Olympic National Park surrounded by trees covered with mosses and other plants.

FAQS about Olympic National Park Hall of Mosses

What is the difference between the Spruce Nature Trail and the Hall of Mosses?

Spruce Nature Trail vs Hall of Mosses: If you have time, it’s worth hiking both trails. 
The Hall of Mosses is shorter and the trees are denser, with more moss. 
The Spruce Nature has more sparse trees and crosses a meadow on the way to the river, before looping back around.

How far is the Hall of Mosses from the Hoh Rainforest Visitor Center?

It’s about a minute’s walk from the Hoh Rain Forest Visitor Center to the start of the Hall of Mosses trail.

What national park is the Hall of Mosses in?

The Hall of Mosses is in Olympic National Park.

How long is the Hall of Moss trail?

The Hall of Mosses is 0.8 miles in total.

Is Hall of Mosses trail dog friendly?

No, pets are not permitted on the Hall of Mosses Trail in order to preserve the fragile environment and ecosystem.

Where is the Hoh Rainforest?

The Hoh is on the west side of Olympic National Park, and is accessed by the Upper Hoh Road, which you get to from Highway 101.  It’s about an hour drive from Forks and two hours from Port Angeles.

How to get to Hoh Rainforest?

To get from Seattle to Hoh Rainforest, head west out of town and take the Bainbridge Ferry. Get on WA-3N in Poulsbo from WA-305N and then follow WA-104Q to US-101.  This is the main highway that circles around the Olympic Peninsula. 
After about 2.5 hours, you’ll see the turn off to the Hoh Rainforest on your left. The entire trip takes about 4.5 hours.

To get from Tacoma to Olympic National Park and Hoh Rainforest, get on WA-16W then take WA-3N to US-101 and follow this around until you get to the turn off for the Hoh Rainforest on your left.  The trip takes about 4 hours. 

What is the best time of year to visit the Hall of Mosses?

The best time of year to visit the Hall of Mosses and the Hoh Rainforest is late spring to early fall.  It is most crowded in summer, but this is when there is less rainfall.

When is the best time to visit Hoh Rainforest?

The best time of day to visit Hoh Rain Forest and the Hall of Mosses is early morning, when the light makes the moss glow and you’ll have the best chance of getting a parking spot without having to wait.  Late afternoon is also good, to avoid the crowds.

Where to stay near Hoh Rainforest?

There is a campground in Hoh Rainforest.  Otherwise, there are plenty of accommodation options in Forks, about an hour away.

What’s the best rainforest in Olympic National Park?

There are several temperate rain forests in Olympic National Park including Hoh, Queets and Quinault. Hoh Rainforest is the most popular.  The highlight is the stunning Hall of Mosses, Forks, Washington.

What’s the most famous Washington rainforest?

Hoh Rainforest is the most famous rainforest in Washington.

Small road surrounded by ferns and trees covered with moss in Hoh Rainforest Hall of Mosses Olympic National Park
FREE DOWNLOAD
Subscribe to regular updates with tips for planning, travel inspiration and trip ideas and get instant access to the free PDF of this
Hall of Mosses Trail Guide

Travel Insurance for Olympic National Park and the Hoh Rain Forest, Washington

Whether you’re hiking the Hall of Mosses Trail (Washington) or visiting some other part of Olympic National Park, you should definitely get travel insurance.  This can protect you not only against medical and emergency repatriation but can also cover things like trip cancellation, loss and/ or theft of property, etc. 

A great insurance option is Travelex.  It has coverage for all you’ll need. You can choose the best travel insurance plan for your trip here or get a quote right now:

728x90 Get Quote

Enjoy the Hall of Mosses, Washington!

You might also like


Do you have any tips for the Hall of Mosses hike or questions about this beautiful rainforest in Washington State? I’d love to hear about them.  Join my private Facebook group National Parks Collectors and comment and let me know (you can also pick up extra planning tips, share your photos and stories with other national park lovers and more).

If you liked this post about the Hall of Mosses, Forks, WA, please share the love and Pin It to your Olympic National Park board!

WHERE ARE YOU IN YOUR PLANNING PROCESS?

Are you just starting to think about taking a national parks trip? Get Inspiration
Are you starting to plan a trip to Olympic National Park? Read my Guide to Olympic National Park
Are you looking for a place to stay? Seach accommodation guides
Are you ready to book your trip? Use these Planning and Booking Resources
Do you want to read a book about national parks? Check out my Recommended Reading List

About the Author

James Ian Yosemite

James Ian is a national park, camping and hiking expert.

He has dedicated his life to travel, visiting more than 80 countries, all 7 continents and all of the main national parks in the United States. With over 35 years experience in the travel industry, James has worked on cruise ships, at resorts and hotels, and as a travel planner who’s helped hundreds of people plan successful trips to US national parks. 

Based on his experience visiting our national parks multiple times, in-depth research and expertise as a travel planner, James has published detailed itineraries for most of the major national parks in the US. These itineraries, as well as in-depth park guides, comprehensive camping and hiking gear reviews and buying guides, and helpful packing lists and gift guides will help you have your own incredible trip to US national parks without stress and hassle.

As a national park expert, James has contributed to many publications, including Time Business News, Savoteur, Best Trip, and Wired.

Read more…


Parks Collecting is a participant in the Amazon.com Services LLC Associates Program, an affiliate advertising program designed to provide a means for sites to earn advertising fees by advertising and linking to amazon.com. Amazon and the Amazon logo are trademarks of Amazon.com, Inc. or its affiliates. As an Amazon Associate I earn from qualifying purchases.

12 Fun Facts About Zion National Park In Utah

Zion National Park is an incredible place of red rock cliffs, slot canyons, iconic hikes, and much more.  But it’s not just beautiful; it’s also fascinating!

Want to learn more about Zion? Let’s take a look at some interesting facts about Zion National Park.

No time right now to read these fun facts about Zion National Park? Pin It and save it for later:

River surrounded by trees, bushes and red rock mountains, with the text above that says Explore the Wonder of Zion National Park 12 Fascinating Facts You Need to Know
Two photos: Above huge rock formations, and below are trees; and below is a river surrounded by trees and bushes and red rock mountains, with the text that says 12 Fun Facts About Zion National Park.

Please note this post may contain affiliate links, which means we may receive a commission, at zero cost to you, if you make a purchase through a link. Please see our full Disclosure for more information. If you have any questions, please contact me.

If you are planning to visit Zion National Park in spring, summer, or fall, make your planning easy and stress free with a detailed itinerary. I have 1-, 2-, and 3-day itineraries for Zion National Park that include all the park highlights, give you choices based on your preferred activity level, and take all the stress out of planning your trip.

Check out the three Zion National Park itinerary options


Basic Zion National Park Facts

  • Location: Southwestern Utah, United States
  • Size: 229 square miles
  • Number of Visitors each Year: 4,692,417 in 2022, making it the third most popular National Park
  • Annual Rainfall: The average annual rainfall in Zion National Park is 15.6 inches (1.3 inches/ month)
  • Highest Elevation: 8,726 feet (the summit of Horse Ranch Mountain)
  • Lowest Elevation: 4,000 feet
  • Date it Became a National Park: November 19, 1919
FREE DOWNLOAD
Subscribe to regular updates with tips for planning, travel inspiration and trip ideas and get instant access to the free PDF
12 Fun Facts About Zion National Park

12 Fun Facts About Zion National Park

Here are 12 unique things about Zion National Park that you might not know:

1. Zion was Utah’s first National Park

River surrounded by trees and red cliffs under the blue sky in Zion National Park

Utah is home to the Mighty Five – five incredible national parks that include Bryce Canyon, Canyonlands, Arches, and Capitol Reef.  However, Zion was the first!

The park started out as Mukuntuweap National Monument, which was created by President William Taft in 1909.  It changed its name to Zion in 1918 and was then upgraded and became Zion National Park on November 19, 1919, when President Woodrow Wilson signed it into being.

The canyon was originally named “Mukuntuweap” by John Wesley Powell, who surveyed the area in 1872.  He named it to honor the Southern Paiute people, who lived there.  The name means “straight canyon” or “straight river” in the Paiute language, though the Southern Paiute actually called the canyon “Ioogoon” (“the arrow quiver”). 

So, why was it changed to “Zion”? Well, although the park is now one of the most popular national parks in the country, that wasn’t always the case.  When it was Mukuntuweap National Monument, very few people visited.  The Park Service’s acting director, Horace Albright, felt ‘Mukuntuweap’ was “too difficult to pronounce and really tough to spell” and this deterred prospective visitors.

So, in order to try and attract more visitors, he campaigned for the name to be changed. He succeeded and when more land was added in 1918, the name was changed to Zion National Monument – more about that in fun fact #2.

It worked.  In 1914 only 300 people visited Mukuntuweap. but in 1919, the newly designated Zion National Park had 1,814 visitors.  Numbers have continued to rise and it’s now the third most popular park in the United States!

READ MORE: Opening Zion: A Scrapbook of the National Park’s First Official Tourists by J Clark and M Clark – a fascinating book based around two albums of photographs and newspaper clippings from1920 that document a trip made by six young women from the University of Utah into the newly formed Zion National Park.


2. Zion was named by an early Mormon settler

Zion Lodge Zion National Park

So, how was “Zion” chosen as the name for the National Park?

The word “Zion” is often used by Christians to describe a “holy place” or “kingdom of heaven.” This area, like much of Utah, was settled in the 1800’s by Mormon pioneers.  One such man was Isaac Behunin who built a tobacco, corn and fruit farm in Zion Canyon in 1863 near today’s Zion Lodge.  

As he sat in his yard and gazed at the towering canyon walls around him, he supposedly said, “Here we have natural temples; we can worship as we please. A man can worship God among these great cathedrals as well as he can in any man-made church; this is Zion.” Since Salt Lake City had first been envisioned as the “City of Zion”, he decided to call the canyon “Little Zion.”

He left the area and moved to Kirtland, Ohio soon after but the name stuck and continued to be used by locals. When they were searching for a name to replace “Mukuntuweap”, this local name seemed like a logical choice. 

READ MORE: Zion National Park (Images of America) by Tiffany Taylor – an interesting book that focuses on the lives of Zion’s early pioneer settlers and chronicles in photos how the park has changed over the past century


3. There are four main sections in Zion National Park

Huge rock cliffs and below are small bushes and trees in Zion National Park
Checkerboard Mesa

Most people only visit Zion Canyon, which is where the park’s most popular attractions are.  However, there are three other sections to the park.  

Kolob Canyons is much less visited.  It’s about an hour from Zion Canyon and is accessed through a completely different entrance. It’s home to several great hiking trails, a campground and Kolob Arch (see below).

Kolob Terrace lies in the middle of the National Park and is reached by the Kolob Terrace Road. This scenic drive between Virgin and Lava Point has wonderful views and several trails. 

The East Mesa lies along the top of the east rim and also contains several great hikes, as well as unique geographic features like Checkerboard Mesa.  

READ MORE: Planning a Trip to Zion National Park: Complete Guide


4.  One of the greatest engineering feats of all time is found in Zion

old photo of zion national park, old cars, and two men facing huge rock cliffs surrounded by trees
Postcard featuring the Zion-Mt. Carmel Tunnel

You never used to be able to drive from the East Mesa into Zion Canyon.  But you can now due to one of the world’s most incredible feats of engineering. 

The Zion-Mt. Carmel Tunnel was built in 1930 to connect the East Mesa (and Bryce canyon and Grand Canyon) to the floor of Zion Canyon and what is now the main south entrance to the national park.  The 25-mile stretch of road includes an incredible 1.1-mile tunnel that was built in the side of Pine Creek Canyon. 

If you enter the national park from the east entrance, you will soon go into the tunnel.  There are windows off to the right as you descend, that were intentionally built to provide glimpses of the dramatic scenery.  After just over a mile, you’ll emerge and prepare to have your breath taken away as the panorama of Zion Canyon is laid out before you.

The construction of the tunnel is one of the most incredible Zion National Park facts.  History books talk of how this was started in 1927 and finished in 1930 and at the time was the longest tunnel of its type. The Zion-Mount Carmel Highway, including the tunnel, cost $1,896,000, which was a huge sum of money at the time.

Construction was not easy.  The galleries, or windows, that were specially built to provide views of Zion Canyon, ‘involved the construction of rock walls and arched-masonry culverts.  Add in the seven switchbacks the tunnel goes through, bridges that needed to be built, and the difficulty of working with the soft sandstone and the risk of landslides, and you can start to appreciate just how incredible it is.  

The tunnel wasn’t designed for the large vehicle, like RVs and trailers, that exist today.  Consequently, larger vehicles have trouble navigating the narrow lanes and turns in the tunnel.  If your vehicle is 11’4″ or taller or 7’10” or wider, you will need to get a special tunnel permit so that rangers can close the tunnel to two-way traffic and you can drive down the middle of the road. 

READ MORE: The Zion Tunnel: From Slickrock to Switchback by DT Garate – learn more about this incredible feat of engineering.


5. Zion contains the fourth largest freestanding arch in the world

Huge stone arch surrounded by trees in Zion National Park
Kolob Arch

Arches National Park is the U.S. national park most famous for natural arches, but it’s not the only park that has them.  In fact, the fourth largest freestanding natural arch in the entire world is in Zion.  The third longest is Landscape Arch in Arches National Park, and the two longest are in China. 

The arch in question is Kolob Arch and it’s found in the Kolob Canyons District of the park.  Kolob Arch is 287 feet long, which is just three feet shorter than Landscape Arch.

To see it, you’ll need to hike 14 miles roundtrip into the backcountry to a viewpoint.  The arch itself is off limits. 

READ MORE: Zion Canyon: A Storied Land by G Chesher – written by a park ranger who spent over two decades in the park, this goes over a lot of the history, ecology and geography of the park.


6. Zion National Park has a Subway and Wall Street

Water below the huge rocks in Zion National Park
The Subway

One of the cool facts about Zion National Park is its connection to New York City – at least in the naming of a couple of famous places in the park.  On the surface, this dramatic landscape and a megacity couldn’t be more different, but there are two features that were inspired by famous counterparts in NYC.

At its far end, Zion Canyon narrows into a slot canyon that is appropriately called The Narrows.  You can hike this (see Fun Fact #9). 

About 3 miles into this slot canyon, it becomes just a few yards wide.  The cliffs on both sides tower hundreds of feet above.  This stretch reminded people of the skyscrapers of Wall Street, which gave it its name.

Another fun fact: There is also a Wall Street in Bryce Canyon National Park.

Another part of Zion National Park reminded people of the subway tunnels in NYC.  The left fork of North Creek slot canyon, or “The Subway” as most people call it, is a rounded, tunnel-shaped slot canyon in the backcountry of the national park. 

This is an iconic hike that requires route finding (bottom-up approach) and some rappelling (top-down approach).  To get there, you need a special wilderness permit.

READ MORE: Best Hikes in Zion National Park


7. Zion is a great place to climb cliffs

Three men climbing in tall rock cliffs in Zion National Park
Climbers in Zion National Park

The cliffs and canyons in Zion are Navajo sandstone, which was originally formed from sand dunes that then built up in layers some 110 and 270 million years ago and was subsequently shaped by wind and water.  

Today, Zion National Park features enormous 2000-feet sandstone cliffs, including iconic monoliths like the Court of the Patriarchs and Great White Throne, in addition to the canyon walls.  

This makes it a great place for climbing!  The peak season is March to May and September to November, when climbers come from all over to enjoy a variety of climbing routes. There are climbs for all levels – from beginners to experts. 

There are also routes for different kinds of technical climbing, from sports climbing, where climbers use bolts embedded into the rocks, to more challenging traditional climbing with ropes and lots of hand holds. 

If this sounds appealing, you’ll need a permit and all the right safety gear.  If you’re new to climbing, there are several outfitters in Springdale that offer guided climbs. 

Book an intro to climbing and rappelling experience here

READ MORE: Daniel Stih’s Rock Climbing in Zion National Park by D Stih – details on climbing routes with descriptions, photos, maps and drawings.


8. Zion is also a great place to jump off cliffs

zion canyoneering
Rappelling into a slot canyon near Zion National Park

In addition to towering cliffs, Zion and the surrounded area is riddled with narrow slot canyons.  These extremely narrow canyons are formed over thousands of years by water rushing through soft rock. 

There are several places where these canyons descend in ‘steps’, with drops offs ranging from a few feet to a few hundred feet between each layer. 

These are the perfect place for rappelling – jumping off the edge of each of these drop-offs down into the next layer of the slot canyon.  

READ MORE: If you’d like to learn more about canyoneering in Zion, read my guide to Canyoneering In Zion National Park

Book a half-day canyoneering trip to Coral Sands


9. You can hike in a river in Zion National Park

Zion National park
The Narrows

Zion Canyon narrows into a slot canyon at it far end, with the Virgin River flowing through it.  The hike through the Narrows – most of which is done by wading upstream in the river, is one of the most iconic hikes in the country.  

The hike can be done as a through hike (top-down), which is 16 miles and requires camping overnight.  However, most people do it as an out-and-back day hike from the Temple of Sinawava (the last stop on the Zion shuttle) to Wall Street, which is 3 miles each way. 

This is a unique experience I recommend everyone who is physically able to try. However, since most of the hike is actually in the river, the canyon is closed if the water level is too high or if there is a danger of flash flooding. 

READ MORE: For more details about this amazing hike, read my Guide to Hiking The Narrows


10. Zion has one of the most dramatic – and dangerous – hikes in the country

Huge rock cliffs surrounded by trees in Zion National Park
Angels Landing

The Narrows isn’t the only famous hike in Zion.  Arguably even more famous – and dangerous – is the bone-chilling hike to Angels Landing.

The hike is 5 miles round trip, and gains 1,500 feet mostly by a series of 21 narrow switchbacks called Walter’s Wiggle.  That’s the easy part, though!

It is the last half a mile that makes the trail so legendary.  From Scouts Lookout at the top of Walter’s Wiggles to Angel’s Landing, the trail is only about 5 feet wide as it crosses a ridge with sheer drop offs hundreds of feet high on both sides.  There is a chain to hold on to, but it’s still a thrilling hike that is definitely not good for those with a fear of hikes. 

The rewards at the end are breathtaking views down the length of Zion Canyon. 

It’s also not a hike to take lightly.  This hike has been described as one of the most dangerous hikes in the world; more than 15 people have fallen to their deaths while attempting this hike!

However, if you are sensible and take basic precautions, it’s perfectly safe.  Thousands of people hike it every year without incident.

In fact, the hike became so popular that the National Park Service has implemented a lottery system to limit the number of hikers on the trail at any given time.

READ MORE: If you’d like to try this hike, learn How To Get Angels Landing Permits

For stories about deaths on this hikes and other parts of Zion, pick up Death in Zion National Park: Stories of Accidents and Foolhardiness in Utah’s Grand Circle by Rando Minetor


11. There are archeological sites from people who lived in Zion over 10,000 years ago

Old writings on the rock in Petroglyph Canyon interpretive area in Zion National Park
Courtesy-Zion-National-Park-Photographer-Carl-E.-Jepson-Museum-Catalog-Number-ZION-8161

Before Zion became a national park, it was settled by Mormon pioneers in the 1800s.  People lived here long before that, however.  In fact, the area has been inhabited for more than 10,00 years!  

Various small sites in and around the park exist. From petroglyphs (rock carvings) to granaries, the area is filled with evidence of a rich history. 

A great way to learn more about this is to visit the Human History Museum, near the main south entrance to the park. 

READ MORE: Zion Human History Museum


12. Zion National Park is part of an active volcano field

Red rock cliffs surrounded by trees in Zion National Park
Kolob Terrace

Zion is famous for its canyons, carved by wind and water over thousands of years.  However, it is also part of the Santa Clara volcano field.  Eruptions in this field typically happen every few 10,000 years.  The last was 32,000 years ago (in Snow Canyon State Park), so its due for another – at least in the next 10,000 years or so!

The first major eruption in the area was 1.1 million years ago on the Kolob Plateau near Lava Point in what is now the Kolob Terrace section of the park. This lava flowed all the way down to the Virgin River, possibly damming it and creating a temporary lake.

310,000-220,000 years ago, several eruptions occurred in the Grapevine Wash area. The Kolob Terrace road winds past these lava flows today.

Then 120,000 years ago, Crater Hill erupted just below the West Temple between Rockville and Virgin and the lave again dammed the Virgin River creating a temporary lake.

So, who knows.  Maybe the Virgin River will become a lake yet again some time. 

READ MORE: Water, Rock & Time: The Geologic Story of Zion National Park by R. Eves, R Wheeler, and L Hafen – the story of the formation of Zion Canyon with plenty of photos to accompany the text


Read more Fun Facts about other US National Parks


More Information About Zion National Park

Now that you’ve learned all about Zion National Park, are you feeling inspired to visit Zion National Park?  Start planning your trip now with these guides:


Do you have any other Zion fun facts to share?  I’d love to hear them.  Join my private Facebook group National Parks Collectors and comment and let me know (you can also pick up extra planning tips, share your photos and stories with other national park lovers and more).

FREE DOWNLOAD
Subscribe to regular updates with tips for planning, travel inspiration and trip ideas and get instant access to the free PDF
12 Fun Facts About Zion National Park

If you liked this post about fun facts: Zion National Park, please share the love and Pin It to your Zion National Park board!

Two photos: Above huge rock formations, and below are trees; and below is a river surrounded by trees and bushes and red rock mountains, with the text that says 12 Fun Facts About Zion National Park.
River surrounded by trees, bushes and red rock mountains, with the text above that says Explore the Wonder of Zion National Park 12 Fascinating Facts You Need to Know
WHERE ARE YOU IN YOUR PLANNING PROCESS?

Are you just starting to think about taking a national parks trip? Get Inspiration
Are you starting to plan a trip to Zion National Park? Read my Guide to Zion National Park and Get an Itinerary for Zion National Park
Are you looking for a place to stay near Zion National Park? Find a vacation rental near Zion National Park
Are you ready to book your trip? Use these Planning and Booking Resources
Do you want to read a book about Zion National Park? Check out my Recommended Reading List for Zion National Park

About the Author

James Ian Yosemite

James Ian is a national park, camping and hiking expert.

He has dedicated his life to travel, visiting more than 80 countries, all 7 continents and all of the main national parks in the United States. With over 35 years experience in the travel industry, James has worked on cruise ships, at resorts and hotels, and as a travel planner who’s helped hundreds of people plan successful trips to US national parks. 

Based on his experience visiting our national parks multiple times, in-depth research and expertise as a travel planner, James has published detailed itineraries for most of the major national parks in the US. These itineraries, as well as in-depth park guides, comprehensive camping and hiking gear reviews and buying guides, and helpful packing lists and gift guides will help you have your own incredible trip to US national parks without stress and hassle.

As a national park expert, James has contributed to many publications, including Time Business News, Savoteur, Best Trip, and Wired.

Read more…


Parks Collecting is a participant in the Amazon.com Services LLC Associates Program, an affiliate advertising program designed to provide a means for sites to earn advertising fees by advertising and linking to amazon.com. Amazon and the Amazon logo are trademarks of Amazon.com, Inc. or its affiliates. As an Amazon Associate I earn from qualifying purchases.

8 Best Sol Duc Hikes, Olympic National Park

Waterfalls, lakes, old growth forest, jumping salmon … the Sol Duc region in Olympic National Park has them all!  

The best way to see these and much more is to get out on the trails.  But what trails are there, what do you see on each of them, and which ones should you choose?

To make it easy, here are my picks for the eight best hikes near Sol Duc, Olympic National Park.

TOP TOUR TO SOL DUC: Book a Private Full-Day Hiking now
TOP HOTEL IN PORT ANGELESCheck availability now
TOP HOTEL IN FORKS: Check availability now
FIND THE CHEAPEST CAR RENTAL: Search Discover Cars for the best deals
FIND THE CHEAPEST FLIGHTS: Search Skyscanner for the best deals
GET TRAVEL INSURANCE: Get insured with Travelex before you go

No time right now to discover the best Sol Duc hikes? Pin It and save it for later:

Four photos: falls surrounded by logs, trees, and mossy rocks; blue river surrounded by trees; small road surrounded by trees; and wooden bridge surrounded by trees, ferns, and other plants, with the text that says 8 Jaw-Dropping Hikes in Sol Duc Olympic National Park.
Two photos: Above, Blue lakes surrounded by mountains and trees; and below, n image of a blue lake surrounded by trees, with the text that says 8 Best Sol Duc Hikes Olympic National Park

Please note this post may contain affiliate links, which means we may receive a commission, at zero cost to you, if you make a purchase through a link. Please see our full Disclosure for more information. If you have any questions, please contact me.

FREE DOWNLOAD
Subscribe to regular updates with tips for planning, travel inspiration and trip ideas and get instant access to the free PDF of this guide to the
Best Sol Duc Hikes

Before we look at each of the top Sol Duc hiking trails, here are a few practical things to know:

What to Pack for these Sol Duc Valley Hikes

There is a lot of variety in these hikes.  For the short, easy ones, you won’t need anything special.  However, for the longer hikes, you’ll need some gear to ensure you’re comfortable and adequately prepared. 

  1. Good hiking boots or shoes. Some of these trails are rocky, uneven and/ or have roots across them.  You’ll be much more comfortable if you have good quality hiking shoes or boots.
    If you need to get some, take a look at my Guide to Buying the Best Hiking Shoes/ Boots to help you know what to look for and get some recommendations.  
  2. Trekking poles.  Some of the longer hikes have significant elevation change and using hiking poles will really help – especially your  knees.
    I have these Foxelli trekking poles – they are really lightweight, adjustable, and have shock absorbent tips and grippy cork handles.  Get them here
  3. A camera.  I love the GoPro HERO 12.  It is designed for travel.  It’s water resistant and durable and takes photos, video and even does streaming (when there’s service).  Check current prices on the GoPro HERO 12 here 
  4. Water.  I recommend always taking some water with you when you hike, even for shorter hikes.  For the longer hikes, it’s essential – take more than you think you’ll need.
    I love this hydroflask. It’s easy to carry, keeps temperatures well, and comes in multiple colors. 
  5. Day Hike Essentials. Check my list of essential things to take and wear on a day hike to make sure you have everything you need.
  6. If you’re hiking in winter or spring, especially on the longer trails that head up into the mountains, you will need a good pair of microspikes to give you traction on snow and ice.
    I’ve written a whole buying guide to the best microspikes for hiking, which I recommend reading if this is your first time to buy some. Or you can pick up the ones that I use – these Kahtoola Microspikes.  They are very easy to put on and are really good quality. 
  7. If you’re hiking in summer, you will appreciate having bug spray, as the mosquitoes can be an annoying distraction otherwise.
    You can get some DEET-free bug spray here if you need some. 
  8. On the longer trails, having a handheld GPS is a good idea for peace of mind and to follow your progress and show you where you’re going.
    Read my Guide to the Best Handheld GPS for Hiking for tips on what to buy and recommendations if you’re looking to get one. My top pick is this Garmin model.
Small lake in the middle of the trees and a field of grasses in Olympic National Park.

Tips for Hiking Sol Duc Hot Springs and Nearby

  1. Most of these hikes start from the main Sol Duc Trailhead, though some start from Sol Duc Hot Springs, which is a little further down the road, and a couple are found along the road from Highway 101 to the main trailhead.  There is a picnic area at the parking area at the main trailhead.  This is a surprisingly nice place to have lunch.
  2. You can visit Sol Duc Hot Springs as a day visitor – and soaking in hot mineral water is a great way to unwind after a hike or two. 
  3. Get there early to avoid the crowds and get a parking spot, especially in summer, when the park gets extremely busy.

Sol Duc Trail Map

Use this Sol Duc map or get a detailed topographic trail map from National Geographic in advance (recommended).

A photo of a Sol Duc hiking map with images of plants is attached with the text below "Sol Duc Trail."

Guided Hikes at Sol Duc

You’ll need to have your own vehicle If you want to do most of these hikes.  But there are a couple of tours from Seattle that give you the opportunity to do one or two of them.  And having an expert guide can add extra layers to your experience, as they can share information about the area, so you can appreciate it even more. 

Private Full-Day Hiking Tour in Olympic National Park

An experienced guide will take you on hikes in three main parts of Olympic National Park: Hurricane Ridge (read Best Hikes in Hurricane Ridge to see options); Lake Crescent (read Best Hikes near Lake Crescent) and Sol Duc. 

The main hike you’ll do in the area is the Sol Duc Falls trail.  However, it’s a private tour, so you could add in another short hike or two like Ancient Groves and/ or Salmon Cascades.

BOOK THIS PRIVATE ALL-DAY GUIDED HIKING TRIP TO 3 AREAS IN OLYMPIC NATIONAL PARK

Guided Group Tour to Sol Duc Falls, Hurricane Ridge and Lake Crescent

This tour also goes to these three parts of the national park. You won’t have the same flexibility you would on a private tour, but the Sol Duc hike is to Sol Duc Falls, which is the most popular hike in the area.  There are a maximum 14 people.

BOOK THIS SMALL-GROUP TOUR THAT INCLUDES THE SOL DUC FALLS TRAIL

4-Day Epic Backpacking Hike to Seven Lakes Basin

If doing this 4-day, 3-night hike by yourself seems intimidating, then this guided hike is a great choice. An expert guide will escort you, camping equipment is included, and there are a maximum of five people in the group. It’s a strenuous hike and you’ll need to carry your gear, so you need to be fit, but this is an epic hike into an area of Olympic National park that few people visit.

BOOK THIS 4-DAY GUIDED HIKE TO SEVEN LAKES BASIN


Best Sol Duc Hikes, Olympic National Park

Ranging from a super short and easy stroll to an all-day (or overnight) trek up into the mountains, there are sensational hikes in the Sol Duc area for everyone. 

1. Sol Duc Falls Trail, Olympic National Park

Waterfalls surrounded by rocks and trees in Sol Duc Falls Olympic National Park

Length: 1.6 miles return out-and-back

Difficulty: Easy

Elevation Gain: 200 feet

Trailhead: Sol Duc Trailhead, at end of Sol Duc Hot Springs Road

Description:

This is the most popular Sol Duc trail. Hiking Sol Duc Falls is seldom a solitary experience, but there’s a reason it’s so popular.  Sol Duc Falls are not the biggest falls you’ll ever see but they may also just be the most beautiful.  

The Sol Duc River shifts just as it drops into a ravine, creating a 3- or 4-section waterfall that lies parallel to the main direction of the river, rather than across it like normal falls.  Add in the narrow ravine at the bottom and the surrounding lush forest and it’s a picture-perfect place. 

The hike to the falls takes about half an hour on a well-trodden, easy-to-follow trail through beautiful old growth forest, across several tiny streams, past huge ferns, and under towering trees.  Near the falls is Canyon Creek Shelter, a rustic historic wooden shelter built in 1939 by the Civilian Conservation Corp (CCC).

You can return the way you came or loop back on the Lovers Lane Trail or continue on to the Sol Duc River Trail, the Deer Lake Trail or the epic High Divide Trail loop.

Insider Tips:

Get there early to avoid the crowds and get a parking spot, especially in summer, when the park gets extremely busy. 

There is a reasonably-sized parking lot at the trailhead.  However, if it’s full and you’re up for a longer hike, you can combine this with the Lover’s Lane Trail by starting at the Sol Duc Hot Springs back down the road or start at the Sol Duc Campground and following a trail from there that connects just after the start of the main Sol Duc Trail. This creates a 6.0-mile loop trail that goes through the campground and down near the river.

If you’re a serious photographer, you’ll want special filters, lenses and a tripod to get a long exposure, which creates that soft flowing look.  If you have an iphone, you can create the same look more easily.  Take the photo with “live” on, then when you look at the photo, click on the small down arrow next to “live” in the top left corner and choose “long exposure” from the drop-down menu. 

The best light for photos of the falls is early morning and late afternoon.

Highlights: Old growth forest; waterfall

READ MORE: Sol Duc Falls Trail Guide


2. Ancient Groves Trail, Olympic National Park

Wooden road surrounded by trees and plants in Sol Duc, Olympic National Park

Length: 0.6 miles loop

Difficulty: Easy

Elevation Gain: 52 feet

Trailhead: On the side of the Sol Duc Hot Springs Road, about 9 miles from the entrance station. There is a sign and small parking lot/ pullout on the right side of the road.

Description:

This easy Sol Duc hike is a loop through a grove of ancient trees, many more than 750 years old!  The undergrowth is covered in moss and the trail crosses several gullies filled with enormous ferns. 

This is a great place to see nurse logs, fallen logs with a row of seedlings growing on them; snags, standing trunks of fallen trees that are homes to birds and small forest creatures; and some of the hundreds of varieties of moss that grow in Olympic National Park. You can also see glimpses of the Sol Duc River from the top of a canyon at the edge of the grove.  

There are few better places to appreciate the grandeur of nature!

Insider Tips:

If you are driving into Sol Duc Valley from Highway 101, there is a sign.  The parking is on your right.  However, if you are driving from Sol Duc valley towards Highway 101, there is no sign and it is easy to miss.  So, I recommend doing this hike on your way in. 

There are two trailheads and two access paths to the main loop. When you come to the second sign that says “Loop”, this is NOT the path you entered in. It can be confusing if you don’t know this.  

If the first parking lot you come to is full, drive a little further along the road and you’ll come to another pullout with some additional parking.  There is a trail here that also connects to the loop, so you don’t need to walk back to the other parking lot.

Highlights: Old growth forest; view of Sol Duc River in small canyon

READ MORE: Ancient Groves Trail Guide


3. Salmon Cascades, Olympic National Park

A close photo of waterfalls in Sol Duc Salmon Cascades, Olympic National Park

Length: 190 feet each way, out and back

Difficulty: Easy

Elevation Gain: 0 feet

Trailhead: 5 miles up Sol Duc Hot Springs Road from Highway 101, on the right side.

Description:

At Salmon Cascades, you can experience a different, but no less incredible, slice of nature.  Salmon spawn upriver, then swim to the Pacific Ocean where they spend most of their lives. After a couple of years, they find their way back to the exactly the same place they hatched in order to lay or fertilize their own eggs. 

In order to do this, they need to jump up an 11-foot cascading waterfall! The multi-layered falls are beautiful at any time of year, but in spring and fall when the salmon or trout leap up the falls, they are especially amazing. 

The trail itself is very short and ends at a viewing platform.  You can also walk below the falls where you can often see schools of salmon gathering energy for their leaps of strength.

Insider Tips:

The falls are beautiful all the time, but to have the best chances of seeing the fish jumping, spring and fall are best. Chinook and coho salmon leap up the cascades in the fall (September – early November) and cutthroat trout and steelhead leap up the cascades in spring (March-May).  

Take video. It’s very difficult to snap a phot exactly when a fish is mid-air.  It’s much easier to take videos so you can catch them in action.  

Highlights: Salmon jumping; beautiful waterfall

READ MORE: Salmon Cascades Guide


4. Sol Duc River Trail, Olympic National Park

A river surrounded by logs and tree plants in Sol Duc, Olympic National Park

Length: 17 miles round trip, out-and-back (but you don’t need to go the whole way)

Difficulty: Challenging (Moderate for if you turn back sooner)

Elevation Gain: 3,200 feet

Trailhead: Sol Duc Trailhead, at end of Sol Duc Hot Springs Road

Description:

The first part of this hike is the same as the Sol Duc Falls Trail

After enjoying the falls, continue along the trail at the rustic shelter rather than turning back. The trail ascends gradually as is passes through an ancient conifer forest.  At eye level are ferns, huckleberry bushes and saplings.

Keep an eye out for bears, which are often seen feeding on the bushes here.

The trail has some elevation change as it follows the river climbing through the valley.  There is a lovely twin waterfall and around the five-mile mark, a short way after the junction with the Appleton Pass Trail, you’ll cross the Sol Duc River on a foot log bridge. This is a popular turning back point, but you can continue on deeper into the Olympic Mountains.

The trail ascends more steeply as it moves up to the ridge separating the Sol Duc and Hoh River valleys. It crosses Bridge Creek as around the seven-mile park, reaches Sol Duc Park campground. 

A mile further along is the delightful Heart Lake.  If you’ve made is this far, you might consider continuing along and finishing the full loop along the High Divide Trail

Highlights: River; waterfalls; old growth forest


5. Deer Lake Trail, Olympic National Park

A photo of a lake surrounded by trees in Sol Duc, Olympic National Park

Length: 8 miles round trip, out-and-back

Difficulty: Easy, Moderate – Difficult

Elevation Gain: 1,650 feet

Trailhead: Sol Duc Trailhead at end of Sol Duc Hot Springs Road

Description:

The trail starts with the hike to Sol Duc Falls. At the falls, rather than returning back, follow the signs for Deer Lake.

The trail is steadily uphill, running parallel to Canyon Creek.  There are several small waterfalls along the way to enjoy.

There are actually two lakes – the bigger Deer Lake and another much smaller one nearby.  The lakes are surrounded by woods and are a beautiful spot to relax and enjoy the views.  There’s a primitive campsite there, and, of course, you may see deer in the area.

You can either return the way you came or for a truly epic hike, continue up the High Divide Trail and loop back around the Sol Duc River Trail.

Insider Tips:  

The lake can be buggy in summer, so if you’re hiking at that time of year, don’t forget the bug spray.  You can get some DEET-free bug spray here if you need some.  

The hike is uphill the entire way. I recommend using trekking poles, as they can really make life easier both going up and coming down. I have these Foxelli trekking poles – they are really lightweight, adjustable, and have shock absorbent tips, and grippy cork handles.  Get them here.  

The trail is rocky pretty much the whole way, so you will definitely want to have a very good pair of hiking shoes or boots, with adequate protection for the soles of your feet.  If you need to get some, take a look at my Guide to Buying the Best Hiking Shoes/ Boots to help you know what to look for and get some recommendations.   

If you’re hiking in spring or even into early summer, the trail is often covered in snow, so you will want microspikes.  Otherwise, hiking on snow can be hairy/ scary and dangerous.  I use these Kahtoola Microspikes.  They are very easy to put on and are really good quality.  

There is a vault toilet at the lake.

Highlights: Sol Duc Falls; lovely lake


6. Lovers Lane Trail, Olympic National Park

Narrow road surrounded by trees in Sol Duc, Olympic National Park

Length: 5.8 miles loop

Difficulty: Moderate

Elevation Gain: 480 feet

Trailhead: Sol Duc Trailhead at end of Sol Duc Hot Springs Road OR Sol Duc Hot Springs or Sol Duc Campground Loop B

Description:

If you’re staying or parking at the Hot Springs Resort, and are looking for hikes near Sol Duc Hot Springs, this loop is a great way to see Sol Duc Falls.

From the hot springs, the trail follows the Sol Duc River upstream.  After about a mile, the trail moves away the river and heads uphill deeper into the forest. Ancient, moss-covered Douglas-fir, Sitka spruce and western hemlock trees tower above and gullies of oversized ferns are all around you. 

After viewing the Sol Duc Falls, follow the main Sol Duc Trail back towards the main trailhead, branching off before the trailhead to loop back through Loop B of the Sol Duc Campground, with the river nearby. 

End this Sol Duc natural hot springs hike with a soak in the warm waters!

Highlights: Waterfall; river; old growth forest


7. Mink Lake Trail, Olympic National Park

Lake in the middle of trees and various plants in Sol Duc, Olympic National Park

Length: 5.2 miles round trip

Difficulty: Moderate

Elevation Gain: 1,450 feet

Trailhead: The northwest end of the Sol Duc Hot Springs Resort parking area. 

Description:

This is the other main Sol Duc Hot Springs trail.  Rather than going left on the Lover’s Lane Trail, head right. After about half a mile, you’ll enter old growth forest and immediately notice the difference as the trees shoot up and you can start to feel the age and grandeur of the trees around you.

The trail climbs steadily, the Douglas-firs giving way to western hemlocks, and gullies of lush ferns giving way to subalpine meadows where beautiful wildflowers burst into bloom in early summer.

Mink Lake is not huge, but is surrounded by hemlock and silver fir trees and grassy marshes. Look for orchids, beargrass, and violets around the lake, in season.

You can return the way you came or, for a much longer Sol Duc Hot Springs hike, continue to the Little Divide Trail to Deer Lake, then follow the Deer Lake Trail back to Sol Duc Falls and loop back along the Lover’s Lane Trail to the trailhead. 

Insider Tips:  

The trail can be covered in snow through June.  If you’re hiking that early in the season, wear microspikes to be safe on the snow/ ice.  I use these Kahtoola Microspikes.  They are very easy to put on and are really good quality.  

Mosquitoes love a good lake as much as people do – wear plenty of bug spray in summer.  You can get some DEET-free bug spray here if you need some.  

Highlights: Lake; old growth forest


8. High Divide – Seven Lakes Basins – Heart Lake – Sol Duc River Loop, Olympic National Park

Blue lakes surrounded by trees and behind are mountains in Sol Duc, Olympic National Park

Length: 19 miles loop (6-7 hours)

Difficulty: Challenging

Elevation Gain: 4,000 feet

Trailhead: Sol Duc Trailhead at end of Sol Duc Hot Springs Road

Description:

If you are fit and like to hike, this is the granddaddy of Sol Duc trail hikes.  It can be done in one day if you set out early, but can also be done as an overnight hike (see tips below).

The hike can be done clockwise or counterclockwise, but this is described counterclockwise. 

It starts with the short hike to Sol Duc Falls.  From there, follow the signs for Deer Lake, which is described above. The lake is surrounded by woods and – not surprisingly given its name – is a common place to see deer. 

From there, the trail climbs up along the High Divide Trail through subalpine meadows of wildflowers that burst into bloom in the early summer.  You may spot white mountain goats grazing on the meadows here.

About an hour and a half past Deer Lake, you’ll reach the junction with Lake Lunch.  You can take a side trail to the lake or continue on. The views of the Mount Olympus looming 7,000 feet above the river and other surrounding mountains as you traverse the High Divide Trail are stunning.  

You’ll reach Bogachiel Peak, then descend into the absolutely mind-blowing Seven Lakes Basin.  There are actually eight small, serene subalpine lakes here, all surrounded by mountains.  The view will literally take your breath away. 

The main trail continues on to the aptly-named small Heart Lake, then loops back around and joins the Sol Duc River Trail.

Most of the remaining eight miles are flatter, as they go through gorgeous old growth forest alongside the river.

This is a long hike, but well worth every single step! 

Insider Tips:  

You can do this hike as a (very long) day hike or you can camp overnight.  If you are doing this as a day hike, leave early – no later than 7:30AM.  

If you camping overnight, there are several primitive backcountry campgrounds along the way.  You will need a backcountry permit and to book a campsite on the NPS recreation.gov website. Check the NPS Wilderness Backpacking Reservations page for more details.
Also be aware that bear canisters are required when camping in this area to store your food. They’re available for loan on a first-come, first-served basis to anyone with a backpacking permit. The most popular camp sites are at Heart Lake, Lunch Lake, and Deer Lake. 

If you’d like to do this hike, but it seems intimidating, consider doing a guided 4-day/ 3-night hike with an expert guide. You can book a guided backpacking hike to Seven Lakes Basin here.

There are vault toilets near most campsites that you can also use as a day hiker.

Trekking poles are definitely a good idea on this trail!

A handheld GPS for hiking is also a good idea. My top pick is this Garmin one.

Highlights: Old growth forest; Olympic Mountain views; several stunning lakes

FREE DOWNLOAD
Subscribe to regular updates with tips for planning, travel inspiration and trip ideas and get instant access to the free PDF of this guide to the
Best Sol Duc Hikes

Travel Insurance for Sol Duc, WA

You should definitely have travel insurance when you travel to Sol Duc Valley, Olympic National Park. Good travel insurance will cover you for trip cancellation, theft or damage of your property when traveling, medical help if you have an accident while hiking in Sol Duc Valley, WA, or medical repatriation if you need to get medi-vaced out.

A great insurance option is Travelex.  It has coverage for all you’ll need. You can compare Travel Insurance plans here or get a quote right now:

728x90 Get Quote

Happy hiking!

You Might Also Like:

>> Olympic National Park Guide  
>> Best Hikes in Olympic National Park 
>> Best Things to Do in Olympic National Park  
>> Best Hikes Near Lake Crescent 
>> Hurricane Ridge Visitors Guide 
>> Best Hikes at Hurricane Ridge  
>> Best Hoh Rainforest Hikes  
>> Best Lake Quinault Hikes  
>> Best Beaches in Olympic National Park  
>> Best Tide Pools in Olympic National Park  
>> Best Waterfalls in Olympic National Park 


Do you have any other top picks for the best Sol Duc Hot Springs hiking trails?  I’d love to hear about it.  Join my private Facebook group National Parks Collectors and comment and let me know (you can also pick up extra planning tips, share your photos and stories with other national park lovers and more).

If you liked this post about all the Sol Duc nature trail options, please share the love and Pin It to your Olympic National Park board!

Two photos: Above, Blue lakes surrounded by mountains and trees; and below, n image of a blue lake surrounded by trees, with the text that says 8 Best Sol Duc Hikes Olympic National Park
Four photos: falls surrounded by logs, trees, and mossy rocks; blue river surrounded by trees; small road surrounded by trees; and wooden bridge surrounded by trees, ferns, and other plants, with the text that says 8 Jaw-Dropping Hikes in Sol Duc Olympic National Park.
WHERE ARE YOU IN YOUR PLANNING PROCESS?

Are you just starting to think about taking a national parks trip? Get Inspiration
Are you starting to plan a trip to Olympic National Park? Read my Guide to Olympic National Park
Are you looking for a place to stay? Seach accommodation guides
Are you ready to book your trip? Use these Planning and Booking Resources
Do you want to read a book about national parks? Check out my Recommended Reading List

About the Author

James Ian Yosemite

James Ian is a national park, camping and hiking expert.

He has dedicated his life to travel, visiting more than 80 countries, all 7 continents and all of the main national parks in the United States. With over 35 years experience in the travel industry, James has worked on cruise ships, at resorts and hotels, and as a travel planner who’s helped hundreds of people plan successful trips to US national parks. 

Based on his experience visiting our national parks multiple times, in-depth research and expertise as a travel planner, James has published detailed itineraries for most of the major national parks in the US. These itineraries, as well as in-depth park guides, comprehensive camping and hiking gear reviews and buying guides, and helpful packing lists and gift guides will help you have your own incredible trip to US national parks without stress and hassle.

As a national park expert, James has contributed to many publications, including Time Business News, Savoteur, Best Trip, and Wired.

Read more…


Parks Collecting is a participant in the Amazon.com Services LLC Associates Program, an affiliate advertising program designed to provide a means for sites to earn advertising fees by advertising and linking to amazon.com. Amazon and the Amazon logo are trademarks of Amazon.com, Inc. or its affiliates. As an Amazon Associate I earn from qualifying purchases.