Zion National Park is famous for its classic hikes and legendary views. So, if you’re planning a trip to Zion, you’ll want to know where to find the best views in Zion National Park.
Whether you’re looking for the best places to photograph in Zion National Park for your album or Instagram, or just want to know where to soak in the splendor of the park, here are the best viewpoints in Zion National Park.
If you’re planning to visit Zion National Park by yourself, make your planning easy and stress free with a detailed itinerary. I have 1-, 2- and 3-day itineraries for Zion National Park that include all the park highlights, give you choices based on your preferred activity level, and take all the stress out of planning your trip.
No time right now to discover the best photo spots Zion National Park? Pin It and save it for later:

🛏️TOP HOTEL PICK: Check availability now
🚘FIND THE CHEAPEST CAR RENTAL: Search Discover Cars for the best deals
✈️FIND THE CHEAPEST FLIGHTS: Search Skyscanner for the best deals
🧳GET TRAVEL INSURANCE: Get insured with Travelex before you go
📱TAKE AN AUDIO TOUR: Buy an audio tour now
Subscribe to daily national parks planning tips, travel inspiration and trip ideas and get instant access to the free PDF of this
Guide to The Best Photo Spots in Zion National Park
Table of Contents
The Best Photo Spots: Zion National Park
1. Observation Point
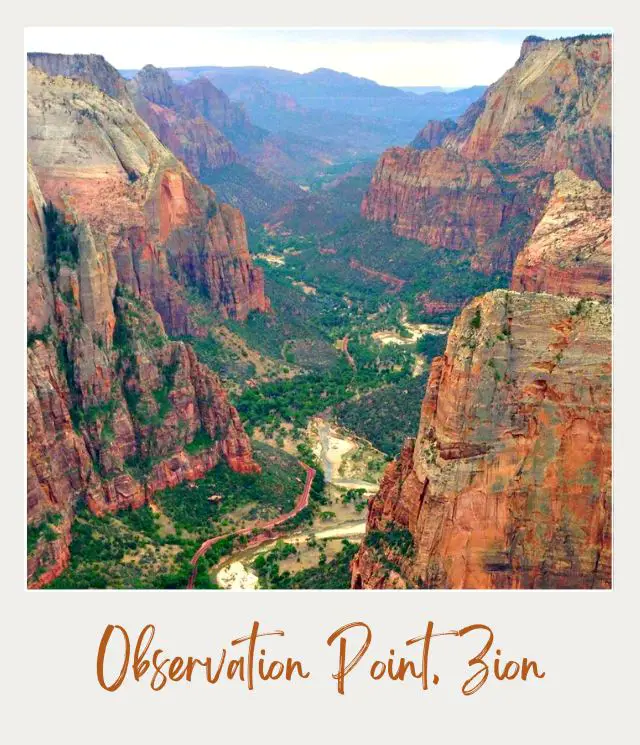
The view
If you’ve seen pictures of Zion National Park with the whole canyon spread far below, it was probably taken from here.
At Observation Point, you stand on the rim of Zion Canyon, 2,200 feet above the canyon floor, with a 270° view over the surrounding area. You can see down the entire length of the canyon, including Angel’s Landing far below you.
This is my top pick for the best view in Zion National Park.
Best time to take photos
The main view is looking south, so the view is great throughout the day, but morning is best.
How to get there
There used to be a steep and strenuous trail up from the main Zion Canyon, but this has been blocked by a major rockfall since 2019 and is unlikely to be reopened anytime soon. It can still be reached from the east though – either the East Mesa Trail or the East Rim Trail.
The East Mesa Trail is easier. The 3.5-mile sandy trail is mostly along an old jeep road on flat ground through meadows of sage brush, grasses and wildflowers and thinly forested areas. At the end of the trail, you exit the scrubby forest out on to Observation Point.
➡️ Read my Guide to The East Mesa Trail for more details
The East Rim Trail can be accessed from the Stave Spring Trailhead (4.5 miles each way; moderate) or the East Rim Trailhead near Checkerboard Mesa (10 miles each way; strenuous).
➡️ Read my Guide to The East Rim Trail for more details
Tips
The small parking area at the East Mesa Trailhead can only be accessed by high clearance 4WD vehicles and is completely inaccessible when muddy. If you have a regular vehicle, an alternative is the take a hikers’ shuttle from Zion Ponderosa Ranch Resort.
For the best photos, use a wide-angle lens and polarizing filter.
READ MORE:
➡️ This hike is included in my guide to the Best Hikes in Zion National Park.
➡️Complete descriptions and details are included in my 3-Day Zion Itinerary.
2. Canyon Junction Bridge | Pa’Rus Trail
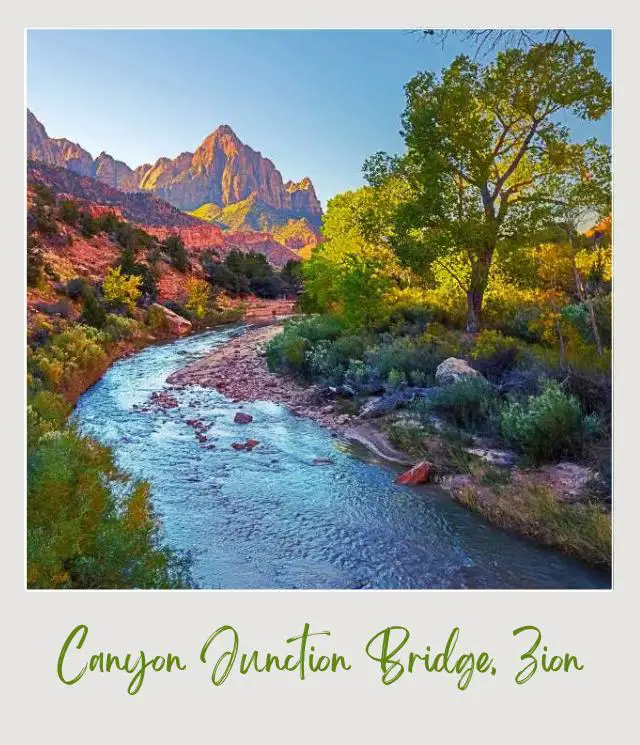
The view
From the bridge, there is a classic view of The Watchman mountain with the Virgin River in the foreground.
Best time to take photos
This is widely considered the best place to view sunset in Zion National Park. However, it’s also lovely at sunrise and is also a great place for night photography of the stars and Milky Way.
How to get there
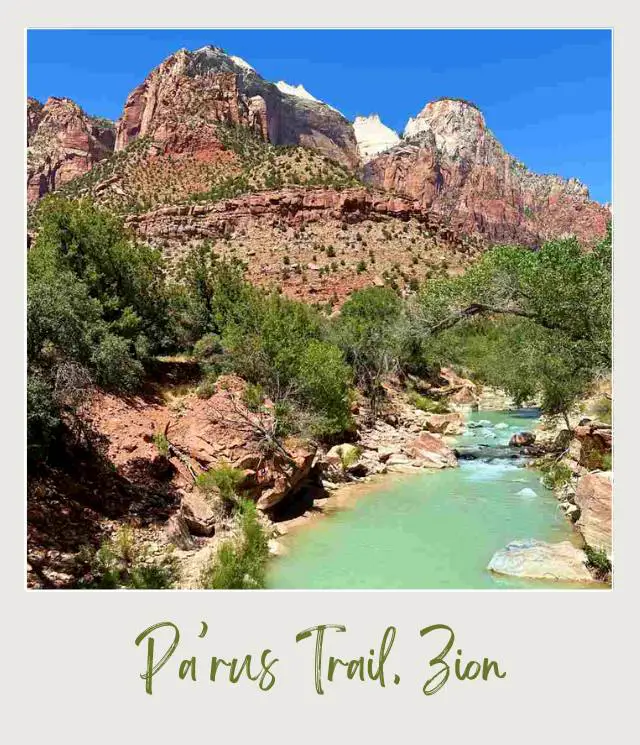
The bridge is a stop on the Zion shuttle. It’s also possible to drive to the bridge, but parking is very limited. A lovely way to get there is to walk along the easy, paved, 1.7-mile (each way) Pa’Rus Trail from the Visitor Center.
Tips
This is a very popular place to see and photograph the sunset. Get there early.
It’s especially lovely at Golden Hour, the hour before the sun actually sets when the light is soft and everything seems bathed in a golden glow.
Stick around after sunset for the Blue Hour when the light creates a deep blue backdrop.
There is a sign on the bridge that says you aren’t allowed to walk on it. You can get a similar view on one of several of bridges on the Pa’Rus Trail that starts at Canyon Bridge.
READ MORE:
➡️The Pa’Rus Trail is included in my guide to the Best Hikes in Zion National Park.
➡️Complete descriptions and details are included in my 1-, 2- and 3-Day Zion Itineraries.
3. The Narrows
The view
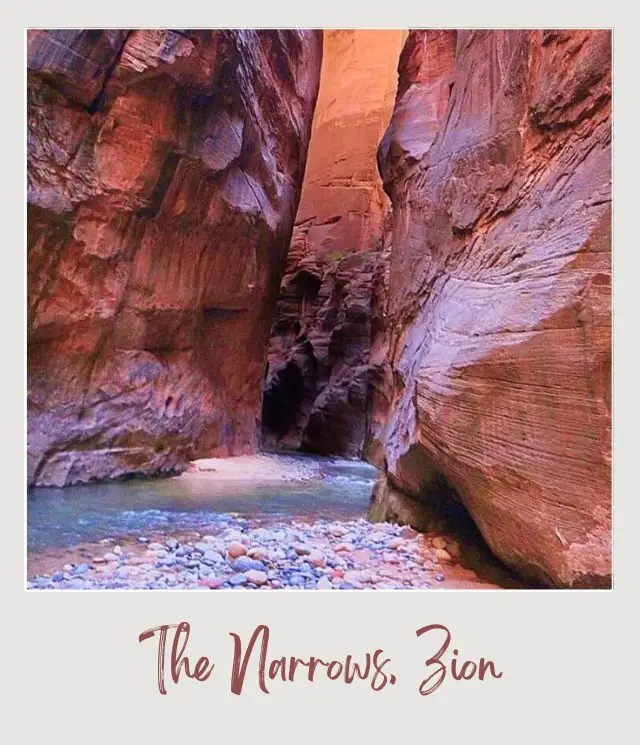
The Narrows is an aptly named narrow slot canyon with the Virgin River flowing through it. The narrowest section is the Wall Street section. Here, the canyon is just a few yards wide and over 1,000 feet tall. The dramatic scenery makes this another of the best views at Zion National Park.
Best time to take photos
The best time for photos is first thing in the morning when you have the best chance of getting photos without crowds of people in them.
How to get there
Take the shuttle (or an e-bike) to the last stop, the Temple of Sinawava. From there, walk along the Riverside Walk for one mile to the end. This is the start of the Narrows hike.
If you’re looking to buy an e-bike (a great way around the shuttle situation), check out e-bikes on REI here.
Tips
Most of the hike is in the river, so take a dry bag to protect your camera in case you slip and fall in completely. Hiking poles or sticks are also a big help in stabilizing you as you cross pebbly river beds in a running river. You can rent them in nearby Springdale.
The hike is closed when the river level is too high or there’s a risk of flash floods. Check with rangers before setting out.
READ MORE:
➡️ Read my Guide to the Narrows Hike for full trail details.
➡️ Complete descriptions and details are also included in my 1-, 2- and 3-Day Zion Itineraries.
4. Canyon Overlook
The view
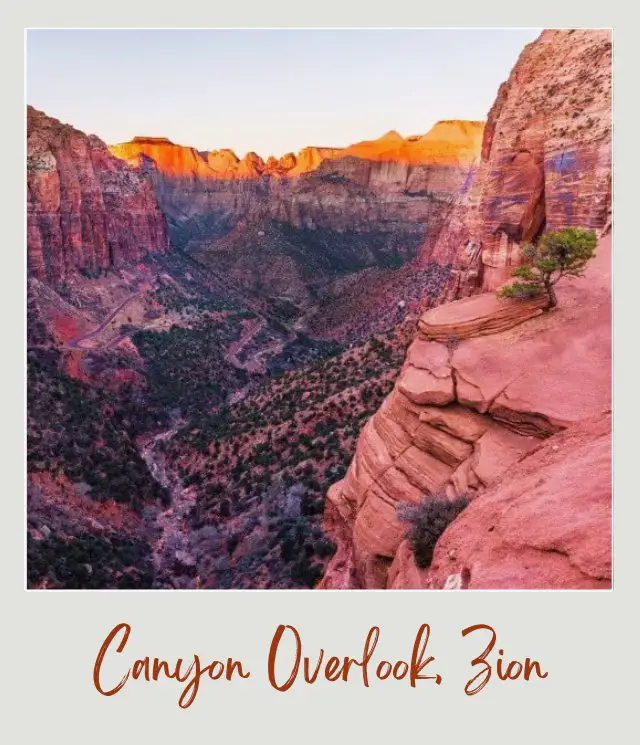
Another top contender for the best view point in Zion National Park, it’s a truly stunning look down Pine Creek Canyon, with the lower Zion Canyon at the end. You can also see Highway 9 and the window holes from the Zion-Mt. Carmel tunnel off to the left.
Best time to take photos
This is one of the best sunrise spots in Zion National Park. The red cliffs glow a brilliant orange color as the first light hits them. However, it’s also a great place to see the sunset at Zion National Park, as there are uninterrupted views of the sun falling behind the cliffs and casting color on to any clouds in the sky.
How to get there
The overlook is reached by a 0.5-mile (each way) hike. It’s rated as moderate with some elevation gain at the start, but after that, it is mostly flat and easy. There are a few exposed sections with steep drop offs with no railing.
To get to the trailhead from the main South Entrance, follow the road up several wide switchbacks that climb the side of Pine Canyon. As soon as you come out of the Zion – Mt. Carmel Tunnel, there’s a small parking area on your right. The trailhead is across the street.
Tips
To see the sunrise, you’ll need to set out in the dark. Take care and make sure you have a good flashlight or headlamp.
The parking lot fills up quickly, so try to get there early.
READ MORE:
➡️ The Canyon Overlook Trail is included in my guide to the Best Hikes in Zion National Park.
➡️ Complete descriptions and details are included in my 2- and 3-Day Zion Itineraries.
➡️ This is one of the things you can do without needing the Zion Shuttle. Read more about how to visit Zion without the shuttle.
5. Angels Landing
The view
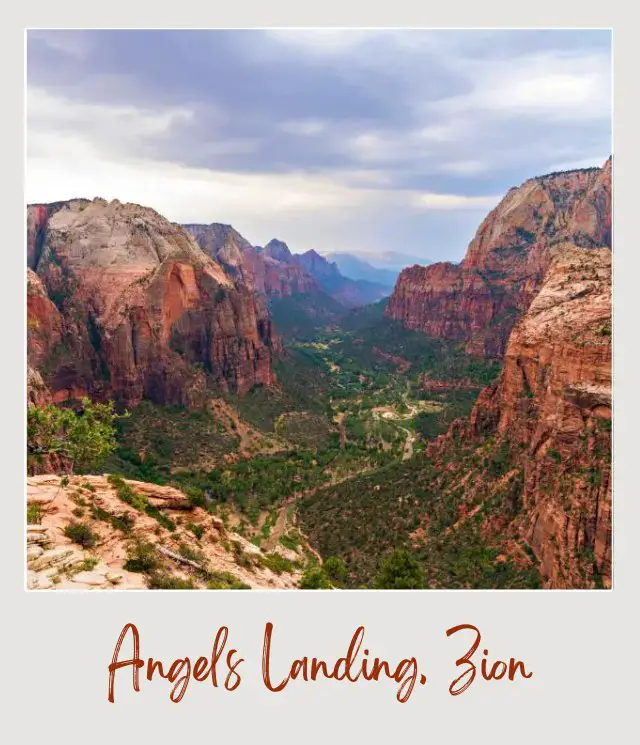
The view is one of the most classic – and spectacular – views down the length of Zion Canyon.
Best time to take photos
The reality is that when you take photos from Angel’s Landing will most likely depend on when you can get a permit (see below) – and with such a breathtaking view, it’s hard to go wrong – but sunrise and sunset are ideal.
How to get there
Angel’s Landing is the most popular hike in the park. The strenuous hike is 2.7 miles each way. The last 0.5 miles involves walking along a narrow ridge with steep drops offs on both sides. It’s not good if you’re afraid of heights. To get to the Angel’s Landing Trailhead, take the shuttle to the Grotto stop.
Tips
If you can’t get a permit or are afraid of hikes, you can just hike to Scout’s Landing, which is just before the last scary 0.5 miles. The views here are still stunning.
For the best photos, use a wide-angle lens and polarizing filter.
You don’t want to be lugging heavy camera equipment on this dangerous hike. A gorillapod will do the trick.
READ MORE:
➡️ Permits are needed to hike the last 0.5 miles from Scout’s Lookout to Angel’s Landing for most of the year. There’s a lottery system to get them. Learn how to get Angels Landing permits.
➡️ Read my Guide to The Angels Landing Trail for more details
➡️ Read my Tips for Hiking Angels Landing
➡️ Complete descriptions and details are included in my 1-, 2- and 3-Day Zion Itineraries.
6. Bridge Below the Court of the Patriarchs
The view
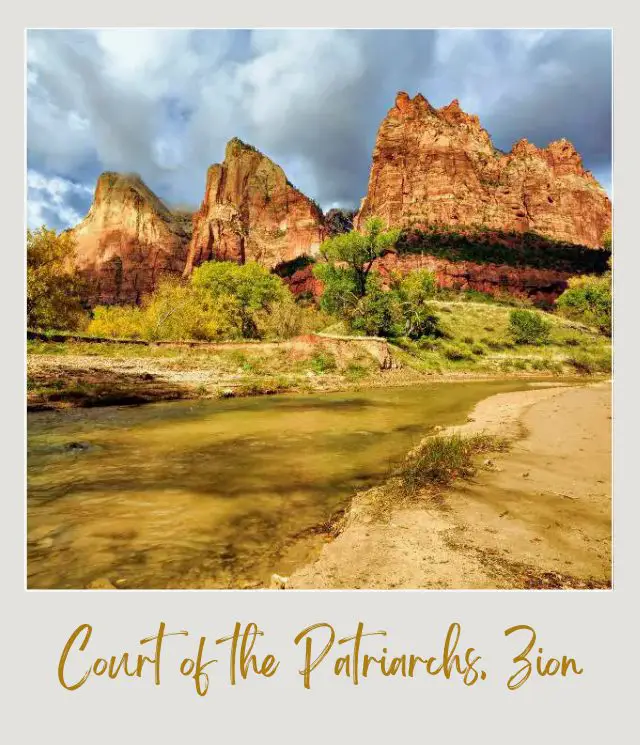
The Court of the Patriarchs is a picturesque group of sandstone cliffs named after the biblical figures of Abraham, Isaac, and Jacob. There are several viewpoints to see them, but one that’s hard to beat is to frame them with the picturesque bridge crossing the Virgin River in the foreground.
Best time to take photos
This is another of the best views of Zion National Park at sunrise when they glow as the first rays of sun hit them, though they’re still stunning later in the day.
How to get there
Take the shuttle to the Court of the Patriarchs stop. When you get there, cross the street and walk past a horse stable until you reach the bridge. You can go down to the water’s edge to get views of the bridge from below with the Court of the Patriarchs behind.
Tips
Use a slow shutter speed to create a smooth flowing effect for the river.
READ MORE:
➡️ Planning a trip to Zion National Park
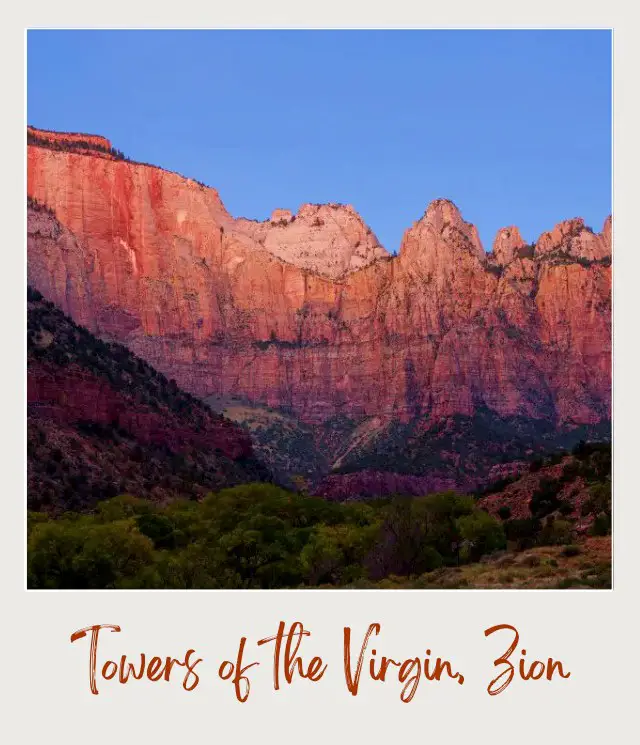
7. Behind the Human History Museum
The view
This spot has the best views of the Towers of the Virgin, beautiful cliffs of red rock. Starting from the left, you can see the West Temple, the Sundial, the Towers of the Virgin, and the Altar of Sacrifice.
Best time to take photos
This is a popular Zion National Park sunset and sunrise spot. However, the best light and views are just after sunrise when they cliffs take on a beautiful orange glow.
How to get there
Take the shuttle to the Human History Museum stop or walk from the Visitor Center along the Pa’Rus Trail. You can also drive there, but there is limited parking at the museum.
Tips
This is one of the most popular Zion photography spots, so it’s best to get there at least half an hour before sunrise.
READ MORE:
➡️ The Best Time of Year to Visit Zion National Park
8. Emerald Pools
The view
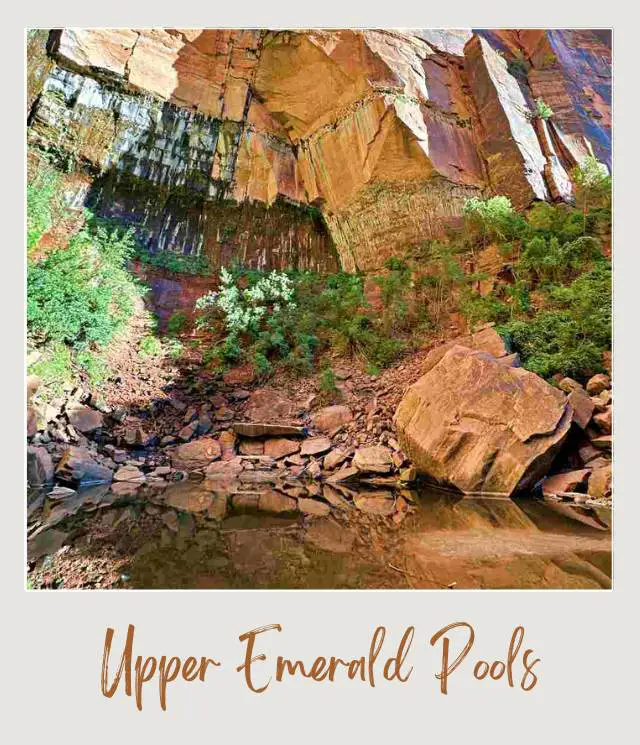
The Emerald Pools are a series of beautiful emerald green pools surrounded by lush vegetation and connected by a couple of tall waterfalls.
The views here are not expansive panoramas or dramatic peaks. Instead, there are endless opportunities for scenic shots of hanging gardens, waterfalls, colorful pools, and sandstone cliffs.
Best time to take photos
Photos are best in early morning or later afternoon when the light is softest.
How to get there
Take the shuttle to Zion Lodge. Cross the street to get to the trailhead. There are three levels of pools reached along a network of interconnected trails.
Lower Emerald Pool has plants growing on the cliff face, forming a beautiful hanging garden. The trail goes under an alcove where a waterfall drops (or drips) down from the middle pools above, forming the lower pool. This is the easiest of the Emerald Pool trails.
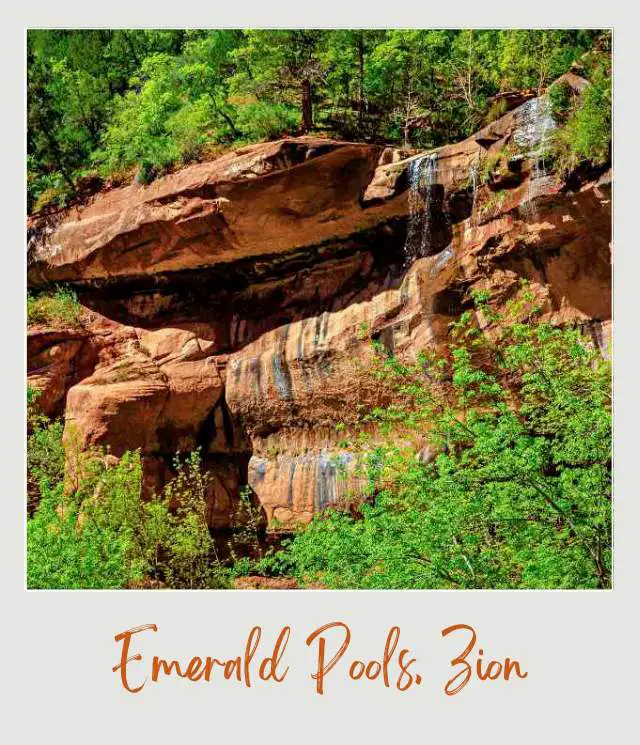
The Middle Emerald Pools are reached via a short connector trail from the Lower Emerald Pool below, or from the Lodge via the Middle Emerald Pool Trail.
From the Middle Emerald Pools, there’s a side trail (out-and-back) that climbs to the Upper Emerald Pool, the largest of the pools. It’s located at the bottom of steep 300-foot-high cliff that surround the area on three sides, forming a dramatic natural amphitheater.
Tips
There is water in the pools year-round, and they are always beautiful, but the waterfalls are often reduced to a trickle in summer, so are best photographed in spring or after heavy rain.
A tripod and a neutral density filter will help get the best photos.
READ MORE:
➡️ The Emerald Pools Trails are included in my guide to the Best Hikes in Zion National Park.
➡️ Complete descriptions and details are included in my 1-, 2- and 3-Day Zion Itineraries.
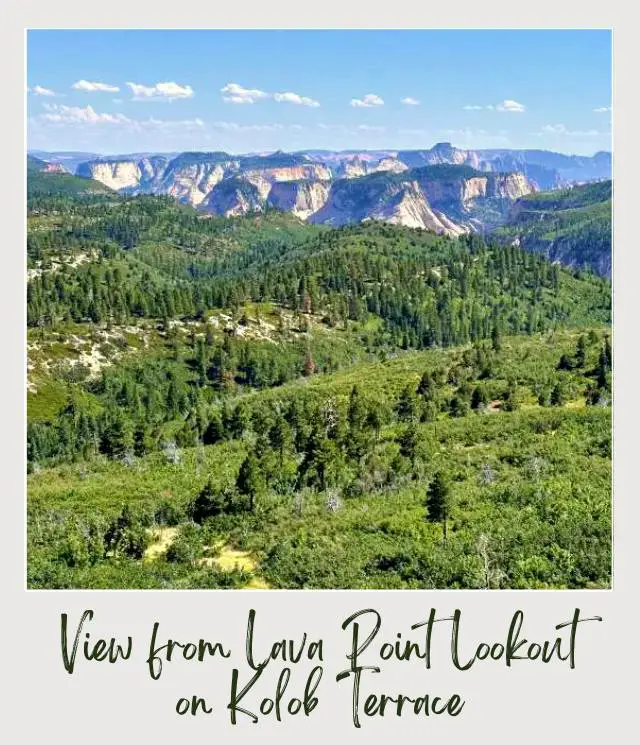
9. Lava Point Overlook
The view
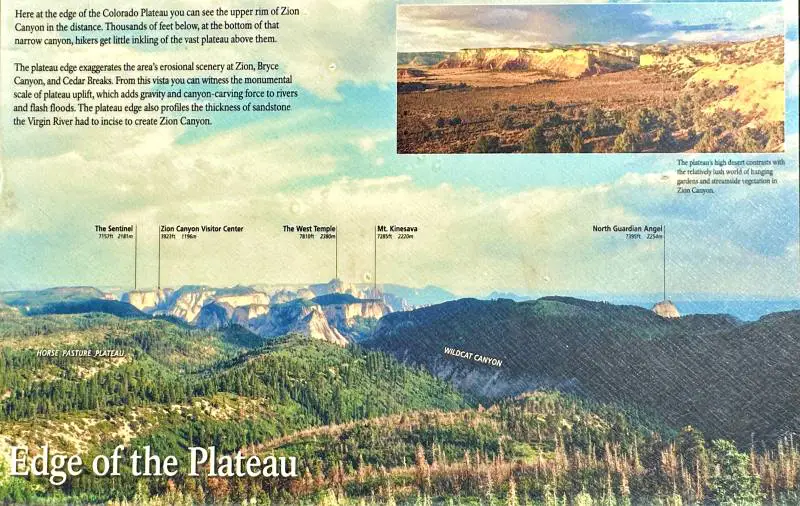
The views here are stunning – and you’ll be able to enjoy them without sharing them with thousands of other people. The view is of the top of the canyon. There is a panoramic view of the entire area. In the distance, you can see Zion Canyon. There are several interpretive signs at the lookout that points out where the Narrows, the Visitor Center, the West Temple, etc. are.
Best time to take photos
This is another best sunset Zion National Park spot. The last afternoon sun bathes the distant hills in brilliant red, orange and gold colors.
How to get there
The overlook is in the Kolob Terrace section of Zion. It’s one to the best Zion National Park viewpoints by car. Take the Kolob Terrace Road from Virgin and drive for 20 miles to the turnoff for Lava Point. The last 1.5 miles is on an unpaved road. You do not need to hike – the overlook is right next to the parking lot.
Tips
The overlook is inaccessible in winter and vehicles over 19 feet aren’t permitted on Kolob Terrace Road. The overlook is not overly crowded, but the parking lot is small, so get there early enough for the sunset to secure a spot.
A zoom lens will help bring the canyon closer.
READ MORE:
➡️ Complete descriptions and details are included in my 2- and 3-Day Zion Itineraries.
10. Echo Canyon
The view
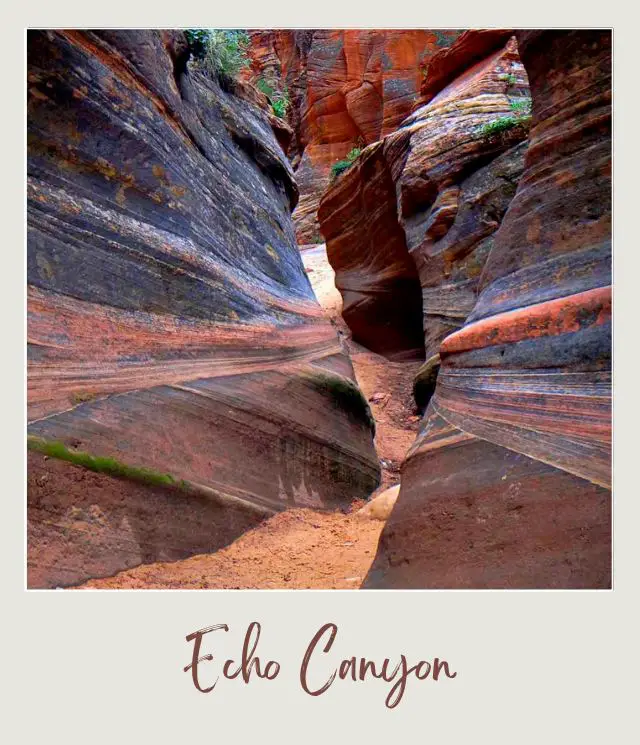
The views here are somewhat similar to The Narrows – a narrow slot canyon. However, there is no river and the colors are dark layers of swirled rock, creating a dramatic effect.
Best time to take photos
Any time of day is OK here.
How to get there
The canyon used to be accessible from below, but that access has been blocked by a rock slide. Now, the only way is to hike down from Observation Point. If you took the East Mesa Trail, continue along and down the East Rim Trail. If you took the East Rim Trail, this is near the end of the line before you need to turn back at the landslide. The hike is steep and strenuous.
Tips
See Observation Point for how to get to the trailhead(s).
READ MORE:
➡️ Complete descriptions and details are included in my 3-Day Zion Itinerary.
Zion National Park Best Photo Spots Map

Essential Equipment for Zion Photography
Before we look at the best photo spots in Zion National Park, first a quick look at some essential equipment you’ll need.
1. A camera (or camera phone)
Zion National Park is a photographer’s dream. I often just use my iPhone and this is OK for vacation snaps, but if you’re serious about photography, you’ll have a real camera with all the bells and whistles, and you will certainly take better photos than I do. A good choice is a Sony A6400 camera.
2. A tripod
For photos in the early morning or late afternoon, a tripod is essential for long exposure shots. Since you need to hike to many of these viewpoints, a Gorillapod tripod can be a handy alternative to a traditional tripod. It’s small, light and flexible, and can be set up on all types of uneven surfaces. They sell them for regular cameras and cell phones.
➡️ Check out prices for regular camera Gorillapods here and for cell phone Gorillapods here.
3. A wide-angle lens and a zoom lens
If you’re taking photos on your cell phone, it can be helpful to get a wider angle lens than phones come with in order to capture the more expansive views.
You can get a set of a 0.45x wide-angle lens and a 15x macro lens for close ups. It’s compatible with all single and dual-camera phones including all iPhone models, Samsung Galaxy and Note, Google Pixel, Huawei and more. ➡️ Check prices on Amazon here.
If you’re using your phone camera, the digital zoom on a camera phone gives the illusion of getting close, but then when you look at the photos later, they are not at all clear. An optical zoom is much better.
For a zoom lens, check out this 28x telephoto lens. It works on the front and rear cameras for both single-camera and multi-camera phones including iPhone11 XS MAX XS XR X 8 Plus 8 7 Plus 7 6 Plus 6, Samsung Galaxy S9 Plus S9 S8 Plus S8 S7, Edge S7 S6 Edge+ S6 Edge S6, Google Pixel 3 XL 3 2 XL 2 XL LG iPad, Motorola HTC One Plus, HUAWEI and more.➡️ Check out prices on Amazon here.
4. Binoculars or Spotting Scope
Your trip doesn’t need to be all about just the photos. Sometimes it’s good just to soak in the views. A good pair of binoculars or a spotting scope is a great investment for this trip.
The best binoculars for the money are the Vortex Optics Diamondback 10×42 Roof Prism Binoculars. They are reasonably priced and come with a carry case. ➡️ Check them out on Amazon here.
Because I take binoculars on all of my trips, I’ve done extensive research into the best binoculars. These detailed guides include helpful info on what to look for, detailed reviews of the best of the best, and recommendations based on what exactly you will use them for and your price range:
➡️ Guide to the best binoculars for the money
➡️ Guide to the best binoculars under $300
➡️ Guide to the best binoculars under $200
➡️ Guide to the best binoculars under $100
➡️ Best Spotting Scopes for Wildlife Viewing
Tips for Taking Zion National Park Photos
‼️ If you’re planning to take sunrise or sunset photos, get there well in advance. These viewpoints are popular and you want to be able to secure a spot. Check the sunrise and sunset times for Zion National Park here.
‼️ Try to be there for Golden Hour – the hour before sunset and the hour after sunrise.
‼️ If you’re there for sunset, don’t leave as soon as the sun sets. The best color in the sky/ clouds is after the sun sets.
‼️ Stay for Blue Hour – after the sun has set when the sky forms a dark blue backdrop for photos.
‼️ Use a long exposure selection on your camera.
‼️ Take a tripod to photograph sunrise and sunset. If you need to hike in, consider a simple tripod like a Gorillapod.
‼️ It can be very cold in the morning even during summer months. Dress warmly and dress in layers
Have a great trip to Zion! I hope this guide has helped you discover some top places for Zion Park photos.
More Planning Resources for Zion National Park
⭐ Zion National Park Guide
⭐ Zion Itineraries
⭐ Planning a Trip to Zion National Park
⭐ 7 Mistakes to Avoid
⭐ How Many Days in Zion National Park?
⭐ Best Hikes in Zion National Park
⭐ How To Get Angels Landing Permits
⭐ Hiking The Narrows In Zion National Park
⭐ Best Things To Do In Zion National Park
⭐ Canyoneering In Zion National Park
⭐ Tips For Visiting Zion National Park
⭐ How To Get To Zion National Park
⭐ Zion Shuttle Service Guide
⭐ How to visit Zion Without Using the Shuttle
⭐ The Airports closest to Zion National Park
⭐ The Closest Airport to Zion National Park
⭐ The Best Time of Year to Visit Zion National Park
⭐ Visiting Zion Throughout the Year
⭐ 12 Fun Facts About Zion National Park
⭐ Best Books About Zion National Park
⭐ Best Vacation Rentals Near Zion National Park
📷 Best Views in Grand Teton National Park
📷 Best Views in Grand Canyon National Park
📷 Best Views in Bryce Canyon National Park
📷 Best Views in Olympic National Park
📷 Best Views in Shenandoah National Park
Which Zion National Park photo spots are you most excited to see? Join my private Facebook group National Parks Collectors and comment and let me know (you can also pick up extra planning tips, share your photos and stories with other national park lovers and more).
Subscribe to daily national parks planning tips, travel inspiration and trip ideas and get instant access to the free PDF of this
Guide to The Best Photo Spots in Zion National Park
If you enjoyed this guide to the best views Zion National Park has, Pin It to your Zion National Park board for easy reference!


💡 Are you just starting to think about taking a national parks trip? Get Inspiration
‼️ Are you looking for helpful tips for visiting US national parks? Read articles that share useful tips on a range of national-park related issues
💻 Are you starting to plan a trip to Zion National Park? Read my Guide to Zion National Park
📋 Do you want a ready-made super detailed plan for your trip to Zion? Get a detailed 1 – 3-day Zion National Park Itinerary
🛏️ Are you looking for a place to stay near Zion National Park? Find a vacation rental near Zion National Park
💲 Are you ready to book your trip? Use these Planning and Booking Resources
📖 Do you want to read a book about Zion National Park? Check out my Recommended Reading List for Zion National Park
About the Author
James Ian is a national park, camping and hiking expert.
He has dedicated his life to travel, visiting more than 80 countries, all 7 continents and most of the national parks in the United States. With over 35 years experience in the travel industry, James has worked on cruise ships, at resorts and hotels, and as a travel planner who’s helped hundreds of people plan successful trips to US national parks.
Based on his experience visiting our national parks multiple times, in-depth research and expertise as a travel planner, James has published detailed itineraries for many of the major national parks in the US. These itineraries, as well as in-depth park guides, and other resources will help you have your own incredible trip to US national parks without stress and hassle.
As a national park expert, James has contributed to many publications, including USA Today, Newsweek, Time Business News, Savoteur, Best Trip, and Wired.
I’m a member of the Amazon Services LLC Associates Program. As an Amazon Associate I earn from qualifying purchases.


