Hiking The Wildcat Trail Monument Valley: Complete Guide

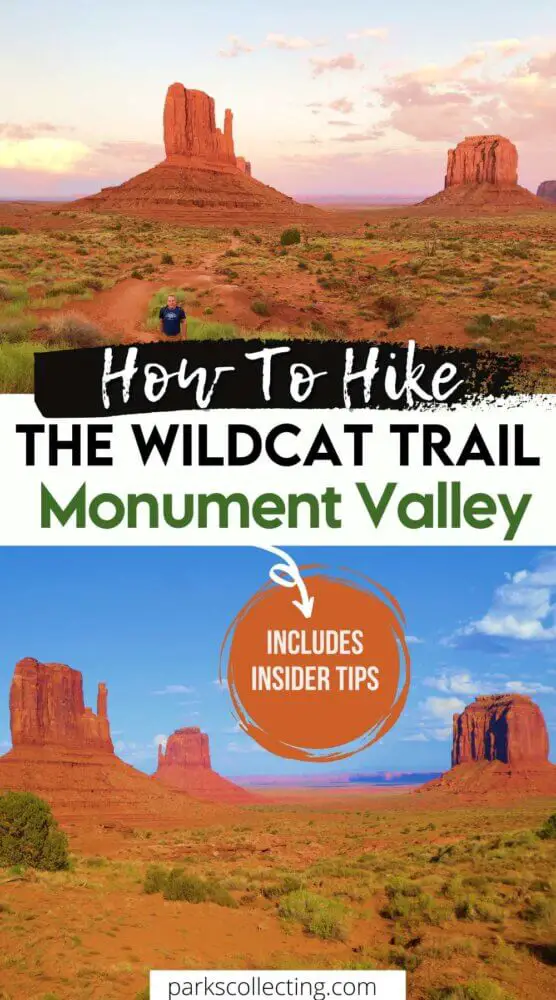
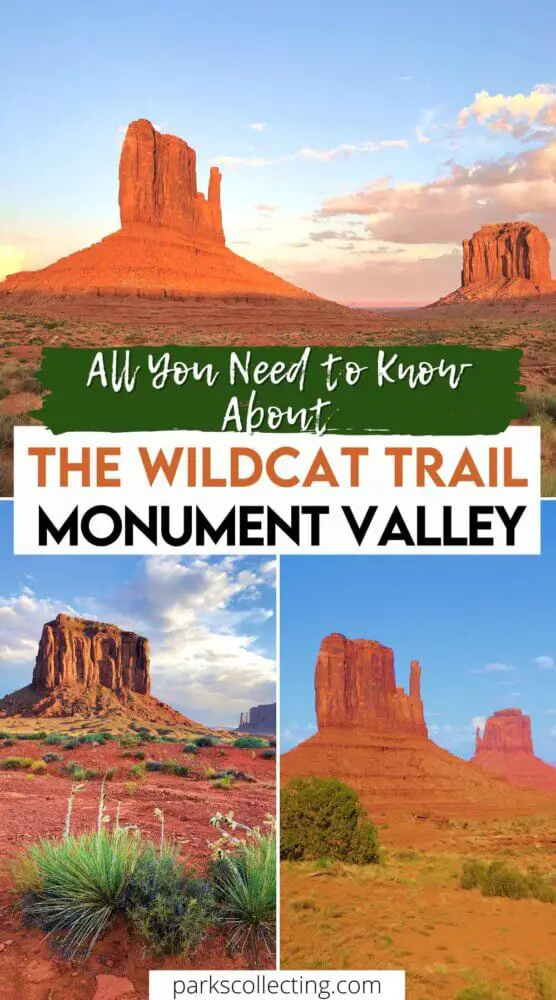
Hiking the Wildcat Trail, Monument Valley is a true once-in-a-lifetime experience.  The Wildcat Trail is not only one of the absolute best Monument Valley hiking trails, it is the only Monument Valley trail that you could hike without a guide.  And one that you will, surprisingly, most likely have to yourself. 

Monument Valley is quintessential American wild, wild west.  The stunning buttes and mesas are iconic images featured in multiple movies and TV shows.  Seeing the valley in real life is a magical experience.  The valley is on Navajo tribal land, so most of it can only be accessed with a Navajo guide, but there is one trail you can hike by yourself. 

TOP TOUR: Book a day trip from Sedona now
TOP HOTEL PICK: Check availability now
FIND THE CHEAPEST CAR RENTAL: Search Discover Cars for the best deals
FIND THE CHEAPEST FLIGHTS: Search Skyscanner for the best deals
GET TRAVEL INSURANCE: Get insured with Travelex before you go

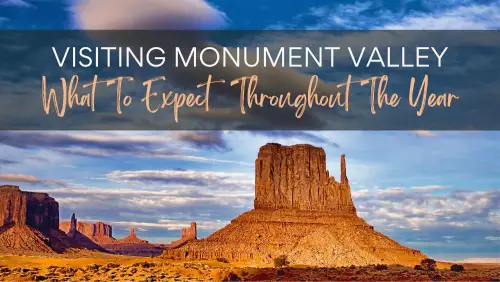
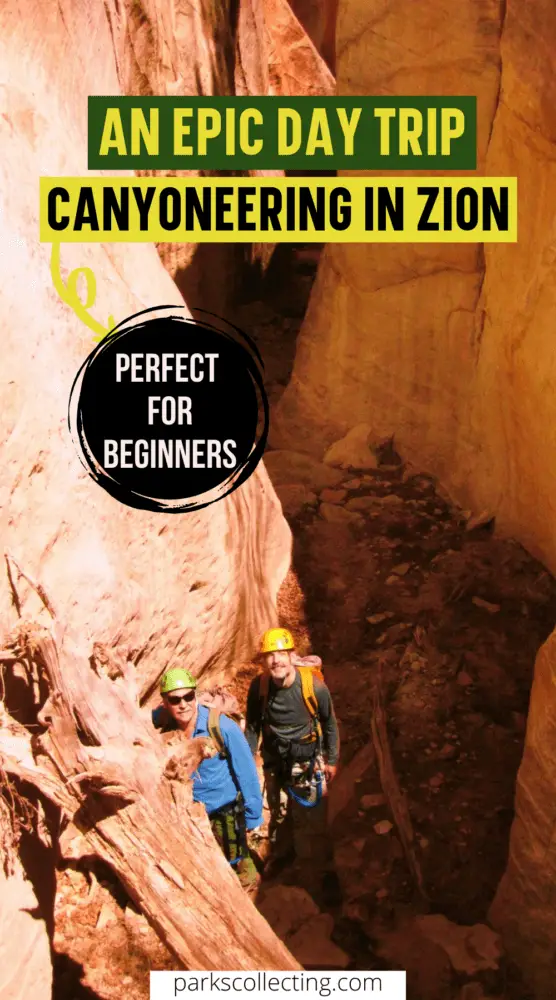
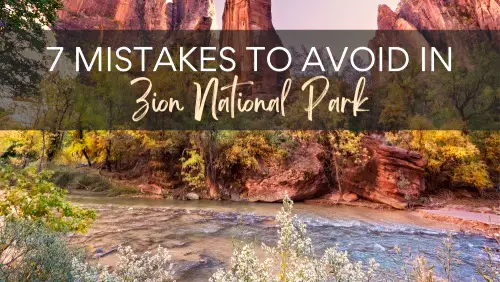
No time right now to read this Guide to Hiking the Wildcat Trail, Monument Valley?  Pin It and save it for later:

How to Hike the Wildcat Trail Monument Valley
All You Need to Know about the Wildcat Trail Monument Valley

Please note that some of the links below may be affiliate links.  If you make a purchase through these links, I earn a small commission at no additional cost to you. Read my Disclosure for more information.

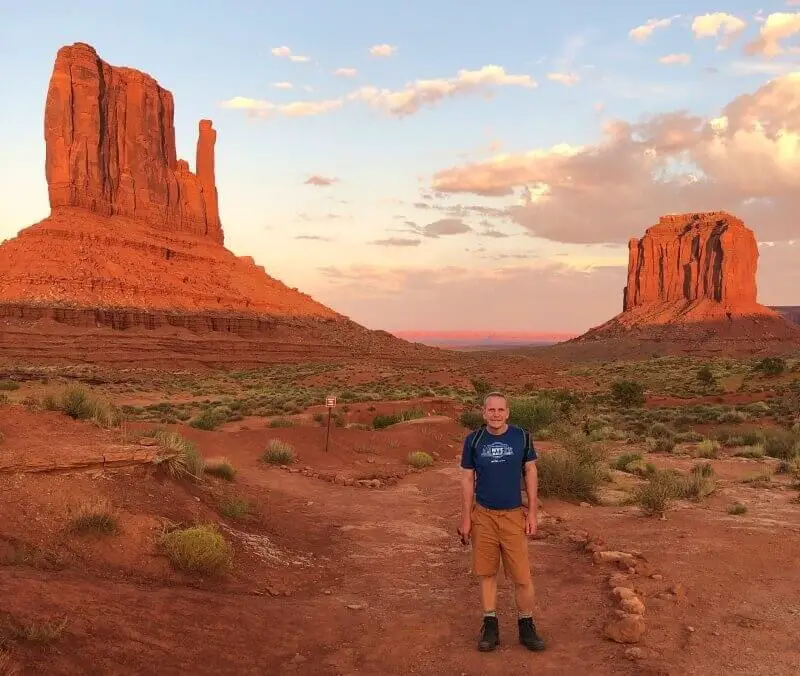
The Wildcat Trail descends from The View Hotel and camping area and circles around West Mitten.  Seeing the vegetation, desert wildlife and the incredible rock formations up close and at your own pace is a truly memorable experience. 

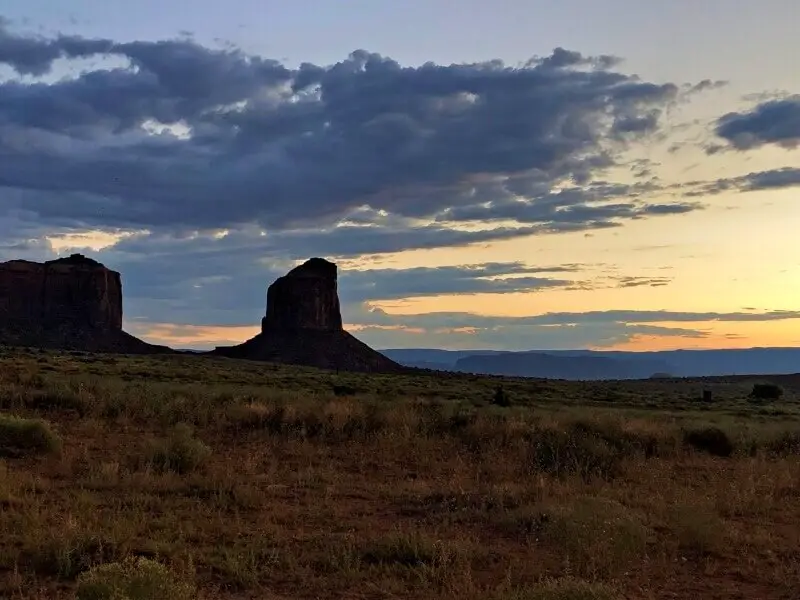
The trail also provides breathtaking panoramic views of the Monument Valley landscape. The colors of the desert are especially stunning in the first light of dawn and the last light just before the sun sets.  At these times of day, the stunning rock formations glow a brilliant, unearthly color.  They look like they have been photoshopped and oversaturated, but this is just nature putting on a show. 

Even more incredible to me is that chances are you won’t see another soul!  I did the hike in early September at 6:00pm and saw one other couple the entire time.

The trail has a steep descent and ascent in soft sand that can seem cruel at the end when you are tired, but most of it is fairly flat hard dirt.  I LOVED this hike!

FREE DOWNLOAD
Subscribe to monthly updates with tips for planning, travel inspiration and trip ideas and get instant access to the free PDF of this
Guide to Hiking the Wildcat Trail

Wildcat Trail, Monument Valley Details

  • Distance: 3.6 miles/ 5.8 km
  • Type: lollipop/ lasso
  • Elevation change: 380 feet/ 116 m
  • Time: Approx. 2 hours.  I did it in just under 2 hours, but didn’t stop much.
  • Difficulty: Easy-moderate.  Most of the trail is fairly flat and easy, but the start is a descent down soft sand, which means the end is an ascent up soft sand! Also, Monument Valley is 4,838 feet/ 1,475 m above sea level, so the elevation can make it harder than it would be at sea level.
  • Trailhead: At the intersection  where the Monument Valley self-drive road starts
  • Highlights: Sunrise/ sunset; close views of the West Mitten; panoramic views of Monument Valley; seeing the desert flora
  • Fee: The trail itself is free, but there is a fee to enter Monument Valley Navajo Tribal Park.  This is $20 for a vehicle of up to four passengers or $10 per walk-in, bicycle, or motorcycle.
  • Open: Before 11:00am and after 5:00pm.  Between 11:00 am and 5:00pm, the trail is closed due to the dangers of extreme heat in summer.
Wildcat-Trail-Monument-Valley

Tips for Hiking the Wildcat Trail

  1. The trail is well-marked and easy to follow, but nonetheless, I recommend reading my Guide to Reading Trail Markers if you are a newbie hiker.
  2. Go early or go late.  You actually don’t have a choice in the warmer months, as the trail is closed in the heat of the day, but this is the best time to go anyway.  The sunrises and sunsets over Monument Valley are SPECTACULAR. We did it at 6:00pm and it was pleasant in early September. 
  3. The trail crosses a couple washes and the trail actually goes along a wash for part of it.  As the name suggests, washes are subject to flash floods, so check with the visitor center before heading out to make sure there is no rain in the area.  The visitor center is open:
    • 8:00 am – 5:00 pm, October 1 – April 30
    • 6:00 am – 8:00 pm, May 1 – September 30
    • 8:00 am – 12:00 pm Thanksgiving
    • Closed Christmas Day and New Year’s Day
  4. You don’t need a permit per se, but you do need to register at the visitor center office before you go and when you get back.  If you do this in the evening, the visitor center will be closed when you get back.  We found ourselves in this situation, so we let the camping office know.  This is so that someone knows you are out in the desert in case you get stuck there.  But stay on the trail, go early or late and take plenty of water and you should be OK. 
  5. Wear appropriate clothing and pack all you need.  Check to make sure you have everything on my Day Hike Packing List and that you have the essential hiking gear for beginner hikers here.
  6. Wear decent hiking shoes or boots. Read my reviews of the best hiking boots and shoes if you need new ones.
  7. Take lots of water!  Monument Valley hikes are not for the unprepared.  The trail is completely exposed (there is no shade) and the desert heat in summer (and even in spring and fall) is fierce and you can easily get dehydrated without realizing.  Take more water and drink more often than you think necessary. I like the  Que collapsible bottle  
  8. Wear sun protection.  This includes:
  9. Hiking poles will help you, especially on that last 0.5 miles/ 1 km.  If you need to get some hiking poles, check out my pick here.
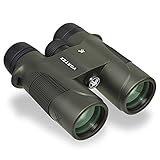
  10. Take binoculars.  There are animals and birds in the desert that you can see better through binoculars.  You can also use them to see details in the rock formations.  The best binoculars for the money are the Vortex Optics Diamondback 10×42 Roof Prism Binoculars. Read a comprehensive Guide to the Best Binoculars for the Money for top choices, reviews and recommendations.
  11. You may well have the trail to yourself, but you should still follow basic hiking etiquette.
  12. If you are a newbie hiker, read my Hiking 101 guide.
  13. Consider staying in the campground, which is next to the trailhead.  It is (much) cheaper than the hotel, and there are jaw-dropping views of the valley from your tent.   If you are looking for a tent, read my Guide to Buying a 4-Person Tent (which I recommend for 2-4 people plus luggage), a 6-Person Tent or an 8-Person Tent (if you are traveling with a group of friends or your family)
  14. If you are hiking in the afternoon, it is a good idea to take a flashlight with you in case you don’t get back by dark. 

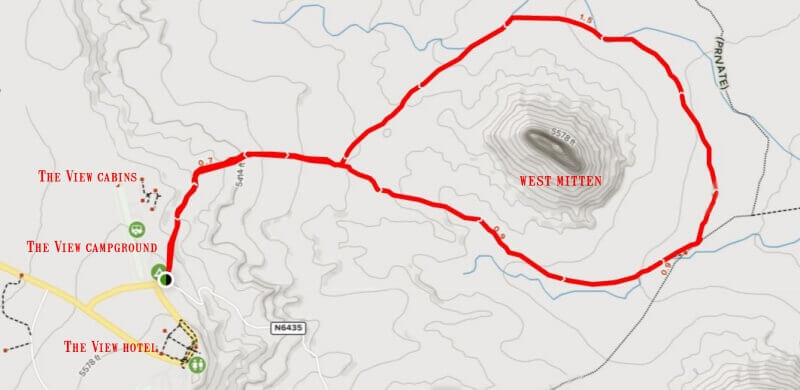
Wildcat Trail Monument Valley Map

Wildcat-Trail-Map-Monument-Valley
FREE DOWNLOAD
Subscribe to monthly updates with tips for planning, travel inspiration and trip ideas and get instant access to the free PDF of this
Guide to Hiking the Wildcat Trail

Monument Valley Wildcat Trail Description

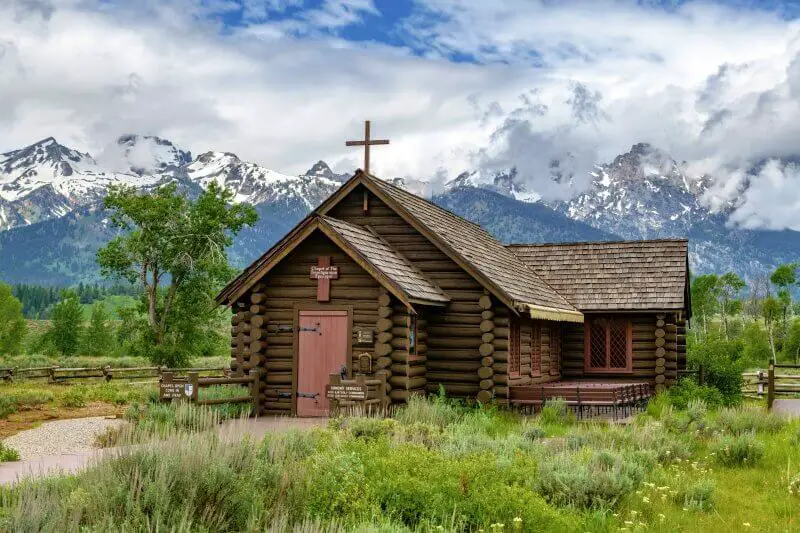
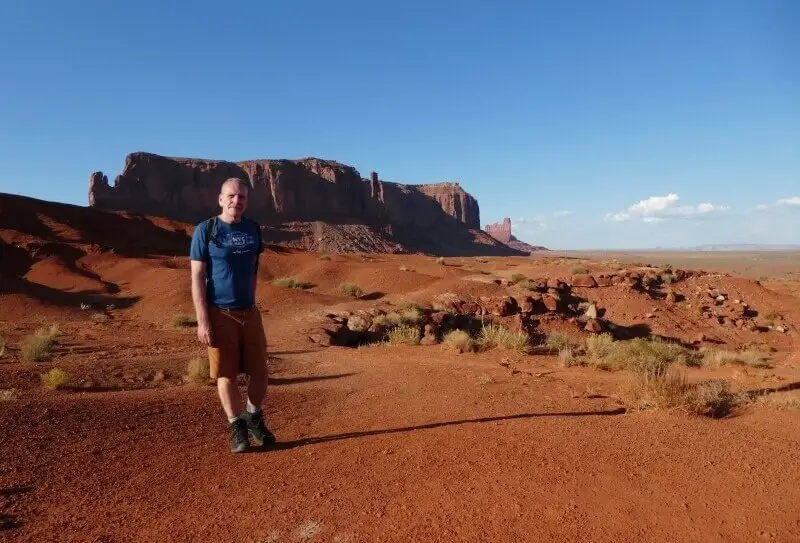
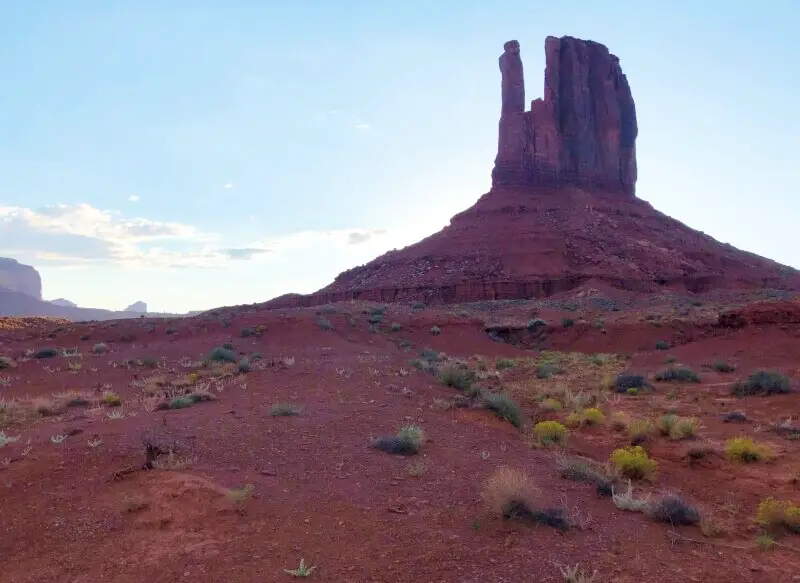
The trail starts at the northeast corner of intersection where the Monument Valley self-drive starts.  To get there from the visitor center, facing away from the valley, turn right at the bottom of the steps.  You will soon arrive at the intersection and see the sign for the trail head.  The campground and cabins are straight ahead if you continue along the road. 

The trail starts by descending down a soft sandy slope (think ‘sand dune’).  The campground is to your left and then the cabins are up and off to your left a little further along.  You soon leave them behind.

wildcat-trail-Monument-Valley
About 15 minutes into the hike

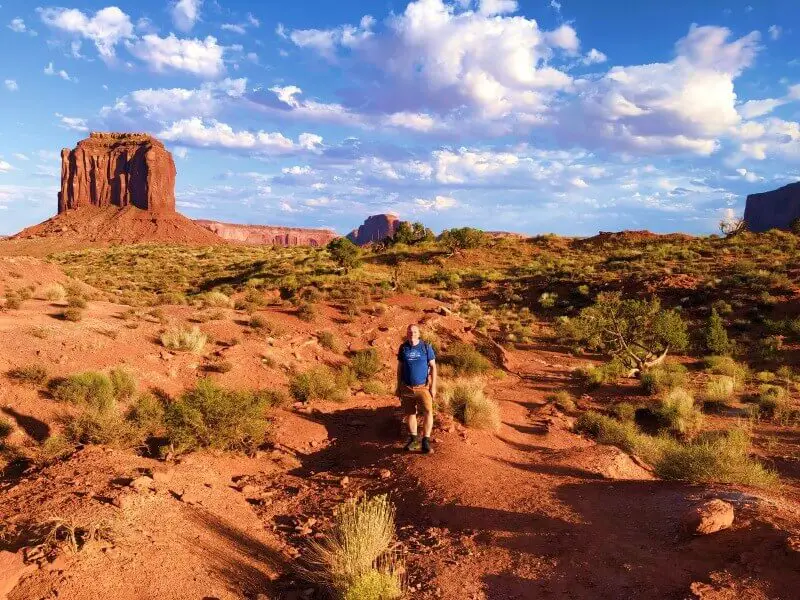
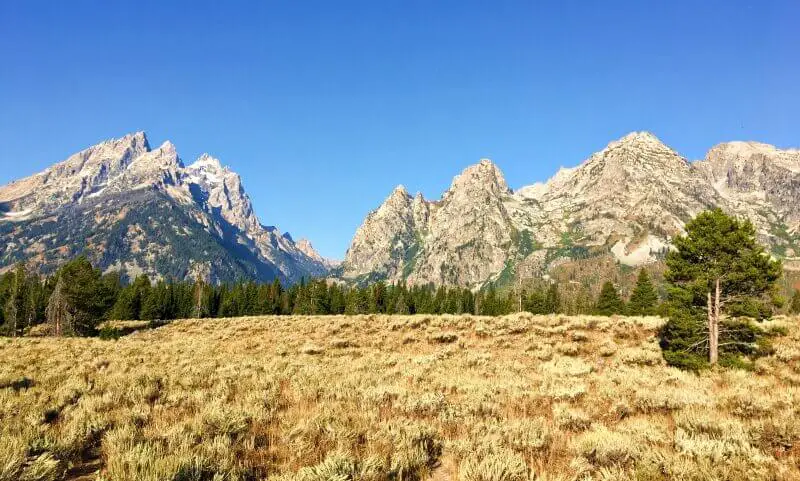
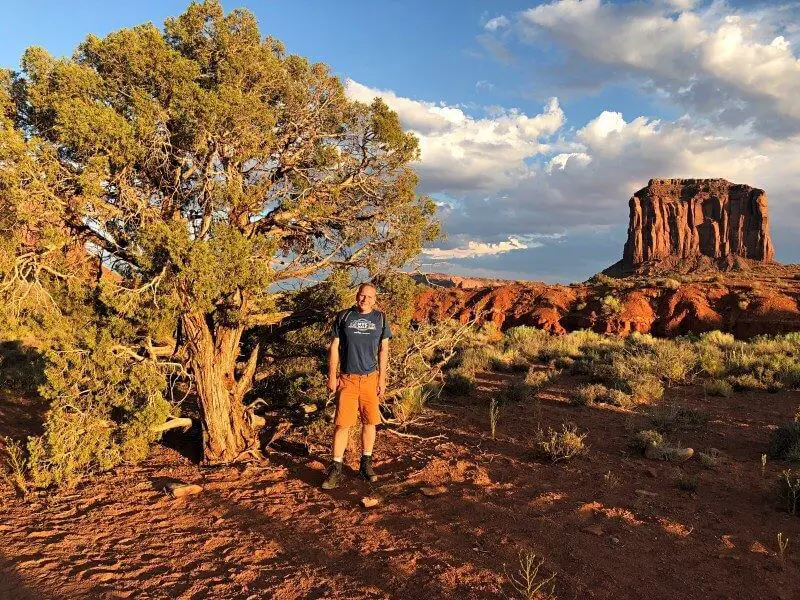
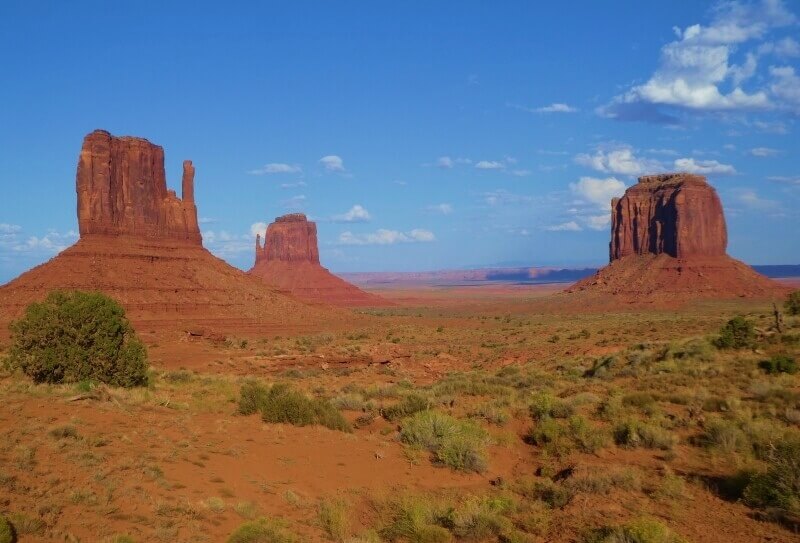
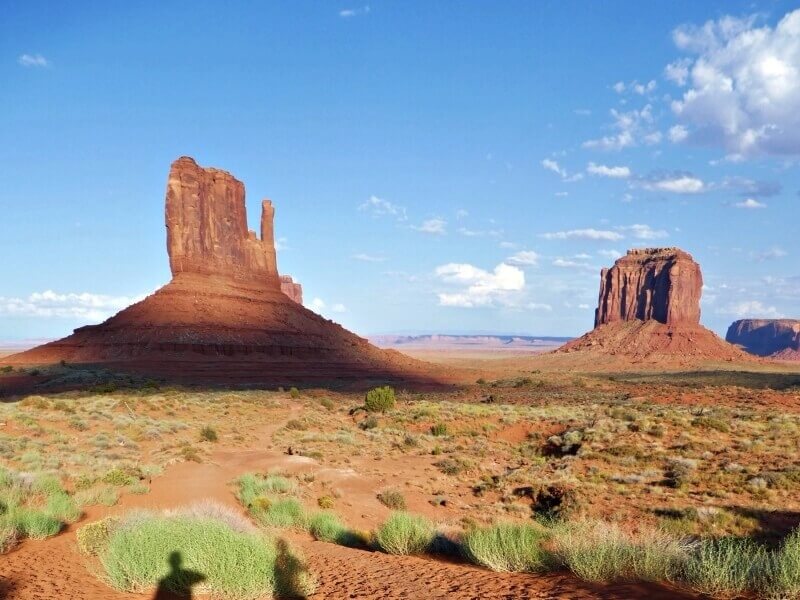
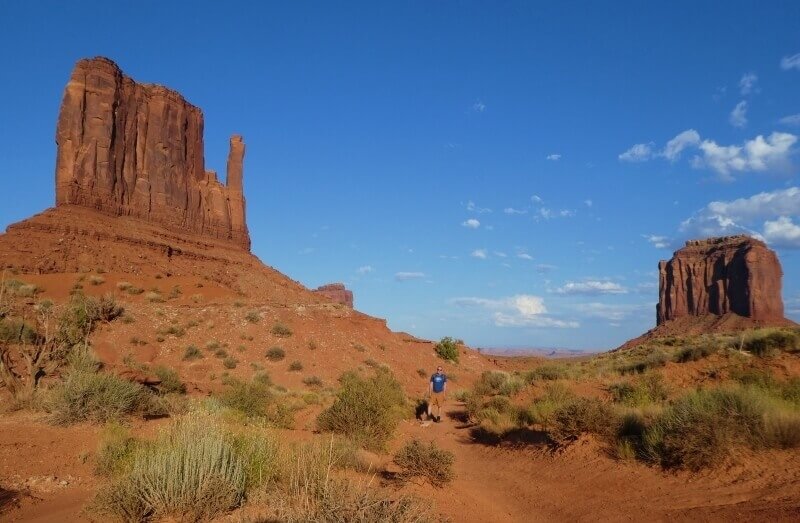
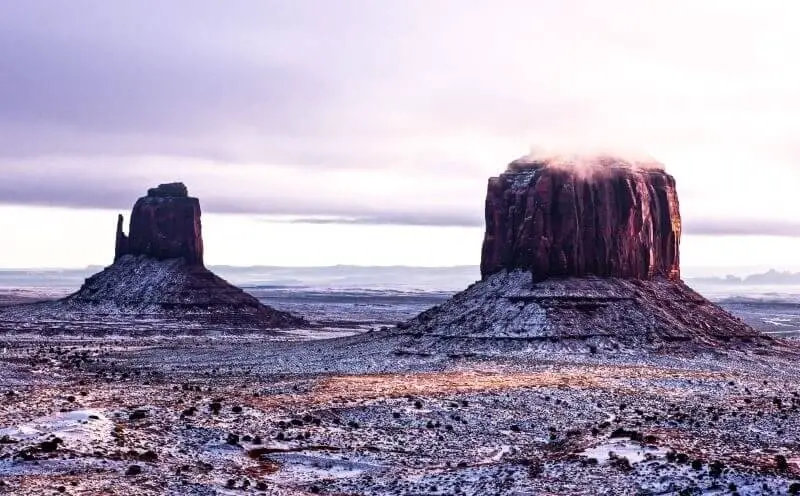
There are incredible views from here over Monument Valley.  You can see East Mitten, West Mitten and Merick buttes.  The big butte closest to you is West Mitten and the trail circles around this.

Wildcat-Trail-Monument-Valley
West Mitten, East Mitten and Merrick Butte

Continue downwards along the sandy trail.  The trail is pretty easy to see and follow.  There are small signs indicating the names of various plants along the way.  One thing I like about this trail is that it not only gives you panoramic views of the valley landscape, but also gives you an opportunity to see desert life up close and personal. 

Wildcat-Trail-Monument-Valley
The trail is easy to follow

0.7 miles/ 1.13 km into the hike, you come to a fork.  This is where the loop around the West Mitten starts.  There is a small sign here indicating that you should go right (east) so that you circle around in a counterclockwise direction. You will return along the trail to the left.

Wildcat-Trail-Monument-Valley
East Mitten is now hiding behind West Mitten

The dirt trail continues as it circles around West Mitten.  It crosses a couple of washes, but is easy to follow. 

Wildcat-Trail-Monument-Valley
Soon we will starting to circle around West Mitten

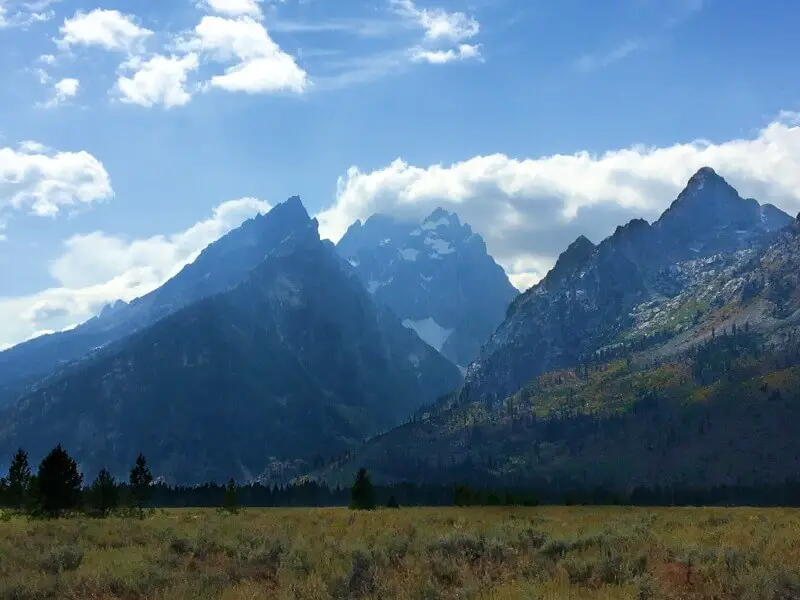
There are great view of Merrick Butte.

Wildcat-Trail-Monument-Valley
Merrick Butte

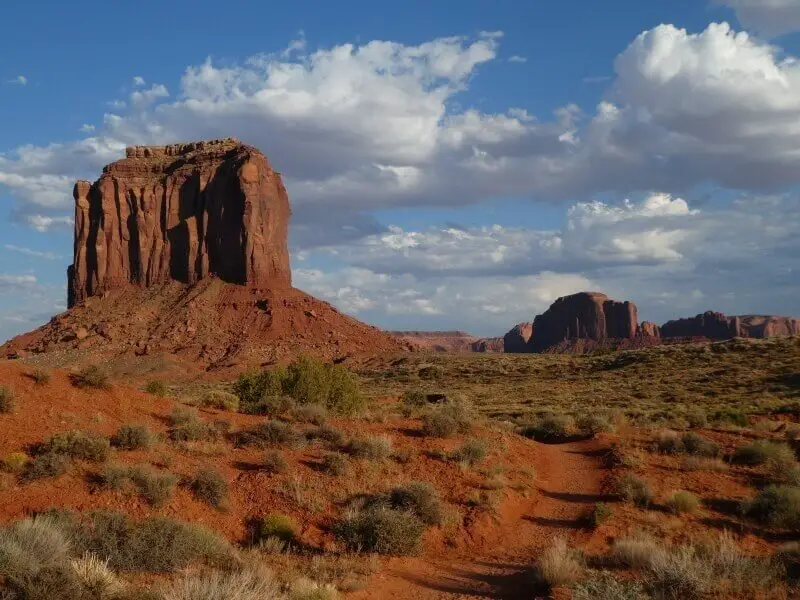
At the 1.7 miles/ 2.7 km mark, the trail joins a dirt road for a short section.  This is another great spot for photos of West and East Mittens and Merrick Butte.

Wildcat-Trail-Monument-Valley
More buttes and mesa in the distance

Another 0.1 mile/ 160 m along, the trail leaves the road and heads off the left. 

Wildcat-Trail-Monument-Valley
Great view of Merrick Butte with the Three Sisters in the background

The view of West Mitten changes a lot as you circle around it.

Wildcat-Trail-Monument-Valley
At this angle, West Mitten blocks out the sun

At 2.7 miles, you will get to another wash.  Hike in the wash for about 0.1 miles/ 160 m when the trail again heads off the left.

Wildcat-Trail-Monument-Valley
One of the few trees on the trail

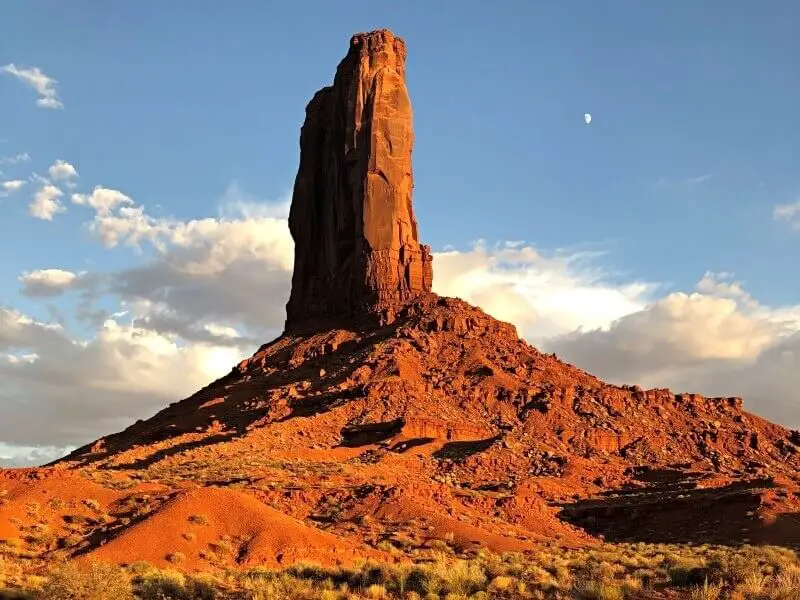
I could even see the moon clearly in the sky as the West Mitten blocked out the late afternoon sun.

Wildcat-Trail-Monument-Valley
The moon is rising

This is an angle that you don’t usually get to see:

Wildcat-Trail-Monument-Valley
Side view of the West Mitten

There is a small hill before ending the loop and getting back to the same trail you started on. 

Wildcat-Trail-Monument-Valley
Where the loop meets back up with the main trail

If you are doing this hike in the late afternoon, be sure to turn around often, as it is around this time, depending on when you started, that West Mitten glows a bright orange color like it is on fire in the last direct sunlight of the day.  It’s breathtaking!  At the junction, turn right and head back towards the trailhead.

Wildcat-Trail-Monument-Valley
The light is amazing at this time of day

This was my favorite part of the hike – such incredible light!

The last 0.5 mile/ 1km section of the trail is climbing back up the soft sand that you descended at the beginning.  This is the hardest part of the trail because it is at the end when you are most tired and it is uphill in soft sand. It’s not that long a distance though and you will be back in no time.

Wildcat-Trail-Monument-Valley
The sun has set, but the view is still beautiful

Make sure you sign back in so that everyone knows you are no longer out in the desert.


Wildcat Trail, Monument Valley FAQ

Can you hike in Monument Valley?

Yes, there are actually several hikes in Monument Valley, though the Wildcat Trail is the only one that you can do without a Navajo guide.

Where can I hike in Monument Valley without a guide?

The Wildcat Trail is the only hike that you can do in Monument Valley Navajo Tribal Park without a Navajo guide. 

Where is the Wildcat Trail?

The Wildcat Trail is in Oljato-Monument Valley (Tsé Biiʼ Ndzisgaiiin the Navajo language, pronounced [tsʰépìːʔntsɪ̀skɑ̀ìː]), in the area designated as the Monument Valley Navajo Tribal Park.  Monument Valley traverses Arizona and Utah, but the trailhead is in Arizona.

The trail starts near the View Hotel/ visitor center at the four-way intersection with the entrance road, the road for the self-drive, the short road to the camping and cabin areas and the parking lot.

How long does it take to hike the Wildcat Trail?

It took me just under two hours, but I didn’t stop much because I wanted to make sure I got back before dark.  At a more leisurely place, you could easily take 3 hours to hike the Wildcat Trail.

When is the best time of year to hike the Wildcat Trail?

The best time of year to hike the Wildcat Trail in Monument Valley is spring or fall. I hiked it in early September and it was great.

This is the desert and summer (mid-June to August) is VERY hot, with day time temperatures averaging over 90°F / 32°C.  The trail is exposed, which means that there is NO shade on this trail.  Even early in the morning and late afternoon it can be ridiculously hot, so if you are hiking the trail then, be sure to take more water than you think you will need and drink often.  You don’t notice yourself dehydrating in the dry desert heat because your sweat evaporates immediately.

In winter (November to February), it gets cold because of the elevation and it can snow here.  Seeing the buttes and mesas of Monument Valley covered in snow is kind of magical, but hiking in the snow can be quite challenging. 

If you do this, wear warm clothing and take your time.  Check out my:

Monument-Valley-in-winter

Spring (March to early June) and fall (September and October) are much more comfortable, though even then, you should respect the desert and make sure you have lots of water and make sure you pack and dress appropriately. Check my Day Hike Essentials Packing List to make sure you take what you need. Spring often has wildflowers in bloom.

What is the best time of day to hike the Wildcat Trail?

The best time of day to hike the Wildcat Trail is early morning or late afternoon.

Sunrises over Monument Valley are nothing short of spectacular, so it is worth getting up early for the sunrise, with West and East Mittens silhouetted behind a technicolored sky, then head down into the valley on the hike. 

sunrise-Monument-Valley

My favorite time, though is late afternoon.  The trail is closed 11:00am – 5:00pm, so head out between 5:00pm and 6:00pm.  I wouldn’t leave later than 6:00pm or you will be hiking the last part in the dark.

Wildcat-Trail-Monument-Valley
Look back as you go, so you don’t miss this view

Near the end of the hike, the West Mitten will start blazing.  The bright color looks like it is made of super-heated molten rock.  Your photos will be #nofilter. 

How much does it cost to hike the Wildcat Trail?

The trail is free.  However, there is a fee to enter the Monument Valley Navajo Tribal Park.  This is $20 for a vehicle of up to four passengers or $10 per walk-in, bicycle, or motorcycle.

Note that this is NOT a national park, so national park passes are not valid here.

Do I need a permit for the Wildcat Trail?

No, you do not need a permit to hike the Wildcat Trail.  However, you do need to register.  There is a sign-in sheet in the visitor center adjacent to the View Hotel.  You should sign in and sign out. This is so that someone knows you are out wandering around in the desert (and that you are back). 

What can I see on the Wildcat Trail?

The Wildcat Trail gives you panoramic views and also lets you see the desert up close.  You will see the changing shape of the West Mitten as you circle around its base, which gives you a real appreciation for its size.  Further in the distance are the East Mitten and Merrick Butte, with additional rock formations further afield. 

You will also see various desert flora.  Plants you can see alongside the trail include purple sage (which does actually smell like sage), prickly Mojave yucca, brittlebush, rabbitbush and cliffrose.  Small signs along the first part of the trail help you identify them.

Is the Wildcat Trail the best hike in Monument Valley?

I think that the Wildcat Trail is the best hike in Monument Valley because it has the most classic view of the valley, you can do it without a guide and it gives you a chance to get out into the desert and see one of the classic buttes, West Mitten, from all angles. 

Other hikes in Monument Valley (guide required) include:

  • Hunt’s Mesa (the highest point in Monument Valley)
  • Teardrop Arch (a famous arch)
  • Mystery Valley (the neighboring valley, which most people never get to visit

Travel Insurance for Monument Valley

You need travel insurance whenever you travel, but especially when in the desert.  The Wildcat Trail is not especially long or isolated, but you are out in the desert alone, and there is always the possibility that something could go wrong, so it is best to always be prepared. 

If you are American, your health insurance may cover medical expenses (always check with your healthcare provider for out-of-state coverage), but is unlikely to cover emergency repatriation.  For more details on what travel insurance covers and what to look for when buying travel insurance, read my Guide to Travel Insurance

A good insurance option is Travelex.  You can compare Travel Insurance plans here or get a quote right now:

728x90 Get Quote

Why do I like Travelex?  It’s one of the major travel insurance providers in the United States with 25 years of experience. Unlike many insurances, it covers a range of adventure sports and activities and has several plans and optional upgrades so you can get coverage for your exact trip.   You can compare Travel Insurance plans here or get a quote right now:


Happy hiking!

Do you have any tips for visiting Monument Valley to share? I’d love to hear them. Join my private Facebook group National Parks Collectors and comment and let me know. 

WHERE ARE YOU IN YOUR PLANNING PROCESS?

Are you just starting to think about taking a southwest trip? Get Inspiration
Are you starting to plan a trip to Monument Valley? Read my Guide to Monument Valley
Are you ready to book your trip? Use these Planning and Booking Resources
Do you want to read a book about Monument Valley? Check out my Recommended Reading List

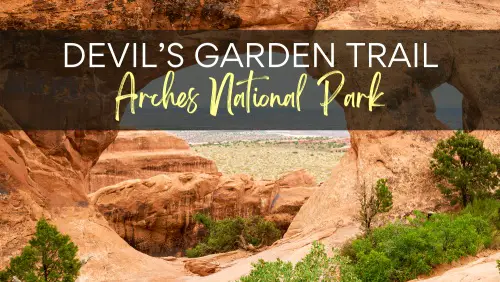
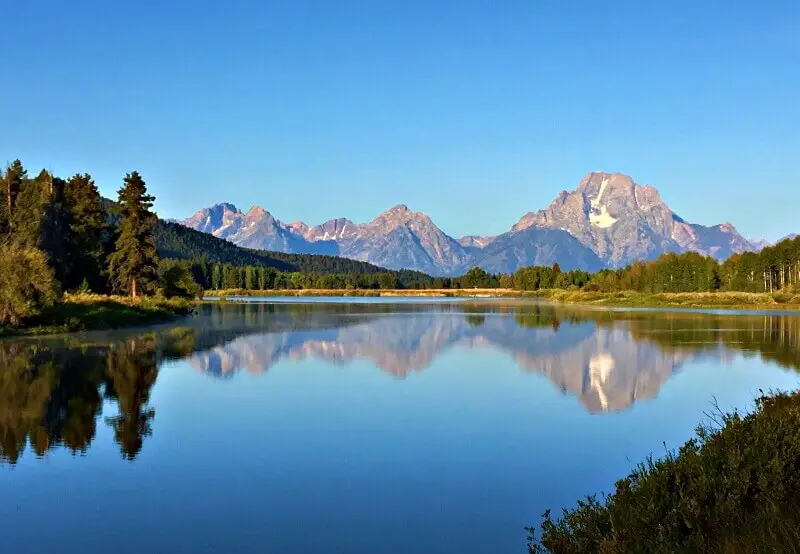
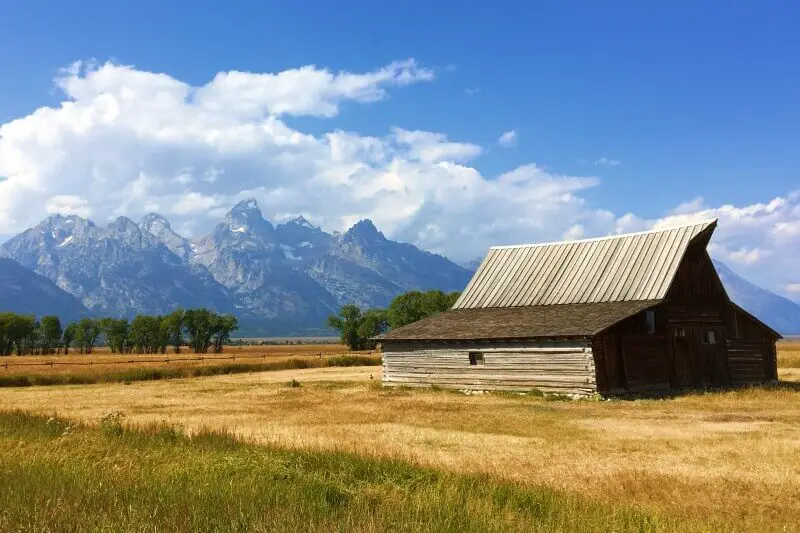
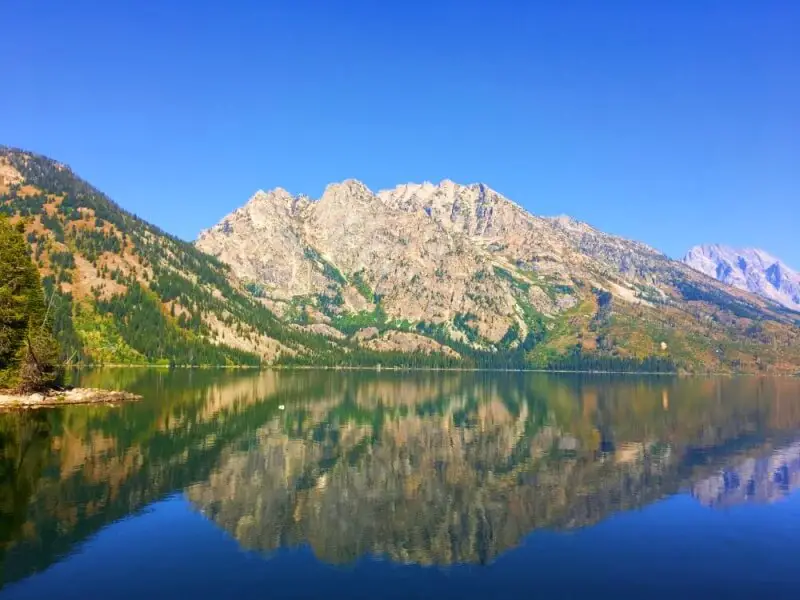
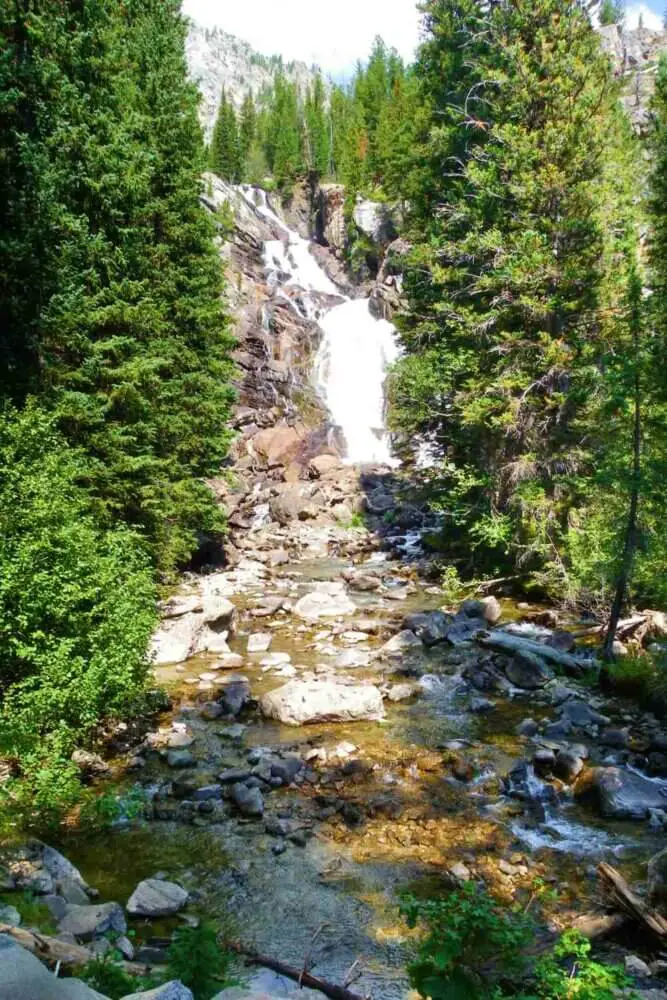
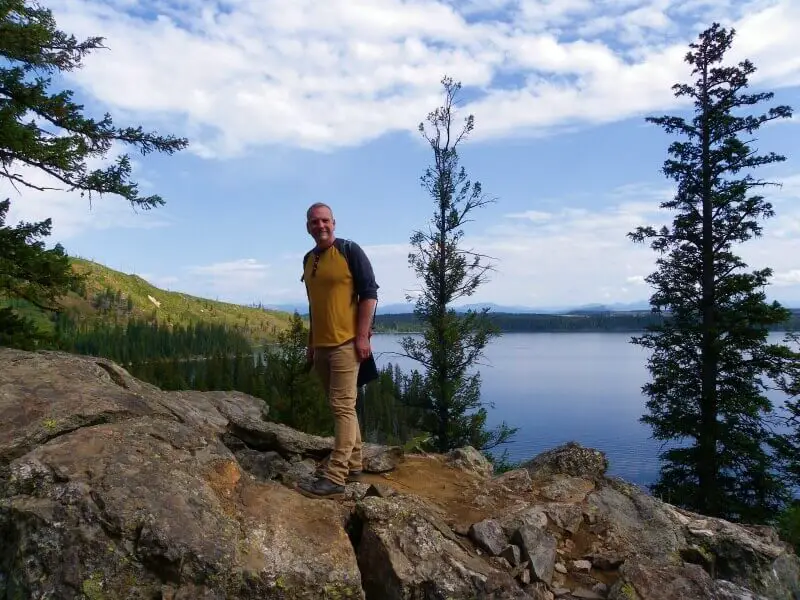
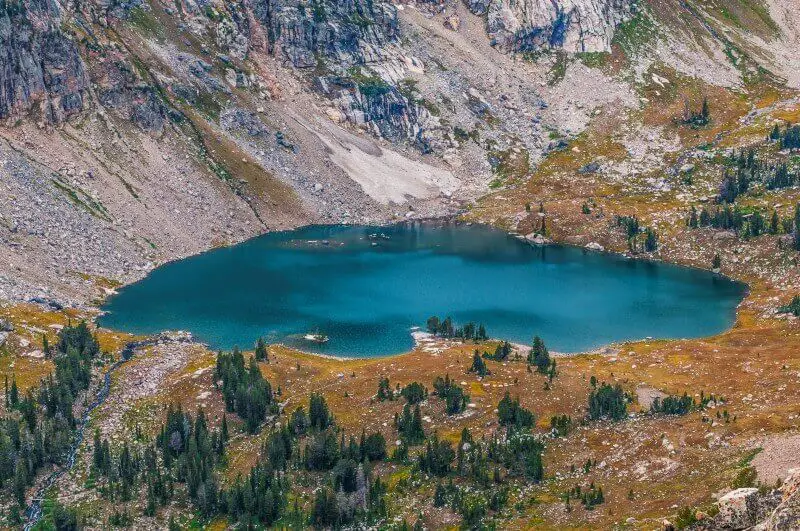
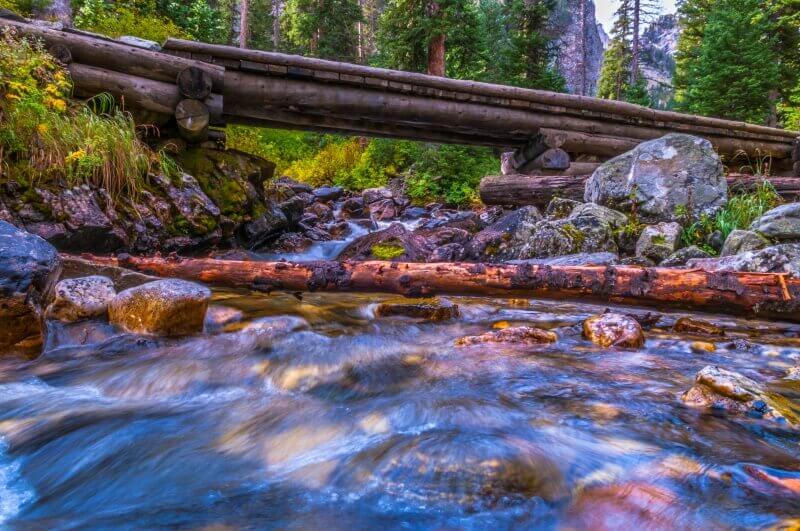
Read about other great hikes in the U.S. Southwest:

FREE DOWNLOAD
Subscribe to monthly updates with tips for planning, travel inspiration and trip ideas and get instant access to the free PDF of this
Guide to Hiking the Wildcat Trail

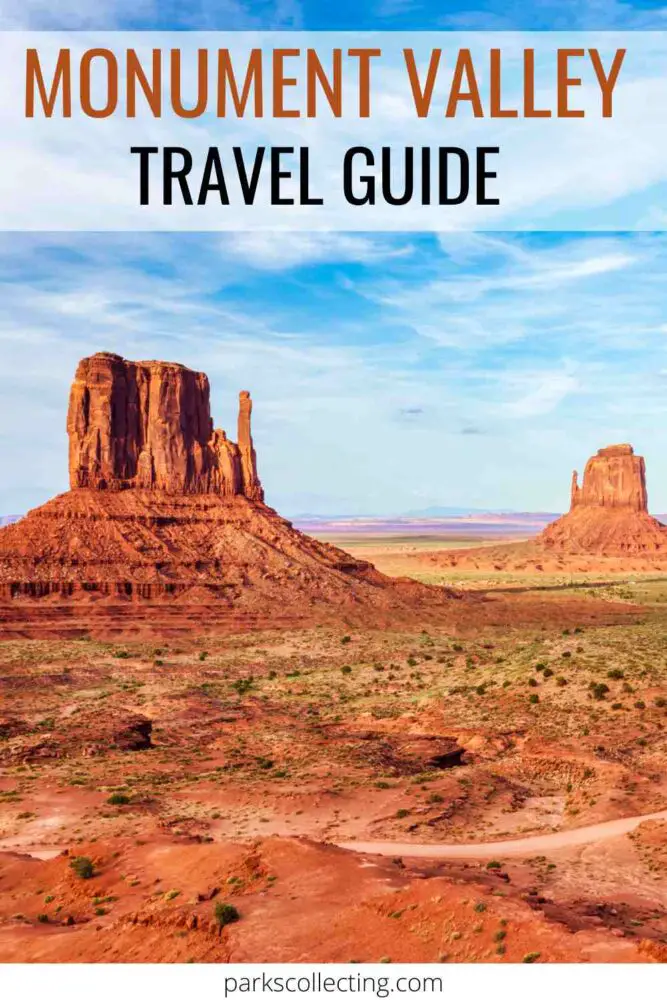
If you liked this post, please share the love and Pin It to your American Southwest and Bucket List boards!

All You Need to Know about the Wildcat Trail Monument Valley
How to Hike the Wildcat Trail Monument Valley

About the Author

James Ian Yosemite

James Ian has traveled to 82 countries and all 7 continents.  He has visited all of the main national parks in the United States, as well as many national monuments and state parks.

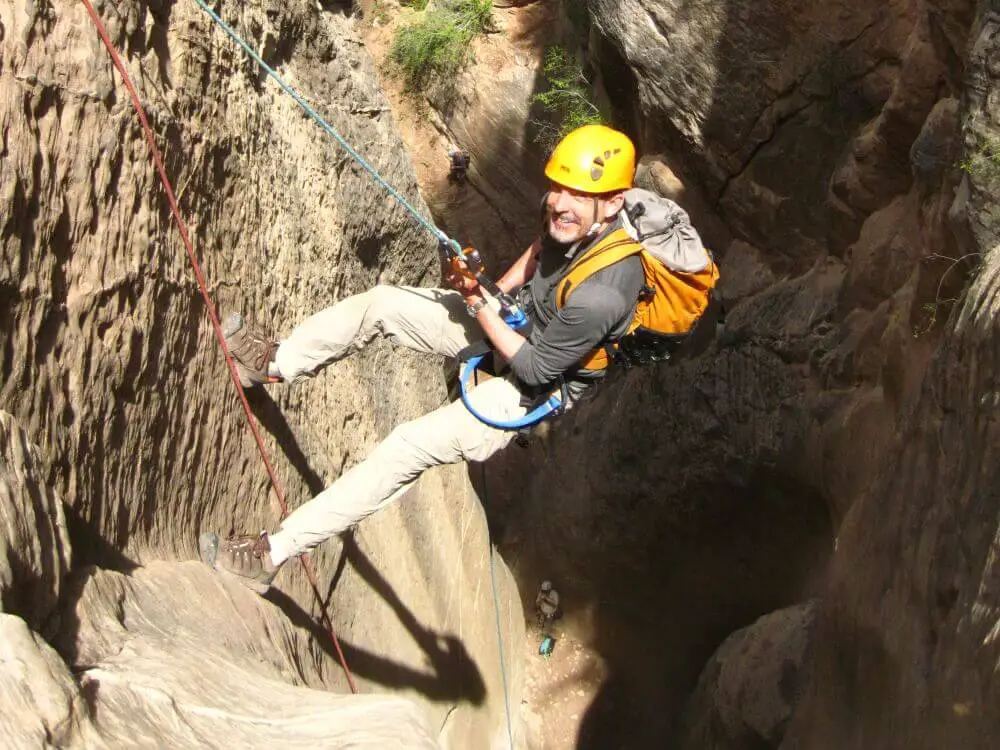
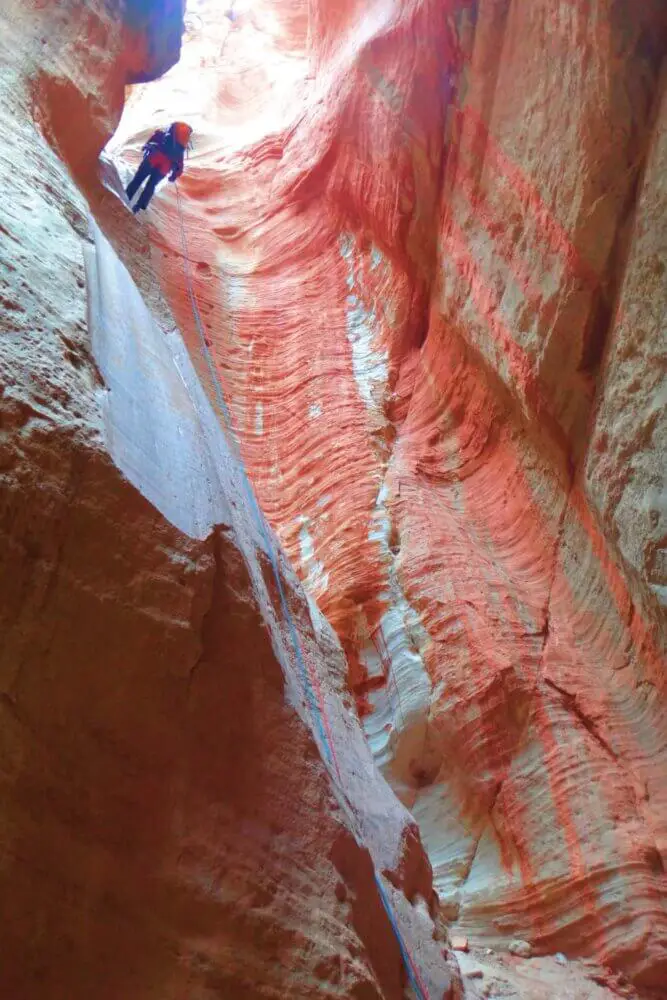
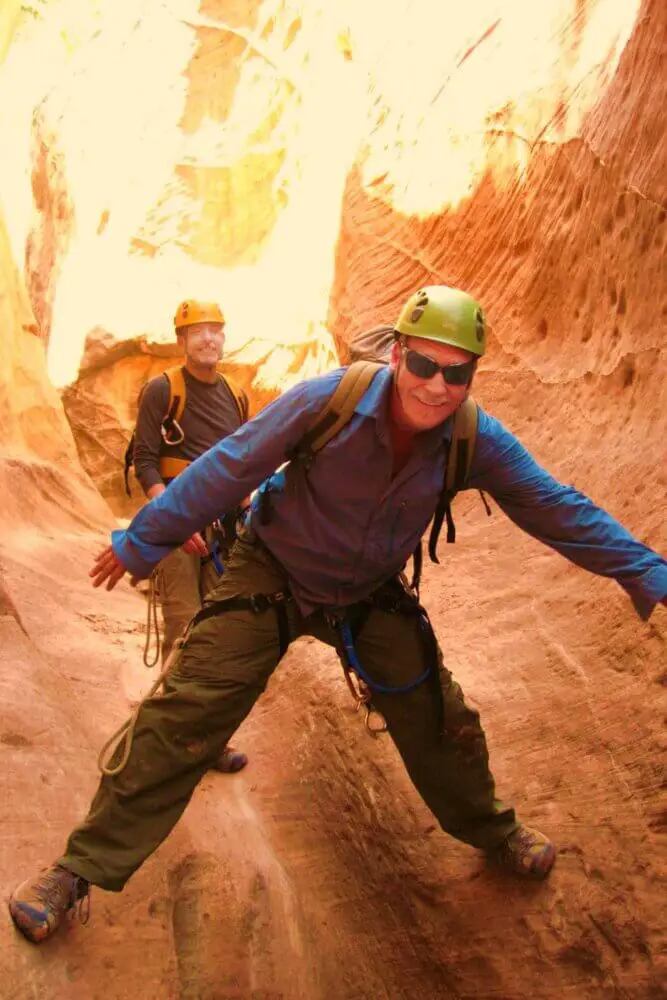
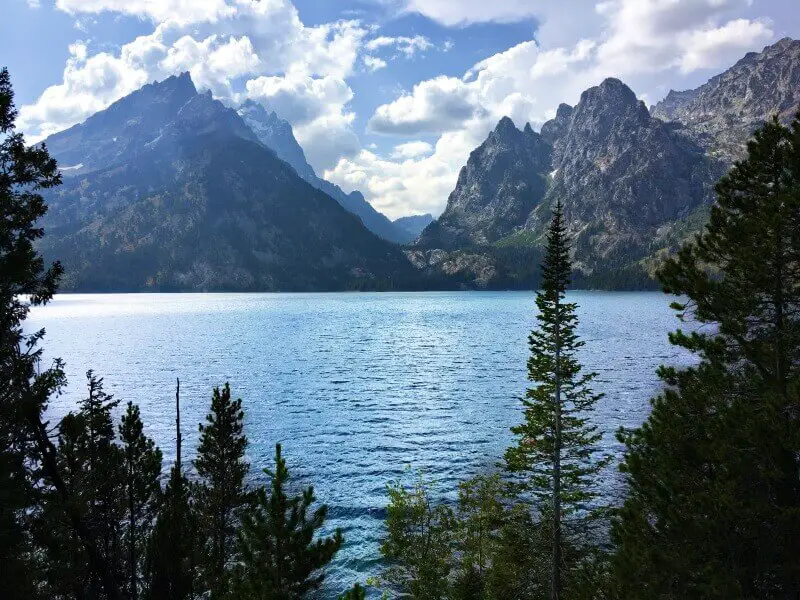
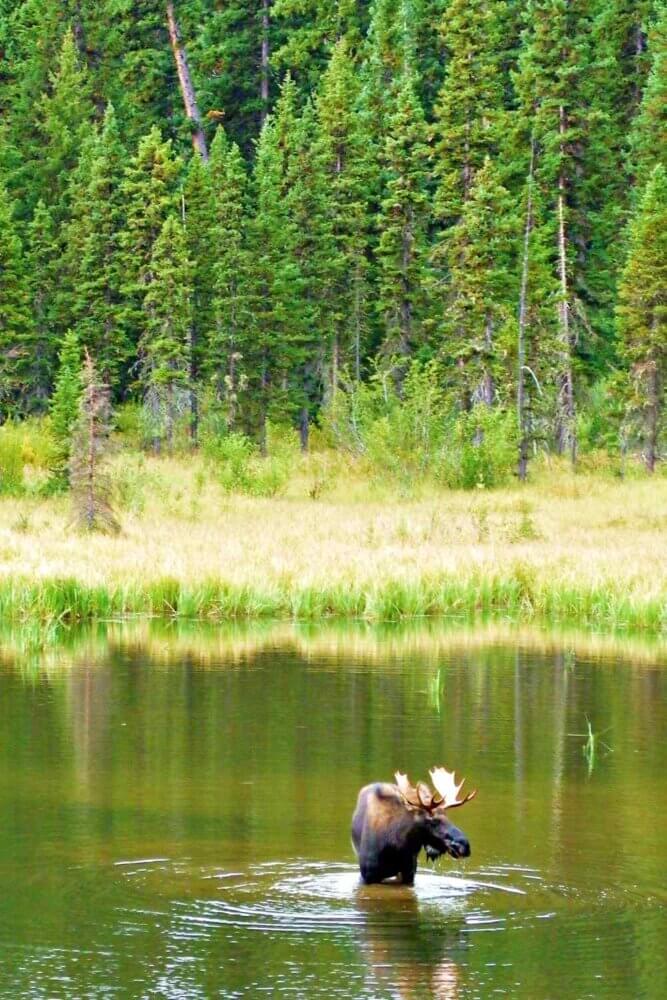
He has rafted through the Grand Canyon; rappelled down slot canyons near Zion and Arches; hiked among the hoodoos in Bryce and the enormous trees in Sequoia; admired the waterfalls in Yosemite and the colored hot springs in Yellowstone; seen moose in Grand Tetons and seals in the Channel Islands, and much more.

Read more…


Parks Collecting is a participant in the Amazon.com Services LLC Associates Program, an affiliate advertising program designed to provide a means for sites to earn advertising fees by advertising and linking to amazon.com. Amazon and the Amazon logo are trademarks of Amazon.com, Inc. or its affiliates. As an Amazon Associate I earn from qualifying purchases.

Monument Valley Guide

If you think of classic wild west landscape, you are probably thinking of Monument Valley. The towering buttes and mesas feature in countless western movies. In movies, this is the landscape of romance and exploration.

Today, is makes up the Monument Valley Navajo Tribal park and it is possible to not only see the incredible landscape, but also take a tour with a Navajo guide and learn more about their culture.


Monument Valley Travel Guide

Navigate this Monument Valley guide by clicking on the articles below to read in-depth information about each aspect of Monument Valley.

Monument Valley Navajo Tribal Park at a glance

State: Arizona/ Utah (the state border cuts through the valley)
Main attractions: Mesas and buttes, Navajo culture
Best time to go: Spring and fall
Hotels/ Airbnbs: The View, Gouldings, Mexican hat, Kayenta
Campgrounds: The View, Gouldings, some others near the park
Dining: The View, Gouldings
Shuttle: No, but if you have an RV, you will need to book a tour to take you into the valley


Monument Valley Guide

Free guides to help you plan your trip to Monument Valley:


Best Tours of Monument Valley


To save this Monument Valley visitor guide for later, Pin It to your National Parks board:

Monument Valley Travel Guide

About the author

James Ian Yosemite

James Ian is a national park, camping and hiking expert.

He has dedicated his life to travel, visiting more than 80 countries, all 7 continents and all of the main national parks in the United States. With over 35 years experience in the travel industry, James has worked on cruise ships, at resorts and hotels, and as a travel planner who’s helped hundreds of people plan successful trips to US national parks. 

Based on his experience visiting our national parks multiple times, in-depth research and expertise as a travel planner, James has published detailed itineraries for most of the major national parks in the US. These itineraries, as well as in-depth park guides, comprehensive camping and hiking gear reviews and buying guides, and helpful packing lists and gift guides will help you have your own incredible trip to US national parks without stress and hassle.

As a national park expert, James has contributed to many publications, including Time Business News, Savoteur, Best Trip, and Wired.

Read more…

Grand Canyon Guide

Grand Canyon National Park is justifiably famous as one of the Seven Wonders of the Natural World and one of the best national parks in the United States. The enormous canyon is breathtaking. 

You can visit either the north or the south rim (or both). The north rim is higher, is less visited, and has a shorter season and fewer facilities. 

Most people visit the south rim, which has plenty of facilities, activities, accommodations, stores, and restaurants. You can enjoy the views from multiple vantage points along the rim, hike down into the canyon, take mule ride, and even ride the rapids of the Colorado River through the canyon. 

Use this Grand Canyon National Park Travel Guide to get all the information you need about how to visit the Grand Canyon to have an amazing trip. 

Grand Canyon National Park At A Glance

State: Arizona
Main attractions: Canyon, river
Shuttle: Yes (South Rim only)


    Itineraries for Grand Canyon National Park

    *** Available for purchase ***

    These are not your average blogger itineraries, which tend to be short summaries of things that they did on their one visit there. These itineraries are all about YOU and helping you have the best time.

    They will take away the overwhelm that often accompanies planning a trip to Grand Canyon National Park. They’re a combination detailed hour-by-hour itinerary (with options for different activity levels), guidebook, hiking guide, driving directions, travel tips, and more. You’ll need nothing else to plan your trip – it’s all done for you (but you still have choices).

    One-day, two-day or three-day detailed itineraries for Grand Canyon National Park available for purchase:

    EXCLUSIVE BONUS CONTENT WITH GRAND CANYON ITINERARIES

    Grand Canyon Accommodations Guide
    Grand Canyon Dining Guide
    Grand Canyon Shuttle Guide

    Grand Canyon Travel Guide

    Please note this post may contain affiliate links, which means we may receive a commission, at zero cost to you, if you make a purchase through a link. Please see our full Disclosure for more information. If you have any questions, please contact me.

    How to Plan a Trip to the Grand Canyon  

    Planning a trip to the Grand Canyon can be overwhelming – but it doesn’t have to be.  Use this Grand Canyon guide for all your Grand Canyon planning.  Click on the links below to go to detailed guides and answers to your questions

    The best option to take away the overwhelm is to pick up a detailed itinerary.   I have done all the heavy lifting for you.  Choose from one, two or three days.  Each itinerary is crammed with detailed driving and hiking maps, hour-by-hour suggestions of what to do and where to go to avoid spending your precious vacation time driving around parking lots or competing with crowds on the trails.   

    Get a 1-day, 2-day, or 3-day itinerary for Grand Canyon National Park

    This guide will help you with what you should AVOID doing when you plan a trip to Grand Canyon National Park.

    Read More: 7 MISTAKES TO AVOID IN THE GRAND CANYON

    Some helpful Grand Canyon trip planning information:

    Phantom Ranch has rustic cabins and hiker dorms at the bottom of the canyon.  It’s extremely popular, so there is a lottery system in place to secure a coveted spot.

    Read More: THE PHANTOM RANCH LOTTERY SYSTEM


    Entrance Fee for Grand Canyon National Park 

    There is an entrance fee for the park.  Find the latest fees on the NPS website.    

    To avoid long lines and save money, if you are planning to visit more than just the Grand Canyon this year, it can be great value to purchase an America The Beautiful pass.   

    The one-year pass includes standard entrance at all sites managed by the National Park Service, Forest Service, Fish and Wildlife Service, Bureau of Land Management, Bureau of Reclamation, and Army Corps of Engineers. The pass covers the entrance fee for a driver and all passengers in a personal vehicle or up to 4 adults at sites that charge per person.

    Get an America The Beautiful pass here


    Grand Canyon National Park Entrances 

    You can access Grand Canyon from the North Rim or the South Rim.  It takes over 4 hours to drive between them.   

    The South Rim is easier to access and has more facilities, and this is where most people visit.  The main entrance is the South Entrance Station.  It’s 5 miles north of the gateway town of Tusayan; 55 miles north of Williams, Arizona via SR 64 from I-40; and 80 miles north of Flagstaff, Arizona via US 180. 

    You can also access the South Rim from the Desert View East Entrance. This is on Arizona State Highway 64 near Cameron and is convenient if you are coming from points east like Page, AZ. 

    The entrance to the North Rim of Grand Canyon National Park is located 30 miles south of Jacob Lake on Highway 67, not far from the Utah border.  It’s 14 miles from the actual rim of the canyon.  This entrance (and the entire North Rim) is only open mid-May to mid-October.  


    Grand Canyon National Park Visitor Centers 

    The North Rim Visitor Center is near the parking lot for Grand Canyon Lodge and Bright Angel Point. 

    On the South Rim, the main Grand Canyon Visitor Center is in Grand Canyon Village near Mather Point.   

    You can also get information at the Grand Canyon Conservancy Visitor Center Park Store. 

    Additional Visitor Centers are the Verkamp’s Visitor Center in the Village Historic District, near Hopi House and El Tovar Hotel, and at Desert View. 

    Grand Canyon Village also has a separate Backcountry Information Center. There are also a shop and exhibits at Kolb Studio and the Yavapai Geology Museum. 


    Best Tours of the Grand Canyon


    Things to Do at the Grand Canyon

    If you’ll be visiting the south rim of the Grand Canyon, there is no shortage of things to do and see.

    Read More: BEST THINGS TO ON GRAND CANYON’S SOUTH RIM

    There are multiple overlooks and viewpoints along the South Rim, North Rim and inside the canyon where you can enjoy spectacular and ever-changing views of the canyon.

    Read More: THE 25 BEST VIEWS OF THE GRAND CANYON 

    For a different perspective of the canyon, nothing beats riding in a raft or small boat on the Colorado River through the canyon. 

    Read More: GRAND CANYON RAPIDS GUIDE


    Where to Stay Inside Grand Canyon National Park 

    There are several lodges and campgrounds inside the national park.  

    The lodges on the South Rim are: El Tovar Hotel; Bright Angel Lodge & Cabins; Kachina Lodge; Maswik Lodge; Thunderbird Lodge; and Yavapai Lodge.  

    The South Rim campgrounds are: Mather Campground; Trailer Village RV Park; and Desert View Campground (East Entrance). 

    The lodge on the North Rim is the Grand Canyon Lodge. The North Rim Campground is the only campground on the north rim. 

    Below the rim of the canyon, there are several backcountry campgrounds: Bright Angel Campground (right at the bottom); Havasupai Gardens (formerly Indian Garden) Campground (halfway down the Bright Angel Trail); and Cottonwood Campground (halfway down the North Kaibab Trail). 

    There is only one lodge at the bottom of the canyon, Phantom Ranch. Spaces are limited and it’s very popular, so there is lottery system to get a reservation.

    Read More: HOW TO GET PHANTOM RANCH RESERVATIONS


    Places To Stay Near Grand Canyon National Park 

    If you prefer to book through Airbnb, there are several lodges, hotels and cabins in and near the park.

    Read More: GRAND CANYON AIRBNBS

    If you’ll be staying in Flagstaff for your Grand Canyon trip or on the way there or back, a vacation rental is a great option.

    Read More: FLAGSTAFF VACATION RENTALS

    Many people combine a trip to Sedona with their visit to the Grand Canyon.

    Read More: SEDONA VACATION RENTALS 


    How to Get To Grand Canyon National Park

    The most common ways to get to Grand Canyon National Park are to drive or fly into one of the nearby airports and pick up a rental car there.   

    However, there are other options, too, including a daily train to the South Rim from Williams.

    Read More: HOW TO GET TO GRAND CANYON

    If you need a rental car, find one on RentalsCars.com 

    If you’re looking for a flight, find a good deal on Skyscanner 


    The Airports for Grand Canyon National Park 

    There are several airports near Grand Canyon that you can fly into/ out of. This Grand Canyon visitors guide gives you the full lowdown on all the nearby airports and the pros and cons of using each of them. 

    Read More: GRAND CANYON AIRPORTS

    If you’re looking for flights, use Skyscanner to scan the Internet for the cheapest deals.  


    How to Get Around Grand Canyon National Park 

    The easiest way to get around the South Rim is to take a free shuttle. There are several routes from Tusayan, around Grand Canyon Village, west to Hermit’s Rest and east to Yaki Point.

    If you want to head further east to Desert View, you’ll need to drive.  


    When to Visit Grand Canyon National Park

    The north rim is only open mid-May to mid-October.

    If you’re considering traveling to the Grand Canyon, when to visit varies based on individual preferences. In this guide, we’ll take a look at what the park’s like in each season and month to help you decide when to visit the Grand Canyon.

    Read More: BEST TIME TO VISIT GRAND CANYON

    The South Rim is open year-round. In general, the best times to go to Grand Canyon National Park are April-May and September-November when the days are cool but not freezing, the weather is drier, and there are fewer people. Summers get very crowded, and winter, while different, can be snowy and cold.

    Read More: BEST TIME TO VISIT GRAND CANYON


    How Long to Spend in Grand Canyon National Park 

    How many days you should go to the Grand Canyon for depends on when you have time off, how much time you have, your budget, and your interests.  I recommend at least three days to see all the main areas along the South Rim, do some hikes and experience other don’t-miss activities. If you add on a river trip, you’ll need a solid week.


    Hikes in Grand Canyon National Park

    The Grand Canyon has some truly incredible hikes, from the easy Rim Trail to the epic Rim-to-Rim two-day hike.  

    The most famous trail in Grand Canyon National Park is the Bright Angel Trail, going from the South Rim to the Colorado River and Phantom Ranch at the bottom of the canyon.

    Read More: GUIDE TO THE BRIGHT ANGEL TRAIL

    The Grand Canyon is just one place to head in the winter for great hiking.

    Read More: BEST WINTER HIKES IN ARIZONA


    Travel Insurance for Grand Canyon National Park 

    In addition to working out the logistics of your trip using this travel guide, Grand Canyon planning should also include travel insurance.  Protect yourself against trip cancellation, loss or theft of your property, or any medical emergencies.   

    A great insurance option is Travelex.  It has coverage for all you’ll need. You can compare Travel Insurance plans here or get a quote right now: 

    728x90 Get Quote

    Travel Tips for Grand Canyon National Park 

    My top three tips for how to visit Grand Canyon National Park are: 

    1. Stay more than a day. According to park surveys, the average stay is 5 to 7 hours, with just 17 minutes spent looking at the canyon. However, this is not enough time to do everything at Grand Canyon Village alone and certainly not enough time to truly appreciate the beauty of the canyon. There are multiple overlooks along the rim with different views. I recommend allowing at least three days at the South Rim to really take this amazing place in.  
    2. Have a plan.  You want to get the most out of your time at the Grand Canyon. The best way to do this is to get one of my detailed itineraries. They tell you when and where to go to hit all the highlights, see the best views at the right time, and have the best chance of being in the right place at the right time to enjoy the trails and take the best photos.  Get the 1-, 2-, and 3-day itineraries here
    3. Go below the rim.  Most people just see the canyon from the rim, but to truly appreciate its enormity and grandeur, you have to head below the rim and be surrounded by the towering canyon walls. Going even just a short way will give you a whole different perspective.

    Books About the Grand Canyon 

    I love to read books about places I go.  Get in the spirit of your vacation and learn about the Grand Canyon before you go, immerse yourself with reading material while you’re there, and/ or keep your memories alive after your trip.   

    This Grand Canyon reading list includes interesting tales, information, novels and picture books.

    Read More: GRAND CANYON READING LIST


    To save this Grand Canyon visitors guide for later, Pin It to your National Parks board:

    Grand Canyon Travel Guide

    About the author

    James Ian Yosemite

    James Ian is a national park, camping and hiking expert.

    He has dedicated his life to travel, visiting more than 80 countries, all 7 continents and all of the main national parks in the United States. With over 35 years experience in the travel industry, James has worked on cruise ships, at resorts and hotels, and as a travel planner who’s helped hundreds of people plan successful trips to US national parks. 

    Based on his experience visiting our national parks multiple times, in-depth research and expertise as a travel planner, James has published detailed itineraries for most of the major national parks in the US. These itineraries, as well as in-depth park guides, comprehensive camping and hiking gear reviews and buying guides, and helpful packing lists and gift guides will help you have your own incredible trip to US national parks without stress and hassle.

    As a national park expert, James has contributed to many publications, including Time Business News, Savoteur, Best Trip, and Wired.

    Read more…


    Bryce Canyon National Park Guide

    Bryce National Park is home to hoodoos – natural stone pillars. Thousands of them cram into Bryce Amphitheater and more are scattered along the canyon. They create a bizarre, alien-like environment that is like nothing else you will ever see.

    You can see them en masse from the rim or hike down among them and see these incredible formations up close. The unique environment puts this firmly on the list of the best national parks in the United States.


    Bryce Canyon Guide

    Navigate this Bryce Canyon National Park guide by clicking on the articles below to read in-depth information about each aspect of Bryce Canyon National Park.

    Bryce Canyon National Park at a glance

    State: Utah
    Main attractions: Hoodoos
    Best time to go: Year round
    Hotels/ Airbnbs: Inside park and Bryce Canyon Village
    Campgrounds: Inside park and near the park
    Dining: Inside park and Bryce Canyon Village
    Shuttle: Yes (free)


    Itineraries for Arches National Park

    *** Available for purchase ***

    These are not your average blogger itineraries, which tend to be short summaries of things that they did on their one visit there. These itineraries are all about YOU and helping you have the best time.

    They will take away the overwhelm that often accompanies planning a trip to Bryce Canyon National Park. They’re a combination detailed hour-by-hour itinerary (with options for different activity levels), guidebook, hiking guide, driving directions, travel tips, and more. You’ll need nothing else to plan your trip – it’s all done for you (but you still have choices).

    One-day or two-day detailed itineraries for Bryce Canyon National Park available for purchase:

    EXCLUSIVE BONUS CONTENT WITH BRYCE CANYON ITINERARIES

    Bryce Canyon Accommodations Guide
    Bryce Canyon Shuttle Guide
    Bryce Canyon Shuttle Guide

    Bryce Canyon National Park Guide

    Free guides to help you plan your trip to Bryce Canyon National Park:


    Best Tours of Bryce Canyon


    To save this Bryce Canyon travel guide for later, Pin It to your National Parks board:

    Bryce Canyon Travel Guide

    About the author

    James Ian Yosemite

    James Ian is a national park, camping and hiking expert.

    He has dedicated his life to travel, visiting more than 80 countries, all 7 continents and all of the main national parks in the United States. With over 35 years experience in the travel industry, James has worked on cruise ships, at resorts and hotels, and as a travel planner who’s helped hundreds of people plan successful trips to US national parks. 

    Based on his experience visiting our national parks multiple times, in-depth research and expertise as a travel planner, James has published detailed itineraries for most of the major national parks in the US. These itineraries, as well as in-depth park guides, comprehensive camping and hiking gear reviews and buying guides, and helpful packing lists and gift guides will help you have your own incredible trip to US national parks without stress and hassle.

    As a national park expert, James has contributed to many publications, including Time Business News, Savoteur, Best Trip, and Wired.

    Read more…

    Arches National Park Guide

    Arches National Park is one of my favorite American national parks. There are over 2,000 natural arches in the park, mostly focused in several key sections in the park. Many of them are short and easy walks from parking lots, though there are some longer and more challenging hikes too.

    The incredible natural beauty and variety of ways to experience the arches and fins they are formed from put this park on my list of the best national parks in the United States.


    Arches National Park Travel Guide

    Navigate this Arches National Park guide by clicking on the articles below to read in-depth information about each aspect of Arches National Park.

    Arches National Park at a glance

    State: Utah
    Main attractions: Natural arches, fins
    Best time to go: Spring and fall
    Hotels/ Airbnbs: Moab
    Campgrounds: One inside park and many near the park
    Dining: Moab
    Shuttle: No


    Itineraries for Arches National Park

    *** Available for purchase ***

    These are not your average blogger itineraries, which tend to be short summaries of things that bloggers did on their one visit there. These itineraries are all about YOU and helping you have the best time.

    They will take away the overwhelm that often accompanies planning a trip to Arches National Park. They’re a combination detailed hour-by-hour itinerary (with options for different activity levels), guidebook, hiking guide, driving directions, travel tips, and more. You’ll need nothing else to plan your trip – it’s all done for you (but you still have choices).

    One-day, two-day or three-day detailed itineraries for Arches National Park available for purchase:

    EXCLUSIVE BONUS CONTENT WITH ARCHES NATIONAL PARK ITINERARIES

    Arches Accommodations Guide
    Arches Dining Guide
    Dead Horse Point State Park Guide

    Arches National Park Guide

    Free guides to help you plan your next trip to Arches National Park:


    Best Tours Arches National Park


    To save this guide to Arches National Park for later, Pin It to your National Parks board:

    Arches National Park Travel Guide

    About the author

    James Ian Yosemite

    James Ian is a national park, camping and hiking expert.

    He has dedicated his life to travel, visiting more than 80 countries, all 7 continents and all of the main national parks in the United States. With over 35 years experience in the travel industry, James has worked on cruise ships, at resorts and hotels, and as a travel planner who’s helped hundreds of people plan successful trips to US national parks. 

    Based on his experience visiting our national parks multiple times, in-depth research and expertise as a travel planner, James has published detailed itineraries for most of the major national parks in the US. These itineraries, as well as in-depth park guides, comprehensive camping and hiking gear reviews and buying guides, and helpful packing lists and gift guides will help you have your own incredible trip to US national parks without stress and hassle.

    As a national park expert, James has contributed to many publications, including Time Business News, Savoteur, Best Trip, and Wired.

    Read more…

    Canyoneering In Zion National Park: Complete Guide

    I plant one foot firmly about a few inches from the edge.  I separate my other leg about two feet away, angled away from the edge.  Then, very carefully, I shift my weight over the foot closest to the edge. 

    I crane my neck over the side and peer down.  My nerves hit me all at once.  I feel a little dizzy and worry that I might tip forward off the cliff.  On either side, sheer cliffs drop down about 30 feet to a flat area below.  It looks very, very far down.

    TOP TOUR: Book a small group tour now
    TOP HOTEL PICK: Check availability now
    FIND THE CHEAPEST CAR RENTAL: Search Discover Cars for the best deals
    FIND THE CHEAPEST FLIGHTS: Search Skyscanner for the best deals
    GET TRAVEL INSURANCE: Get insured with Travelex before you go

    No time to read about canyoneering in Zion National Park? Pin it and save it for later:

    The Most Epic Adventure in Zion Canyoneering
    Epic Day Trip Canyoneering in Zion National Park

    “Go on”, I hear.  “You’ll be fine.”

    I am not convinced, but figure I have no one to blame but myself.  I grip the rope in my hands so tightly my fingers turn red and inch forward.  Nearing the edge, I turn my body around, facing away. Not seeing down is definitely better.

    The rope stretching from me to the anchor about 10 feet away is taut.  I risk a glance back to judge how far from the edge I am.  Not far.  At all. 

    The backs of my feet feel no ground beneath them.  I lean back.  “If the rope or the anchor give way now, I’m dead,” I think to myself. 

    My head pounds.  Is it too late to turn back?  My legs are jelly.  My stomach churning.

    “Go on”, I hear.  “You’ll be fine.”

    I jump…

    Please note that some of the links below may be affiliate links.  If you make a purchase through these links, I earn a small commission at no additional cost to you. Read my Disclosure for more information.

    If you are planning to visit Zion Canyon National Park by yourself, make your planning easy and stress free with a detailed itinerary. I have 1-, 2- and 3-day itineraries for Zion National Park that include all the park highlights, give you choices based on your preferred activity level, and take all the stress out of planning your trip. 

    Check out the three Zion National Park itinerary options

    Canyoneering in Zion National Park

    This experience rappelling down a series of narrow slot canyons should be on your Zion National Park trip if you have a sense of adventure and not too much of a fear of heights.  It is easy to arrange and surprisingly easy to do, but you do need to have a reasonable level of fitness.

    The Experience: Canyoneering Zion National Park

    Kevin and I had decided to spend our 10th anniversary in Zion National Park, Utah, USA after being inspired by a fellow traveler on our Grand Canyon river rafting trip the year before.

    We discovered in our Internet research that the hills in and around Zion are embossed with a maze of slot canyons – narrow canyons with steep walls close together. Some are stacked in a multi-layered staircase, where the “steps” are 15-150 feet high.

    There are lots of really great things to do in Zion Canyon National Park.  You can hike in the river along The Narrows slot canyon, but the only way to experience most of the slot canyons is by canyoneering (or “canyoning” depending on where you’re from).  What is “canyoneering”?   

    It basically means descending and traversing through canyons. In the narrow slot canyon around Zion, it involves climbing or rappelling (abseiling) down the rock faces on a rope from one layer of the skinny canyon to another.

    FREE DOWNLOAD
    Subscribe to monthly updates with tips for planning, travel inspiration and trip ideas and get instant access to the free PDF of this
    Guide to Canyoneering in Zion National Park

    Canyoning vs canyoneering

    You may hear the term ‘canyoning’.  They are the same thing.  Canyoning is more common on British English.

    Zion National Park canyoneering

    Canyoneering Zion is widely considered some of the best canyoneering in Utah.  Canyoneering guides are essential unless you are an experienced rappeller with your own gear. 

    You will need to arrange a Zion canyoneering guide to take you on a canyoning and rappelling tour with one of the outfitters based in Springdale, just outside the main entrance to the national park.  We were lucky to find a great one.

    The tour operator stated that their guided canyoneering Zion expedition is for people who “are self-sufficient on extended outdoor excursions; can carry a pack up to 35 pounds for 8 – 12 hours; have previous rope handling and rappelling experience or possess rapid technical skill acquisition capabilities; (and) enjoy pushing (themselves) to the limit.” 

    Well, if by all that they mean someone who is “mid-forties, 30-40 pounds overweight, works out daily by walking to and from the subway, has never rappelled and has a mild fear of heights, but is VERY determined and likes to be adventurous”, then I fit the profile perfectly. I decided that my creative interpretation and their ignorance would qualify me and signed up.

    Sign up for canyoneering in Zion National Park here.

    FREE DOWNLOAD
    Subscribe to monthly updates with tips for planning, travel inspiration and trip ideas and get instant access to the free PDF of this
    Guide to Canyoneering in Zion National Park

    The canyoneering guide, Zion

    We arrived at offices in Springdale around 6:45am. I sucked in my stomach, signed the waivers saying that this was a crazy thing to do and if anything happened it was all my fault, received a bewildering tangle of ropes and metal things and met Bill, our guide. 

    Bill was 43, good-looking, rugged, outdoorsy and very friendly.  He welcomed us and instantly made us feel comfortable.

    One of my favorite things about experiential travel is meeting local people and learning about their lives and experiences.  Bill talked a LOT. 

    As we drove for over an hour to our destination, he regaled us with tales of his adventurous outdoor life, told us about other gay couples he’d guided for, inspired us with the story of his life spent pursuing his passions, shared successes of previous canyoneering newbies, and reassured us with his years of experience and canyoneering highlights. 

    He made us feel totally comfortable, that it was OK to be ourselves and express our fears, and that we could do this.  We loved him already.

    A long hike uphill from the car followed.  I was hot and out of breath, and bringing up the rear, but keeping up. An hour or so later we arrived at the top of the canyon.

    “That’s the worst part of the day over”, Bill confidently said.  I didn’t believe him but appreciated his attempt to make me feel good.

    zion canyoneering slot canyon

    The First Descent

    So, there we are, standing at top of the first of 12 slot canyons that we will descend that day.   Nearby is a 30-foot cliff. One of the shortest of the day. 

    Bill patiently and methodically gets us into our gear, demonstrates what we will do and goes over the canyoneering basics, answers our questions, checks and double checks everything is in working order and quizzes us to make sure we fully understand everything we need to do.  His thoroughness, obvious expertise and calm manner makes me feel calm and in control.

    I peer over the edge and my confidence disappears.   My fear of heights kicks in and I am immediately terrified. 

    I try to remind myself why I decided to do this; that it would be an exciting and amazing way to see a part of the world I wouldn’t otherwise see, to do something I had never tried before, and to get a unique perspective on this landscape.  Staying at the top will achieve none of these things. 

    I don’t believe in being held back by fear.  Fear can hold you back from achievement, from excitement, from success.  I refuse to let fear hold me back.

    So, I jump.

    zion starting canyoneering

    Well, I kind of half jump, half step down the first part of the cliff, releasing a little rope. My controlled descent begins. I am strapped into a harness, tethered securely to an anchor, and tightly gripping a rope in each hand. 

    I plant my feet very firmly against the vertical cliff and lean back. It’s surprisingly easy. And surprisingly fun.

    I focus.  My nerves disappear.  This is awesome! I inch down the cliff.  Suddenly my feet are swinging in the air; the cliff has disappeared.  This is the overhang Bill mentioned was half-way down.  I hang in the air and slowly lower myself down.  I’ve got this. 

    My feet touch the ground.  As I release the ropes and stand up straight, I feel relief and exhilaration.

    Zion Canyoneering

    I look up.  Kevin’s face peers over the edge, looking slightly disbelieving.

    Fear is a funny thing.  Kevin hesitates; but we all have our ways of overcoming fear.  You just need a strong motivator.  Another group of canyoners approaches behind us.  Five men, talking loudly of technical climbing things.   

    It turns out that Kevin’s fear of embarrassment is stronger than his fear of falling.  The thought of holding them up, of having them all standing around watching him teeter at the edge and judging him is more terrifying to him than risking his life. 

    He also jumps.  And makes it to the ground slowly and safely.

    1 down.  11 to go.

    zion canyoneering

    The rest of the day canyoneering in Zion National Park

    The first was definitely the worst.  We gain confidence as we slowly descend from one layer of the canyon to the next. 

    There is very little walking in between – the “staircase” is steep.  Three canyon cliffs later, we find ourselves peering down a hole, surrounded by smooth waves of marbled sandstone.  The undulating walls towering around us are worn smooth by flash floods.  They glow golden and orange as the sun hits them.  It is magical.   

    The hole below us narrows with perspective to a tiny landing 110 feet below us.  110 feet seems exciting.  Kevin descends. I follow. We are having fun.

    Canyoneering Zion National Park

    After being passed by that group at the first descent, we are alone all day.

    As we descend down one drop after another, we take photos, falling in love with canyoneering and entranced by the adventure and by the beauty of our surroundings. 

    The power and intimacy of nature is overwhelming.  It’s easy for us to imagine tubes of water gushing down the pipes of the canyons, cascading from one canyon down to the next, carving grooves as it goes.  We feel cocooned in the walls around and above us and thrilled by the drops below.

    zion canyoneering

    Near the end of the day, we clamber over an enormous driftwood tree trunk, worn smooth by countless floods, wedged in the narrow crevice that is this canyon.

    Finally we get the last descent of the day.  Below us, the canyon walls are just 15 feet down and a meter apart. Bill is confident we can get down  this one without a rope.  We clamber down, wedging our legs against one wall and our backs against the other.  We are fearless!

    Canyoneering in Zion National Park

    The Verdict: Slot canyoneering near Zion

    Would I recommend this Zion guided canyoneering tour?  Absolutely!  Rappelling in Zion was one of the highlights of our trip.


    Happy canyoneering!

    Do you have any stories of canyoneering, rappelling or visiting Zion? I’d love to hear them. Comment below.  

    Are you planning a trip to Zion National Park? Read my Zion National Park Guide

    FREE DOWNLOAD
    Subscribe to monthly updates with tips for planning, travel inspiration and trip ideas and get instant access to the free PDF of this
    Guide to Canyoneering in Zion National Park

    If you liked this post, please share the love and Pin It to your National Parks or Adventure boards!

    Discover the Slot Canyons of Zion Utah
    Canyoneering in Zion National Park

    If you are planning to visit Zion Canyon National Park by yourself, make your planning easy and stress free with a detailed itinerary. I have 1-, 2- and 3-day itineraries for Zion National Park that include all the park highlights, give you choices based on your preferred activity level, and take all the stress out of planning your trip. 

    Check out the three Zion National Park itinerary options

    For more adventures in the U.S. southwest, read about:

    WHERE ARE YOU IN YOUR PLANNING PROCESS?

    Are you just starting to think about taking a national parks trip? Get Inspiration
    Are you starting to plan a trip to Zion National Park? Read my Guide to Zion National Park and Get an Itinerary for Zion National Park
    Are you looking for a place to stay near Zion National Park? Find a vacation rental near Zion National Park
    Are you ready to book your trip? Use these Planning and Booking Resources
    Do you want to read a book about Zion National Park? Check out my Recommended Reading List for Zion National Park

    About the Author

    James Ian Yosemite

    James Ian is a national park, camping and hiking expert.

    He has dedicated his life to travel, visiting more than 80 countries, all 7 continents and all of the main national parks in the United States. With over 35 years experience in the travel industry, James has worked on cruise ships, at resorts and hotels, and as a travel planner who’s helped hundreds of people plan successful trips to US national parks. 

    Based on his experience visiting our national parks multiple times, in-depth research and expertise as a travel planner, James has published detailed itineraries for most of the major national parks in the US. These itineraries, as well as in-depth park guides, comprehensive camping and hiking gear reviews and buying guides, and helpful packing lists and gift guides will help you have your own incredible trip to US national parks without stress and hassle.

    As a national park expert, James has contributed to many publications, including Time Business News, Savoteur, Best Trip, and Wired.

    Read more…


    Parks Collecting is a participant in the Amazon.com Services LLC Associates Program, an affiliate advertising program designed to provide a means for sites to earn advertising fees by advertising and linking to amazon.com. Amazon and the Amazon logo are trademarks of Amazon.com, Inc. or its affiliates. As an Amazon Associate I earn from qualifying purchases.

    Hiking The Narrows In Zion National Park: Complete Guide

    The cold water was up to my thighs and gushed fairly strongly against me.

    I planted my walking stick firmly in front of me and moved my back leg forward, pushing against the flow of water. I carefully felt the rocks beneath me and when I felt stable, shifted my weight forward. In this way, I slowly moved forward, upstream and angling across the river to a narrow rocky beach barely two feet/ 60 cm wide on the other side of the river.

    On either side of the river, sheer cliffs, about 20 feet/ 6 m apart, rose straight up to the sky for about 1,000 feet/ 300 m, leaving a narrow strip of blue directly above me.

    TOP TOUR: Book a small group tour now
    TOP HOTEL PICK: Check availability now
    FIND THE CHEAPEST CAR RENTAL: Search Discover Cars for the best deals
    FIND THE CHEAPEST FLIGHTS: Search Skyscanner for the best deals
    GET TRAVEL INSURANCE: Get insured with Travelex before you go

    No time right now to read about hiking the Narrows in Zion National Park? Pin it and save it for later:

    What You Need to Know About HIking The Narrows in Zion
    How to HIke The Narrows

    Please note that some of the links below may be affiliate links.  If you make a purchase through these links, I earn a small commission at no additional cost to you. Read my Disclosure for more information.

    If you are planning to visit Zion Canyon National Park by yourself, make your planning easy and stress free with a detailed itinerary. I have 1-, 2- and 3-day itineraries for Zion National Park that include all the park highlights (including The Narrows, of course), give you choices based on your preferred activity level, and take all the stress out of planning your trip. 

    Check out the three Zion National Park itinerary options

    The Narrows Hike in Zion National Park Overview

    The United States has incredible national parks, and I had done plenty of hikes, but I had never done river hiking before, nor had I hiked in a slot canyon (a very narrow canyon with very high and steep walls). The Narrows hike, a famous hike in Zion National Park, involves both.

    When researching Zion National Park, I discovered that there are actually several legendary Zion Canyon hikes, including Angel’s Landing and the Subway. 

    But consistently, one of the absolute best hikes in Zion National Park I had read about was the Zion water hike … the Zion Canyon Narrows hike … the most famous of the Zion slot canyon hikes… the famed Zion river walk …  It is one of the top photo spots in Zion.

    You have to hike in the river most of the way because there is no path. There is no path because the river runs through a canyon that’s only about 20 feet wide at its narrowest point. It sounded fun, so when Kevin and I were visiting Zion National Park, it, along with rappelling down the canyons, was high on our list of things to do.

    FREE DOWNLOAD
    Subscribe to monthly updates with tips for planning, travel inspiration and trip ideas and get instant access to the free PDF of this
    Guide to Hiking The Narrows
    Wall St the Narrows in Zion National Park

    Essential Information for Hiking the Narrows in Zion National Park

    There are several things to consider before doing this hike.

    How to hike the Narrows

    There are a couple of ways to access the narrows:

    1. On a guided tour

    There are several tours you can take that include not only Zion National Park, but also nearby parks such as Bryce Canyon. This is a great option if you have limited time and/ or don’t want to be bothered with planning all of the details yourself. All of the tours below include the possibility of doing the Narrows hike in Zion NP.

    1. Self-guided

    You can use the information to travel independently to Zion National Park and do the Narrows hike.

    Hiking the Narrows : What to wear and what to take with you

    When hiking in the Narrows, hiking gear choices are important.  Hiking in a river that is filled with glacial melt is not something you want to do in shorts. Hiking in a river that has a rocky, uneven bottom is not something you want to do barefooted. Hiking in a river that has strongly flowing water is not something you want to do without something to help stabilize you as you wade across and along it.

    So, you will need:

    Do you need to rent gear to hike the Narrows?

    Technically you don’t, but if you don’t have or want to buy waterproof gear (pants, socks, boots) and a stick to help stabilize you, it is possible to rent them. I recommend having your own shoes – and a hiking pole is always a good idea – but renting waterproof pants is advisable.

    There are several Zion Narrows outfitters in Springdale, the town just outside the Zion National Park entrance, that offer Zion Narrow rentals.  We arranged our Zion Narrows gear rental through Zion Adventures in Springdale.  It was easy and worth the money.

    We picked the gear up the night before at no extra charge so that we could catch an early bus in the morning.

    Hiking resources

    Additional hiking resources include:

    Two options for the Zion National Park Narrows hike

    The Narrows map
    Map of the Narrows Hike

    There are two options for hiking the Narrows, Zion. 

    1. Bottom up. This is the out-and-back Zion narrows day hike, starting and ending at the shuttle bus stop.
    2. Top down. This involves being dropped off at the starting point and hiking for two days, with overnight camping.

    How long is the Narrows hike in Zion?

    You can see from the map that the full length is 5 miles/ 8 km each way, but you can easily do part of it and still have an incredible experience. The top down hike is about 16 miles (25.5 km).

    How long does it take to hike the Narrows?

    We did the bottom up approach.  We took our time, stopped for lunch and explored the side canyon for a while and it took us about 8 hours. We got back to the shuttle about 5:00 pm and back to Springdale to drop off our rented gear a little before 6:00 pm.

    You can definitely just walk for an hour or so, but the scenery gets more dramatic as you go deeper into the canyon, and it is worth making a whole day of it if you can.

    If you get dropped off and start at the other end and hike down only, it typically takes 2 days.

    Do I need a permit to hike the Narrows?

    For the bottom-up hike, which most people do, you do NOT need a permit. However, you should check with the National Park Service to make sure that the hike is open. The Narrows are subject to flash floods and can be abruptly closed.

    For the top-down hike, you DO need a Zion Narrows permit.  You can get Zion National Park permits from the National Park Service.

    How much does it cost to hike the Narrows?

    There is no extra fee to do the hike, other than the park entrance fee. Weekly passes to Zion National Park cost $35/ vehicle / $30 per motorcycle or $20 per person.

    If you plan to visit more than a couple of parks in a year (or the same park more than twice), then look at getting the America the Beautiful Pass.   It gives you unlimited access for a year (from date of purchase) to over 2,000 federal recreation sites including all U.S. national parks plus national forest and BLM lands.  It includes admission for one vehicle or four people (for places that charge per person).

    Buy the America the Beautiful Pass here

    Is the Narrows sometimes closed?

    Yes.  The Narrows are in a slot canyon and are subject to flash flooding. The National Park service in the United States is really awesome for all sorts of reasons, but one of them is the close monitoring of the status of flash floods. Always, always check with the park service the days and day before to make sure that it is open. If there is a danger of flash flooding the national park service will close it.

    Do I need to be fit to hike the Narrows?

    You do need a moderate level of fitness. I was 30-40 pounds overweight and not very fit at the time, and had no problems, however. Most of the hike is wading through water on uneven rocks, so if you are unstable on your feet, then this is not for you.

    When is the best time to hike the Narrows?

    The best time to go to Zion National Park, especially if you are there for the Narrows hike, depends on water temperature, the height or flow of the river and the likelihood of flash flooding.  In general:

    • December, January, February: It’s really cold and you will definitely need appropriate clothing for hiking in a river in the middle of winter.  BUT there will not be a lot of other people there, so it is a good time to avoid crowds.
    • March and April: It’s the start of spring, the snow is melting and the river level is often too high, which can cause the Narrows to be closed.  This is NOT the best time to visit Zion if hiking the Narrows is one of your main reasons to go.
    • May and June:  This time of year is good to visit.  I visited in May and it was great.  It’s warming up, the river level has usually dropped, and the chance of flash floods is not high (but can still happen).
    • July and August:  This is the rainy or monsoon season, which means a higher chance of flash floods.  It is also peak travel time for many people, is this is the most crowded time of year.
    • September, October and November: This is still considered fairly high season.  The weather is cooler, the monsoon is over, the crowds are thinner.  A good time to visit, though of course, there is still a chance of flash flood closures.

    What time of day is best to start the Narrows hike?

    It is worth getting up early and being one of the first to start the hike. We had the canyon to ourselves most of the day. When we returned in the afternoon, the part of the hike nearest to the start was filled with people. If you don’t mind the other people, then that’s fine, but we always like to be alone, or as alone as possible, when hiking.

    How to get to the start of the Narrows in Zion

    It is not possible to drive in most of Zion National Park. There is a large parking area at the main gate/ the Zion National Park visitor center. If you are staying in Springdale, the town just outside the main entrance, you can leave your car where you are staying.

    There is a free Zion National Park shuttle that picks up in Springdale and at the visitor center and runs along the floor of the main canyon that makes up Zion National Park. The Zion National Park shuttle service is frequent and really easy to use. In 2021, there is a ticket system due to COVID.

    For the Zion Narrows shuttle, get off at the last stop (the Temple of Sinawava stop), at the far end of the park.

    Map of Zion National Park Shuttle route and stops

    zion-canyon-detail-map

    How long does it take to get to the start of the Narrows hike?

    The trip takes about 45 minutes from the visitor center. We took the Zion National Park shuttle to Narrows at 7:30 am and this was early enough to beat the crowds.

    Hiking back along the Narrows in Zion National Park

    From there, it is a short one-mile, flat hike along the Zion National Park Riverwalk to the start of The Narrows. This is mostly on a paved path and if you don’t want to hike The Narrows, I would recommend hiking the riverside walk.  Zion National Park riverside walk is pretty and will take you to the beginning of the slot canyon.  It takes about 15-20 minutes.

    FREE DOWNLOAD
    Subscribe to monthly updates with tips for planning, travel inspiration and trip ideas and get instant access to the free PDF of this
    Guide to Hiking The Narrows

    If you are planning to visit Zion Canyon National Park by yourself, make your planning easy and stress free with a detailed itinerary. I have 1-, 2- and 3-day itineraries for Zion National Park that include all the park highlights, give you choices based on your preferred activity level, and take all the stress out of planning your trip. 

    Check out the three Zion National Park itinerary options

    Description of the Narrows hike in Zion National Park

    Since we were hiking the Narrows bottom up, after the one-mile Riverwalk, we arrived at the Gateway to The Narrows. This is where we changed into dry pants that we had rented from Zion Adventures.

    The start of the Narrows trail, Zion NP

    At the start, the canyon is still quite wide and the river fairly shallow. The bottom is rocky and the stick we had definitely helped stabilize us. To avoid wading completely upstream all the time, we crossed at a diagonal from one side to the other, seeking a narrow path that sometimes ran along the river’s edge.

    As we progressed upstream, the sides of the canyon closed in. We passed Mystery Falls, a small waterfall sliding down the rock face.

    James and waterfalls hiking the Narrows in Zion National Park

    A little further along Narrows Alcove was a dramatic overhang with streaks of yellow and black rock overhanging a bend of the river.

    overhang The Narrows Zion national park

    As we progressed, the sides of the canyon narrowed even more, rising steeply on both sides, now towering hundreds of feet above us, blotting out most of the sky. The water was mostly knee-deep but deepened in parts to waist height and we relied heavily on our sticks to give us stability as we strained at times against the fast-flowing current. It was very interactive and we really had to focus, as we constantly sought the best way to cross.

    Struggling against the current the Narrows in Zion National Park

    Further along, the sides swirled as we passed Grotto Alcove, and blackened walls swallowed the river ahead.

    Zion Wall Street

    Soon after, the Narrows’ Wall Street section began, as the canyon narrowed to about 20 feet wide and the occasional sandy beach disappeared. In the Zion Narrows Wall Street, the walls  tower about 1000 feet above the river. It was incredibly beautiful and dramatic.

    Wall street section of the Narrows in Zion National Park

    Turning back

    We proceeded a little further along, but then decided to turn back and found a small beach with drift wood – the prefect sunny spot for lunch. It’s possible to continue up to Big Springs, where there is a campground, and beyond.

    For the entire morning and lunch time, we were alone in the canyon, except for a handful of people we passed coming the other way. They had gotten dropped off at the other end of the canyon and taken 2 days to walk downstream.

    Tour operators in Springdale organize drop-offs for those wanting to do this. Keep in mind you will have to hike the river with your tent, sleeping bag and food.

    Wall Street section of the Narrows in Zion National Park

    After a relaxing lunch in a spectacular setting, we explored the even narrower side canyon, Orderville Canyon, towards Veiled Falls. Here the water was only ankle deep, a nice break from the strong currents of the main river.

    Orderville Canyon the Narrows in Zion National Park

    As we walked back, we encountered a lot more people, especially as we got close to the start of the hike.

    The verdict: Hiking the Narrows

    The Zion Park Narrows hike is one of the most unusual hikes I have ever done.  There are several incredible Zion National Park hikes, and this was definitely the highlight for me of all the Zion hikes I did. 

    As long as you are physically able, I would highly recommend it. It was, in a word, amazing. The scenery was dramatic and awe-inspiring and the Zion Narrows hike itself fun and fully engaging.


    Happy hiking!

    Do you have any stories about Zion National Park? I’d love to hear them. Join my private Facebook group National Parks Collectors and comment and let me know.

    For more information about Zion National Park, read my Zion NP Guide.

    WHERE ARE YOU IN YOUR PLANNING PROCESS?

    Are you just starting to think about taking a national parks trip? Get Inspiration
    Are you starting to plan a trip to Zion National Park? Read my Guide to Zion National Park and Get an Itinerary for Zion National Park
    Are you looking for a place to stay near Zion National Park? Find a vacation rental near Zion National Park
    Are you ready to book your trip? Use these Planning and Booking Resources
    Do you want to read a book about Zion National Park? Check out my Recommended Reading List for Zion National Park

    If you are planning to visit Zion Canyon National Park by yourself, make your planning easy and stress free with a detailed itinerary. I have 1-, 2- and 3-day itineraries for Zion National Park that include all the park highlights, give you choices based on your preferred activity level, and take all the stress out of planning your trip. 

    Check out the three Zion National Park itinerary options

    FREE DOWNLOAD
    Subscribe to monthly updates with tips for planning, travel inspiration and trip ideas and get instant access to the free PDF of this
    Guide to Hiking The Narrows

    If you liked this post, please share the love and Pin it to your Hikes and National Parks boards for later!

    How to HIke The Narrows
    All You Need to Know About The Narrows Hike in Zion

    About the Author

    James Ian Yosemite

    James Ian is a national park, camping and hiking expert.

    He has dedicated his life to travel, visiting more than 80 countries, all 7 continents and all of the main national parks in the United States. With over 35 years experience in the travel industry, James has worked on cruise ships, at resorts and hotels, and as a travel planner who’s helped hundreds of people plan successful trips to US national parks. 

    Based on his experience visiting our national parks multiple times, in-depth research and expertise as a travel planner, James has published detailed itineraries for most of the major national parks in the US. These itineraries, as well as in-depth park guides, comprehensive camping and hiking gear reviews and buying guides, and helpful packing lists and gift guides will help you have your own incredible trip to US national parks without stress and hassle.

    As a national park expert, James has contributed to many publications, including Time Business News, Savoteur, Best Trip, and Wired.

    Read more…


    Parks Collecting is a participant in the Amazon.com Services LLC Associates Program, an affiliate advertising program designed to provide a means for sites to earn advertising fees by advertising and linking to amazon.com. Amazon and the Amazon logo are trademarks of Amazon.com, Inc. or its affiliates. As an Amazon Associate I earn from qualifying purchases.

    Zion National Park Guide

    Zion National Park is one of the most incredible Utah parks. The main part of the park is Zion Canyon, and unlike most canyons, it is the canyon floor, rather than the rim, that is the main place to visit. The surrounding area is riddled with narrow slot canyons, which make for unique hikes and epic experiences canyoneering for the more adventurous.  

    When you visit Zion National Park, you can spend the time on the flat canyon floor surrounding by incredible red rock views, or embark on some of the most unique hikes in the country. There is a reason that Zion is the best national parks in the United States

    However, planning a trip to Zion National Park can be tricky.  The park is incredibly popular and can get crowded.  Use this guide to visiting Zion National Park to get all the information you need to have an amazing Zion trip. 

    Zion National Park at a Glance

    State: Utah
    Main attractions: Canyon, slot canyons, views, hikes
    Shuttle: yes


    Itineraries for Zion National Park

    *** Available for purchase ***

    These are not your average blogger itineraries, which tend to be short summaries of things that they did on their one visit there. These itineraries are all about YOU and helping you have the best time.

    They will take away the overwhelm that often accompanies planning a trip to Zion National Park. They’re a combination detailed hour-by-hour itinerary (with options for different activity levels), guidebook, hiking guide, driving directions, travel tips, and more. You’ll need nothing else to plan your trip – it’s all done for you (but you still have choices).

    One-day, two-day or three-day detailed itineraries for Zion National Park available for purchase.

    EXCLUSIVE BONUS CONTENT WITH ZION NATIONAL PARK ITINERARIES

    Zion Accommodations Guide
    Zion Dining Guide
    Zion Shuttle Guide

    Zion National Park Travel Guide

    Please note this post may contain affiliate links, which means we may receive a commission, at zero cost to you, if you make a purchase through a link. Please see our full Disclosure for more information. If you have any questions, please contact me.

    How to Plan a Trip to Zion National Park  

    Planning trip to Zion National Park can be overwhelming – but it doesn’t have to be.  Use this Zion National Park visitors guide for all your Zion National Park trip planning.  Click on the links below to go to detailed guides and get answers to your questions.  

    The best option to take away the overwhelm is to pick up a detailed itinerary. I have done all the heavy lifting for you. Choose from one, two or three days. Each itinerary is crammed with detailed driving and hiking maps and hour-by-hour suggestions of what to do and where to go to avoid spending your precious vacation time waiting in lines or competing with crowds on the trails.   

    Get a 1-day, 2-day, or 3-day itinerary for Zion National Park here 

    Make your planning easier with this step-by-step guide to all you need to think about and do when planning a trip to Zion.

    Read More: HOW TO PLAN A TRIP TO ZION

    7 things you should AVOID doing when planning a trip to Zion National Park.

    Read More: 7 MISTAKES TO AVOID IN ZION NATIONAL PARK

    There is a reservation system for the iconic Angels Landing hike. This guide breaks it all down for you. 

    Read More: HOW TO GET ANGELS LANDING PERMITS

    To access the main part of Zion Canyon, you need to take a (free) shuttle most of the year. But it’s possible to visit Zion without dealing with the crowded shuttle.  Learn how here. 

    Read More: HOW TO VISIT ZION WITHOUT THE SHUTTLE


    Entrance Fee for Zion National Park 

    There is an entrance fee for the park.  Find the latest fees on the NPS website

    To avoid long lines and save money, if you are planning to visit more than just Zion this year, it can be great value to purchase an America The Beautiful pass.   

    The one-year pass includes standard entrance at all sites managed by the National Park Service, Forest Service, Fish and Wildlife Service, Bureau of Land Management, Bureau of Reclamation and Army Corps of Engineers. The pass covers the entrance fee for a driver and all passengers in a personal vehicle or up to 4 adults at sites that charge per person.

    Get an America The Beautiful pass here


    Zion National Park Entrances 

    Zion National Park has four main sections.  

    1. East Mesa:  The East Entrance Station is here. This is where you’ll enter the park if you come from Kanab, Grand Canyon’s North Rim, or Bryce Canyon.  You’ll go through the Zion-Mt Carmel Tunnel soon after entering.  There are several hiking trails into the park in this area of the park, too. 
    2. Zion Canyon: Zion’s main entrance is here, the South Entrance Station.  The main gateway town of Springdale is also here.  This is where you’ll enter the park if you come from Las Vegas.   
    3. Kolob Terrace: Enter along Kolob Terrace Road near Virgin (open seasonally only).  There is no formal entrance gate here. The road continues all the way to Kolob Reservoir and beyond.
    4. Kolob Canyons: This is a more remote section of the national park that is accessed separately and has its own entrance station. 

    Zion National Park Visitor Centers  

    There are three Visitor Centers in Zion National Park.

    1. The main Zion Canyon Visitor Center is just inside the South Entrance.
    2. The Zion Human History Museum also has a smaller Visitor Center.
    3. There is also the Kolob Canyon Visitor Center.

    For opening hours, which vary seasonally, visit the NPS website.  


    Things to Do in Zion National Park

    There is no shortage of things to do in Zion National Park, no matter when you go. 

    Whether you are an adrenaline junkie or prefer to enjoy scenery on a scenic drive, there are plenty of activities in and around Zion to enjoy.

    Read More: 17 THINGS TO DO IN ZION

    Zion is famous its breathtaking scenery.  Don’t miss out on any of the amazing views with this detailed list and description of the best photo spots in the park. 

    Read More: BEST PHOTO SPOTS IN ZION

    One of the most fun – and most adventurous – activities in and near Zion is canyoneering. Rappelling down a series of narrow slot canyons is something you’ll never forget. Get full details and description in this comprehensive guide. 

    Read More: CANYONEERING IN ZION


    Best Tours of Zion National Park


    Where to Near Zion National Park 

    The main gateway town for Zion National Park is Springdale, which is just outside the main South Entrance.  Find accommodations in Springdale here 

    If you’d prefer to stay in a house, cabin or apartment in and around Springdale, my guide to the best vacation rentals in Springdale has some top suggestions. 

    Read More: BEST RENTALS NEAR ZION


    Places To Inside Zion National Park 

    There is one lodge inside the park. Check availability for Zion Lodge. 

    There are three campgrounds.  South Campground and Watchman Campground are both just inside the South Entrance in the main Zion Canyon section. Lava Point Campground is in the Kolob Terrace section of the park. There are no campgrounds in the Kolob Canyons part of the park.  


    How to Get To Zion National Park

    When you plan a trip to Zion National Park, you need to know the best way to get there.

    Read More: HOW TO GET TO ZION NATIONAL PARK

    If you need a rental car, find one on RentalsCars.com 

    If you’re looking for a flight, find a good deal on Skyscanner 


    The Best Airports for Zion National Park

    There are several airports you can fly into/ out of for Zion. The largest is Las Vegas, but others like St. George Regional Airport are closer.

    Read More: CLOSEST AIRPORTS TO ZION

    Use Skyscanner to scan the Internet for the cheapest deals to help you decide and book. 


    When to Visit Zion National Park 

    In general, the best times to go to Zion National Park are May and September. You’ll avoid the summer crowds and heat, but everything will be open. However, these aren’t the only good times to go. 

    Read the quick summary of the best times to visit Zion National Park so you can make the right decision.

    Read More: BEST TIME TO VISIT ZION

    This Zion National Park trip planner has detailed information on every season, so you can make the most informed decision for your own trip. 

    Read More: VISITING ZION NATIONAL PARK THROUGHOUT THE YEAR


    How Long to Spend in Zion National Park

    How many days you should go to Zion for depends on your interests, how much you like to hike (and how fit you are), your budget, and how much time you have available.  I recommend at least three days for the main section of the park, and longer if you want to visit Kolob Canyons as well. 

    If you have less or more time, and/ or want to see what you can realistically expect to see and do in that time, this Zion guide has a more detailed breakdown for you. 

    Read More: HOW MANY DAYS FOR ZION


    Hikes in Zion National Park

    Zion National Park has two of the most famous hikes in the US – Angels Landing and The Narrows. But there are dozens of other amazing trails as well. This Zion hiking guide describes the top hikes.  It includes trail details so you can choose the best hikes for you. 

    Read More: BEST HIKES IN ZION

    The Narrows is an iconic hike in the Virgin River through a narrow slot canyon a few feet wide and hundreds of feet high. Get full trail details and descriptions in this detailed guide. 

    Read More: THE NARROWS TRAIL GUIDE

    There is a reservation system for the iconic Angels Landing hike. This guide breaks it all down for you. 

    Read More: HOW TO GET ANGELS LANDING PERMITS


    Travel Insurance for Zion National Park 

    In addition to using this Zion National Park visitor guide for trip planning, you should also think about travel insurance.  Protect yourself against trip cancellation, loss or theft of your property, or any medical emergencies.   

    A great insurance option is Travelex.  It has coverage for all you’ll need. You can compare Travel Insurance plans here or get a quote right now: 

    728x90 Get Quote

    Travel Tips for Zion National Park 

    My top three tips for a Zion National Park visit are: 

    1. Have a plan.  Avoid the crowds as much as possible and see all the highlights.  Get one of my detailed itineraries – they tell you when and where to go to have the least chance of getting caught in crowds and the best chance of being in the right place at the right time to enjoy the trails and take the best photos.  Get the 1-, 2-, and 3- day itineraries here
    2. Get an early start each day. This is the best way to beat the crowds and have the best light for photos.  
    3. Don’t just do the famous hikes.  There are dozens of incredible trails in Zion that are less crowded but no less spectacular than their famous counterparts.


    To save this guide to Zion National Park for later, Pin It to your National Parks board:

    Zion National Park Travel Guide

    About the Author

    James Ian Yosemite

    James Ian is a national park, camping and hiking expert.

    He has dedicated his life to travel, visiting more than 80 countries, all 7 continents and all of the main national parks in the United States. With over 35 years experience in the travel industry, James has worked on cruise ships, at resorts and hotels, and as a travel planner who’s helped hundreds of people plan successful trips to US national parks. 

    Based on his experience visiting our national parks multiple times, in-depth research and expertise as a travel planner, James has published detailed itineraries for most of the major national parks in the US. These itineraries, as well as in-depth park guides, comprehensive camping and hiking gear reviews and buying guides, and helpful packing lists and gift guides will help you have your own incredible trip to US national parks without stress and hassle.

    As a national park expert, James has contributed to many publications, including Time Business News, Savoteur, Best Trip, and Wired.

    Read more…


    The 42-Mile Scenic Loop Drive, Grand Teton National Park: Complete Guide

    You pull over into a turnout at the side of the road.  Spread before you, stretching from left to right, is a sensational view of jagged, snow-covered mountain peaks, rising straight up out of the plains.

    Just below, a river stretches slowly around a bend.  Aspen trees, leaves turning yellow in an early fall chill and white trunks glistening in the early morning sunshine, are the perfect foreground for stunning photos. 

    This is just one stop of many on this sensational 42-mile drive, where jaw-dropping vistas start to become blasé.

    TOP TOUR: Book a full-day tour now
    TOP HOTEL PICK: Check availability now
    FIND THE CHEAPEST CAR RENTAL: Search Discover Cars for the best deals
    FIND THE CHEAPEST FLIGHTS: Search Skyscanner for the best deals
    GET TRAVEL INSURANCE: Get insured with Travelex before you go

    No time right now to read about the 42-mile Scenic Loop Drive, Grand Teton National Park?  Pin it and save it for later:

    The Grand Tetons Epic 42 Mile Scenic Drive
    Ultimate Guide to Grand Teton Scenic Drive

    Please note this post may contain affiliate links, which means we may receive a commission, at zero cost to you, if you make a purchase through a link. Please see our full Disclosure for more information. If you have any questions, please contact me.

    The best drive through Grand Teton National Park is along the 42-mile Scenic Loop Drive.  Grand Teton National Park’s craggy peaks rise dramatically off the side, lakes provide the perfect foreground for breathtaking mountain views (most of the ten best views in the Grand Tetons are along this drive) and there are always good chances of seeing moose, bison and bears, especially in the early morning and late afternoon. 

    This drive makes my list of the most beautiful drives in US national parks and is an integral part of my Grand Teton itineraries. No matter how long you spend in Grand Teton, you should do this drive.

    FREE DOWNLOAD
    Subscribe to monthly updates with tips for planning, travel inspiration and trip ideas and get instant access to the free PDF of this
    Guide to 42-mile Scenic Grand Tetons Drive

    Note that this post is written for doing the Grand Teton 42 mile loop in summer when everything is open. However, it’s also possible to do part of the drive in winter. If you are visiting Grand Teton National Park in winter, check out the best things to do in winter in the Grand Tetons and Jackson and read my Guide to Visiting Grand Teton National Park in winter.

    If you are planning to visit Grand Teton National Park in spring, summer or fall, make your planning easy and stress free with a detailed itinerary. I have 1-, 2-, and 3-day itineraries for Grand Teton that include all the park highlights, give you choices based on your preferred activity level and take all the stress out of planning your trip.

    Check out the three Grand Teton itinerary options

    The 42-mile Scenic Loop Drive, Grand Teton National Park FAQs

    Can you drive through Grand Teton National Park?   

    Yes, you can. In fact, when you take the 42 mile scenic drive, Grand Teton National Park reveals itself in all its splendor :-).

    What is the 42- mile scenic loop drive?

    There are two main Grand Teton National Park scenic drives – the inner road and the outer road.  The Grand Teton loop drive route combines them both.  It goes along Teton Park Road (the inner park road, Grand Teton NP), which runs parallel to the mountains inside the park and then loops around, continuing back along the parallel US 26, which is a little further away from the mountains but still with incredible views of the mountains. 

    How long does it take to drive the loop in Grand Teton National Park?

    The whole 42 miles/ 67.5 km scenic drive through Grand Teton National Park takes 1-2 hours (or even longer), depending on how often and for how long you stop. However, the Grand Teton drive will almost certainly take you much longer, as there are so many places to stop and take in the views along the way.

    Where does the 42 Mile Scenic Drive start?

    You can enter the drive from three different points. 

    • From Jackson in the south, drive north on 191/ 89/ 26 (the same road – it just shares three numbers) to Moose Junction and start there. 
    • If you are coming from Yellowstone in the north, you will enter the loop at the Jackson Lake Junction
    • You can also come from the Dubois in the east via the Togwotee Pass and enter at the Moran Junction

    How can I do the Grand Teton National Park scenic loop drive?

    There are really two options:

    1. Drive yourself

    If you didn’t drive to Grand Teton National Park in your own car, you can rent a car.  If you are only visiting Grand Teton National Park or starting your trip here, you will fly into Jackson Hole airport.  You can pick up a rental car there and then do the drive yourself.

    A Grand Teton self driving tour gives you the greatest flexibility.  You can take as long as you want and spend extra time to see wildlife or soak in views that you especially love.  You can also do the drive more than once (as I did) at different times of the day. 

    Find the best rental car for you right here Before you book your rental car, read my Guide to Finding the Cheapest Car Rental for tips on how to save money.

    Note that the inner Teton Park Road is inside the national park gates, so you will need to pay an entrance fee for the park. It costs $35/ week for vehicles.

    Something to keep in mind is that if you plan to visit more than a couple of parks in a year (or the same park more than twice), then look at getting the America the Beautiful Pass.  It gives you unlimited access for a year (from date of purchase) to over 2,000 federal recreation sites including all U.S. national parks plus national forest and BLM lands.  It includes admission for one vehicle or four people (for places that charge per person).

    Buy the America the Beautiful Pass here

    2. Take a tour

    Driving in Grand Teton National Park is pretty easy, but if you don’t want to drive, there is another option.  You can get a transfer from the airport to Jackson (book one here to save yourself the hassle of arranging it when you get there), and then arrange a half day or day tour that will take you along the scenic drive. 

    A big advantage to taking a tour is that the guides know the best photo spots and likely places to see wildlife.  Health and safety measures are all taken on these tours.

    Half Day tour from Jackson or Teton Village

    The four-hour tour hits all of the highlights including Mormon Row and Moulton Barn, Moose, Signal Mountain, Oxbow Bend, Elk Ranch Flats (which is where I saw bison for the first time) and Snake River Overlook (where Ansel Adams took his iconic photos of the Grand Tetons).  Maximum 10 travelers.

    Check availability and prices for the half-day tour here

    Full day private tour from any location in the area

    If half a day isn’t enough and if you would rather have a private tour and all the flexibility that that gives you (you can stay longer if you are enjoying a particular stop) then this private tour is the best choice for you.  The tour, which can accommodate up to 4 people, is 8-9 hours and includes lunch and binoculars for wildlife spotting.  The longer time period means you have a greater chance of seeing animals. The tour travels the entire scenic loop road with multiple stops along the way.

    Check availability and prices for the full-day private tour here

    When is the best time of day for the Grand Teton loop drive?

    The drive is best done in the early morning or dusk. 

    Early morning is best, because there is a good chance of seeing wildlife, plus the mountains glow a bright golden color when the first beams of sunlight shine on them.  Even if you don’t manage to get up for the sunrise, the light is best on the Teton ranges throughout the morning. 

    Noon to mid-afternoon is the worst time, as the mountains are silhouetted and photos typically don’t turn out well (I speak from experience!).  However, the views are lovely looking towards the Gros Ventre Mountains at this time, for example, from the top of Signal Mountain.

    Sunset over the mountains, especially the minutes after the sun has actually set behind the peaks, can be stunning and dusk is a good time to see moose and bears.

    What do I need to take on the Grand Teton scenic drive?

    There are a few main things I recommend (other than snacks):

    1. A camera (or camera phone)

    Grand Tetons National Park is a photographer’s dream. I use my iPhone and this suits me just fine as I’m not a hard-core photographer, but I was glad I had it.

    If you are serious about photography, you will have a real camera with all the bells and whistles, and you will certainly take better photos than I do. 

    If you have a Sony A6400 camera, check out the best lenses for the Sony A6400 here.

    2. A tripod

    If you are taking photos in the early morning or late afternoon, a tripod is essential for long exposure shots.  Because I don’t want to spend my vacation lugging around lots of equipment, I use a Gorillapod tripod.  It’s tiny, flexible, light and can be set up on all types of uneven surfaces.  They sell them for regular cameras and cell phones.

    Check out prices for regular camera Gorillapods here and for cell phone Gorillapods here.

    3. A wide-angle lens and a zoom lens

    Most of the time my camera phone is fine as is, and with the iPhone 11, there is a wide-angle feature, which I love, but the wider the better for the expansive landscapes of the Grand Tetons. 

    You can get a set of a 0.45x wide-angle lens and a 15x macro lens for close ups.  It’s compatible with all single and dual-camera phones including all iPhone models, Samsung Galaxy and Note, Google Pixel, Huawei and more. Check prices on Amazon here.

    The digital zoom on a camera phone gives the illusion of getting close, but then when you look at the photos later, they are not at all clear.  An optical zoom is much better. 

    For a zoom lens, check out this 28x telephoto lens.  It works on the front and rear cameras for both single-camera and multi-camera phones including iPhone11 XS MAX XS XR X 8 Plus 8 7 Plus 7 6 Plus 6, Samsung Galaxy S9 Plus S9 S8 Plus S8 S7, Edge S7 S6 Edge+ S6 Edge S6, Google Pixel 3 XL 3 2 XL 2 XL LG iPad, Motorola HTC One Plus, HUAWEI and more. Check out prices on Amazon here.

    4. Binoculars

    Even if you aren’t a serious birdwatcher, a solid pair of binoculars is a great investment for this trip.  The best binoculars for the money are the Vortex Optics Diamondback 10×42 Roof Prism Binoculars.  They are reasonably priced, good for casual wildlife viewing and come with a carry case.  I used them to see bison, moose and black bears up close, all on this drive.  Check them out on Amazon here.

    Because I take binoculars on all of trips (and have a pair in my kitchen to check out deer in my backyard), I have done extensive research into the best binoculars. These detailed guides include helpful info on what to look for, detailed reviews of the best of the best, and recommendations based on what exactly you will use them for and your price range:

    When is the Grand Teton loop road open?

    Can you drive through Grand Teton National Park in winter?

    Yes, but the full loop road is not open year-round.  The inner road (Teton Park Road) can get a great deal of snow in winter, so Teton Park Road is closed to vehicular traffic November 1 – April 30 and open May 1 – October 31.

    The outer road is a highway (it shares the numbers 26/89/191) and is kept clear year round. 

    What are the highlights of the Grand Teton National Park drive?

    I strongly recommend doing the entire Grand Teton National Park loop, whether that it all at once or broken up over two or more days. Driving through Grand Teton National Park  really is the best way to see the park (in addition to getting out and hitting the hiking trails). I also recommend taking your time and stopping ta all the stops.

    However, if your time is limited and you just want to see the top highlights on the Grand Teton drive loop, stops absolutely not to miss are:

    • Oxbow Bend
    • Snake River Overlook
    • Schwabacher landing
    • Mormon Row
    • Jenny lake
    • Signal Mountain

    Read more about these in my guide to the best viewpoints in Grand Teton National Park.


    42-mile Scenic Loop Drive Grand Teton National Park Map

    Click on the Grand Teton scenic loop map to see the full route and the major points of interest along the way.  

    You can save the Grand Teton scenic drive map for easy reference.

    FREE DOWNLOAD
    Subscribe to monthly updates with tips for planning, travel inspiration and trip ideas and get instant access to the free PDF of this
    Guide to 42-mile Scenic Grand Tetons Drive

    Description of the 42-mile Scenic Loop Drive, Grand Teton National Park

    I will describe the Grand Teton National Park scenic drive from Moose in a clockwise direction (though you can go in the opposite direction, of course). 

    The Inner Park Road

    If you are coming from Jackson, head north out of town on 26/89/191 and start the Grand Teton scenic byway at Moose, turning left off the highway and crossing the Snake River to arrive in this small settlement. 

    Moose

    It is worth visiting spending time in Moose for Doonan’s Chuckwagon; the Church of Transfiguration, a tiny wooden church with a large window behind the altar framing stunning views of the Grand Teton mountains; and Menors Ferry historic district. 

    Chapel-of-the-Transfiguration Grand Teton Scenic Drive
    Chapel of the Transfiguration

    You can take a side trip on the Moose Wilson Road, where there is a good chance of seeing wildlife. However, part of this road is dirt and not passable with an RV. The National Park Service rangers are surfacing the road in 2022, so there will be road closures.

    After leaving Moose, drive north along Teton Park Road past Windy Point Turnout and Taggart Lake Trailhead to arrive at Jenny Lake after about 7.7 miles (approx. 15 minutes if you don’t stop). Jenny Lake is the starting point for many great hikes (see my post on The Best Hikes in Grand Teton NP for more details) plus boat trips on the lake.

    Jenny Lake

    From Jenny Lake, continue north on Teton Park Road for 3.3 miles.  This is about six minutes without stopping, but you should stop at the Cascade Canyon turnout for direct views into the canyon. 

    View-of-Grand-Tetons-from-Cascade-Canyon-Turnout
    Cascade Canyon Turnout

    3.3 miles north of the Jenny Lake is the Jenny Lake Loop road to the left.  The Jenny Lake scenic drive is a 4-mile one-way road south heading south via the Cathedral Group Turnout (definitely worth a stop, as the Cathedral Group of peaks are some of the most stunning in the park).

    Cathedral-Group-Turnout-Grand-teton-National-Park-scenic-drive
    Cathedral Group Turnout: This was taken in the afternoon. Photos are better in the morning

    Other stops include the trailheads for Leigh and String Lakes (see Best Hikes in Grand Teton National Park for full details of these hikes), the Jenny Lake Lodge (the grand jewel of the lodges in the park – and one of the best national park lodges and inns) and the Jenny Lake Overlook.  This is definitely best in the morning, as the sun is behind it in the afternoon, causing a silhouette/ bad lighting for photography. 

    View-of-GRand-Tetons-across-jenny-Lake-afternoon
    Jenny Lake Overlook

    Signal Mountain

    You will eventually get back to Teton Park Drive. Turn left/ north and repeat this 2.3 miles/ 3.7 km of the main loop drive. From the north end of the Jenny Lake Loop road, it is 6 miles/ 9.7 km (8 minutes with no stops) to the turn off to Signal Mountain Road to the right. On the way are Mountain View Turnout, Mount Moran Turnout and Potholes Turnout.

    You can hike from Signal Mountain Lodge up to the Signal Mountain summit (worth it if you like to hike, see details of this here), but you can also drive.  Near the top of Signal Mountain is Jackson Lake Overview, which is a great place to see the sunrise, as you will see the first rays of dawn shining on the mountains, turning Teton Peak a brilliant orange color, then turning the mountains a beautiful pink and orange behind Jackson Lake. 

    Signal-Mountain-Summit-Road-Grand-Teton-National-Park-Jackson-Lake-Overlook
    Jackson Lake Overlook

    If you are doing the drive in the afternoon, there is a viewpoint at the top of the mountain over Jackson Hole valley and the Gros Ventre Mountains that is different from the mountain views of the Grand Tetons, but beautiful nonetheless.

    View-from-Signal-Mountainafternoon-opposite-direction-from-Grand-Tetons
    View of the Gros Ventre Mountains from the top of Signal Hill

    Back on the main Teton Park Road, it is another 1.2 miles/ 1.9 km north to Signal Mountain Lodge, where there is access for boating, dining and accommodations.

    Continuing north for another 1.7 miles/ 2.7 km is Jackson Lake Dam.

    Jackson-Lake-Dam Grand teton Scenic Drive
    Jackson Lake Dam

    1.3 miles from there is the junction with John D Rockefeller Junior Parkway (Route 191).  Turn right. 

    The Outer Road

    If you are coming from Yellowstone, this is where you will join the 42-mile loop.  Grand Teton National Park entrance fee is only needed for the inner road. Let’s continue in a clockwise direction along the outer road. 

    Oxbow Bend

    It is just another 1.2 miles/ 1.9 km to Oxbow Bend, one of the most famous scenic viewpoints in the park.  In the early morning, this bend of the Snake River often provides a perfect reflection for the mountain views.

    Grand-Tetons-from-Oxbow-Bend-morning
    Oxbow Bend

    5 minutes – 2.5 miles/ 4 km from this is the Moran entrance to the Park.  Just past this is the junction to Highway 26/287 which is where you will come from if you come from Dubois.

    Turn right on to US 26/ Highway 89/ 191.  This road runs roughly parallel to Teton Park Road, but is further away from the mountains.  Most of this stretch goes through farmland, and there are good chances of seeing herds of bison in the fields along the roadside.  2.3 miles/ 3.7 km along is Elk Ranch Flats turnout on the right, which is worth a quick stop. 

    Bison-from-outer-road-Grand-Teton-National-Park
    Bison from Antelope Flats

    Another 2.1 miles/ 3.4 km is Cunningham Cabin Historic Site down a short road to the right. This was the scene of a historic wild west shoot out back in the day. Pick up a pamphlet with more information near the small parking lot.

    Snake River Overlook

    A further 4.2 miles/ 6.8 km takes you to Snake River Overlook, also on the right.  This is a ‘don’t miss’ stop.  It is the place where the famous photographer Ansel Adams took many of his most iconic photos of the mountains. 

    The view is truly stunning – with a lovely bend of the Snake River in the foreground below you and the mountains forming the perfect backdrop. 

    This is a great spot to see the sunrise.  The sun rises behind you, but the mountains glow in the first beams of early morning light. 

    Grand-Tetons-from-Snake-River-Overlook-sunrise
    Snake River Overlook at dawn

    Schwabacher Landing

    Another 3 miles/ 4.8 km along is Teton Point lookout on the right, with more great views. Then 1.3 more miles/ 2 km is the turnoff to Schwabacher Landing.  Keep a careful eye out for the sign.  You will turn off on to a dirt road and it is a short drive to the end of the road.  There are two parking areas near each other. From there, you can do short walks along the Snake River. 

    Moose are commonly seen here, and if you are very lucky, you can get the classic shot of a moose with water dripping off its chin, framed by the Grand Teton ranges.  There is also a beaver dam and plenty of birds. 

    Photography is best in the morning, but it is also a great place to come in the late afternoon to see the wildlife and birdlife.

    Schwabacher-Landing-Grand-tetons
    Schwabacher Landing

    Back on the main road, Glacier Point Turnout is 0.6 miles/ 1 km further down the road, then Blacktail Pond Overlook another 2.1 miles/ 3.4 km along, down a short side road to the right. Just past this is Antelope Flats Road to the left. 

    Mormon Row

    Turn down Antelope Flats road to get to Mormon Row.  Mormon Row is a major historical site in the area.  Originally settled by a group of Mormons in the mid 1800’s, it became a farming community. 

    Today, there are six main buildings, a drainage system, barns, fields and corrals. It is most famous for the photogenic Moulton Barn, built in 1935.

    1.6 miles/ 2.5 km down the road, take the first right.  Moulton Barn is 0.3 miles/ 0.5 km down the road on your right. If you have seen photos of a picturesque barn with the Grand Teton mountains behind it, then chances are it is Moulton Barn.  This is maybe the single most iconic shot of the mountains. 

    For the classic photo, there is a spot (worn bare) near the fence off to the left and in front, some distance away from the barn.  This spot frames the barn perfectly.

    T.A.-Moulton-Barn-on-Mormon-Row-Teton-National-Park
    Moulton Barn on Mormon Row

    Back on the main road, it is 1.2 miles/ 2km to the junction with Teton Park Road to the right.  This will take you back to Moose. 

    If you entered the scenic road loop from Yellowstone or Dubois, turn right to continue around the loop.  If you came from Jackson and want to return, then keep going straight. 

    Safety when driving the Teton scenic loop

    There isn’t a huge amount of traffic on this road and the road is well maintained in season.  However, there is some traffic AND you may encounter large animals. Therefore, always use the turnouts to pull over and take photos.  It can be dangerous pulling over to see wildlife just along the side of the road. 

    At night, drive slowly and keep an eye out for animals.  We saw black bears on the road at late dusk.  Elk, bison, mule deer and pronghorn antelope also frequently cross roads and moose even use the roads to travel along at times, so be careful.   

    Travel Insurance for Grand Teton National Park

    You do NOT want to hit a moose with your car (you will be the loser in that ‘fight’).  Even animals that are smaller than a moose (which is BIG) will do damage to your rental car and if you don’t have insurance, it will be a very expensive encounter.  Travel insurance covers other things too such as a lost or damaged camera and illness, so you should never travel without good travel insurance.  If you want to learn more about travel insurance, read my Guide to Buying Travel Insurance.

    A good insurance option is Travelex.  You can compare Travel Insurance plans here or get a quote right now:

    728x90 Get Quote

    Planning and Packing for Grand Teton National Park

    I always use a combination of blogs and guidebooks to plan my trip.  Although I usually use Lonely Planet guidebooks, for my Grand Tetons/ Yellowstone trip, I preferred the Compass American Guides: Yellowstone and Grand Teton National Parks by Brian Kevin.  Most of the book is about Yellowstone, but there is a sizable section on Grand Teton National Park too, with lots of practical information.

    Buy it on Amazon here

    When you are ready for your trip, check out my Essential Packing List. And if you are planning to do some hiking, make sure you have everything on my Day Hikes Essentials list.

    FREE DOWNLOAD
    Subscribe to monthly updates with tips for planning, travel inspiration and trip ideas and get instant access to the free PDF of this
    Guide to 42-mile Scenic Grand Tetons Drive

    Enjoy the drive!

    Do you have any adventures in Grand Teton National Park to share? I’d love to hear them. Join my private Facebook group National Parks Collectors and comment and let me know.

    WHERE ARE YOU IN YOUR PLANNING PROCESS?

    Are you just starting to think about taking a national parks trip? Get Inspiration
    Are you starting to plan a trip to Grand Teton National Park? Read my Guide to Grand Teton National Park
    Are you looking for a detailed itinerary for Grand Teton National Park? Get a one-, two-, or three-day Grand Teton Itinerary
    Are you looking for a place to stay near Grand Teton National Park? Find a vacation rental near Grand Teton National Park
    Are you ready to book your trip? Use these Planning and Booking Resources
    Do you want to read a book about Grand Teton National Park? Check out my Recommended Reading List for Grand Teton National Park

    If you are also planning to visit Yellowstone in the same trip, read my Yellowstone National Park Guide and detailed Yellowstone itineraries.

    If you liked this post about the 42 mile loop Grand Teton National Park, please share the love and Pin it to your National Parks board!

    Ultimate Guide to Grand Teton Scenic Drive
    The Grand Tetons Epic 42 Mile Scenic Drive

    About the Author

    James Ian Yosemite

    James Ian is a national park, camping and hiking expert.

    He has dedicated his life to travel, visiting more than 80 countries, all 7 continents and all of the main national parks in the United States. With over 35 years experience in the travel industry, James has worked on cruise ships, at resorts and hotels, and as a travel planner who’s helped hundreds of people plan successful trips to US national parks. 

    Based on his experience visiting our national parks multiple times, in-depth research and expertise as a travel planner, James has published detailed itineraries for most of the major national parks in the US. These itineraries, as well as in-depth park guides, comprehensive camping and hiking gear reviews and buying guides, and helpful packing lists and gift guides will help you have your own incredible trip to US national parks without stress and hassle.

    As a national park expert, James has contributed to many publications, including Time Business News, Savoteur, Best Trip, and Wired.

    Read more…


    Parks Collecting is a participant in the Amazon.com Services LLC Associates Program, an affiliate advertising program designed to provide a means for sites to earn advertising fees by advertising and linking to amazon.com. Amazon and the Amazon logo are trademarks of Amazon.com, Inc. or its affiliates. As an Amazon Associate I earn from qualifying purchases.


    The 10 Best Hikes In Grand Teton National Park

    Hiking Grand Teton National Park is a real treat.  Canyons take you deep into the mountains so are you surrounded by dramatic scenery; ponds, rivers and ponds give you a good chance to see moose up close and personal; stunning mountain views are reflected in mirror-like alpine lakes; trails take you to hidden waterfalls…. 

    There are easy strolls, moderate day hikes and even challenging multi-day treks. No matter what your comfort (and fitness) level, there is a hike (or 10) for you.

    TOP TOUR: Book a full-day tour now
    TOP HOTEL PICK: Check availability now
    FIND THE CHEAPEST CAR RENTAL: Search Discover Cars for the best deals
    FIND THE CHEAPEST FLIGHTS: Search Skyscanner for the best deals
    GET TRAVEL INSURANCE: Get insured with Travelex before you go

    No time right now to read about the best hikes in Grand Teton National Park? Pin it and save it for later:

    10 Amazing Hikes in Grand Teton National Park Anyone Can Do
    10 Great Hikes in Grand Teton National Park Not to Miss
    10 Awe Inspiring Hikes to Add to your Grand Teton National Park Bucket List

    Please note this post may contain affiliate links, which means we may receive a commission, at zero cost to you, if you make a purchase through a link. Please see our full Disclosure for more information. If you have any questions, please contact me.

    8 out of these 10 hikes are included on my Grand Teton itinerary.

    If you are planning to visit Grand Teton National Park in spring, summer or fall, make your planning easy and stress free with a detailed itinerary. I have 1-, 2-, and 3-day itineraries for Grand Teton that include all the park highlights, give you choices based on your preferred activity level, and take all the stress out of planning your trip. 

    Check out the three Grand Teton itinerary options 

    Read my guide on How Long to Spend in Grand Teton if you aren’t sure how long to go for (though if you want to do all of these hikes, you’ll need a few extra days than most people go for – you won’t be disappointed if you do!).

    Tips for hiking in Grand Teton National Park

    Before we look at the 10 best Teton hikes, here are a few things to consider:

    1. America The Beautiful Pass

    These hikes are inside the national park, so you will need to pay to enter. It costs $35/ week per vehicle or $25 per week for person if you enter on foot or bicycle. However, if you plan to visit more than a couple of parks in a year (or the same park more than twice), then look at getting the America the Beautiful Pass.  

    It gives you unlimited access for a year (from date of purchase) to over 2,000 federal recreation sites including all U.S. national parks plus national forest and BLM lands.  It includes admission for one vehicle or four people (for places that charge per person).

    Buy the America the Beautiful Pass here

    2. Wildlife

    Chances are very good on many of the best hikes in the Tetons of seeing wildlife, including moose and black bears.  The NPS requires you to stay at least 25 yards from most wildlife and at least 100 yards from bears (and wolves).

    Moose can be aggressive if they feel threatened – and they are VERY big – so stay well away from them. 

    Always take something with you to scare bears away before you get too close to them.  Get bear spray here and a bear bell here.

    3. Trekking Poles

    Some of the longer hikes can be over rough terrain and in windy canyons.  For those hikes, especially, it can be a good idea to take trekking poles with you.

    There are things you need to consider when choosing hiking poles, including the weight, material, price, pole design, grips and straps, tips and shock absorbers durability. 

    I like the Foxelli ones – they are lightweight, shock absorbent and collapsible with cork grip handles. Check them out on Amazon here.

    4. Adequate Footwear

    You definitely want to have good footwear. Read reviews and recommendations of the best hiking shoes/ boots and the best hiking sandals and for easier summer walks, the best walking sandals.

    5. Weather

    Finally, the weather can change quickly, so it is important to always be prepared.  If you aren’t sure what you need to take and wear, check my Day Hike Essentials list.

    FREE DOWNLOAD
    Subscribe to monthly updates with tips for planning, travel inspiration and trip ideas and get instant access to the free PDF of this
    Guide to the Best Hikes in Grand Teton National Park

    If you are planning to visit Grand Teton National Park in spring, summer or fall, make your planning easy and stress free with a detailed itinerary. I have 1-, 2-, and 3-day itineraries for Grand Teton that include all the park highlights, give you choices based on your preferred activity level and take all the stress out of planning your trip.

    Check out the three Grand Teton itinerary options

    Best Hikes in Grand Teton National Park

    Hiking in Grand Teton national Park is some of the best in all of America’s national parks. The first five hikes on this list are all connected in some way and can be done together as one really long hike or can be broken up into easier chunks.

    Note that these hikes are all for the warmer months when the snow has melted. If you plan to visit Grand Teton National Park in winter, read my Grand Tetons Winter Guide.

    So, what are the best hikes in Grand Teton National Park?

    1. Jenny Lake Loop, Grand Teton National Park

    Jenny-lake-reflections-boat-grand-tetons

    The next four hikes on this list all start at the opposite side of Jenny Lake from the parking lot and visitor center, half way around the loop, so they can be combined with all, or part of, this loop hike. 

    Most people bypass the loop trail by taking the Jenny Lake boat shuttle, but the flat loop around Jenny Lake is a fairly easy Grand Teton hike that is well worth doing.  It’s one of the most scenic hikes in Grand Teton National park: there are stunning views of Cascade Canyon and the Cathedral Group of mountain peaks.   

    All or part of this trail can be easily combined with other easy hikes in Grand Teton National Park, including Moose Pond and Hidden Falls, to make a full day of it.

    Trail length: 7.5 miles / 12 km

    Elevation change: 275 feet/ 84 m

    Difficulty: Moderate

    TrailheadJenny Lake Trailhead

    The hike goes around the entire Jenny Lake, the second-largest lake in Grand Teton NP.  To go counterclockwise, start near the boat dock area and head north along the eastern shore of the lake.  It is fairly flat through woods here, though there are a couple of small hills.  There are plenty of incredible views of the Cathedral Group and Cascade Canyon from this part of the trail.  In the early morning, the surface of the lake is often as still and clear as a mirror, so there are perfect reflections of the mountains in the lake. 

    You will see a large sloped area that was burned by fire in 1999.  You hit this after about 2.6 miles/ 4.1 km as you get to the junction of the String Lake Outlet. This side trail takes you a bridge about 0.5 miles/ 800 m away that then connects to String Lake.  The junction to the main String Lake trail is off the right another 0.8 miles/ 1.3km along. You can take this if you also want to do the String Lake loop.  

    Continue straight to follow the Jenny Lake loop. At the 4.9-mile/ 7.9km mark, you get to the West Shore boat dock.  If you have had enough, you can take the Jenny Lake shuttle back to the trailhead/ parking lot.  You could also take the shuttle to this point and complete half the loop.

    If you want to hike to Hidden Falls, Inspiration Point, Cascade Canyon or Lake Solitude, then this is where all of those trails start.

    To keep going around the Jenny Lake Loop, take the right fork. The trail goes through more woods on this side of the lake. At around 6.4 miles/ 10.3 km, there is another trail to Hidden Falls (the horse trail).  Stay left. Just after that is a short trail off to the left to Moose Pond.

    At 6.6 miles/ 10.6km is the Valley Trail junction – stay left.  Soon you will come to the boat dock and then the end of the trail.

    How long does it take to hike around Jenny Lake? About 2.5 hours. This is a lovely walk with frequent lake views, mountain views from the eastern shore and through pine forest. 

    Tips:

    • Do the hike counter-clockwise in the morning for the best light (or clockwise in the afternoon). 
    • Part of the trail goes near the road, so early morning, when there is less traffic, is best.
    • There are several popular Grand Teton day hikes in the area, so the Jenny Lake parking lot fills up early, especially in summer. Stay at the Jenny Lake Campground or get there before 9:00am to be sure you get a parking spot.
    • The trail is quite narrow in parts, so if you are new to hiking, I recommend checking out my Guide to Hiking Etiquette 101

    2. Hidden Falls Trail, Grand Teton National Park

    Hidden Falls Grand Teton National Park

    One of the most popular places to visit in Grand Teton, Hidden Falls can be reached by hiking 2.4 miles of the Jenny Lake Loop trail (clockwise) each way to the trailhead, or by taking the Jenny Lake shuttle to and/ or from the trailhead.  The shuttle takes about 12 minutes and leaves throughout the day in season. 

    The Hidden Falls and Inspiration Point trails are connected, and since they are two of the best short hikes in Grand Teton National Park, combining them is very common.

    Trail length: 1.3 miles / 2.1 km

    Elevation change: 230 feet/ 70 m

    Difficulty: Easy

    TrailheadJenny Lake Trailhead

    Start on the Inspiration Point trail.  Grand Teton NP does have black bears, so I recommend taking  bear spray or a bear bell.

    The trail heads uphill from the West Boat Dock through spruce forest for about 0.3 miles/ 0.5 km, crossing a wooden bridge over Cascade Creek, before reaching the Jenny Lake Loop trail.  Another 0.2 miles/ 320 m along is the horse trail; go straight.  Soon after that is the side trail to Hidden Falls. Turn left here. The falls are a short distance along this side trail.

    The falls are hidden from view until you get right to their base, hence the name Hidden Falls.  Grand Teton National Park has several waterfalls, but at about 200 feet high (over several drops), these are probably the most impressive. 

    After visiting the falls, return back to the main trail.  You can then turn right to go back to the lake or turn left to continue on to Inspiration Point (recommended).

    Tips:

    • There are several popular Grand Teton trails in the area, so the Jenny Lake parking lot fills up early, especially in summer. Stay at the Jenny Lake Campground or get there before 9:00am to be sure you get a parking spot.  
    • Best combined with the hike to Inspiration Point.
    • This hike is ideal for beginner hikers. If you are a novice hiker, read my hiking guide for beginners.
    • The trail is often busy, so be prepared for crowds.  Early morning or late afternoon have fewer people.

    3. Inspiration Point, Grand Teton National Park

    Inspiration-Point-hike-Grand-Teton-national-Park

    The Jenny Lake hike to Inspiration Point Teton National Park is one of the most popular Grand Teton hikes and is usually combined with Hidden Falls and often with Cascade Canyon and/ or the Jenny Lake Loop trails.

    Trail length: 2.2 miles / 3.5 km

    Elevation change: 450 feet / 137 m

    Difficulty: Easy-moderate

    Grand Teton Inspiration Point TrailheadJenny Lake Trailhead

    Start by following the description above to Hidden Falls.  If you are unfamiliar with reading trail markers, check out my Guide to Reading Trail Markers.

    Either continue straight along the trail and skip Hidden Falls (not recommended – it is just a short distance down a side trail) or when returning from the Hidden Falls side trail, turn left to Inspiration Point. From the Hidden Falls trail, it is less than 0.5 miles/ 0.8 km and 200 feet/ 61 m elevation each way. 

    The trail gets rockier and is uphill, but is worth it for the views.  Near the point, there is a short section of the trail that goes along a steep ledge.  If you have a fear of heights, this can be a little hairy; however, it is fairly short.

    From Inspiration Point, there are clear views over Jenny Lake, Jackson Hole and the Gros Ventre Mountains in the distance.  There are views behind you of Symmetry Spire and Storm Point; however, the main views are to the east of the lake and valley. 

    To be perfectly honest, I don’t think this view is as stunning as the views of the Grand Teton range, but it does give you a different perspective from the ubiquitous mountain views that you see for most of your trip to Grand Teton National Park.

    Previously, you could continue on from Inspiration Point to Cascade Canyon.  However, for the past few years, this connecting trail has been closed for rehabilitation of the trail.  If you wanted to hike to Cascade Canyon, the only option was to return back to the lake and take the other trail up to Cascade Canyon.  Check when you arrive to see if the connecting trail is open or not.

    Tips:

    • Due to the position of the sun, photos are best in the afternoon.   Late afternoon will give you nice light and fewer people, but be prepared for the 2-mile hike around Jenny Lake or coordinate with the last boat back.
    • There are several popular Grand Teton National Park hiking trails in the area, so the Jenny Lake parking lot fills up early, especially in summer. Stay at the Jenny Lake Campground or get there before 9:00am to be sure you get a parking spot.
    • Best combined with Hidden Falls.

    4. Cascade Canyon, Grand Teton National Park

    Cascade canyon grand teton national park

    One of the best day hikes in Grand Teton National Park, the Cascade Canyon loop is my personal favorite.  It’s not too hard or long and the scenery is absolutely breathtaking.  Plus, I saw moose and river otters.  Read a full description of the Cascade Canyon hike here.

    The hike can easily be combined with other popular Grand Teton National Park hikes to Hidden Falls and Inspiration Point

    Trail length: 9 miles/ 14.5 km

    Elevation change: 1,110 feet/ 338 m

    Difficulty: Moderate

    TrailheadJenny Lake Trailhead

    Unless you are hiking to Hidden Falls and Inspiration Point first, take the right trail from the boat dock.  The first 1.5 miles/ 2.5 km is quite steep as it climbs up through woods to the start of the canyon.  Once you are in the canyon, it does flatten out though. 

    When you turn around a corner and the forest thins out and you see the canyon for the first time, your jaw will hit the ground.  The view of Grand Teton and Mount Owen to the south and the craggy cliffs of the south side of Hanging Canyon to the north will take your breath away!  Literally. 

    For the next 1.5 miles/ 2.4 km, the trail follows alongside Cascade Creek, with stunning views the whole way.  There are good chances of seeing black bears, moose and even river otters. 

    The trail then heads into woods, so the views are more obscured.  However, the further the trail goes, the steeper the south canyon wall gets.  About another mile/ 1.6 km or so, there are stunning views through the trees of the waterfall that gives the canyon its name cascading down the entire side of the mountain from a glacier atop the craggy peaks of Mount Owen down to the creek far below. 

    Another half a mile/ 800 m onward, the trail reaches a fork.  The left/ south fork goes to Hurricane Pass and Alaska Basin and the right/ north fork goes to Lake Solitude and eventually connects to the parallel Paintbrush Canyon.

    If you just plan to do the Cascade Canyon Trail, this is the point most people turn back.  If you have some more steam left, you can continue along Cascade Canyon to Lake Solitude (another 2.5 miles/ 4 km each way).

    I LOVED this hike – not that hard and such amazing scenery! 

    Tips:

    • There are several popular Grand Teton National Park trails in the area, so the Jenny Lake parking lot fills up early, especially in summer. Stay at the Jenny Lake Campground or get there before 9:00am to be sure you get a parking spot.
    • This is quite a long hike, so I recommend making sure you have everything on my Day Hike packing list with you.
    • To get to the trailhead, you hike 2.4 miles from the Jenny Lake parking lot along the Jenny Lake Loop trail; hike 1.7 miles/ 2.7 km from the String Lake parking lot; or take the Jenny Lake shuttle boat across the lake (recommended).  What time does Jenny Lake shuttle start? The times vary throughout the season, but I recommend taking the earliest boat. Reservations for the shuttle boat are not necessary.

    5. Lake Solitude, Grand Teton National Park

    Lake-Solitude-Grant-Teton-National-Park-hike

    One of the more challenging Grand Teton hiking trails, this is an extension of the Cascade Canyon trail.  The gorgeous alpine lake surrounded by steep mountain slopes makes it one of the best hikes Grand Teton and well worth the extra effort to get there.

    Trail length: 15.3 miles / 24.6 km

    Elevation change: 2,350 feet / 716 m

    Difficulty: Difficult

    TrailheadJenny Lake Trailhead

    How do you get to Lake Solitude, Grand Tetons?

    The Lake Solitude hike (Tetons National Park) starts through Cascade Canyon.  At the fork at the end of the canyon, take the North Fork.   The trail continues through spruce forests and crosses Cascade Creek twice.  The first time is just after the fork.  Look to the left to see an historic cabin that was built in 1935.  The second creek crossing is another 0.4 miles/ 640 m along.  You emerge from the forest here to see a jaw-dropping U-shaped, glacier-carved canyon in front of you. 

    Soon after this, the trail starts to climb from the canyon floor up the west side of the canyon.  The trail is rocky for most of the rest of the way.  It is possible to camp here (get a backcountry permit from the national park office).  If you don’t want to carry all that gear with you, although it is one of the longest Grand Teton National Park day hikes, it is definitely doable in a day.  However, if you want to combine it with the Paintbrush Canyon hike, then I recommend camping overnight (though the combo is also possible in one long day).   

    Note that this part of the trail can still be covered in snow into June and July, but is usually covered in wildflowers late July/ early August. The canyon narrows as the trails becomes steeper.  The last mile/ 1.5 km is quite tough.

    After about 7.5 miles/ 12 km, the views open up and there an absolutely breathtaking view of Lake Solitude below you, surrounded by a steep granite wall about 1,500 feet/ 450 m tall.  A waterfall cascades down the cliff into the lake. 

    To get down to the lake, take the side trail about 100 yards/ meters further on.  A small rocky peninsula in the lake makes a perfect viewpoint. 

    After enjoying the stunning views, you can either continue on to Paintbrush Canyon Divide (this adds another 5 miles/ 8 km to your hike and the first couple of miles are steeply uphill, so it best done by breaking it up by camping overnight at one of the nearby campgrounds) or return through Cascade Canyon.  The return trail has great views of Mt. Owen and Grand Teton.

    This tag-on to the Cascade Canyon hike is hard going, but if you are fit enough, the views of this gorgeous alpine lake is worth the effort.

    Tips:

    • There are several popular Grand Tetons hiking trails in the area, so the Jenny Lake parking lot fills up early, especially in summer. Stay at the Jenny Lake Campground or get there before 9:00am to be sure you get a parking spot.
    • There are backcountry campgrounds near Lake Solitude.  Staying there breaks the hike up, making the hike from here to Paintbrush Canyon easier in one way, but keep in mind that you will need to carry your gear up steep trails.  If you plan to do this, you will need a back-country permit
    • This can be a challenging hike, so make sure you have the right gear.  Check out my Best Hiking Gear list
    FREE DOWNLOAD
    Subscribe to monthly updates with tips for planning, travel inspiration and trip ideas and get instant access to the free PDF of this
    Guide to the Best Hikes in Grand Teton National Park

    6. Moose Pond, Grand Teton National Park

    Moose Pond Grand teton National park

    The Moose Ponds trail is not only one of the best hikes in Grand Tetons to see wildlife, it’s also one of the most popular Grand Teton easy hikes.

    Trail length: 2.7 miles/ 4.3 km

    Elevation change: 195 feet/ 59 m

    Difficulty: Easy

    TrailheadJenny Lake Trailhead

    The Moose Pond trail (Grand Teton National Park) starts along the Jenny Lake Loop trail.  Go down the paved path to the boat deck, turn left and cross the footbridge.  There are stunning views of the mountains across the lake, which can look like a mirror, especially early on the morning.  At 0.8 miles/ 1.3 km is the junction with the Lupine Meadows Road trail.  Keep straight. 

    About 0.2 miles/ 320 m further on, the trail to Moose Ponds is on your left. It’s a bit of a climb up to a point where you can see the pond below.  There are often moose sighted in the pond, eating grasses growing in the shallow water, surrounded by woods and framed by the stunning Teewinot Mountain. 

    Be careful not to get too close to the moose though, as they are wild animals and can be dangerous if they feel threatened.  This is a good time to use a zoom lens.   If you take photos with your iPhone, as I do, you can get an attachable zoom lens on Amazon here.

    The trail goes back downhill to the pond, circles around the first pond and continues around the top/ north of the second pond.  At 1.3 miles/ 2km, there is a small side trail to a small lookout with views over the pond.

    From there, you can turn back or extend the hike by almost a mile and continue in a loop through Lupine Meadows via Lupine Valley Road.

    Of course, everyone has their own experiences, but this was the best – and by far the most picturesque – sighting I had of moose in Grand Teton and Yellowstone National Parks.

    Tips:

    • This hike is often led by a park ranger. Check at the Jenny Lake Visitor Center and sign up if you can.  You will hike in a small group, which is not everyone’s cup of tea, but you will get a commentary from a ranger with interesting facts about the park, wildlife and geology.   Of course, you can also do it by yourself.
    • This is just of the many hiking trails Grand Teton National Park has in the area, so the Jenny Lake parking lot fills up early, especially in summer. Stay at the Jenny Lake Campground or get there before 9:00am to be sure you get a parking spot.

    7. String Lake Loop, Grand Teton National Park

    String-Lake-Trail-grand-teton-national-park

    The String Lake hike is one of the best day hikes Grand Teton National Park because of the incredible views of some of the key Teton peaks seen across a gorgeous lake. 

    Trail length: 3.8 miles/ 5.7 km

    Elevation change: 275 feet / 84 m

    Difficulty: Easy

    TrailheadString Lake Trailhead (or Leigh Lake Trailhead)

    Going counter clockwise from the String Lake Trailhead, the trail, which is mostly paved at this point, follows the east shore of the lake, passing some interpretative signs.  There are amazing views of the Cathedral Group (Teewinot Mountain, Grand Teton and Mount Owen) and Mount Moran.   The path ends after 0.3 miles/ 0.5 km and for the next 0.3 miles/ 0.5 km follows the road to the Leigh Lake Trailhead. 

    You will then be walking on the Leigh Lake Trail for the next 0.8 miles/ 1.3 km.  This part of the trail, around the eastern shore of String Lake, provides wonderful views of Mount Moran across the lake.  At the one-mile/ 1.6 km mark, you’ll pass the String Lake Horse Trail to the road.  Keep straight.  Another 0.4 miles/ 640 m takes you to the Bearpaw Lake Trail junction.  If you turn right, you get to Leigh Lake and then Bearpaw lake. 

    For the String Lake loop, turn left. You will soon cross a small wooden bridge over the Leigh Lake Outlet then continue on through lodgepole pine forest until the 2-mile/ 3.2-km mark.  At this point, you would turn right to continue on to Paintbrush Canyon.  However, you will turn left to continue around String Lake. There are lovely views of String Lake below you for parts of this stretch of the hike.

    At 3.4 miles/ 5.4 km, you will get to the junction to the Jenny Lake Trail to the right.  If you wanted to combine this hike with the Jenny Lake loop, you would turn right. 

    To continue around String Lake, turn left. Another 0.2 miles/ 320 m along there is a small bridge over the String Lake Outlet.   Turn left and another 0.1 miles/ 150 m takes you back to the trailhead.

    This is an especially lovely hike in the morning, when the lake often provides a perfect reflection of the surrounding mountains.

    Tips:

    • This is one of the most popular hikes at Grand Teton National Park, so the parking lot at the trailhead fills early.  I recommend getting there before 9:00am in summer to get a spot.
    • Go around the lake counter clockwise for the best mountain views in the morning light.

    8. Paintbrush Canyon, Grand Teton National Park

    paintbrush trail grand teton

    Although this is a challenging hike due to its length and elevation change, it is easily one of the best hiking trails in Grand Teton National Park because of the spectacular mountain scenery and not one, but four, lakes.

    Trail length: 5.8 miles/ 9.3 km to Holly Lake. 7.6 miles/ 12.2 km to Paintbrush Divide.  9.8 miles/ 15.8 km to Lake Solitude.

    Elevation change: 2,592 feet/ 790 m to Holly Lake.  3,865 feet/ 1,178 m to Paintbrush Divide.

    Difficulty: Difficult

    TrailheadLeigh Lake Trailhead or String Lake Trailhead

    If you start at the Leigh Lake parking lot, go down to String Lake and turn right on the String Lake Loop Trail. There are stunning views of Teewinot Mountain, Rockchuck Peak and Mount Moran.  About 0.5 miles/ 800 m along, the String Lake Horse Trail branches off to the right.  Continue straight.  You will pass the junction with the Bearpaw lake Trail, which goes to Leigh Lake, at 0.9 miles/ 1.5 km.  Turn left and you will soon cross a small bridge over the Leigh Lake Outlet, which joins Leigh and String Lakes. The trail slopes up slightly, going through pine forest.  1.6 miles/ 2.6 km in, the trail meets the main Paintbrush Canyon trail to the right.   This is where you meet up with folks who started at the String Lake Trailhead. 

    If you start at the Spring Lake Trailhead, head left and you will almost immediately meet up with the Jenny Lake Loop trail.  Turn right and follow this trail for about 0.3 miles/ 0.5 km until the junction with the String Lake Trail.  Go straight ahead/ right to continue around String Lake for about half a mile/ 800 m.  You will then get to the junction of the Paintbrush Trail to the left.  The String Lake loop goes around to the right.  This is where you will meet up with people who started at the Leigh lake Trailhead. Go left/ straight.

    The trail then proceeds up a series of switchbacks to the canyon.  3 miles/ 4.8 km into the hike, you’ll pass through huckleberry bushes for about a mile.  This is prime bear country, so be sure to have a  bear spray or a bear bell with you.  3.9 miles/ 6.3 km in is the mouth of Paintbrush Canyon.  Cross the creek and the views open up and you will be rewarded with breathtaking views of the canyon.  You can often see moose in the creek along this section of the trail.

    Around 4.5 miles/ 7.2 km, there are large boulders and the trail is steep and rocky.  Trekking poles are a good idea here.  There are lovely views of Leigh and Jackson Lakes.

    6 miles/ 9.7 km from the trailhead, the trail splits.  These trails join up again, so you can go either way, but the right trail is shorter and more scenic.  Soon after you take the right fork, there is a small marshy lake with great views of Paintbrush Divide.  Another 0.5 miles/ 800 m takes you to Holly Lake, nestled below Mount Woodring.

    Holly-Lake-Paintbrush-Canyon Grand teton National Park
    Holly Lake Grand Teton National Park

    0.2 miles/ 320 m further along, the trail rejoins the other trail (that you took if you turned left at the fork). The trail then ascends quite steeply and it can be snowy around here. There are a couple of short sections on narrow ledges with sheer drop offs on one side – if you are afraid of heights, these can be quite hairy!

    7.6 miles/ 12.2 km in, you get to Paintbrush Divide.  There are absolutely stunning 360° views of the incredible Grand Teton ranges.  This is the common turning back point, though it is possible to continue on another 2.2 miles/ 3.2 km (downhill) to Lake Solitude.

    Tips:

    • Starting at the Leigh Lake Trailhead is 0.2 miles/ 320 m shorter each way; however, starting at the String Lake Trailhead takes you around the bottom of String Lake, which is a particularly pretty trail. 
    • This can be combined with the Lake Solitude hike through the parallel Cascade Canyon for an epic 20-mile/ 32-km loop (17.5 miles/ 28 km if you take the shuttle boat across Jenny Lake).  If you do that, it is recommended to hike in a counter-clockwise direction for the best light for photos. 
    • Paintbrush Divide is high (10,696 feet/ 3,260 m) and can be covered in snow even in July, so check conditions before you set out if you plan to do the full Paintbrush-Cascade Canyons loop.
    • String Lake Trailhead especially fills up early as hiking in the Grand Tetons is popular, so get there early (before 9:00am is best).

    9. Signal Mountain, Grand Teton National Park

    Signal-Mountain-Summit-Road-Grand-Teton-National-Park-Jackson-Lake-Overlook

    Although you can drive to many places in Grand Teton National Park (read about the don’t-miss 42-mile Tetons scenic loop drive here), hiking is much more rewarding.  This is definitely true of Signal Mountain.  A road goes right to the top, but the trail gives you more time to enjoy the views and your surroundings along the way.

    Trail length: 6.6 miles/ 10.6 km

    Elevation change: 1,040 feet / 317 m

    Difficulty: Moderate

    TrailheadSignal Mountain Lodge

    The trailhead is about 0.2 miles/ 300m from the main parking lot, opposite where the park employees live.  Walk west along the road after the general store and campground office or walk along the path just east of the campground office. The trail almost immediately crosses Teton Park Road and then starts a steep uphill, crossing Signal Mountain Road after 0.5 miles/ 800 m. 

    Soon after you cross the road, you pass a small pond covered in water lilies and proceed through a pine forest.  About 0.6 miles/ 1km, there are great views of Mount Moran.  0.1 mile/ 150 m further along, there is a fork in the trail.  The trail splits here, but rejoins later, so you can go either way.  However, it is best to take the right fork for the ascent, which goes past a lake, and take the other trail coming down so that you get mountain views on the way back.

    1.9 miles/ 3km into the hike, the trails rejoin and is fairly steep uphill, passing through meadows and more lodgepole pine forests for 0.6 miles/ 1 km before reaching Jackson Lake Overlook. This is an especially lovely spot to see the sunset/ early morning light, with stunning views of Jackson lake and the Grand Teton Mountains.

    You can continue on to Signal Mountain Overlook, but this last 0.8 mile/ 1.3 km is along the road.

    Tip:  Jackson lake Overlook is a great place to see the sunrise and Signal Mountain Overlook is a great place to see Jackson Hole and the Gros Ventre mountains late afternoon or sunset.


    10. Taggart Lake, Grand Teton National Park

    Taggart-Lake-one-of-the-best-hikes-in-Grand-Teton-National-Park
    Taggart Lake. Photo credit: Ashley + Nick from Illness to Ultra

    If you are looking for a calm and gentle hike that still provides a stunning view of the Grand Tetons, then you need to head out on the Taggart Lake Trail, one of the best hikes in the Grand Tetons. 

    You have the option of making this a 3.3 mile/ 5.3 km out and back or an almost 4-mile/ 6.4 km loop hike. With only 300 feet/ 91 m of elevation gain, Taggart Lake is a great little hike for the entire family. 

    Trail length: 3.3 miles/ 5.3 km (out and back) or 4 miles/ 6.4 km (loop via Beaver Creek Trail)

    Elevation change: 300 feet/ 91 m

    Difficulty: Easy

    TrailheadTaggart Lake Trailhead

    As you start from the trailhead, veer right (the Beaver Creek Trail is to the left).  You can expect to hike through aspen-covered moraine until the trail opens up to spectacular views of the Grand Tetons for the rest of the way.

    The hike itself can get a little confusing as it crosses both the Beaver Creek Trail and the Bradley Lake Trail.  At about 1.1 miles/ 1.7 km is the junction with the Bradley Lake Trail off to the right. 

    Continue straight to Taggart Lake. A GPS or map is helpful when you reach these junctions to make sure you stay on track. See my Guide to the Best GPS for Hiking if you’re thinking of getting one.

    However, this is usually a heavily trafficked trail, so friendly hikers are always available to offer directions should you need them.  

    Once you arrive at the 305-acre, glacially carved lake, feel free to hop in for a swim to cool down – that is if you can handle cold water temperatures!  Having lunch next to the lake is the preferred way of enjoying the incredible lakeside view of the nearby Grand Tetons.

    After lunch, if you are up for a longer hike, consider tacking on the extra 1 mile/ 1.6 km to the nearby, but smaller, Bradley Lake. If not, feel free to head back the way you came or take the loop trail back to the parking lot.

    Tips:

    • The Taggart Lake trailhead is located only 2.3 miles north of the Moose Entrance Station or 3.5 miles south of the Jenny Lake Visitor Center. 
    • Can be extended by adding Bradley lake and by returning via the Beaver Creek Trail

    Explored by fellow bloggers Ashley + Nick from Illness To Ultra


    Grand Teton National Park Trail Map

    Click on the Grand Teton National Park trail map below to see each individual hike.

    For more a more detailed Grand Teton National Park hiking map, get the National Geographic topographical trail maps for Grand Teton National Park.


    Happy hiking in Grand Tetons National Park!

    Do you have any favorite hikes or tips for hiking Grand Teton National Park? I’d love to hear them. Join my private Facebook group National Parks Collectors and comment and let me know.

    WHERE ARE YOU IN YOUR PLANNING PROCESS?

    Are you just starting to think about taking a national parks trip? Get Inspiration
    Are you starting to plan a trip to Grand Teton National Park? Read my Guide to Grand Teton National Park
    Are you looking for a detailed itinerary for Grand Teton National Park? Get a one-, two-, or three-day Grand Teton Itinerary
    Are you looking for a place to stay near Grand Teton National Park? Find a vacation rental near Grand Teton National Park
    Are you ready to book your trip? Use these Planning and Booking Resources
    Do you want to read a book about Grand Teton National Park? Check out my Recommended Reading List for Grand Teton National Park

    If you are also planning to visit Yellowstone in the same trip, read my Yellowstone National Park Guide and detailed Yellowstone itineraries.

    FREE DOWNLOAD
    Subscribe to monthly updates with tips for planning, travel inspiration and trip ideas and get instant access to the free PDF of this
    Guide to the Best Hikes in Grand Teton National Park

    If you liked this guide to the Grand Teton National Park best hikes, Pin It to your Grand Tetons, National Parks and Hikes boards!

    10 Most Scenic Grand Teton Day Hikes
    Ultimate Day Hike Bucket List Grand Teton National Park
    10 Epic Day Hikes in Grand Teton National Park

    About the Author

    James Ian Yosemite

    James Ian is a national park, camping and hiking expert.

    He has dedicated his life to travel, visiting more than 80 countries, all 7 continents and all of the main national parks in the United States. With over 35 years experience in the travel industry, James has worked on cruise ships, at resorts and hotels, and as a travel planner who’s helped hundreds of people plan successful trips to US national parks. 

    Based on his experience visiting our national parks multiple times, in-depth research and expertise as a travel planner, James has published detailed itineraries for most of the major national parks in the US. These itineraries, as well as in-depth park guides, comprehensive camping and hiking gear reviews and buying guides, and helpful packing lists and gift guides will help you have your own incredible trip to US national parks without stress and hassle.

    As a national park expert, James has contributed to many publications, including Time Business News, Savoteur, Best Trip, and Wired.

    Read more…


    Parks Collecting is a participant in the Amazon.com Services LLC Associates Program, an affiliate advertising program designed to provide a means for sites to earn advertising fees by advertising and linking to amazon.com. Amazon and the Amazon logo are trademarks of Amazon.com, Inc. or its affiliates. As an Amazon Associate I earn from qualifying purchases.