Trying to figure out how to see the best of Arches without hiking every trail? You’re not alone.
If you’re short on time, traveling with kids, or just want to take in the views without breaking a sweat, the Arches Scenic Drive is the perfect solution – but it helps to know exactly where to stop and what not to miss.
I’ve driven this route more than once – sometimes with a packed itinerary, other times just soaking in the views. I’ve explored every pullout, stopped at every major overlook, and learned which stops are truly worth it (and which ones you can skip if you’re pressed for time).
This guide is for anyone who wants to experience the park’s highlights from the road – whether you’re planning a quick half-day visit or want to combine driving with a few short walks.
Here’s a quick teaser: One of the best viewpoints is actually at the very start – Park Avenue feels like you’ve stepped into a red rock cathedral, and it’s just steps from the parking lot.
In this guide, I’ll walk you through every stop along the Arches National Park scenic road, with tips, photos, and insider details to make your drive unforgettable.
Whether you’re planning your whole trip around this or just using it as a starting point, I’ll help you make the most of driving in Arches National Park.
Let’s hit the road and check out the best stops along the Arches Scenic Drive.
Watch the stops and tips for the Arches scenic drive on video:
🔔 You can also watch this video on YouTube directly (opens in new tab).
🎙️ Or listen as a podcast:
🛏️ TOP HOTEL PICK: Check availability now
🚘 FIND THE CHEAPEST CAR RENTAL: Search Discover Cars for the best deals
✈️ FIND THE CHEAPEST FLIGHTS: Search Skyscanner for the best deals
🧳 GET TRAVEL INSURANCE: Get insured with Travelex before you go
📱 TAKE AN AUDIO TOUR: Buy an audio tour now
Table of Contents
Arches National Park Driving Tour
You shouldn’t need any more than this guide for the scenic drive, but if you prefer to listen to information, you can get an audio tour of Arches National Park.
It works with an App on your phone. When you purchase the audio tour, you’ll get a link to download the Tour Guide App. Stories will then play automatically as you proceed along the drive at each location as determined by GPS. No cell signal or WiFi required.
➡️ GET AN AUDIO SELF-GUIDED TOUR OF ARCHES NATIONAL PARK
Subscribe to daily national parks planning tips, travel inspiration and trip ideas and get instant access to the free PDF of this guide to
The Arches National Park Scenic Drive
Tips for the Scenic Drive Arches National Park
Overview of Drive
The entrance to Arches National Park is just 5 miles from Moab. Soon after you enter the park, you’ll see the Visitor Center on your right.
After the Visitor Center, the road winds up a series of switchbacks to the main part of the park. The scenic drive starts after you get up to the plateau.
Most of Arches National Park is visited along this one road. However, there are two side roads that I’ve included here. The first is to the Windows Section, with a stop at Garden of Eden. The other is the trailhead and viewpoints for Delicate Arch.
Timed Entry Permits
To reduce traffic congestion, the NPS has implemented a timed entry system into Arches National Park for several of the peak months (April – October) during the peak times (7:00AM – 4:00PM). If you want to enter the park at these times, you will need to get a timed entry permit.
➡️ Read my Guide to the Arches National Park Timed Entry System for full details.
Parking at Arches National Park
You’d think that having a timed entry permit system would mean that you’d be able to get a parking spot at any of the stops on the scenic drive. Not so much.
The timed entry has definitely helped eliminate or at least reduce long lines to get in, but parking at many of these overlooks – and especially those that are also trailheads – is still limited and often fill up.
I’ve described the drive in the order you’ll come to everything as you drive from the entrance to the end of the road. However, you don’t have to do everything in this order.
If you plan to do any hiking, you’ll want to mix the order up so you can time your hikes with parking spaces, the sun, etc.
I strongly recommend checking out my 1- and 2-3 – day itineraries for Arches National Park. These are detailed itineraries that are carefully timed to minimize the possibility of waiting for parking spots.
Arches National Park Scenic Drive Time
The entire drive (including the side roads) is 46 miles out and back. You can drive it straight through (and back) in about 2 hours without stopping. However, you’ll want to stop and enjoy the sights.
To allow for short stops at each of the viewpoints, you should allow 4 – 5 hours. This is without any hiking.
Adding in Hikes
If you have mobility issues, then just doing the scenic drive and enjoying all the viewpoints is definitely worth it! However, if you can, I really recommend doing some hikes. There are several short and easy hikes, plus some that are longer and more challenging.
➡️ READ MORE: Best Hikes in Arches National Park
What to Take on the Arches Scenic Drive
My main recommendation is food and water. The national park gets really hot in summer. You’ll stay cool in your vehicle, but whenever you get out to enjoy the views, you’ll be exposed to the elements, so drink plenty of water. And of course, always be sun safe.
Where to eat along the Arches Scenic Drive
There are no restaurants, cafes, or shops inside Arches National Park. The only accommodation is a primitive campground at Devils Garden at the far end of the road. So, unless you want to drive out of the park for lunch and back in, which I don’t recommend, you’ll want to have food with you. Pack a picnic lunch.
There are designated picnic areas across from Balanced Rock, at Devils Garden, across the road from Balanced Rock, at the Delicate Arch Viewpoint and at the Visitor Center.
The Arches National Park Scenic Drive Stops
Here are all the major stops along the scenic drive in Arches National Park.
1. Park Avenue Viewpoint and Trailhead
Soon after getting to the top of the switchbacks from the Visitor Center, you’ll reach a small overlook, Moab Fault Overlook. Unless you really want to stop at every single overlook on the drive, I wouldn’t bother with this.
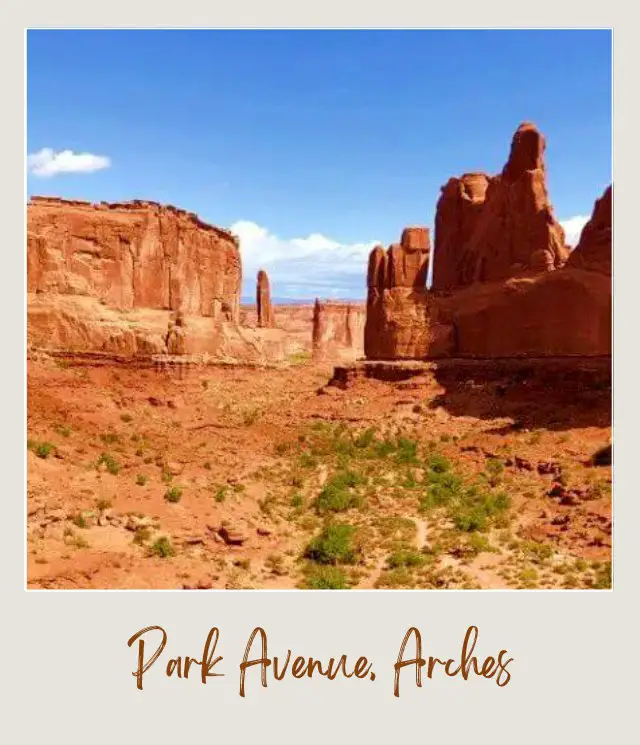
Soon after (2.1 miles from the Visitor Center), you’ll come to the Park Avenue Viewpoint and Trailhead. You’ll definitely want to stop here. There’s a decent sized parking lot, but it does fill up. If it’s full, wait until someone leaves.
There’s a short walk on a mostly flat, paved, accessible path from the parking lot to the viewpoint. There are interpretive signs along the path.
Park Avenue is a canyon with towering sandstone cliffs on both sides that reminded whoever named it of the skyscrapers along the sides of Park Avenue in New York City.
There are no arches visible here, but the views are stunning. You’ll see Queen Nefertiti Rock on your left and Queen Victoria Rock on your right. The Courthouse Towers are also on your left, further along.
The light is best for photos in the late afternoon, though the views are great any time of the day.
If you want to hike down into Park Avenue, the trail starts at the viewpoint. The trail goes to the Courthouse Towers viewpoint, so if someone in your party can drive but doesn’t want to hike, they could drive there and pick you up at the end so you don’t need to hike back. On the hike, you can see baby Arch up high on the left near the end.
➡️ READ MORE: Best Hikes in Arches National Park
2. La Sal Mountains Viewpoint

0.3 miles (one minute) further along the road, you’ll see a turnoff on your right to this viewpoint. The viewpoint is a short distance down this side road.
There’s a paved path beside the parking area.
In addition to somewhat distant views of the La Sal Mountains, in the opposite direction are good views of some of the major rock formations in the Courthouse Towers area, including Three Gossips, Sheep Rock, and The Organ.
To get a closer view of Courthouse Towers, there’s a short path on a rocky, uneven surface. There are Landmarks on the Landscape interpretive panels.
3. Courthouse Towers Viewpoint
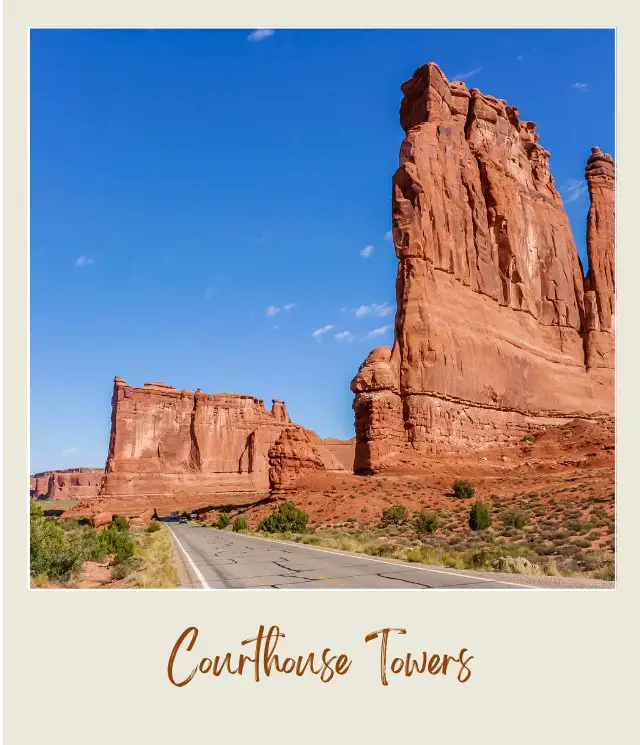
A mile further along the main road (about 2 minutes), you’ll come to a long parking lot on your right. The Courthouse Towers Viewpoint is the far end of the Park Avenue Trail and if you want to do this hike, you could do it from this direction. Across the road, looking back, Courthouse Towers are on your right.
Looking away from Park Avenue, with the main Arches Road behind you, the large rock formation on your right is The Organ. The Tower of Babel is to your left, a little further along the road.
4. Petrified Dunes Viewpoint

2.4 miles further along (about 4 minutes), there’s a pullout on the right side of the road. In the distance, you can see some petrified sand dunes. It’s not the most exciting view, but it’s kind of cool to think that the rounded sandstone hills you can see used to be sand dunes.
About 200 million years ago, the area was a desert, covered in sand dunes made of fine-grained sand blown down from the northwest. Over time, the dunes were covered in other layers of sediment. These layers compressed the sand. Groundwater containing dissolved minerals trickled through the sand dunes below, leaving calcium carbonate that glued the grains of sand together, forming hard Navajo Sandstone. Then erosion washed away the upper layers, exposing the original sand dunes, now made up of hard sandstone. Pretty cool, huh!
5. Balanced Rock
OK, I know the national park is called “arches” and you haven’t seen any arches yet (other than possibly Baby Arch in Park Avenue), but the next stop is also not an arch. You’ll get to them, I promise.
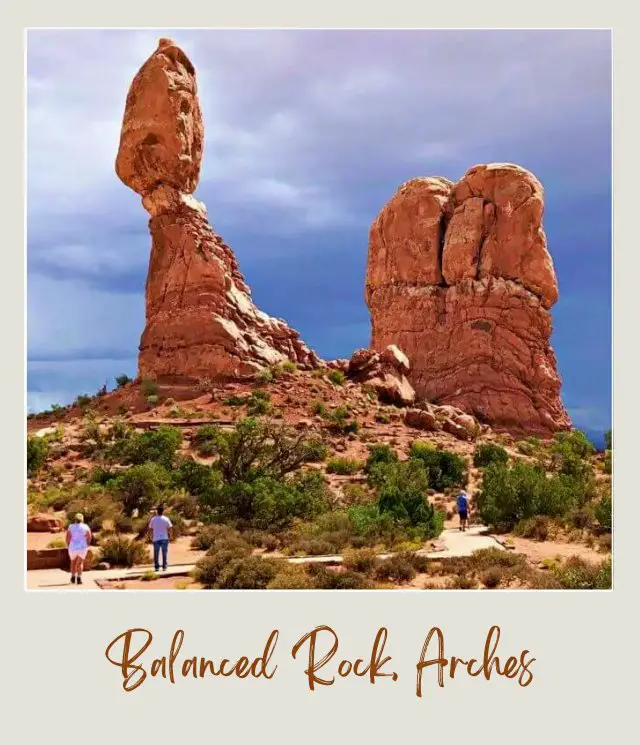
3 miles (about 7 minutes) from the Petrified Dunes Viewpoint, you’ll come to one of the most iconic features in the national park, Balanced Rock. This is a 128-foot-tall, 3,600-ton rock that looks like it balanced precariously on a pillar of sandstone.
It’s actually an optical illusion. The rock is, in fact, firmly attached to its pedestal by Dewy Bridge mudstone. However, the mudstone is eroding, so eventually the rock will fall. In fact, it used to have a smaller sibling called Chip-Off-the-Old-Block, which fell in 1975-6.
The parking area is reasonably sized, but popular. You can see the rock from the parking lot/ side of the road. However, there is a 0.3-mile lollipop/ lasso trail that goes close to the rock, then loops around it. It looks very different from different angles. The trail is mostly flat and paved.
There’s a picnic area nearby on the other side of the road.
➡️ READ MORE: Fun Facts About Arches National Park
6. Garden of Eden

0.2 miles after Balanced Rock, you’ll come to a turn off on the right to Windows Section. Another 1.1 miles (about 2 minutes) down this side road, you’ll see the sign for Garden of Eden on your left.
This was named by someone with an imagination after the rocky shapes that supposedly resemble flowers and trees. You can be the judge of that.
There are no trails in this area, but you can walk through the pillars to get closer. The surface is uneven and there is some elevation change.
If you don’t want to do that, you can see enjoy views of the rocky features from the parking lot area. The road does a loop at the end and there are parking spots around this loop.
This area is worth a quick stop, but if your time is limited and you just want to focus on the highlights, you could skip it.
7. North Window | South Window | Turret Arch
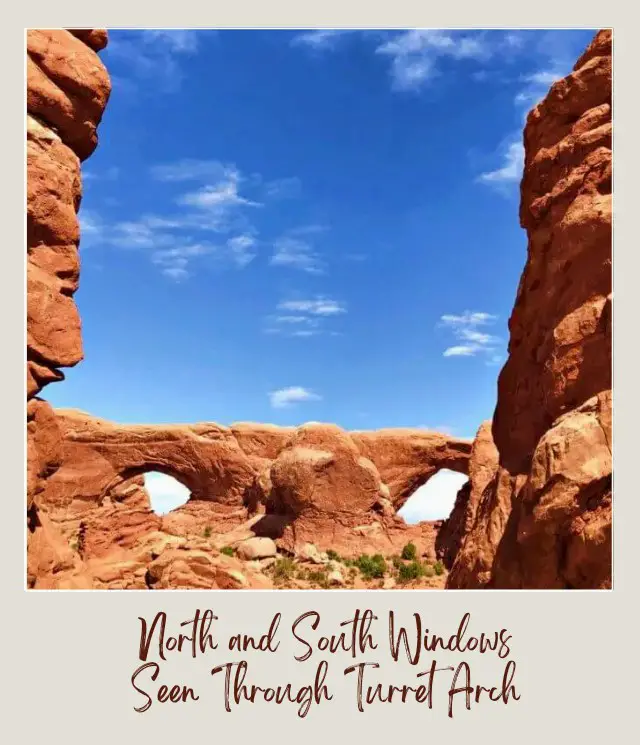
Continue along The Windows Road for a mile (about 2 minutes) until you get to The Windows section. Along this section of the road, you’ll pass Elephant Butte and the Parade of Elephants.
At The Windows, you’ll finally get to see some arches!
The road splits in two and becomes one-way. You’ll go off to the right, the upper section. There are parking spaces about half-way along here. The trailhead to the North and South Windows and Turret Arch is on the right from this parking lot.
Grab the first free parking spot you see!
The road loops around to the left to the lower section. There is additional parking here and the trailhead to Double Arch is along here.
If you can hike a little, I really recommend walking to the Windows and to Double Arch. You can’t see them from the parking lots and the trails are fairly short.
‼️ PRO TIP: Don’t think you need to move your vehicle. This area is extremely popular and parking fills up, so once you find a parking spot, keep it.
There’s a path (0.1 miles) between the upper parking lot (The Windows Arches and Turret Arch) and the lower parking lot (Double Arch). There are accessible restrooms reached from the far end of the upper parking lot, past the trailhead for the Windows.
There are three arches to see on the trail from the upper parking lot. The dirt trail is 1.1 miles round trip and has some steps, so is not accessible. The trail splits – Turret Arch is to the right and the two Windows are to the left. The North Window is the first one you come to and the most popular. The South Window is a little further along.
Most people go back the way they came, but there is also a primitive trail that loops behind South Window and back to the parking lot.
➡️ READ MORE: Best Hikes in Arches National Park
8. Double Arch
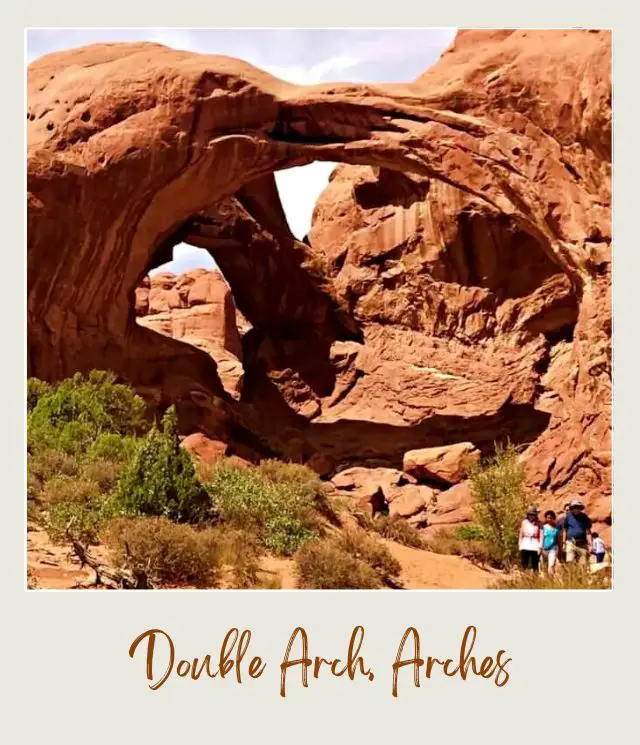
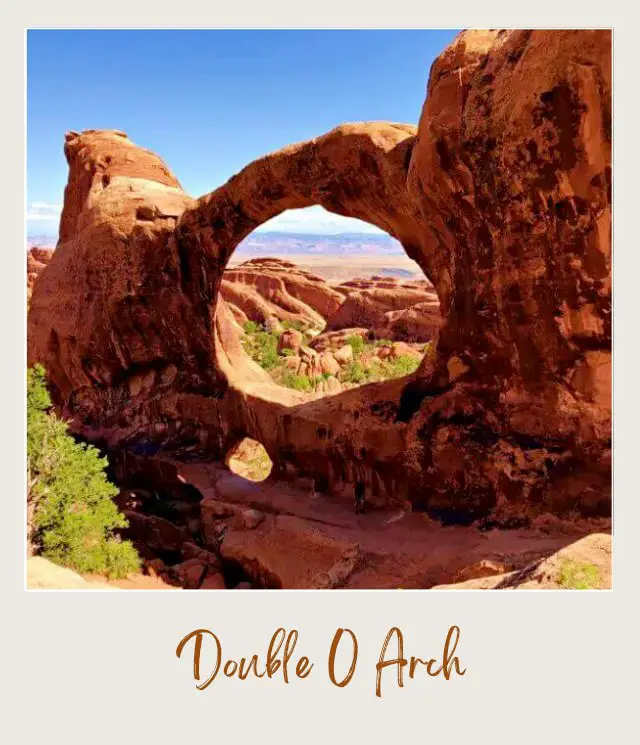
Double Arch is very cool. Not only is it a double arch, but it’s also the tallest arch in the park (112 feet tall) and the third widest arch in the park (144 feet across).
To get there, it’s a 0.5-mile round trip walk from the lower parking lot on a mostly flat hard-packed dirt trail that has no shade and is very hot in summer. Take water!
➡️ READ MORE: Best Hikes in Arches National Park
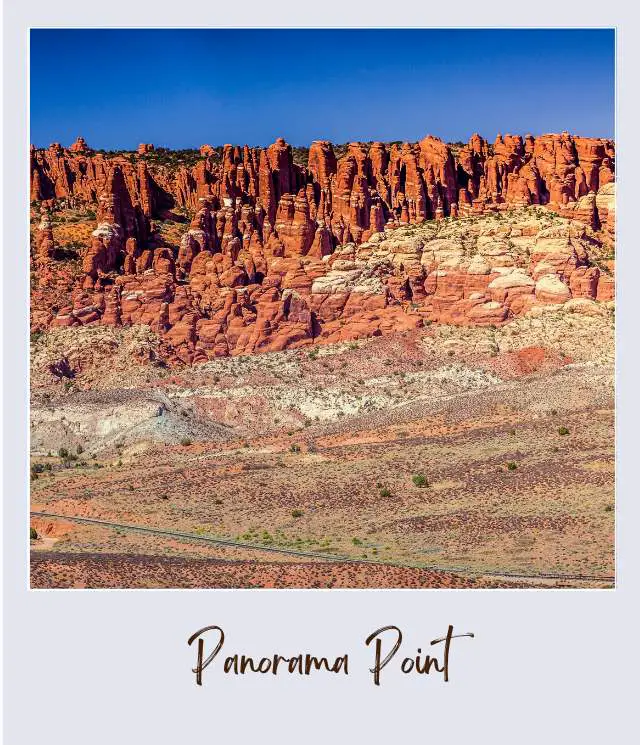
9. Panorama Point
When you’re ready to leave The Windows section, head back to the main Arches Scenic Drive Road. When you get to the main road, turn right.
The road climbs up a hill and after 1.1 miles (about 2 minutes), you’ll come to a road on the right to Panorama Point. This very short spur road ends in a loop with parking along the side of the road.
There are several viewpoints along the parking area/ loop. From the viewpoints, there are (unsurprisingly, given its name), panoramic views of the national park and the surrounding areas.
You can see La Sal Mountains in the distance. That area of red rocky pillars across the valley is Fiery Furnace and you can even see parts of Devils Garden further away slightly to the left.
Because of the expansive views, this is a great place for stargazing.
There is a shelter and some picnic tables, plus a vault toilet.
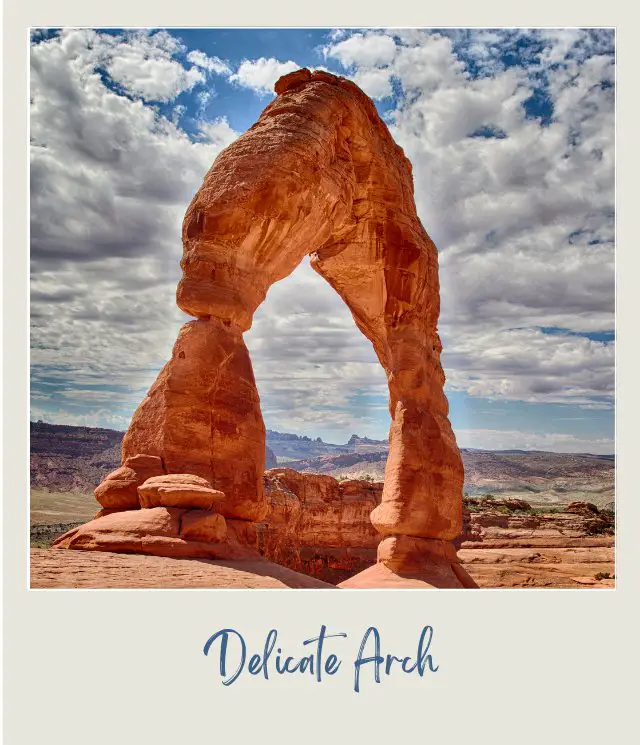
10. Delicate Arch | Wolfe Ranch
Head back to the main road and turn right to continue along Arches National Park Road. The road dips down into a valley and climbs back up again. After 1.4 miles (about 2 minutes), you come to Delicate Arch Road on your right. Turn right and continue for another couple of minutes (1.2 miles) until you arrive at the trailhead for Delicate Arch on your left. There’s a large (but very popular) parking lot, plus some additional parking on the right side of the road.
Delicate Arch is by far the most famous arch in Arches National Park and is featured on Utah’s license plate. Most arches are formed in the side of a ‘fin’, with walls on both sides. Delicate Arch, however, is free-standing. In fact, it’s the largest free-standing arch in the park, with an opening 346 feet high and 32 feet wide.
To get to the arch itself, you need to hike. It’s a 3-mile round-trip moderate hike with a scary (if you’re afraid of heights like I am) ledge near the end. I definitely recommend the hike if you can, but if not, the area is still worth visiting.
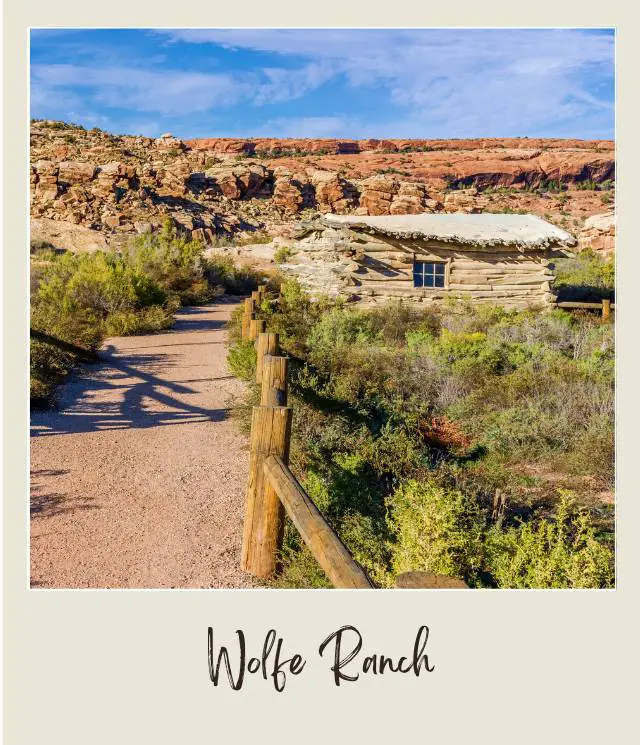
You can’t see Delicate Arch from here, but you can visit Wolfe Ranch, a short walk away. The very basic, one-room cabin dating form 1906 gives a real sense of the harsh life the pioneers lived. You can read more about Wolfe Ranch here.
Continue along the path and cross a short wooden bridge. On the left soon after is a side trail to some cool Ute petroglyphs. From there, either continue along the main trail to Delicate Arch or return to the parking lot.
➡️ READ MORE: Best Hikes in Arches National Park
11. Delicate Arch Viewpoints

If you aren’t up for the hike to Delicate Arch, you can still see it. Continue along Delicate Arch Road for another mile (about 2 minutes) and you’ll come to the parking lot for the Delicate Arch Viewpoints. This is the end of the paved road, and the road loops around, with parking on both sides of the loop and long vehicle parking in the middle.
There are two viewpoints. Be warned – it is distant view of the arch. It’s still worth it if you don’t hike to the arch itself. If you did (or will) hike to the arch, you could skip this, though I still find it interesting to see where the arch is located in relation to its surroundings, which you don’t get such a sense of on the hike to the arch.
The Lower Delicate Arch Viewpoint is a very short (200 feet), flat and accessible walk. You’ll see the arch.
For a better (and marginally closer) view, take the 0.5-mile round trip trail up to the Upper Delicate Arch Viewpoint. This is moderate because you’ll spend most of the time climbing up stairs to get there. It is not accessible.
➡️ READ MORE: Best Hikes in Arches National Park
12. Salt Valley Overlook
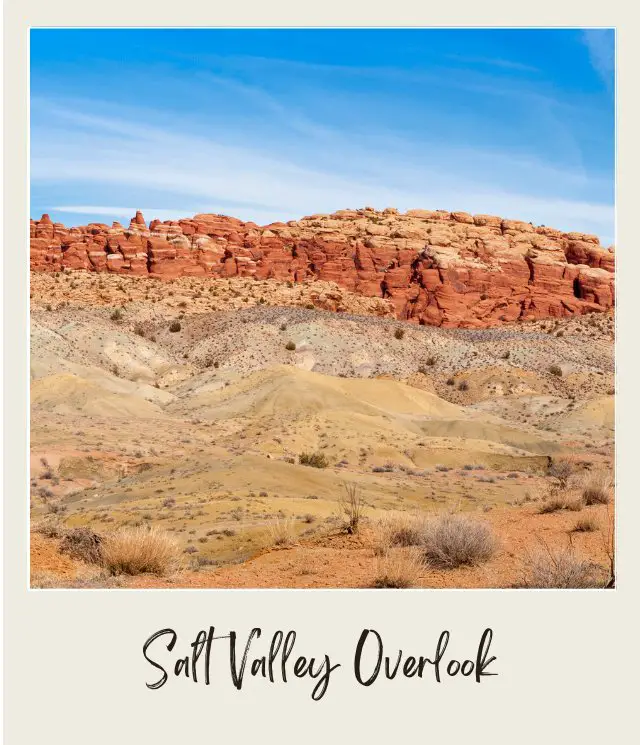
Head back to the main road, turn right and continue for another 2.3 miles until you see the turnoff to Salt Valley Overlook on the right. A very short spur road takes you to the overlook. The road ends at a loop and there are 8 designated parking spots around the far side of the loop.
There’s a panoramic view of – surprise, surprise – Salt Valley. It’s not super exciting, though there are many colored rocks and sands, colored by ores and minerals.
The geology of this area, however, is very interesting. Watch this NPS video to learn how the Salt Valley and arches were formed.
13. Fiery Furnace Viewpoint

Back on the main road, it’s just 0.2 miles (about a minute) to the turnoff for Fiery Furnace Viewpoint. This overlook is another 0.2 miles down this short side spur.
I first assumed that the Fiery Furnace area was named because it was so darn hot there, but in fact, it got its name because the sandstone rocks glow like a wood-fired furnace in the late afternoon light.
The area is a natural labyrinth with narrow passageways between tall sandstone walls. You can hike into it, but only with a special backcountry permit or on a ranger-led guided hike. If you’re an everyday hiker like me, I really recommend the ranger-led hike.
In general, I don’t like hiking in groups. But this place really is a labyrinth and you could easily get lost in there. Plus, the ranger gives you lots of interesting information. The hike does require some scrambling, climbing and shimmying, so it’s not for everyone.
The view alone is worth it, but try to be there late afternoon to see the namesake fiery glow.
➡️ READ MORE: Best Hikes in Arches National Park
14. Sand Dune Arch
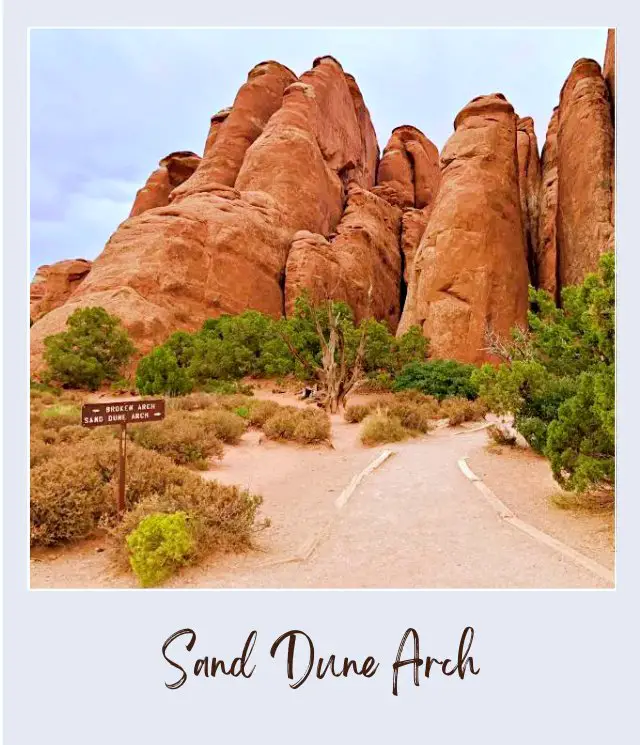
Back on the main Arches Scenic Road, turn right and after 1.9 miles (about 3 minutes), you come to the parking area for Sand Dune Arch. The main parking area is on your right, though there is additional park on the left side of the road.
To see the arch, you will need to walk. The trail starts from the parking lot on the right side of the road. It’s a short (0.2 miles each way) walk.
It’s a pretty cool arch to approach. From the parking lot, there is a clump of rock formations ahead and slightly off to the right. You approach this and then walk through a narrow passageway in between the rocks.
This narrow slot canyon then opens up to a sandy area in the middle of the rocks. You can’t see an arch when you first get there. Then around a corner to the right, you suddenly see a smallish arch, with a sandy deposit (a somewhat euphemistically named ‘dune’) beneath it. It’s very cool.
Kids will love it.
This area is also shady most of the day, so a nice respite from the heat. It can get very crowded though, as the space is not that big.
This is also the start of the trail to Broken Arch and Tapestry Arch (you can also start these hikes from the other end of the loop at Devils Garden Campground). These arches are great to see, but, although the trails are mostly flat(ish), there is a lot of soft sand to walk on.
➡️ READ MORE: Best Hikes in Arches National Park
15. Skyline Arch
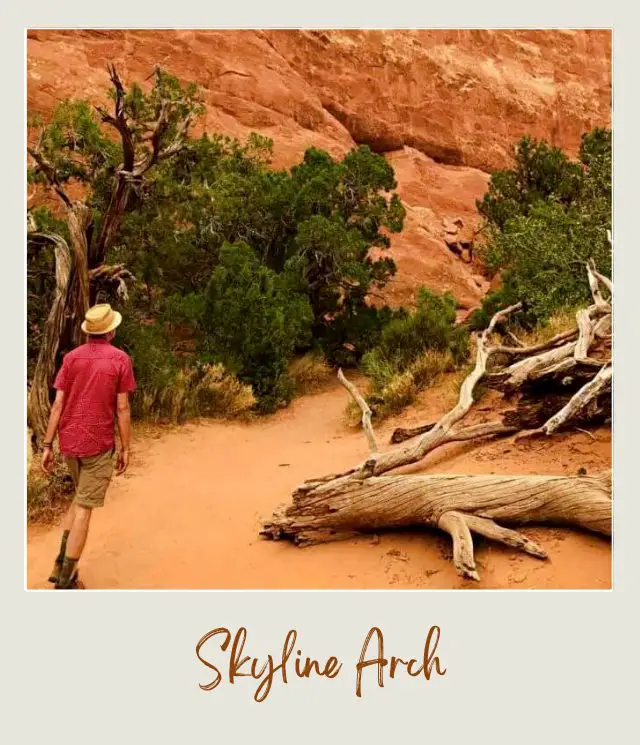
0.7 miles (about one minute) further along the road, you’ll come to Skyline Arch. There’s paved pullout on the right side of the road.
You can see the arch up high near the top of a small cliff. There is an easy 0.2-mile each way trail that goes to the base of the cliff. If you do this short hike, you’ll see huge boulders at the base. Until 1940, half of this arch was blocked, but in that year, the blocked half fell away, leaving the full arch and a bunch of boulders at the bottom.
➡️ READ MORE: Best Hikes in Arches National Park
16. Devils Garden
Continue along the road for another 1.3 miles and you’ll come to a split in the road and it becomes one way. This is the start of a loop that is the end of the road.
Continue around to the right, and you’ll soon pass the Devils Garden Picnic Area and then the turnoff to the Devils Garden Campground, where you’ll also find the other trailhead for Tapestry and Broken Arches (and Sand Dune Arch, though that is a much shorter walk from the Sand Dune parking area).
0.4 miles from where the road splits, you come to the start of the Devils Garden parking area. There are plenty of parking spaces around this end of the loop, though this is a popular part of the park and the parking does fill up. There are restrooms here, too.
There isn’t a whole lot to see from the parking lot. To see any arches, you’ll need to walk.
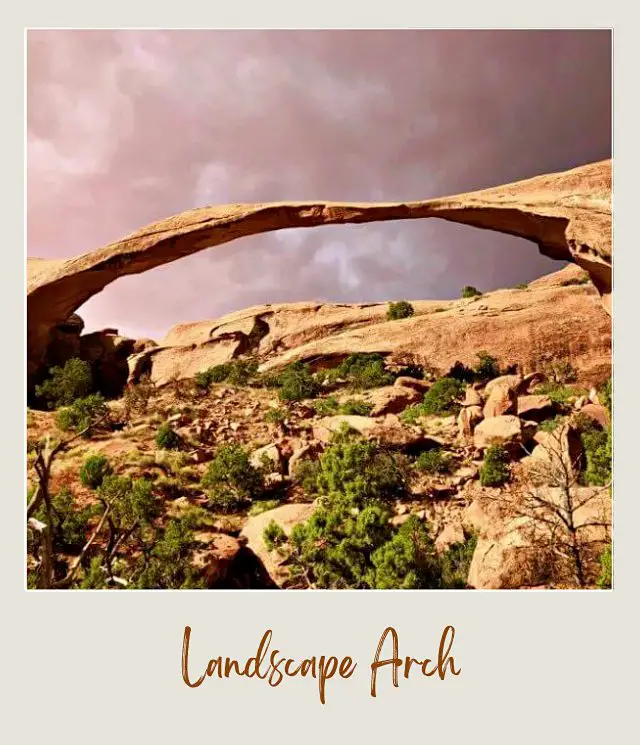
Devils Garden has three connected trails. From the parking lot, walk between tall fins into Devils Garden. It’s an easy 0.8-mile walk each way to Landscape Arch. This arch is 306 feet long and is the longest single span arch in North America and the third longest natural arch in the world (the first two are both in China). Along the way, a short side trail takes you Pine Tree Arch and Tunnel Arch.
To see more arches, you’ll need to head up along the top of a fin. Navajo, Partition and Double O Arches are on the next section. You can then return the way you came or continue on a primitive trail through Fin Canyon to return to the main trail.
➡️ READ MORE: Devils Garden Trail Guide
Hopefully you’re excited about this scenic drive and want to do it all. You totally can. But you may be wondering “How do I include all this into my trip to Arches?” I hear this all the time.
Getting an idea of what to do is a start – and an important start. But the really tricky part is coordinating everything into an itinerary that actually makes sense – so that you’re seeing and doing everything along the drive at the right time of day, joining them all together in a logical order, and managing all the logistics that makes them happen.
To help take away the overwhelm of planning a trip to Arches National Park, I’ve created several super detailed itineraries.
There are 1-day and 2-3-day options: all with detailed hour-by-hour schedules, including alternatives for different activity and fitness levels, plus trail maps and descriptions, driving instructions, important information, essential tips, and everything else you need to make the most of your time in Arches National Park.
Obviously, the more days you spend in Arches the more things you can do, but the itineraries will help you make the most of whatever time you have available. The 1-day itinerary includes the whole drive, but if you want to add in some longer hikes, then you’ll need the 2-3 day itinerary.
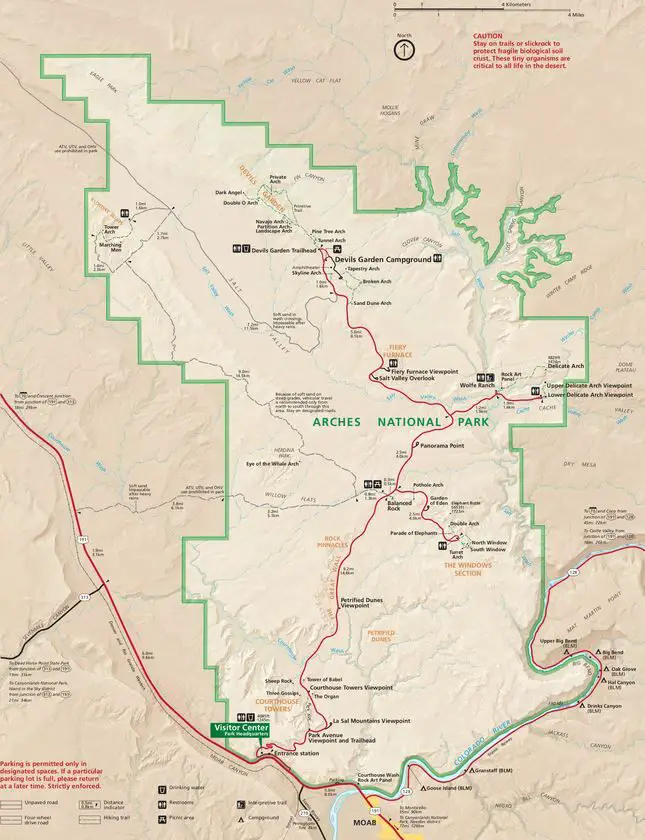
Arches National Park Scenic Drive Map
Here is an Arches National Park driving tour map with all the stops indicated. You can download it before you go.
Or, if you prefer a more traditional map, here is the Arches scenic drive map from the NPS:
FAQS about the Arches National Park Drive
Is there a scenic drive at Arches National Park?
Yes, there is one main road into Arches National Park. Drive through from the entrance all the way to Devils Garden and you’ll see many of the park’s main features.
However, to see many of the most famous arches, you do need to hike short distances.
Can you drive through Arches National Park without a reservation?
In April – October, between 7:00 AM – 4:00 PM, you need a timed entry permit to enter Arches National Park. Outside these times/ dates, you do not need a reservation.
How long is the scenic drive in Arches National Park?
The scenic drive is 46 miles return, including side roads. The Arches scenic drive time is about 2 hours without stops, but you should allow 4 – 5 hours to enjoy the viewpoints along the way.
Is it easy to drive in the Arches National Park?
Yes, the scenic drive in Arches National Park is considered an easy route. The road is not especially steep or winding and there are pullouts or parking areas at all the major places of interest.
Travel Insurance for Driving Arches National Park
You should definitely get travel insurance for your trip to Arches National Park. This can protect you not only against medical and emergency repatriation, but can also cover things like trip cancellation, loss and/ or theft of property, etc.
A great insurance option is Travelex. It has coverage for all you’ll need. You can choose the best travel insurance plan for your trip here or get a quote right now:
Enjoy driving through Arches National Park!
Additional Planning Resources for Arches National Park
⭐ Planning a Trip to Arches National Park: 7 Mistakes to Avoid
⭐ How Many Days in Arches National Park Do You Need?
⭐ Guide To The Arches National Park Reservations System
⭐ The 10 Best Hikes in Arches National Park
⭐ In-Depth Guide To The Devil’s Garden Hike
⭐ 10 Tips For Visiting Arches National Park
⭐ How To Get To Arches National Park
⭐ What Is The Closest Airport To Arches National Park?
⭐ All the Airports near Arches National Park
⭐ When is the Best Time to Visit Arches National Park?
⭐ Visiting Arches National Park: What To Expect Throughout the Year
⭐ 12 Fun Facts About Arches National Park
⭐ Arches Itinerary
⭐ The Best Airbnb Moab
⭐ The Best Books About Arches National Park
Planning a trip to Arches National Park is getting harder all the time. You can make your planning easy and stress free with a detailed itinerary. I have 1-, and 2-3- day itineraries for Arches National Park that include all the park highlights, give you choices based on your preferred activity level, and take all the stress out of planning your trip.
What are your favorite stops on the Arches scenic drive? I’d love to hear about them. Join my private Facebook group National Parks Collectors and comment and let me know (you can also pick up extra planning tips, share your photos and stories with other national park lovers and more).
Subscribe to daily national parks planning tips, travel inspiration and trip ideas and get instant access to the free PDF of this guide to
The Arches National Park Scenic Drive
If you liked this guide, Pin It to your Arches National Park board!


💡 Are you just starting to think about taking a national parks trip? Get Inspiration
‼️ Are you looking for helpful tips for visiting US national parks? Read articles that share useful tips on a range of national-park related issues
💻 Are you starting to plan a trip to Arches National Park? Read my Guide to Arches National Park
📋 Do you want a ready-made super detailed plan for your trip to Arches? Get a detailed 1 – 3-day Arches National Park Itinerary
🛏️ Are you looking for a place to stay near Arches National Park? Find a vacation rental near Arches National Park
💲 Are you ready to book your trip? Use these Planning and Booking Resources
📖 Do you want to read a book about Arches National Park? Check out my Recommended Reading List for Arches National Park
About the Author

James Ian is a national park, camping and hiking expert.
He has dedicated his life to travel, visiting more than 80 countries, all 7 continents and most of the national parks in the United States. With over 35 years experience in the travel industry, James has worked on cruise ships, at resorts and hotels, and as a travel planner who’s helped hundreds of people plan successful trips to US national parks.
Based on his experience visiting our national parks multiple times, in-depth research and expertise as a travel planner, James has published detailed itineraries for many of the major national parks in the US. These itineraries, as well as in-depth park guides, and other resources will help you have your own incredible trip to US national parks without stress and hassle.
As a national park expert, James has contributed to many publications, including USA Today, Newsweek, Time Business News, Savoteur, Best Trip, and Wired.
I’m a member of the Amazon Services LLC Associates Program. As an Amazon Associate I earn from qualifying purchases.
