
Packing the right thing for a national parks trip is very important. Having or not having some key items can make a big difference for your trip .
Packing for a national parks trip isn’t easy. So I’m going to share with you the five things that are easy to overlook, but really make a big difference. I’ll tell you why.
By sharing these things with you, I’m going to help you have even better national parks trips.
Let’s take a look right now.
See these 5 national parks packing essentials people often forget on video:

🔔 You can also watch this video on YouTube directly (opens in new tab).
🎙️ Or listen as a podcast:
There are links below to purchase the things that I mention. Of course, you don’t need to use the links, but they are provided there as a convenience in case there’s something here that I mentioned that you want to get. No pressure, of course.
Table of Contents
Essentials for National Parks Trips
1. Car Charger/ Battery Pack
Phones drain really quickly when you’re taking photos, when you’re using GPS or when they’re searching for a signal.
To save my phone battery as much as possible, I always turn my phone onto airplane mode because that way it’s not looking for a signal when you’re out of the cell service area. It does still drain when you’re using the GPS, obviously, and then when you’re taking photos, which I do a lot, so having a power bank just ensures that your phone will last throughout the whole day there.

I use my phone to take most of my photos. I do have a GoPro, but I tend to use that just for water things and more action kind of shots. So, it drains my battery and I’m often, particularly if I’m taking a million photos, which I tend to do, by the end of the day, kind of worried about my battery being drained.
So that’s where the battery pack comes in handy. So, it’s just been a game changer.
➡️ Get a power bank on Amazon here
I also use the car charger to top it up so that I’m not using the battery pack whenever we’re on the road, and that makes sure that it’s at the maximum as much as possible.

I also use my phone for audio tours, which I love. You purchase an audio tour, you download it to your phone, and then it plays automatically based on your GPS location. You don’t need service for it, but you do need your phone to be active. So I always want to make sure that my phone is charged for that.
The other thing is that it’s always handy to have your phone for the SOS signal, even if you’re out of service range. I haven’t ever had to use this, fortunately, but I have heard of several people who have gotten rescued on the trail where they’ve gotten into trouble by using the SOS feature on their phone.
Now that’s one of those things, obviously you hope never to have to use, but it’s good to have it there and you can only use it of course if your phone is charged. So you always want to make sure that your phone is sufficiently charged.
So that’s where a battery pack and or a car charger really comes in handy and is really essential, I think.
➡️ Get a car phone charger on Amazon here
2. Hiking Poles/ Trekking Poles
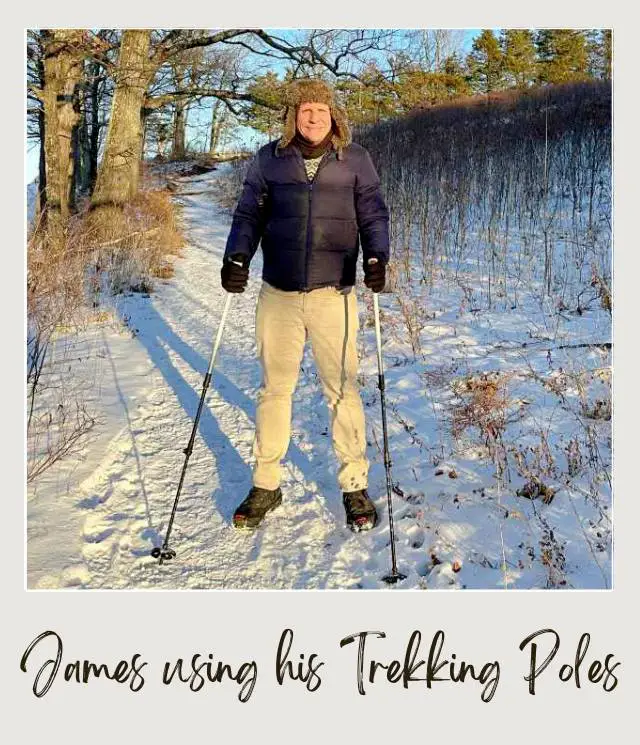
I never used to use these when I was younger and these are one of those things that the first time I started using them, I was just like, what the hell have I been doing this whole time? Like, why wasn’t I using these sooner?
They’re amazing. They really, they take some of the pressure off your knees when you’re going down and off your thighs when you’re going up, they distribute some of that pressure onto your arms and your upper body and it really just makes hiking so much easier.
They also provide stability, so they really a game changer.
The ones that I have are the Leki Jannu ones,

➡️ Read my detailed review of the Leki Jannu hiking poles
➡️ GET THE LEKI JANNU TREKKING POLES ON AMAZON
➡️ GET THE LEKI JANNU TREKKING POLES ON REI
Of course not everyone likes the same poles. There’s lots of different things to consider.
One of them is the material. They tend to be either aluminum. These are the ones that I use. They are a little heavier than the other major option, which is carbon fiber, but they are less brittle, so they bend rather than break if you stress them. So they’re the ones that I prefer, but the carbon fiber are a little lighter.
The grip is also really important. I like the cork grips. They mold your hand a little bit better. They also feel better than when you’re sweating. They absorb the moisture a little bit.
Also, you want to make sure you have wrist straps. Know how to use the wrist straps. I didn’t know that and that’s not included in this video, but, once I started using them properly, like also just takes a lot of pressure off your arms. I really liked that.
Other things to consider are the locking system. There’s twist locks or lever locks. Lever locks, also called flip flops are typically easier ones to use. They’re the ones that I have.
Just make sure that they, – as the poles can kind of wear out a little bit over time and the locks can start to slip, which can be very dangerous, particularly if you’re leaning on them. If you’re on like a slope, for example.
I heard a horror story of someone who was hiking in Grand Canyon and they put a lot of pressure on the hiking pole and it slipped. The locking system didn’t lock fully and he actually fell off the side of the trail down this steep slope and was not in a great situation, was fortunately rescued by a fellow hiker.
But kind of scary and I have had my previous pair started to slip and I didn’t like them for that and swapped them immediately for my Leki Jannus, which I much prefer.
Another thing to consider are shock absorbers. These are little springs inside the shaft that compress when you plant the pole down. They’re particularly handy on rocky trails, or really long treks.
They do take some of the stress off your joints, but they do add weight and they can feel a little bouncy. I don’t love them and I don’t have them, but it is something to consider.
So find the right pole for you. As I said, I really love my Leki Jannu ones, but there are plenty of other options out there. Whatever option you choose, I really recommend them though. They’re, they’re really, again, a game changer.
➡️ PROS & CONS OF TREKKING POLES
➡️ HOW TO CHOOSE HIKING POLES
➡️ HOW TO USE TREKKING POLES
3. First Aid Kit
Another thing, small thing to think about – but I always, always take one with me – is a first aid kit. So a small first aid kit that includes a blister kit is really important if you’re hiking. You do not want to hike with blisters. It’s just miserable.

So blister pads, mole skin bandages, antiseptic wipes, pain [00:07:00] relievers… Depending on where you areIn Joshua Tree, for example, have some tweezers in case one of the spines from the cactus get on you. You will want to be able to remove them very easily.
So you can adapt the contents depending on the park or parks that you’re visiting. But there’s some basics that should be in all of them. And I don’t recommend going into the park, even if you’re not hiking, you never know what’s going to happen and you’re not right near medical attention. So it’s handy to have for sure.
➡️ Get a first aid kit on Amazon here
4. Maps
Next up are maps. Now there’s lots of different ways in which you can do that. That’s a big, broad sort of thing.
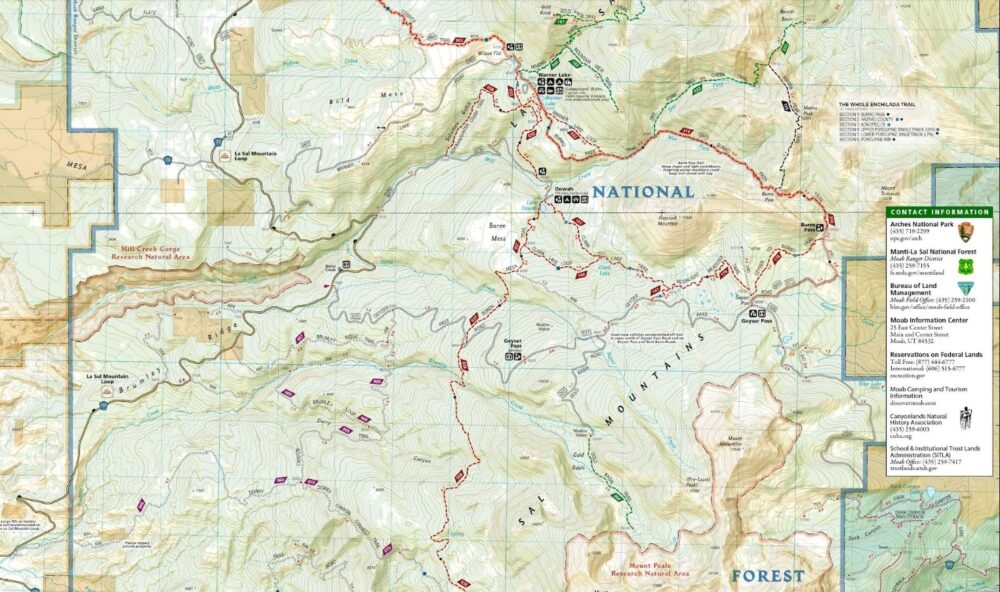
You can either have paper maps or download offline maps in apps like Google Maps, All Trails, or Gaia GPS before you enter the park.
Now, you can typically get a print map at the entrance station, and this is often enough.
I will often enter the park before the entrance station opens up on my first day, so I don’t get them, not straight away anyway. I might get them on my way out. It’s not much use if I spent the entire day wanting to hike around.
So there’s a couple of different options there. the print ones. I really like the National Geographic Trail Maps. They’re topographic maps, so they show elevation change as well as the actual route, so it gives you a better sense of the route.
➡️ See the full range of National geographic maps
The other option are online maps. You should never rely on c ell service. So always download maps in advance. If you subscribe to All Trails, then you could do that for the trails.
At the very least, you can download Google Maps onto your phone, which I never used to do, and I only got onto this somewhat recently, and I was like, whoa, this is great.
If you want to do this, you need to be on your phone. So open up Google Maps. If you don’t know how to do this, if you do, just fast forward through this section.
But if you don’t know, you open up Google Maps on your phone, tap on your profile picture, and then choose the option that says offline maps, and then select your own map.
And then you choose an area and you can adjust the area of the map and then tap download and then it saves directly to your phone or your other device.
It works for driving, not walking. So this is for driving directions, not for hiking, but it’s really great.
Obviously the bigger the area, then the bigger the file size. So you do need to have some storage on your phone or your other device.
5. Binoculars/ Spotting Scope
This is not essential, but really will make your trip better, are binoculars or a spotting scope. If you’re interested in wildlife, then this really does make a better experience.
It’s really easy to miss wildlife or just see them as a little blur in the distance because they’re too far away to see clearly.
Now it is a national park guideline that you need to stay at least a hundred yards from predators, such as bears and wolves, and at least 25 yards from other wildlife such as bison, elk, and deer. And sometimes that’s not even an option to get that close, depending on the environment, and what’s going on.
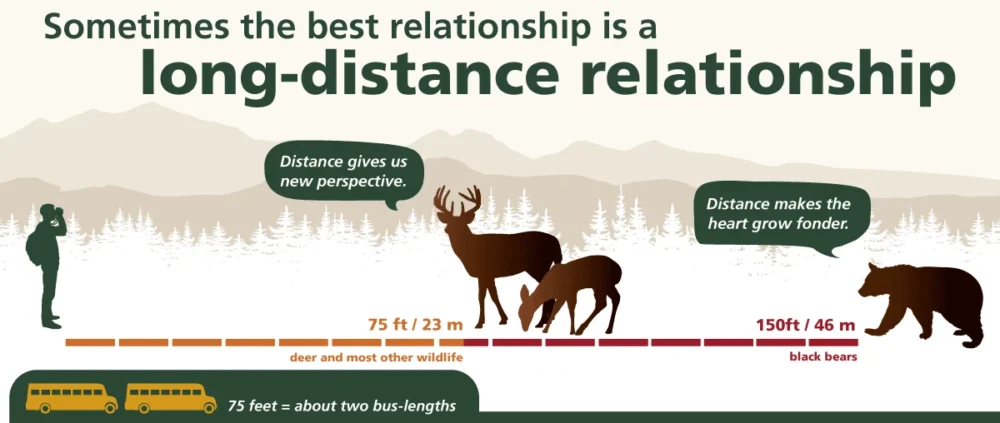
So it’s much safer and less intrusive if you can see them through either binoculars or a spotting scope.
➡️ BEST BINOCULARS FOR THE MONEY
➡️ BEST SPOTTING SCOPES FOR WILDLIFE VIEWING

Now, one of the questions that you may be wondering is, well, what’s the difference between binoculars and a spotting scope? Everybody knows what binoculars are. There’s sort of two lenses like this. Spotting scopes have one.
But other than the aesthetic difference, what does it actually mean?
Binoculars are typically cheaper. They can be quite expensive, but they’re typically cheaper than spotting scopes.
Spotting scopes do tend to be expensive, but they typically have more control. They typically have a stronger zoom and a clearer image. But that does mean that they often require a tripod in order to stay steady because you’re using such a strong zoom,
You can get reasonable binoculars, and if you’re a casual wildlife viewer, then binoculars are totally fine. If you’re more serious about viewing wildlife and that’s kind of your main thing, then it can be really worthwhile to invest in a spotting scope that can run much more expensive.
In either case, there are multiple things to think about, which is why I have written some buying guides to them.
For binoculars, two of the key things to think about are the magnification and the objective lens diameter. The magnification refers to how close the object appears when you look through the binoculars, and the objective lens diameter refers to the size of the lens at the end of the binoculars – the lens furthest from your eyes.
The magnification is typically measured by an X. So 10 X for example, means that an object is magnified 10 times. Common magnifications are 8 x and 10 x. So 8 times bigger or 10 times bigger.
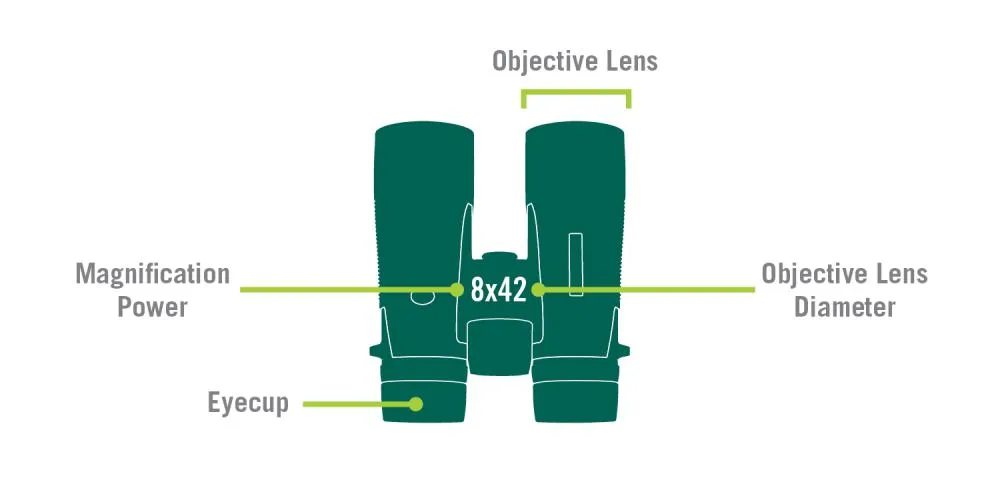
Now you may think, well, obviously the bigger the better, but the smaller the magnification, the wider the field of view. So the more you can see like this, it narrows in as you zoom more. So you may want to balance that.
➡️ Click here to see my pick for the Best Binoculars for the Money on Amazon
➡️ Check the price of the Vortex Diamondback HD 10×42 binoculars on REI
Spotting scopes have the same thing – the magnification, the objective lens size. Something else to think about with the larger objective lens is that they are typically brighter and clearer images, but they also tend to be heavier and more expensive. So you need to find the right balance for what you really want to do when you’re in the parks.
➡️ Click here to see my pick for the best spotting scope for wildlife viewing
So there are some choices there. The main takeaway is to, I think, have one or the other, but to choose the one that really fits what you are planning to do.
As I mentioned, if you’re just a casual viewer of wildlife, a pair of decent binoculars is going to be fine, but if you’re really serious about it, a high quality spotting scope is going to be more suited for you.
Do you have any other thing to include on your national parks summer packing list that’s not here? Join my private Facebook group National Parks Collectors and comment and let me know (you can also pick up extra planning tips, share your photos and stories with other national park lovers and more).
If you found this summer packing list helpful, Pin It to your Packing Lists and National Parks Pinterest board!
More Packing Lists
🥾 Day Hikes
👣 Hiking Gear for Beginner Hikers
🏔️ Winter Hikes
⛺ Tent Camping
🌲 National Parks Essentials
❄️ Winter Vacations
🚗 Road Trips
About the Author
James Ian is a national park, camping and hiking expert.
He has dedicated his life to travel, visiting more than 80 countries, all 7 continents and most of the national parks in the United States. With over 35 years experience in the travel industry, James has worked on cruise ships, at resorts and hotels, and as a travel planner who’s helped hundreds of people plan successful trips to US national parks.
Based on his experience visiting our national parks multiple times, in-depth research and expertise as a travel planner, James has published detailed itineraries for many of the major national parks in the US. These itineraries, as well as in-depth park guides, and other resources will help you have your own incredible trip to US national parks without stress and hassle.
As a national park expert, James has contributed to many publications, including USA Today, Newsweek, Time Business News, Savoteur, Best Trip, and Wired.
I’m a member of the Amazon Services LLC Associates Program. As an Amazon Associate I earn from qualifying purchases.