Struggling to decide if hiking the Skyline Trail in Mt Rainier National Park is worth your time?
I’ve been there – standing at the trailhead, wondering just how tough it’ll be and whether the views live up to the hype.
Let me help make that decision easy.
This is one of my all-time favorite hikes. I’ll walk you through what I loved (hello, Panorama Point!) and what to be ready for (spoiler: parts of the trail are steeper than you think).
This guide is best for anyone who wants to experience a famous trail in Mount Rainier National Park without going in blind. Whether you’re a casual hiker or someone who wants to tackle an iconic alpine route, I’ll help you know exactly what to expect.
What makes it so special? The Skyline Trail delivers front-row views of Mount Rainier, alpine lakes, cascading waterfalls, and even the chance to spot marmots and mountain goats – all in one loop.
Let’s break down everything you need to know about hiking the Skyline Trail – from trail conditions and logistics to tips for the best experience. Let’s get into it.
🛏️TOP HOTEL PICK: Check availability now
🚘FIND THE CHEAPEST CAR RENTAL: Search Discover Cars for the best deals
✈️FIND THE CHEAPEST FLIGHTS: Search Skyscanner for the best deals
🧳GET TRAVEL INSURANCE: Get insured with Travelex before you go
📱TAKE AN AUDIO TOUR: Buy an audio tour now
Table of Contents
Details of the Mount Rainier Skyline Trail loop
Mt Rainier National Park’s most famous hike – the details:
🔹 Distance of the Skyline Loop Mt Rainier: 5.5 miles; loop
🔹 Skyline Trail Mt Rainier Elevation change: 1,700 feet
🔹 How long to hike the Mount Rainier National Park Skyline Trail: 4.5 – 5 hours
🔹 Skyline Trail Mt Rainier Difficulty: Moderately challenging
🔹 Skyline Trailhead: Jackson Visitor Center, Paradise
🔹 Highlights of the Skyline Loop Trail Mount Rainier National Park: Incredible views of Mount Rainier; panoramic views of the Cascade Ranges; meadows of wildflowers in summer; hoary marmots
Cost to hike Skyline loop Trail, Rainier National Park: There is no fee for the trail itself, but you will need to pay a national park entrance fee to get into Mount Rainier National Park.
Check the NPS website for the current fee. Buy it online .
➡️ If you’re planning to visit more than just the Mount Rainier National Park this year (Olympic National Park and North Cascades National Park are both close), it can be great value to purchase an America The Beautiful pass.
🔹 When is the Skyline Trail – Paradise – Mt Rainier National Park Open: The Paradise area is open all year (weekends only in winter), but it you want to hike the trail without snow, go in August or September.
The best time to see wildflowers is late July – August, though there are still a few flowers in early September.
Subscribe to daily national parks planning tips, travel inspiration and trip ideas and get instant access to the free PDF of this
Skyline Trail Guide
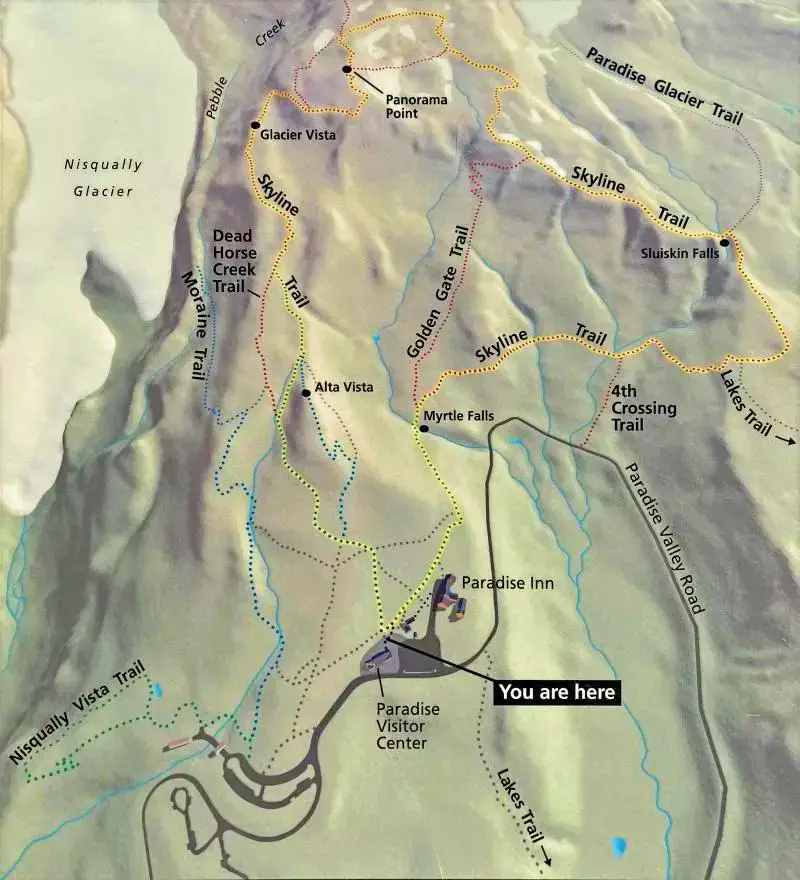
Skyline Trail Mt Rainier Map
Here is a Skyline Trail Map (Mt Rainier National Park) that you can use and follow along with as you read the description below.
The Skyline Trail Mt Rainier National Park Description
This trail description is hiking the Skyline Trail in a counterclockwise direction, but you can hike it clockwise, too.
Skyline Trail to Myrtle Falls, Mount Rainier National Park
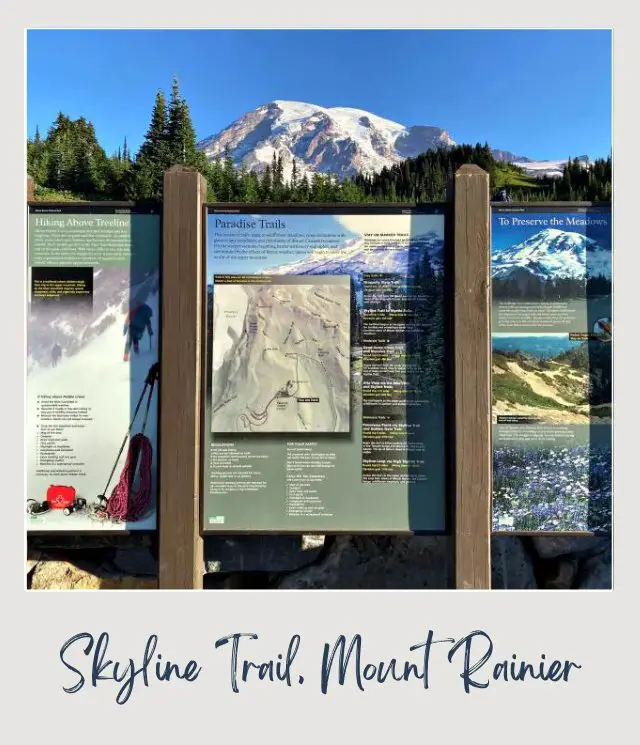
This first part of the trail is paved. The trail starts in behind the main Jackson Visitor Center. There is a Mount Rainier Skyline Trail map and some signs on a board by the stairs.
There are trail signs along the way at all junctions, but there are so many interlaced trails in the Paradise area, that having a map can be handy so you have a sense of where you are. Pick one up at the Visitor Center or get this national Geographic topographical map of the Mount Rainier trails in advance (especially handy if you start the hike before the Visitor Center opens).
A quote on the main staircase leading to the start of the trail says “ … the most luxuriant and the most extravagantly beautiful of all the alpine gardens I ever beheld in all my mountain-top wanderings” – John Muir, conservationist, 1889. Very little has changed in over a century.
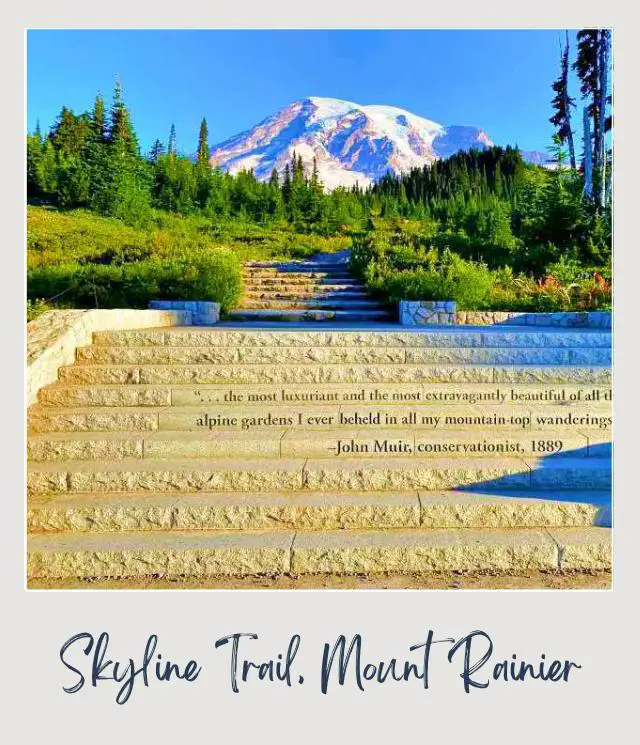
After climbing stairs, you’ll come to a four-way intersection. Go straight ahead to hike the Skyline Trail in a clockwise direction. Go right to hike the trail counterclockwise or if you are just planning to walk to Myrtle Falls. This trail description is hiking the trail counterclockwise.
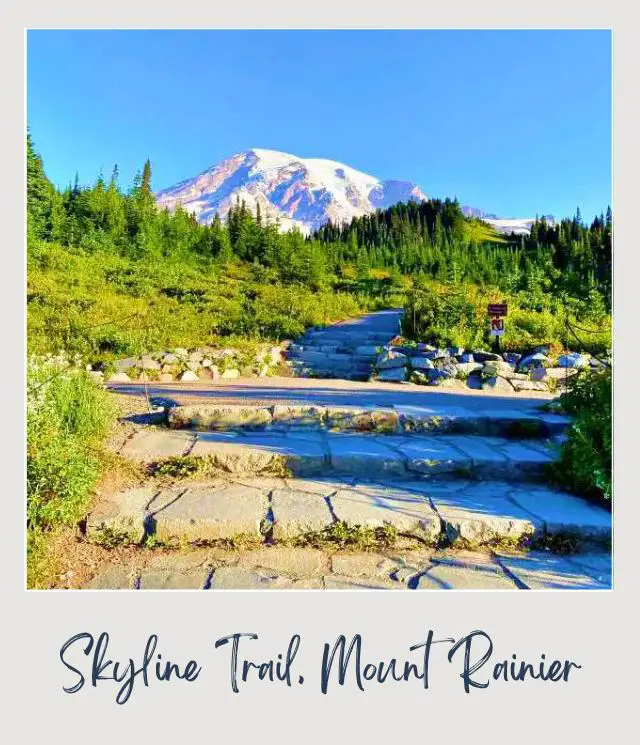
The path starts past bushes and some trees with the Paradise Inn visible on your right and Mount Rainier peaking over the tops of the trees on your left.
About ten minutes into the hike, you’ll come to a junction with the Guide House Trail. It’s well sign-posted and there’s a large sign with a map and notes on how to preserve the meadows (stay on the trail!). Go straight to continue to Myrtle Falls.
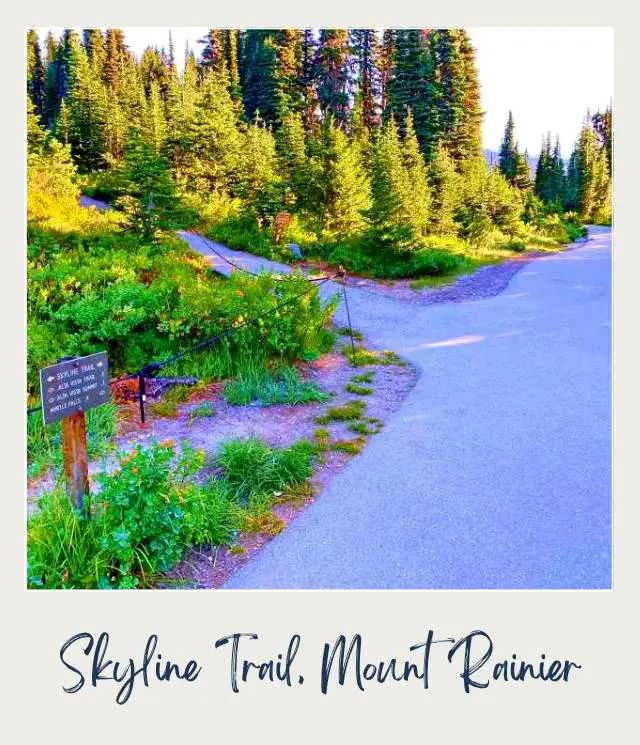
Another couple of minutes down the path, you’ll come to yet another intersection, this one for the Waterfall Trail on your left that connects to the Alta Vista and Dead Horse Creek Trails. Go straight to stay on the Skyline Trail.
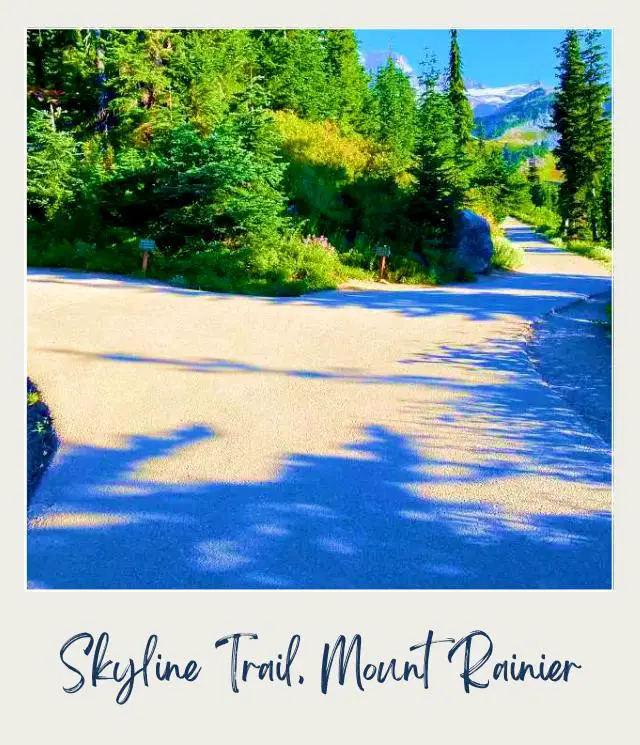
The views open up and there are meadows on both sides with Mount Rainier clearly visible straight ahead. About twenty minutes into the hike, you’ll come to a small log fence a tiny sign indicating the Myrtle Falls Viewpoint off the right.
This is a steep but very short trail down stairs to a viewpoint where there is the classic view of Myrtle Falls from below with a wooden footbridge above and Mount Rainer perfectly framed between trees.

This is the end of the Myrtle Falls Trail (Mt Rainier) and the end of the paved section of the Skyline Trail.
Skyline Trail to Panorama Point, Mt Rainier National Park
If you’re looking for an easy hike, this is a good place to turn back. If you’re up for the full hike, continue on to Panorama Point.
Once you return back up the short side trail, turn right and cross the wooden bridge over the Edith Creek Basin. There is another lovely view of Mount Rainier with the bridge and creek in the foreground.
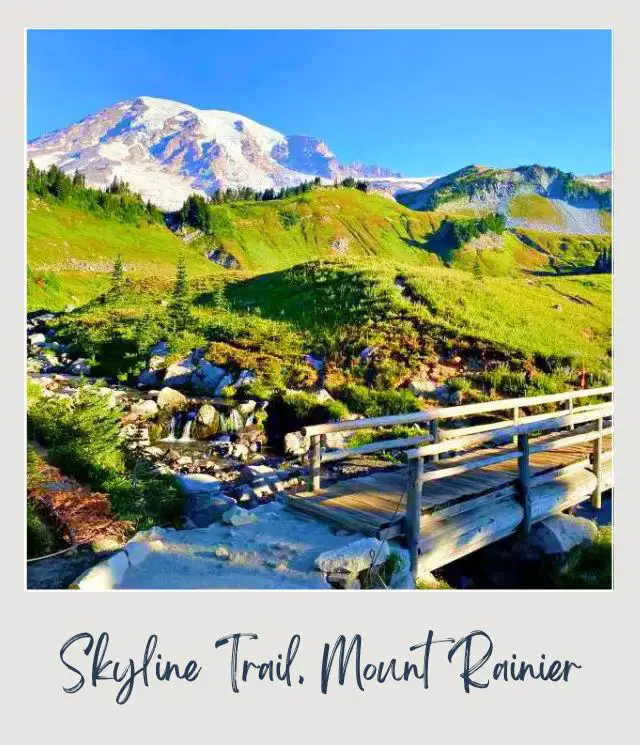
The path is now dirt, but still wide and well-marked. Meadows open up on both sides.
A few minutes after leaving Myrtle Falls, you’ll come to the junction with the Golden Gate Trail. This is short cut that reconnects with the Skyline Trail after 0.5 miles. It’s a shorter route, saving you about a mile, but it’s steeper and it skips Sluiskin Falls and the Stevens – Van Trump Monument, which are worth seeing.
So, I’d recommend veering right to stay on the Skyline Trail, which has wonderful views the whole way. You’re now about half an hour into the hike.
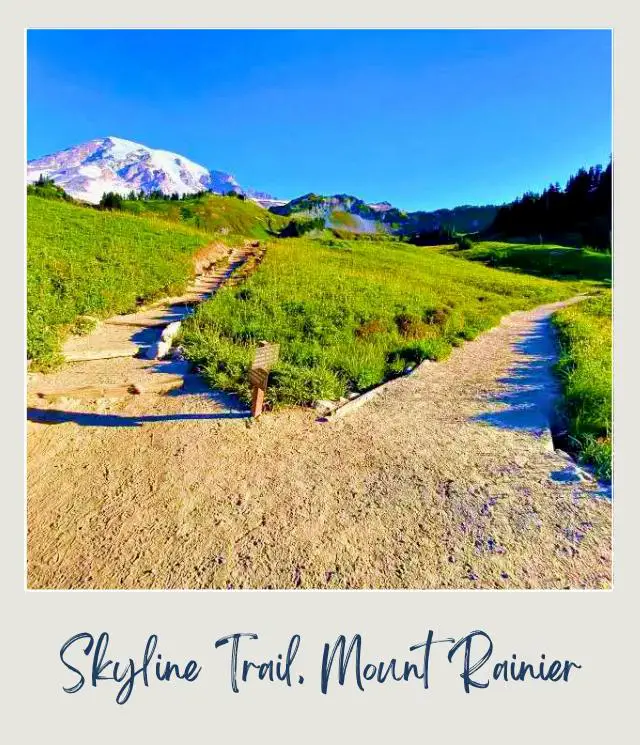
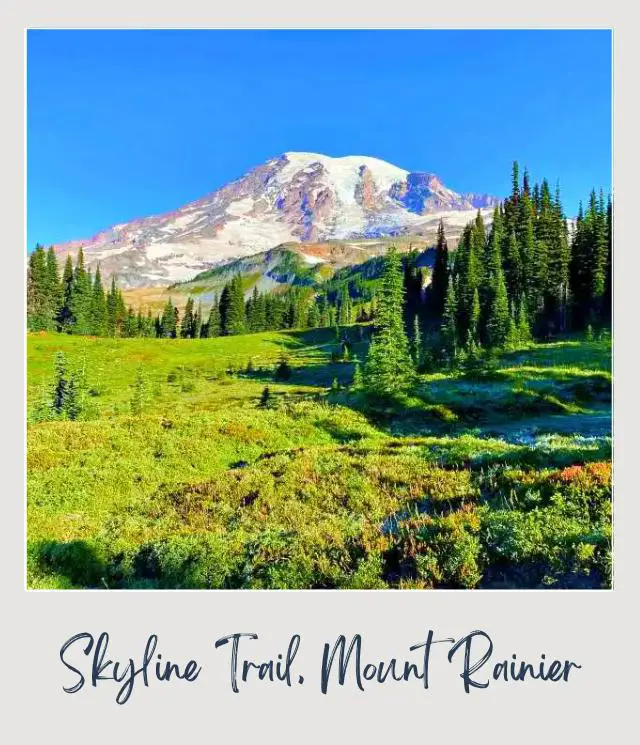
The trail passes more meadows with Mount Rainier poking above in the distance. This area is especially spectacular in summer when the meadows are covered in wildflowers, but beautiful any time of the year.
Looking to other side, you can see several peaks in the Cascade Range, the Paradise trails and meadows in Paradise, and the Paradise Inn and Visitor Center in the distance.
The trail enters the trees and emerges a few minutes later in a hillside of sloped meadows and scattered pine trees. It climbs gradually but steadily and this section is not too strenuous.
About 45 minutes into the hike, you’ll cross a narrow wooden footbridge with a babbling brook below. Soon after, 0.7 miles into the hike, you’ll come to a junction with the 4th Crossing Trail and a small sign indicating that the Lakes Trail is 0.4 miles away.

This area has more meadow views with incredible views of Mount Rainier above the top of the hillside and a nice, albeit distant, view of Paradise Inn with the Cascades behind if you look back.
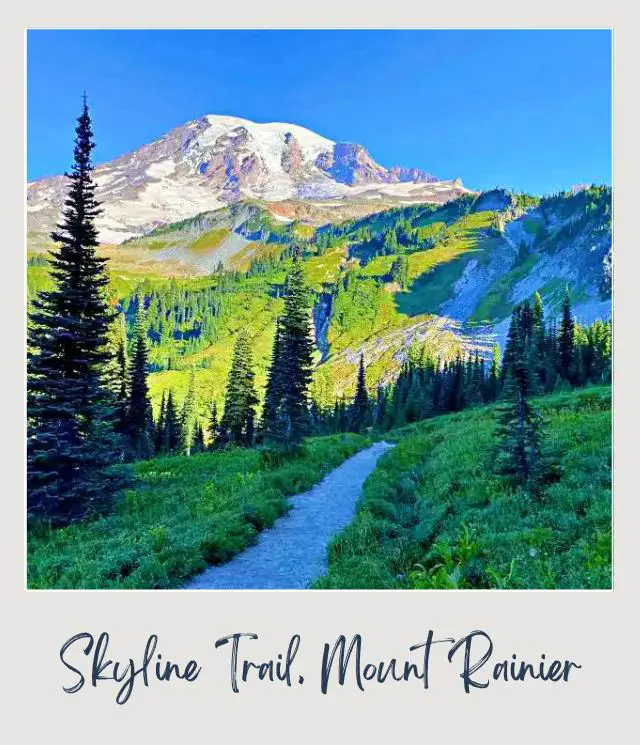
1.4 miles into the hike, you’ll come to the junction with Lakes Trail off to the right. This trail goes down to Reflection Lakes and Louise Lake before looping back to Paradise.
As the sign indicates, go straight to stay on the Panorama Point – Skyline Trail. Panorama Point is 1.9 miles away.
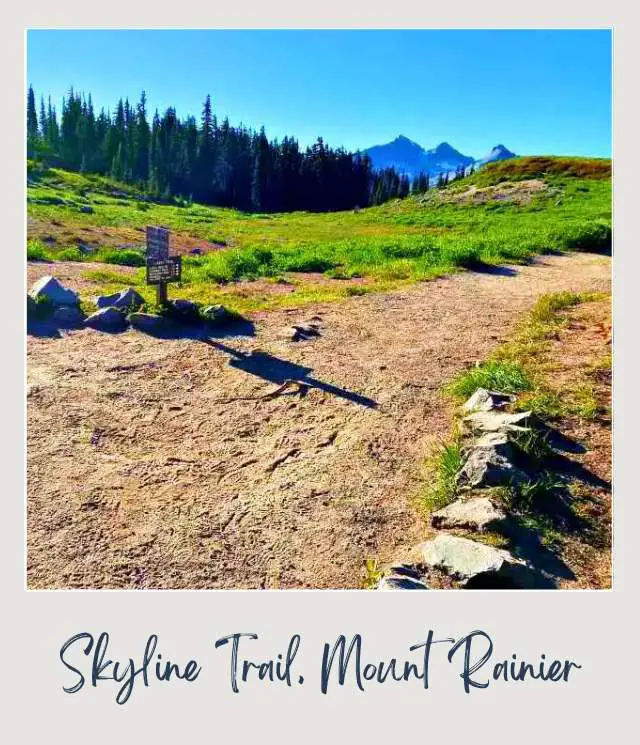
For the next 15 minutes, the path continues to wind its way around, with views of Mount Rainier and the meadows that the national park is famous for in one direction, and panoramic views of the Cascade Mountains in the opposite direction.
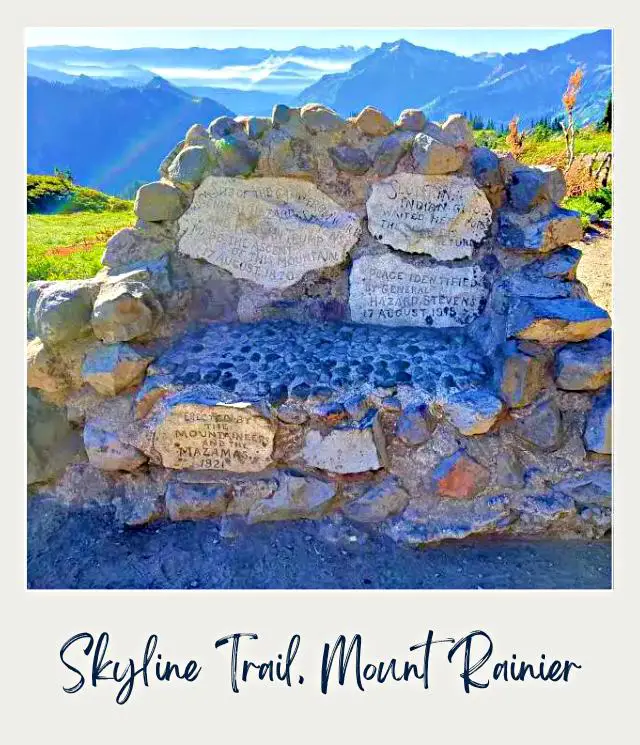
About 1 hour and 15 minutes into the hike, you’ll come to the Stevens Van Trump Historical Monument. This looks like a stone ‘seat’ surrounded by inscriptions.
Hazard Stevens and Philemon B. Van Trump were the first documented climbers to successfully reach the summit of Mount Rainier. Stevens and Van Trump camped at this point before they made their ascent to the summit of the Mount Rainier. They were planning to do it in a day, but ended up overnighting in a cave near the summit before returning.
The four inscriptions on the rock read:
Site of the camp from which General hazard Stevens and P B Van Trump made the ascent of this mountain 17 August 1870
Sluiskin Indian guide waited here for the climbers return
Place Identified by General Hazard Stevens 17 August 1918
Erected by the Mountaineers and the Mazamas 1921
Sluiskin Falls are nearby. They’re small and not that spectacular, but worth a quick look.
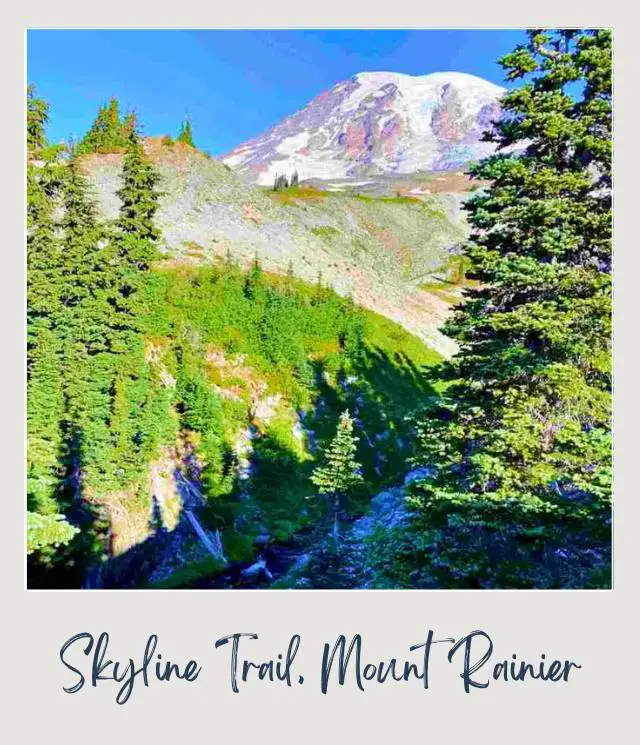
The trail is now getting above the tree line in parts. The view opens up and the scenery becomes rockier.
The Paradise Glacier Trail is off to the right soon after Sluiskin Falls. This is a dead-end trail that used to end at a view of some large ice caves at the end of a glacier, but the glacier has melted and the caves are long gone, so there is no real reason anymore to take this trail.
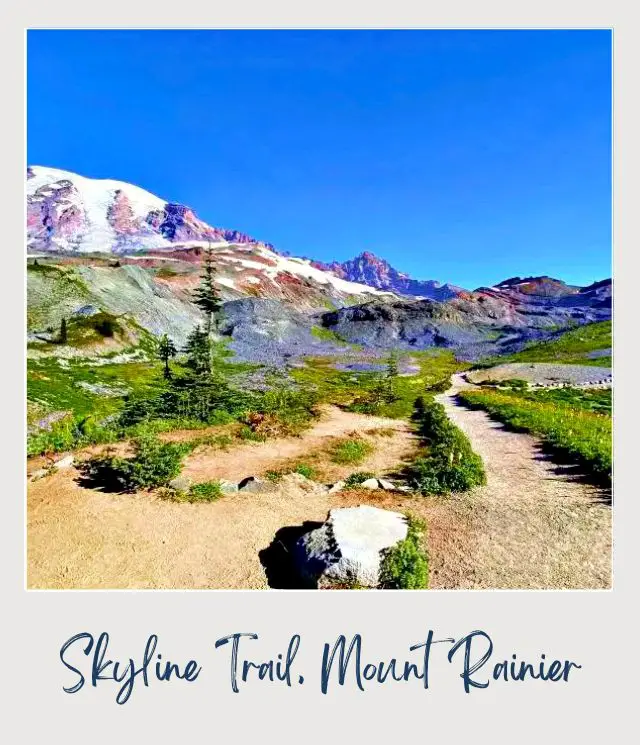
On the left is a small valley with a narrow brook running through it and a super clear view of Mount Rainier behind it. You can see the trail crossing the valley. It heads down and there are multiple small streams with wildflowers growing beside them.
You need to walk from rock to rock across the water and cross a small wooden bridge. If there have been rains, this might involve a water crossing.
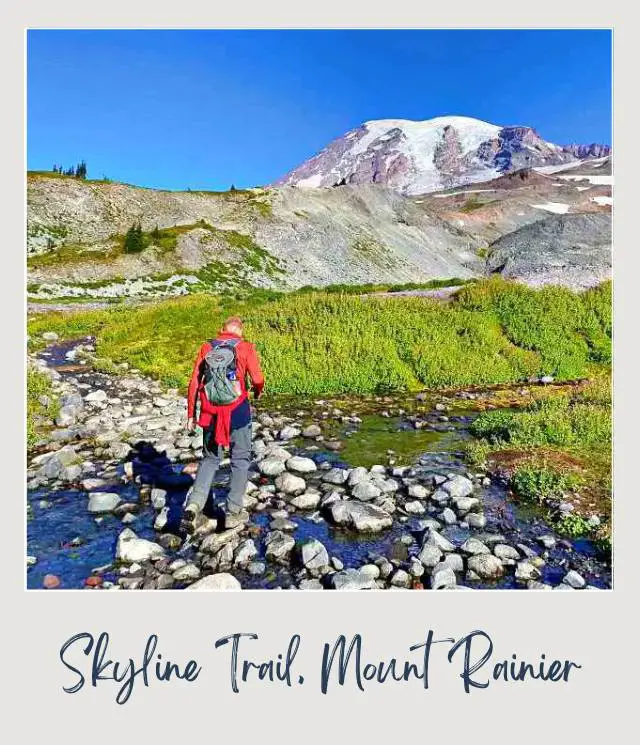
The trail climbs out of the shallow valley, crossing scree. We saw a hoary a marmot here. As you emerge back up, Mount Rainier pops back into sight and there’s also a lovely view of the Paradise Inn in the distance.
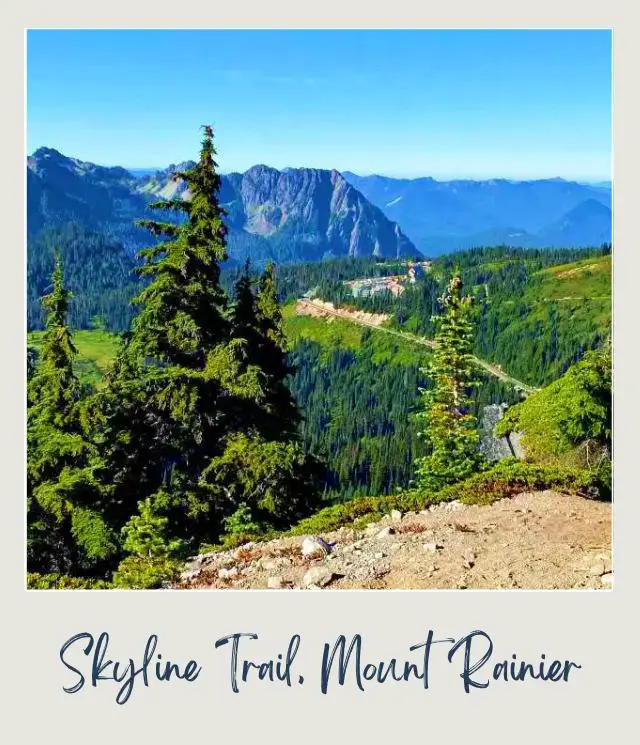
The trail goes along the top of a ridgeline with rocky meadows on the right, Mount Rainier straight ahead, and meadows and trees off to left with panoramic mountain views behind.
About 1 hour 50 minutes into the hike, you’ll come to a viewpoint with a stone slab set up as a bench to sit and relax and enjoy the view of Paradise.
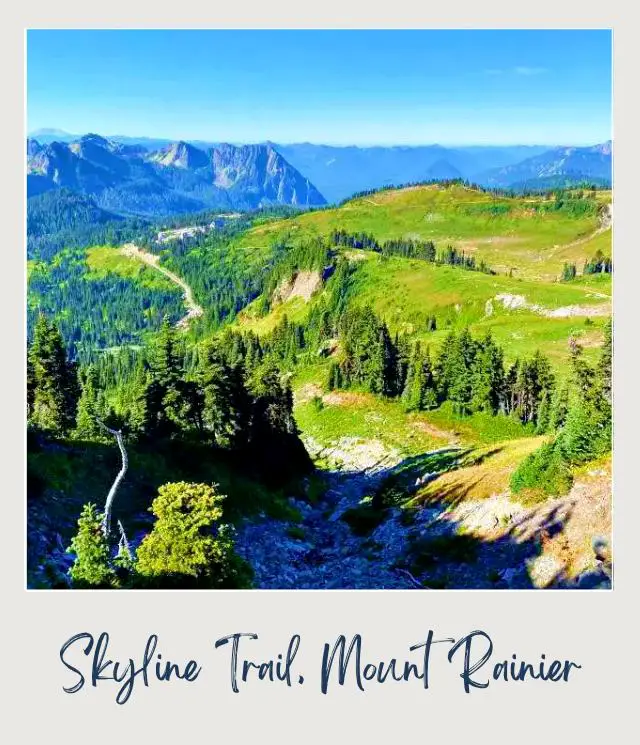
Another five minutes further along, we came to a small section where there was permanent snow.
This entire section is completely covered in snow through July, but even in September, when this photo was taken, patches of permanent snow and ice remain. Fortunately, it is beside the trail, so there was no need to walk over snow or ice.
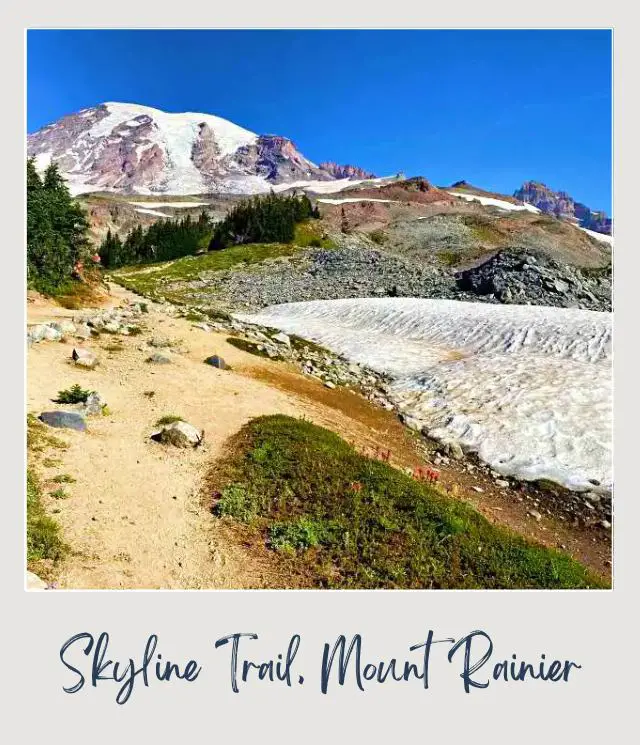
2.5 miles into the hike, you’ll come to the junction with the other end of the Golden Gate Trail. The elevation here is 6,400 feet.
If you took the Golden Gate Trail shortcut, you’ll rejoin the Skyline Trail here and turn left. It’s just 0.9 miles more to Panorama Point, Rainier National Park.
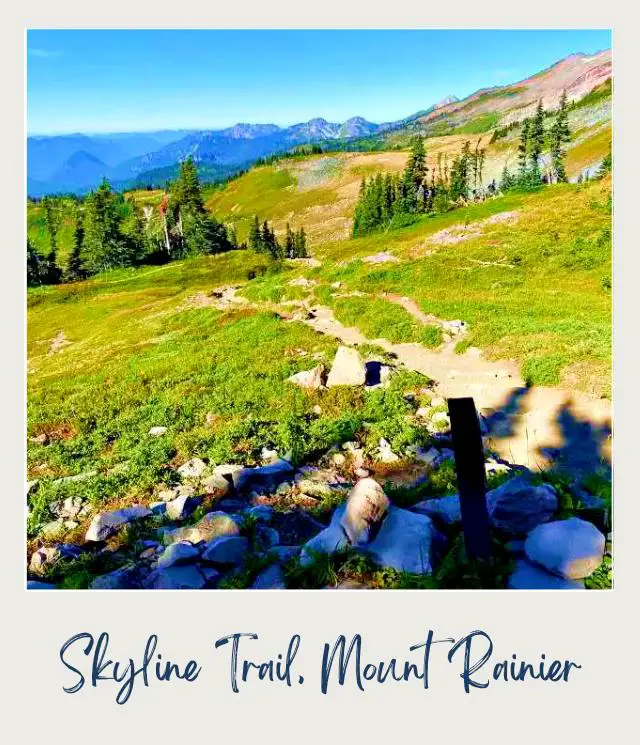
From here, the trail continues to climb steadily and is above the tree line again with little vegetation. The peak of Mount Rainier can still be seen behind the hill.
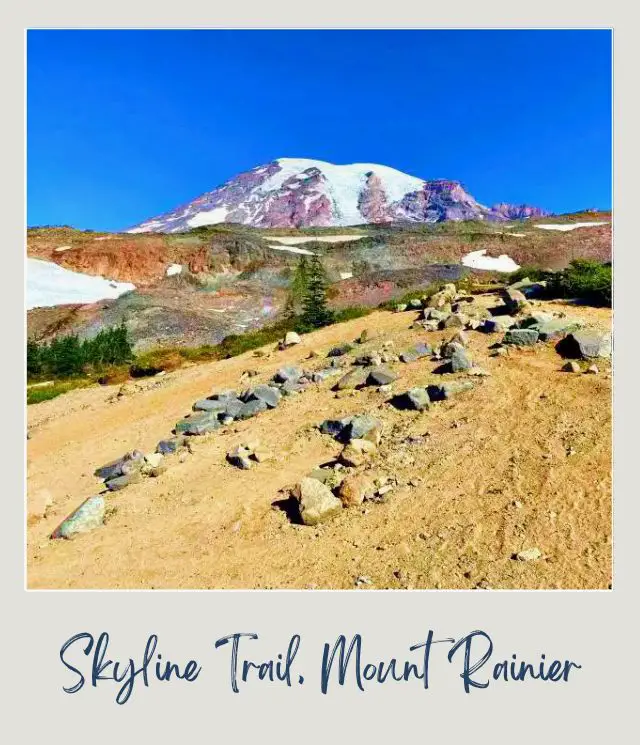
The next portion of the trail is through rocky scree. This is moraine – rocky debris left by a glacier as it receded. Only the very top of Rainier is visible and it’s about to disappear for a while.
About 2 hours 15 minutes into the hike (at least at my pace), you’ll come to a trail on your left that dips down into a small valley. This is a shortcut trail that is marked on the map and cut straight across to Panorama Point. This is sometimes called the “Low Skyline Trail”.
However, it is now blocked off and is not considered safe because it’s covered in permanent snow. So, you have the take the longer “High Skyline Trail” route up and along the ridge.

The trail starts to climb more now. Looking ahead isn’t very exciting, but the view of the Cascades looking back and off to left is great.
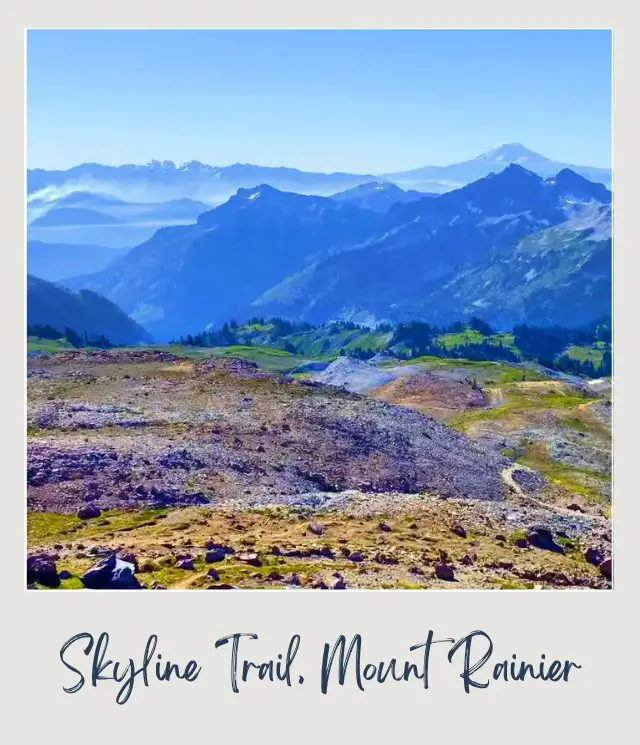
The trail climbs up some small switchbacks and along the side of the mountain. There are views of the Cascades looking back/ to the left. Mostly, though, this is just a climb up through bare rocky landscape.
Then, you’ll come to the highest part of the trail, at an elevation of 7, 050 feet. There’s a short path off to the left that ends a point with stunning views of the Cascade Mountains.
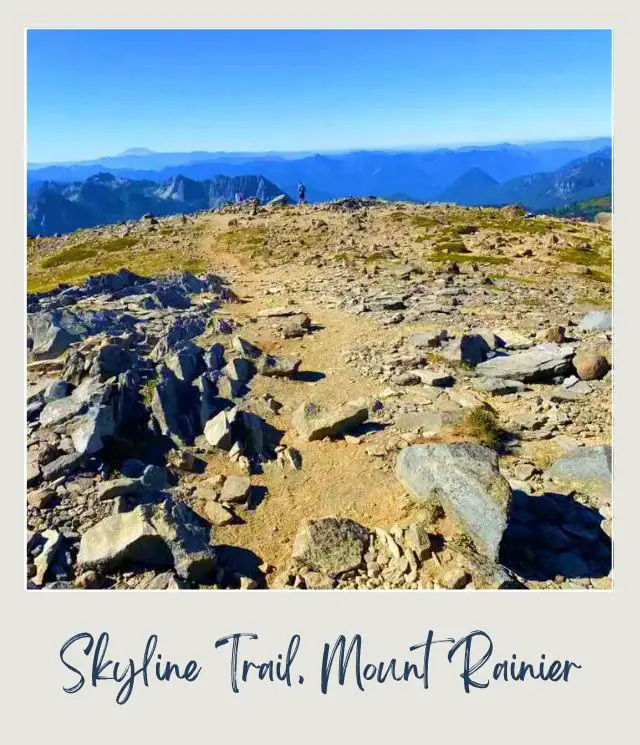
I thought that this was Panorama Point. It isn’t but I think that the views here are better than at Panorama Point, which is lower down. It’s also less crowded than Panorama Point, so this is a nice spot to stop, enjoy the views, and have a snack.
The trail you can see below goes to Panorama Point.
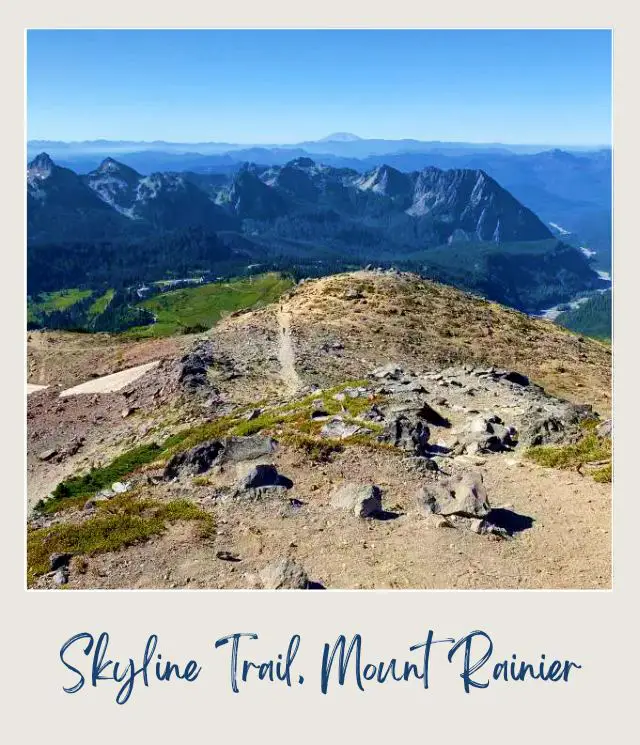
A short further way along, you’ll reach a junction with the Pebble Creek Trail. If you want to ascend Mount Rainier, you take this trail, which peters out and ends up as a climb.
You’re now 2.7 miles into the hike. From here, it’s 0.5 miles to Panorama Point and 1.9 miles to the trailhead.
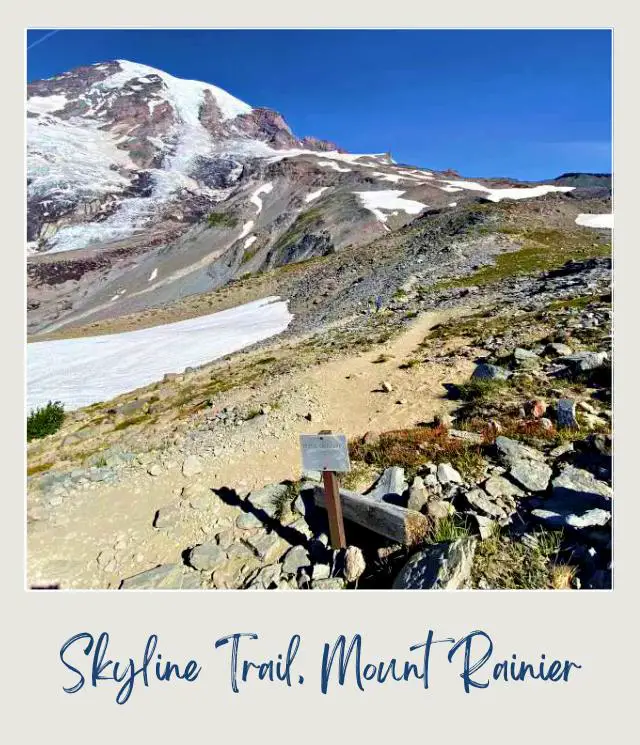
In the next section, it’s a somewhat steep climb down the Panorama Point Trail. Mt Rainier appears at times, off to your right.
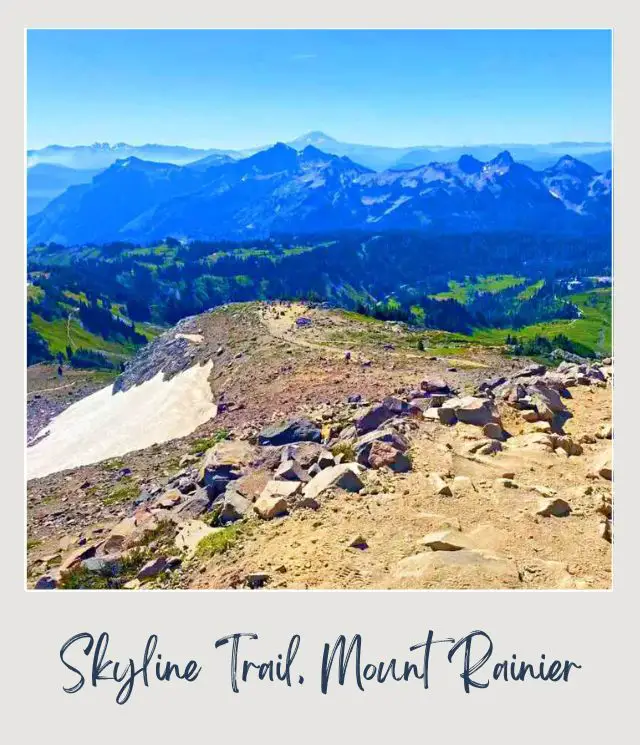
About ten minutes after the Pebble Creek junction, you’ll come to small sign indicating restrooms (pit toilets) to the right and Panorama Point to the left. You can also access the restrooms from a different trail direct from Panorama Point below if you need to go after you’ve taken in the view. This comfort station is only open in summer, typically from mid-June to mid-October.
You are now at Panorama Point, elevation 6,750 feet.

Panorama Point does not face Mount Rainier. Instead, it faces the rest of the surrounding mountains.
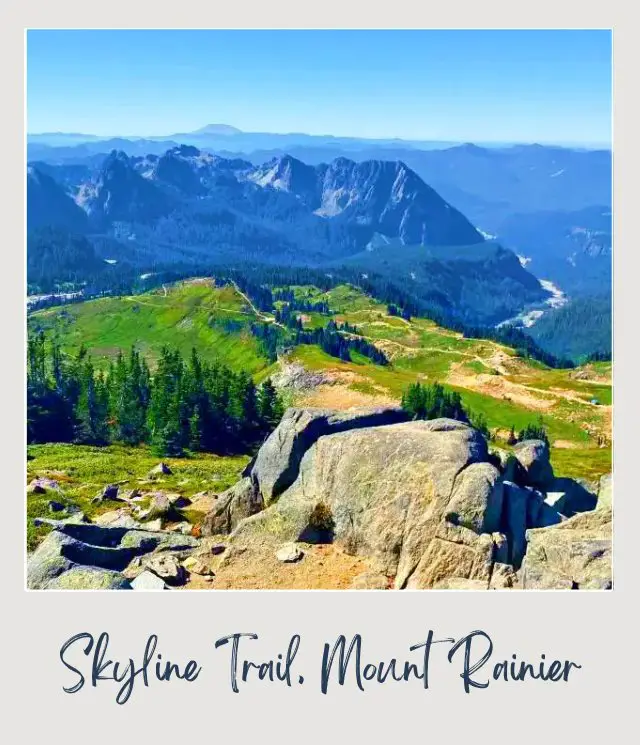
On a clear day, you can see Mount Adams and Mount St Helens among others and as far as Mount Hood in Oregon! There is a sign identifying the peaks you can see.

You’ve now completed the Panorama Point hike. Mt Rainier is peaking over the top of the nearby hills if you look back.
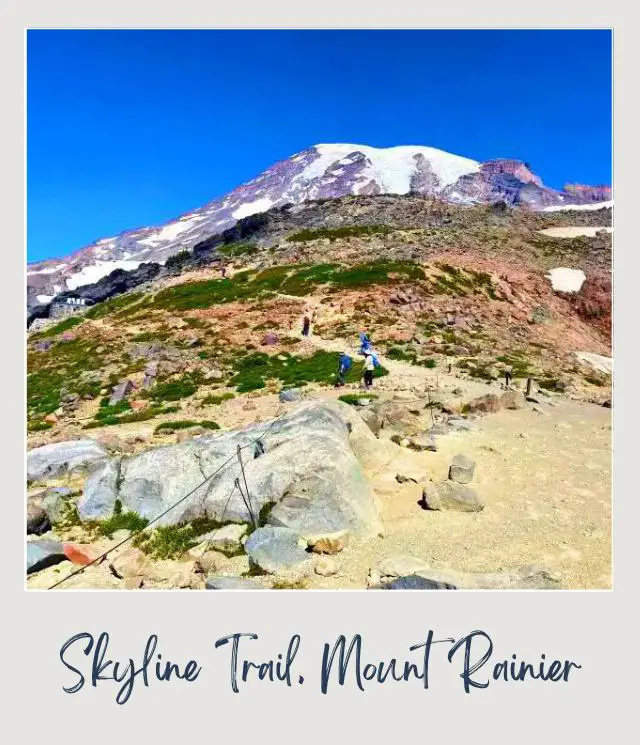
Skyline Trail Panorama Point to Glacier Vista, Mount Rainier National Park
Soon after leaving Panorama Point, you are out of the stony scree and back into picturesque meadows.
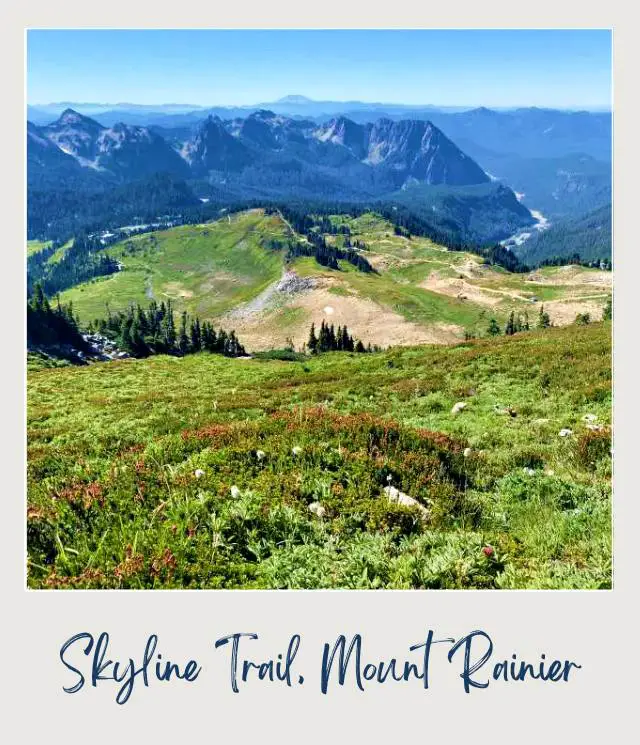
About ten minutes after leaving Panorama Point, you’ll come to a junction with another connecting trail to Pebble Creek and Camp Muir on your right. Camp Muir is where climbers camp overnight before making their ascent to the peak of Mount Rainier.
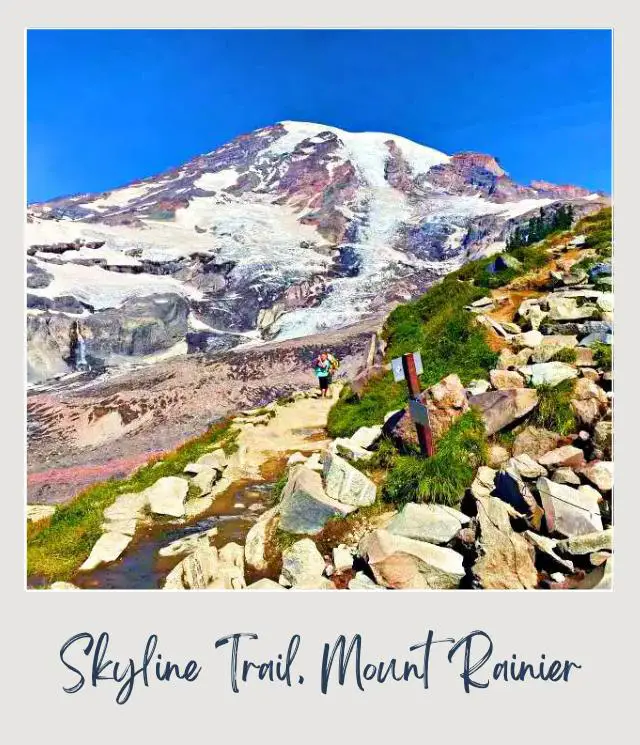
Another five or minutes or so later, there’s a small stone slab bench at a viewpoint with lovely views of Mount Rainier. This is a good place to stop and rest if you are feeling tired.
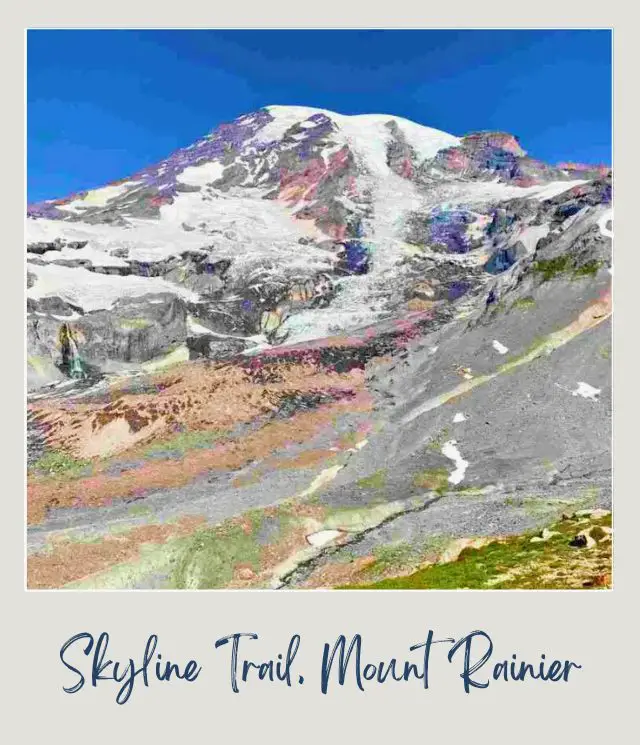
The trail continues to descend with lovely views along the way. Keep an eye out for hoary marmots; it’s common to see them in this area. We saw one admiring the view at one of the viewpoints in this section of the hike.
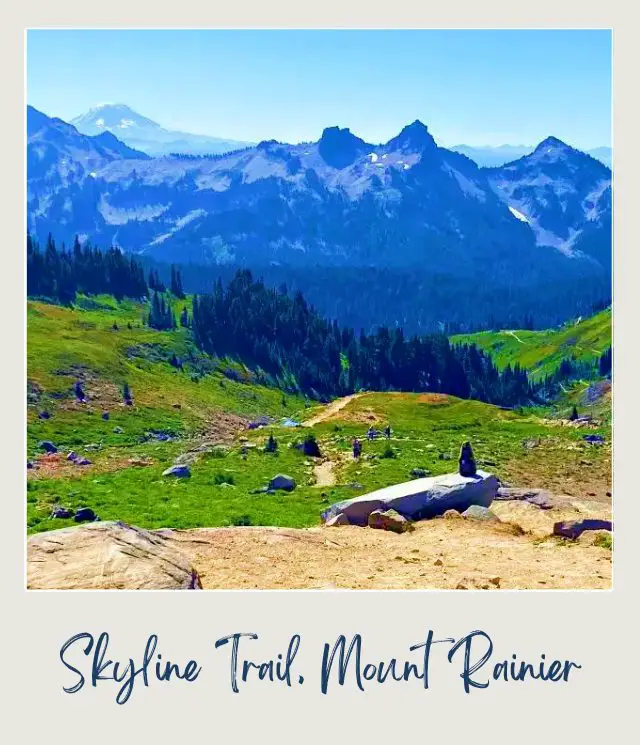
About half an hour after Panorama Point, you’ll come to a small sign indicating a trail to Glacier Vista off to the right.
This is side loop off the main Skyline Trail to Glacier Vista that is worth taking. The trail connects back to the main trail so it adds almost distance and provides a lovely view of the Nisqually Glacier.
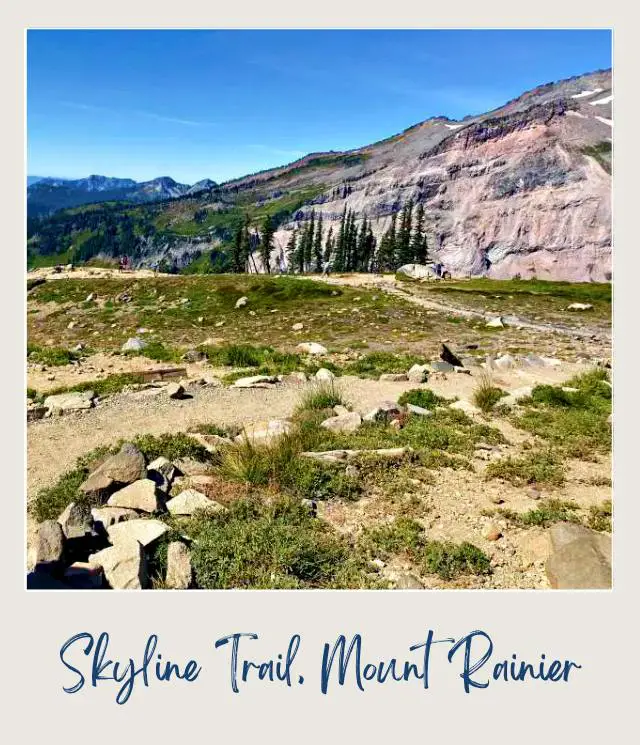
It’s not long before you come to Glacier Vista. At 6,300 feet and with nothing between the view and the mountain, this overlook provides a clear view of the Nisqually Glacier draped down the side of Mount Rainer.
Fun Fact: Mount Rainier has the most glaciers of any peak in the U.S. outside of Alaska. There are 25 major glaciers on Mount Rainier.
This is a popular turning back point for people who hike the Skyline Trail in reverse.
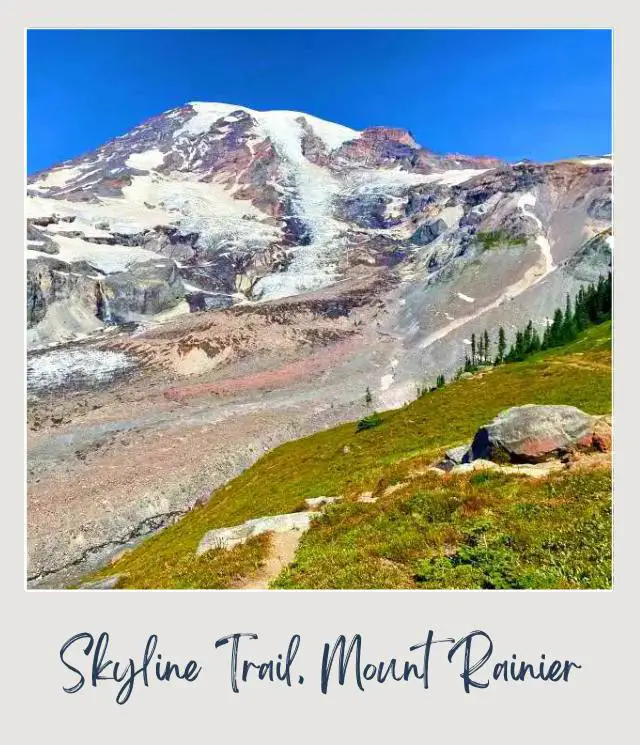
Skyline Trail Glacier Vista to Jackson Visitor Center, Mount Rainier National Park
The section of the Skyline Trail from Glacier Vista back to Jackson Visitor Center is steep but fairly short. You’ll probably notice that the crowd is thicker here. Many people hike the Skyline Trail clockwise and turn back at Glacier Vista.
There are lovely views of the Paradise meadows as the trail continues to descend, but you’ll need to look back for views of Mount Rainier.
You may notice some patches where the meadows are bare. This happens because people walk off the designated trails and trample the incredibly fragile environment. Volunteers and rangers can often be seen planting new flowers and grasses to replace the ones that were destroyed.
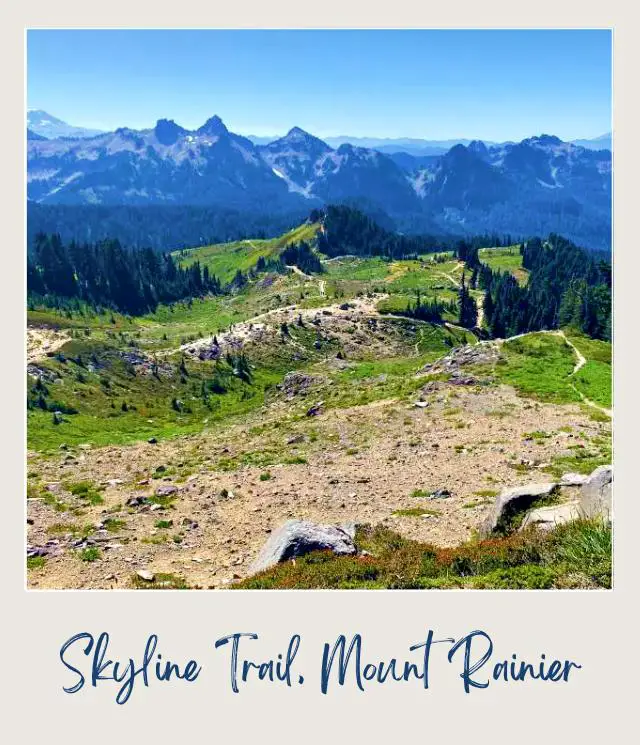
After about five minutes, the Glacier Vista side loop connects back to the main Skyline Trail and continues to descend.
A few minutes later, you’ll come to the junction with the Dead Horse Creek Trail off to the right. The Skyline Trail goes to the left at the fork.
In another ten minutes, you’ll come to wide open paved area. Straight ahead is a small but steep hill, which you can reach on the Alta Vista Trail. To the right is the start of the paved section of the Skyline Trail.
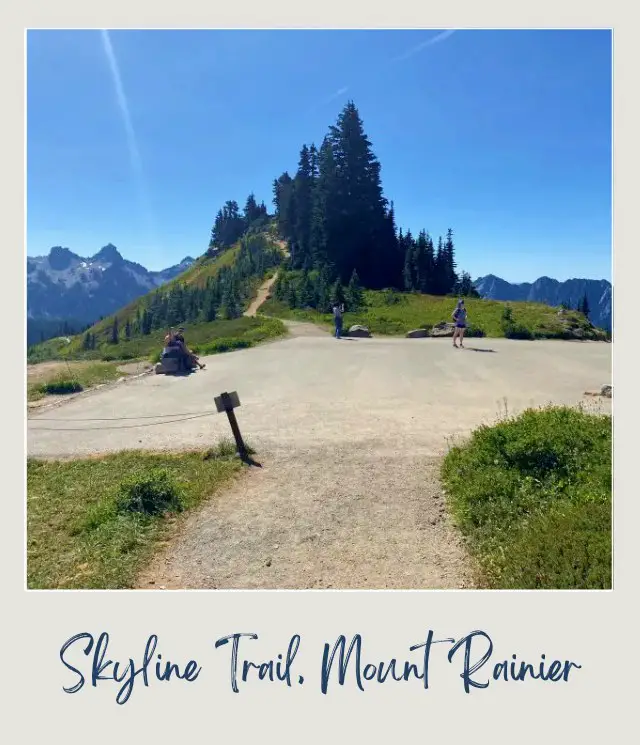
In another couple of minutes, you’ll arrive at the junction of the other end of Dead Horse Creek Trail and then about ten minutes after that, the other end of the Alta Vista Trail.
There are a lot of crisscrossing paths – you can take any of them but the most direct route is to stay on the Skyline Trail. There are signposts at every intersection, but I recommend having a good map so you can keep a sense of where you are and what the trails are doing.

In just a few minutes more, after passing even more beautiful meadows, you’ll arrive back at the Visitor Center. You have now finished hiking the Skyline Trail.
Learning all about the Skyline Trail is a great thing to do, because it will make the hike easier and much more enjoyable.
However, it’s just one of the many amazing hikes in Mount Rainier National Park. And it can be really difficult to know what they all are and how to put them all together for your trip.
As you can see, there’s a lot to know about this one hike alone. It’s even harder to coordinate all the other hikes you want to do and all the other things to see and do in Mount Rainier into an itinerary that actually makes sense – so you’re doing the hikes and activities you want to do and seeing all the views you want to at the right time of day, joining them all together in a logical order, and managing all the logistics that makes them happen.
To help take away the overwhelm of planning a trip to Mount Rainier National Park, I’ve created several super detailed itineraries.
There are 1-, 2-, and 3- day options for Mount Rainier National Park: all with detailed hour-by-hour schedules, including alternatives for different activity and fitness levels, plus trail maps and descriptions, driving instructions, important information, essential tips, and everything else you need to make the most of your time in Mount Rainier National Park.
The itineraries will help you make the most of the time you have available. The Skyline hike is included in all the itineraries, with built in options for different lengths, since you can turn back at several points. And there are also options for people you’re traveling with who prefer not to hike.
What You Need To Take/ Wear on The Skyline loop Trail, Mt Rainier
Skyline loop essential wear and gear include:
🔹 Great hiking boots or shoes
The trail is well marked for the main part, but varies from paved at the beginning and end to hiking on scree in the middle part. Unless you’re just hiking the paved sections to Myrtle Falls or Glacier Vista and back, good hiking boots or shoes are essential.
➡️ If you need to get some, take a look at my Guide to Buying the Best Hiking Shoes/ Boots to help you know what to look for and get some recommendations.
🔹 Trekking poles
Some sections of the trail are quite steep and trekking poles really help going up and down. I used them on this trail and was really glad I had them. My favorite hiking poles are these Leki Jannu trekking poles. They’re lightweight, have shock absorbers, and have comfortable natural cork grips. You can read my detailed review here.
➡️ Check prices on Amazon here or on REI here
🔹 Microspikes
(until near the end of July). Microspikes go over the soles of your shoes and give you traction on snow and ice. There can be snow on the Skyline Trail well into July. Read my guide to The Best Microspikes for Hiking if you need to buy some.
🔹 A camera
I love my GoPro HERO 12. It’s designed for travel. It’s water resistant and durable and takes photos, video and even does streaming (though I’ve never done that).
➡️ Check current prices on the GoPro HERO 12 here
🔹 A powerbank
(if you’re using your phone as a camera). If you use your phone as a camera, the last thing you want to do is to have your battery run out. I like this Loveledi one. It has 2 USB ports and is compatible with most devices.
🔹 Sunwear
This trail has minimal shade. Be sure to wear sunscreen, a good sun hat and sunglasses.
🔹 Layers
The weather can change quickly. It can also get windy. Wear layers so you can adjust your body temperature easily. If you need a windbreaker, I like this Columbia windbreaker for men and recommend this Little Donkey Andy windbreaker for women.
🔹 Binoculars
There are often birds soaring around and animals on the meadows and amongst the trees. I recommend taking binoculars so you can see them up close.
➡️ If you’re looking for some, read my guide to The Best Binoculars for the Money or get my top pick here.
🔹 Water and snacks
Always take more water than you think you’ll need. A lot of the hike is uphill and there is not much shade, so be sure to drink a lot to prevent dehydration. I love this hydroflask. It’s easy to carry, keeps temperatures well, and comes in multiple colors.
🔹 Day Hike Essentials
➡️ Check my list of essential things to take and wear on a day hike to make sure you have everything you need.
10 Tips for Hiking the Skyline Trail, Mount Rainier National Park
1. Set out early (or late)
There are few good reasons to do this.
The parking lots at Paradise fill up early and stay full until mid-afternoon. On summer weekends, they can be full by 9:00am (and sometimes even earlier). When they’re full, the rangers hold traffic at the Nisqually Entrance Station at the bottom of the mountain. But you want to be on the trail early anyway, as this is when the light is better and the weather typically nicer.
Alternatively, wait until mid-afternoon when the crowds start to thin out. However, clouds do sometimes roll in in the afternoon, obscuring Mount Rainier.
In the morning, the light for views of Mount Rainier are better, but the views in the other direction of the Cascade Mountains are better in the afternoon because the light is behind you.
2. Pick a nice day
Which brings me to my next point. This hike is beautiful no matter what, but if you can’t see Mount Rainier, you will be missing out on the showstopper. So try to choose a day when the mountain is clear, if at all possible. Check the weather for Mount Rainier National Park here before you set out for the day.
3. Check current trail conditions
Do this before heading out. Log footbridges frequently wash out during the winter or other conditions could be affecting the trail.
4. Get a map in advance
Use the one here, pick one up at the Visitor Center, or get this national Geographic topographical map of the Mount Rainier trails in advance (this is especially handy if you start the hike before the Visitor Center opens).
5. Bathrooms
There are bathrooms at the trailhead and at Panorama Point. Near the trailhead, there are restrooms at the Visitor Center; at the Guest Service building nearby; or at Paradise Inn around the corner.
6. You can hike clockwise or counterclockwise
Clockwise has a shorter and steeper ascent and a more gradual descent. You get up close views in your face of Mount Rainier from the beginning. After the Pebble Creek Trail, if you want to see Mount Rainier, you have to turn around.
Counterclockwise has a more gradual ascent but a shorter and steeper descent. Mount Rainier is in view for most of the hike up to the Pebble Creek Trail and for parts after that even. For the final section after Glacier Vista, the Mt. Rainier views are mostly behind you.
I prefer hiking the Skyline Trail counterclockwise and then on a separate hike, do part of the Skyline Trail clockwise, looping back along the Dead Horse Creek Trail, so you get the best of both worlds.
7. Pay in advance
To save time at the Nisqually Entrance Station, buy your national park entrance pass online in advance.
If you are planning to visit more than just the Mount Rainier National Park this year it can be great value to purchase an America The Beautiful pass. The one-year pass includes standard entrance at all sites managed by the National Park Service, Forest Service, Fish and Wildlife Service, Bureau of Land Management, Bureau of Reclamation, and Army Corps of Engineers. The pass covers the entrance fee for a driver and all passengers in a personal vehicle or up to 4 adults at sites that charge per person.
➡️ Get an America The Beautiful pass here
8. Parking
There are two main parking areas at paradise. The main parking lot is near (just below) the Visitor Center. There is an overflow parking lot just down the hill. You actually come to this first (on your left) as you drive up the mountain.
9. Don’t get Lost
If you’re hiking before the snow has fully melted (which it doesn’t do until the end of July, usually), the trail can be a little tricky to follow over the snow fields. In that case, having a handheld GPS can be really helpful.
➡️ Read my guide to The Best Handheld GPS for Hiking for tips on what to look for when buying one and some recommendations, if you decide to get one. If you’re hiking in August or September when the snow has melted, the trail is easy to follow and this isn’t necessary.
10. Wildlife
Keep an eye out for mountain goats and hoary marmots. They are super cute but wild, so keep a distance and don’t venture off the trails, as it damages the fragile meadows.

FAQS about the Mt Rainier Skyline Trail Hike
What’s the difference between the low and the high Skyline Trail Mount Rainier National Park?
The Low Skyline Trail has a shortcut between Panorama Point and a more eastern section of the Skyline Trail. It cuts some distance off, but goes over a permanent snow field, so has now been blocked off as unsafe.
The High Skyline Trail goes up along a high ridge between the same points. It therefore has more elevation change and is longer, but is safer. And, since the low Skyline Trail is blocked off, is the only option.
Is Skyline Trail Mt Rainier hard?
The Skyline Trail is rated as moderately difficult. It is 5.5 miles with an elevation change of 1,700 feet.
However, if this seems too daunting, you can just hike the paved sections. These go to Glacier Vista clockwise – still a steep climb – and to Myrtle Falls counterclockwise – much less elevation change and absolutely worth it.
Do you need hiking boots for Skyline Trail?
Yes, I recommend a good pair of hiking shoes or boots for the Skyline Trail hike. Mt Rainier National Park is mountainous, as you’d expect, and although the trail is well-marked and well-maintained, there are sections over scree and a lot of steps and graded trails, so you should definitely have good quality and comfortable footwear.
➡️ Check out my Guide to the best Hiking Shoes and Boots
Is the Skyline Trail worth it?
Yes, absolutely! With views of Mount Rainier, wildflowers, glaciers, and panoramic vistas of the Cascade Mountains, there is a very good reason why this is widely considered the best hike in Mount Rainier National Park.
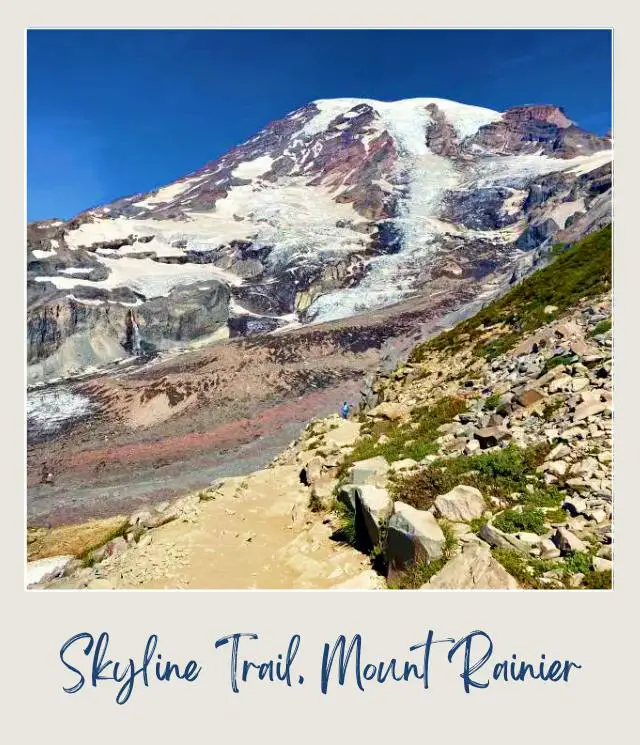
If you’re planning to visit Mount Rainier National Park by yourself, make your planning easy and stress free with a detailed itinerary. I have 1-, 2- and 3-day itineraries for Mount Rainier National Park that include all the park highlights, give you choices based on your preferred activity level, and take all the stress out of planning your trip.
Travel Insurance for Skyline Trail Hike
You should definitely get travel insurance for the Skyline hike. Rainier National Park is mountainous and although this is a very popular hike, it is always possible that something can go wrong.
Travel insurance can protect you for medical and emergency repatriation, and can also cover things like trip cancellation, loss and/ or theft of property, etc.
➡️ A great insurance option is Travelex. It has coverage for all you’ll need. You can choose the best travel insurance plan for the Mt Rainier National Park Skyline Trail here or get a quote right now:
Enjoy the Skyline Trail loop, Mount Rainier National Park!
More Planning Resources for Mount Rainier National Park
⭐ Mount Rainier National Park Guide
⭐ Mount Rainier National Park Itineraries
⭐ Planning a Trip to Mount Rainier National Park: 7 Mistakes to Avoid
⭐ How many days in Mount Rainier National Park do you need?
⭐ Best Hikes in Mount Rainier National Park
⭐ 10 Tips For Visiting Mount Rainier National Park
⭐ How To Get to Mount Rainier National Park
⭐ All the Airports Near Mount Rainier National Park
⭐ The Closest Airport To Mount Rainier National Park
⭐ Best Time To Visit Mount Rainier National Park
⭐ Visiting Mount Rainier National Park: What To Expect Throughout the Year
⭐ 10 Fun Facts About Mount Rainier National Park
Do you have any tips for hiking the Skyline Trail, Rainier National Park or questions about the Skyline Mt Rainier trail? I’d love to hear about them. Join my private Facebook group National Parks Collectors and comment and let me know (you can also pick up extra planning tips, share your photos and stories with other national park lovers and more).
Subscribe to daily national parks planning tips, travel inspiration and trip ideas and get instant access to the free PDF of this
Skyline Trail Guide
If you liked this guide to the Skyline hike, Mt Rainier National Park, Pin It to your Mount Rainier National Park board!


💡 Are you just starting to think about taking a national parks trip? Get Inspiration
‼️ Are you looking for helpful tips for visiting US national parks? Read articles that share useful tips on a range of national-park related issues
💻 Are you starting to plan a trip to Mount Rainier National Park? Read my Guide to Mount Rainier National Park
📋 Do you want a ready-made super detailed plan for your trip to Mount Rainier? Get a detailed 1 – 3-day Mt Rainier National Park Itinerary
💲 Are you ready to book your trip? Use these Planning and Booking Resources
📖 Do you want to read a book about US national parks? Check out my Recommended Reading Lists
About the Author
James Ian is a national park, camping and hiking expert.
He has dedicated his life to travel, visiting more than 80 countries, all 7 continents and most of the national parks in the United States. With over 35 years experience in the travel industry, James has worked on cruise ships, at resorts and hotels, and as a travel planner who’s helped hundreds of people plan successful trips to US national parks.
Based on his experience visiting our national parks multiple times, in-depth research and expertise as a travel planner, James has published detailed itineraries for many of the major national parks in the US. These itineraries, as well as in-depth park guides, and other resources will help you have your own incredible trip to US national parks without stress and hassle.
As a national park expert, James has contributed to many publications, including USA Today, Newsweek, Time Business News, Savoteur, Best Trip, and Wired.
I’m a member of the Amazon Services LLC Associates Program. As an Amazon Associate I earn from qualifying purchases.
