Ever wondered why some hikers look like they’re gliding effortlessly up mountains while you’re huffing and puffing? The secret might be in those sticks they’re carrying.
Trekking poles (also commonly called hiking poles) can cut the load on your knees by up to 25% and turn you into a four-legged hiking machine – if you know how to use them right.
I spent my first year hiking with poles all wrong, death-gripping the handles and fighting against them instead of letting them help. Now, after hundreds of trail miles and a couple of face-plant learning experiences, I’ve figured out the techniques that actually work.
Let me show you how to make trekking poles feel like natural extensions of your arms.
No time right now to learn how to use trekking poles ? Pin It and save it for later:
These are the ones I own and use for day hikes:
Subscribe to daily national parks planning tips, travel inspiration and trip ideas and I’ll send you a free PDF of this Guide:
How to Use Trekking Poles: A Complete Guide for Hikers (With Pro Tips)
Table of Contents
Adjusting Trekking Pole Length
Getting your pole length right makes a huge difference in how well they work for you. Start by standing on flat ground and holding the pole – your elbow should make a 90-degree angle when the tip touches the ground. This is your baseline height.
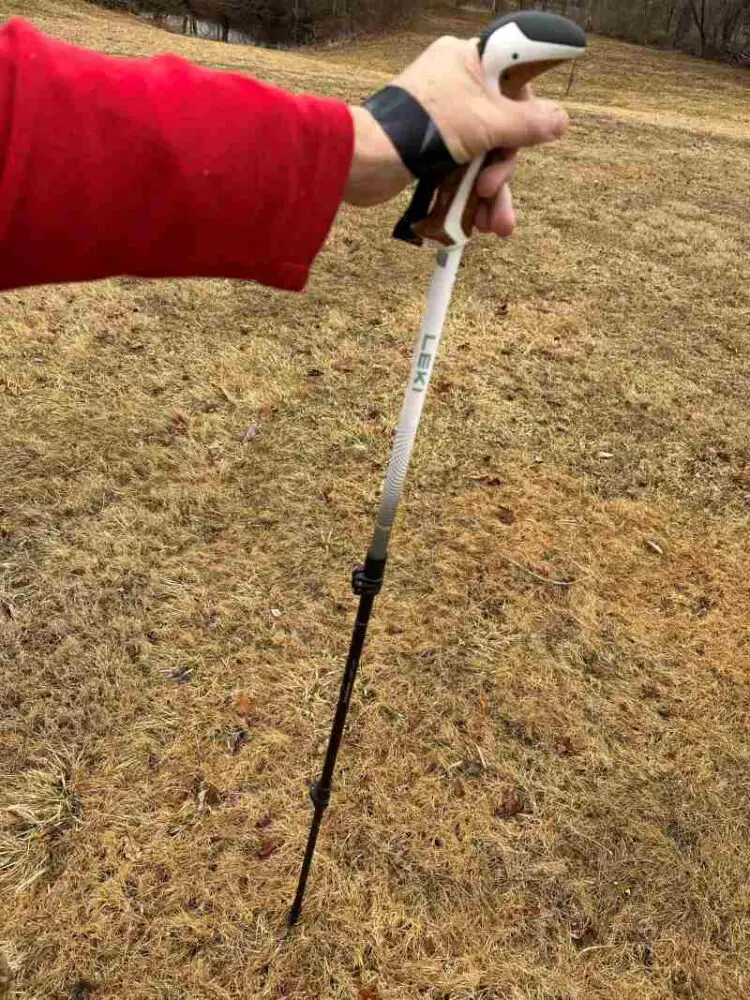
When you hit different terrain, you’ll want to tweak the length.
Going uphill? Make them a bit shorter – this helps you push yourself up more effectively. Heading downhill? Lengthen the poles slightly to give you better reach and take pressure off your knees.
I learned this the hard way on my first few hikes – using trekking poles wrong left me feeling awkward and unstable. Once I got the height dialed in, they felt like natural extensions of my arms.
Setting Up Wrist Straps Correctly
Here’s a game-changer I wish someone had told me earlier – it’s all about how you use those wrist straps. Instead of just grabbing the poles, put your hands up through the straps from below, keeping your thumbs on top. This lets the straps work like little hammocks for your hands.
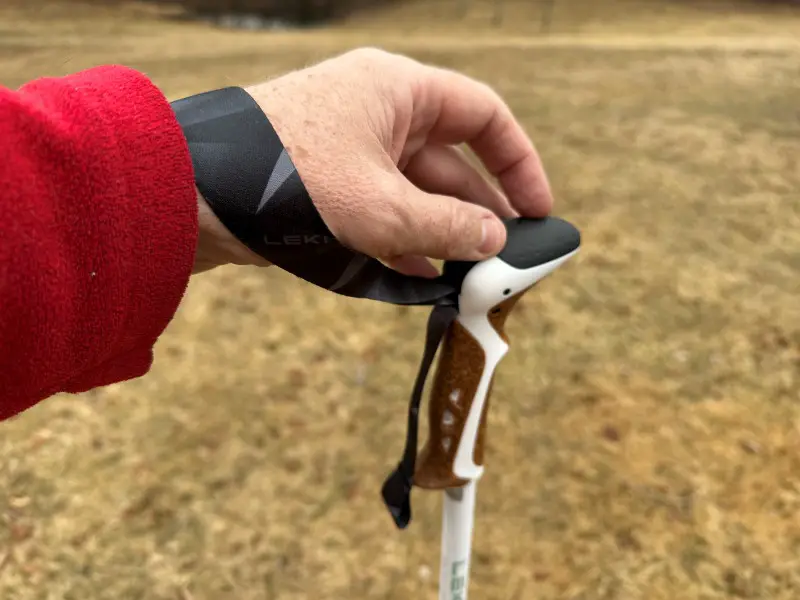
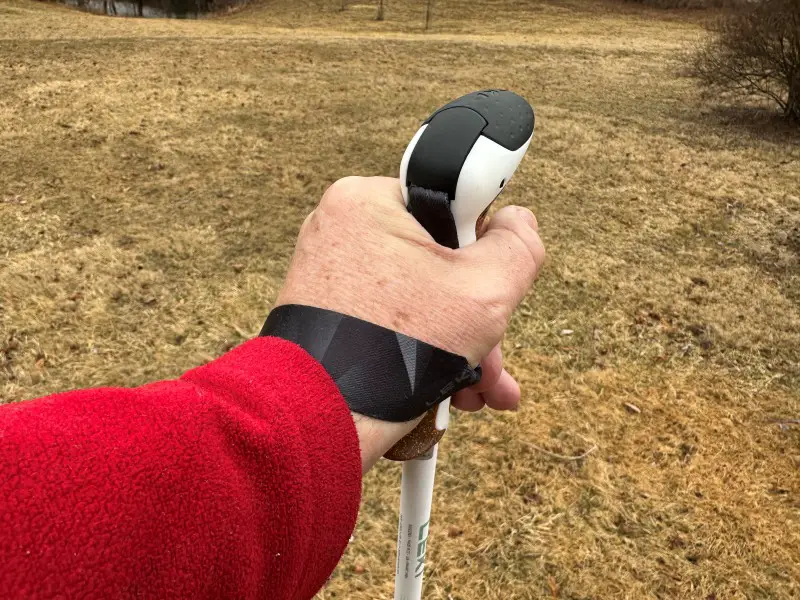
When you set up the straps right, you won’t need to grip the poles tightly. Your hands can stay relaxed while the straps take most of the weight. I used to death-grip my poles until my fingers hurt, but now I barely need to hold on at all.
Make sure to adjust the straps snugly around your wrists – too loose and you’ll lose control, too tight and they’ll cut off circulation. Every pair of poles is a bit different, so play around until you find what feels right.
Proper Grip Technique
When it comes to walking poles technique, less is more. You don’t need to squeeze the grips – think of them as guide rails rather than something you need to control. The straps should do most of the work supporting your weight.
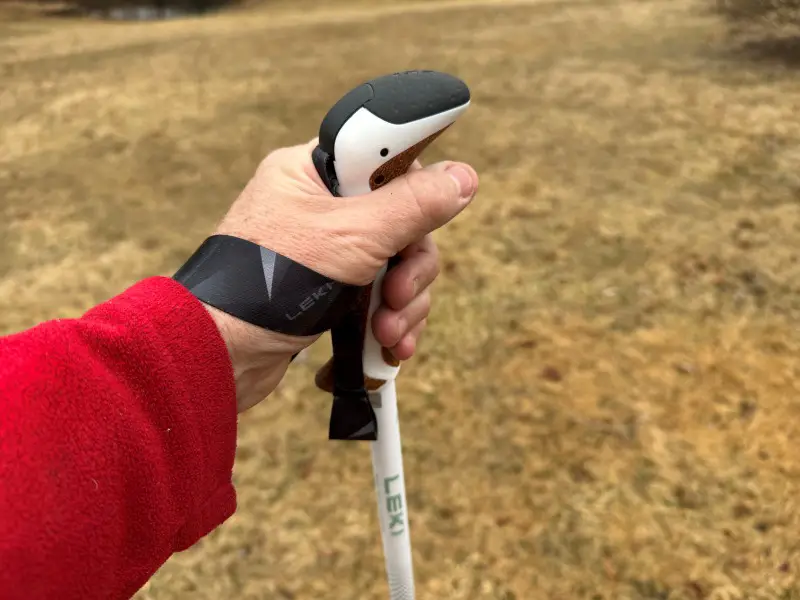
Keep your hands loose and relaxed on the handles. A death grip will tire out your hands fast and can lead to numbness on longer hikes. I used to grip my poles like I was hanging off a cliff, but now I let my fingers rest gently around the grip.
This relaxed grip lets you place the poles more naturally as you walk. Plant them with just enough pressure to steady yourself, then let the straps take the load. Your hands stay fresh, and you’ll move more smoothly across the trail.
Basic Walking Rhythm with Poles
Think of your poles and feet working like a cross pattern – when your right foot steps forward, your left pole goes forward too. The pole tip should hit the ground just before your foot lands, giving you better stability with each step.
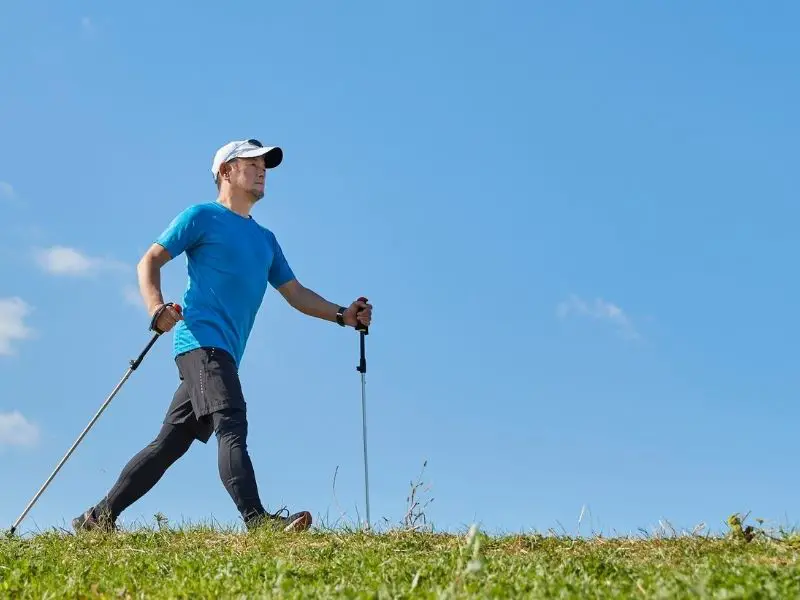
I started with a slow walk to get the timing down. Plant the pole tip about the same distance ahead as your heel lands, keeping it in contact with the ground until your opposite foot moves forward. After a few minutes, this technique for using trekking poles starts feeling natural.
When you pick up speed, the rhythm stays the same but gets faster.
On rocky trails, I slow it down and place my poles more deliberately. Flat ground lets you get into a smooth swing that actually helps push you forward. The key is matching your pole movement to your walking speed – too fast or slow throws off your balance.
Uphill Hiking Technique
When you hit the steep stuff, shorten your poles a bit. This gives you better leverage to push yourself up the trail. I drop my pole length by about 2-3 inches on climbs, and it makes a world of difference in how much energy I save.
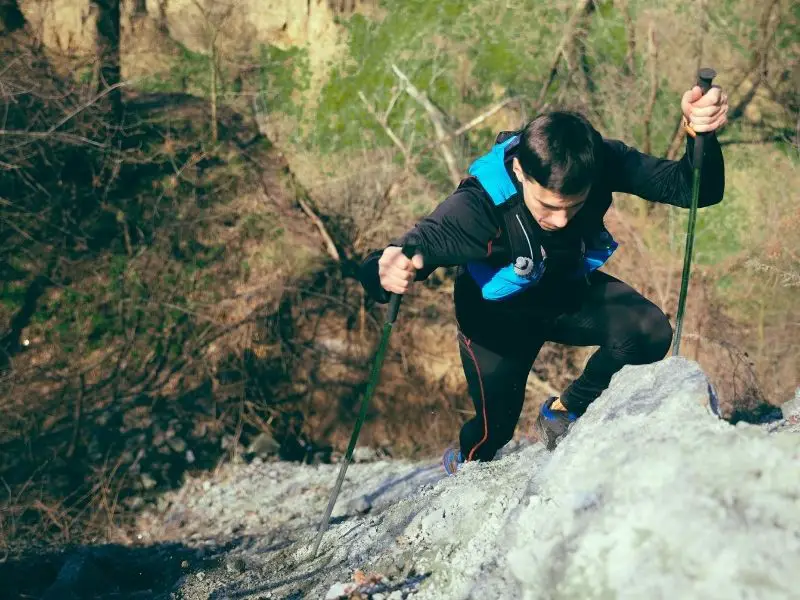
Instead of just using your legs, let your upper body help out. Push down on the poles with your biceps and back muscles as you step up.
I like to plant the pole tip firmly, then press down to help drive myself forward and up. This takes a ton of strain off your legs, which you’ll really appreciate on long uphills.
Keep your poles close to your body when climbing. If they’re too far out front, you’ll waste energy reaching for them. I plant each pole just ahead of my feet, making sure they get good grip before I push off. The steeper the trail gets, the more you’ll want to let them help power you up.
Downhill Hiking Technique
When heading downhill, lengthen your poles about 2-3 inches. This extra reach helps take weight off your knees and gives you better stability. I always test my pole placement before committing my full weight – you don’t want them slipping out from under you.
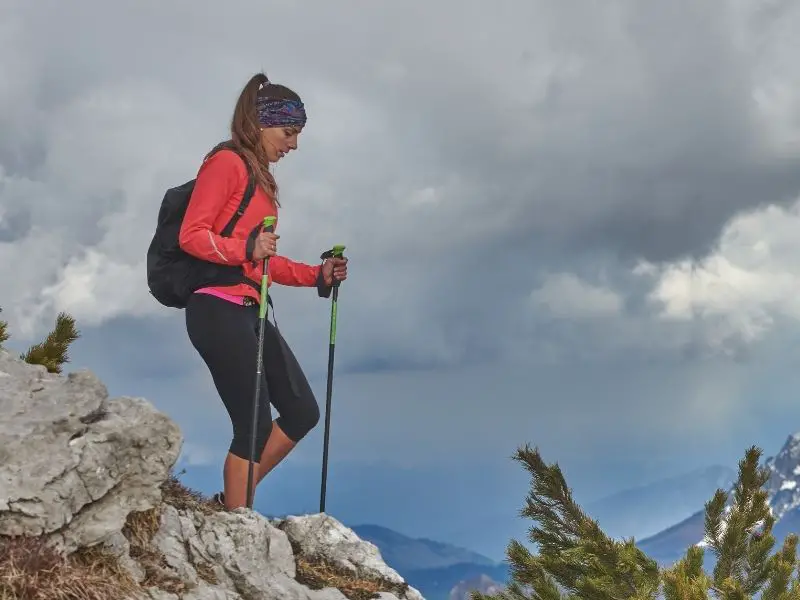
Keep a slight forward lean and let your poles slow your momentum. I plant them a bit further ahead than normal, using them like brakes to control my speed. This saves my knees on steep descents.
Watch out for loose rocks and wet spots where your poles might slip. I learned to plant my poles early and firmly before each step down. When the trail gets really steep, I’ll sometimes place both poles first, then step down between them. It’s slower but way safer than tumbling down the mountain.
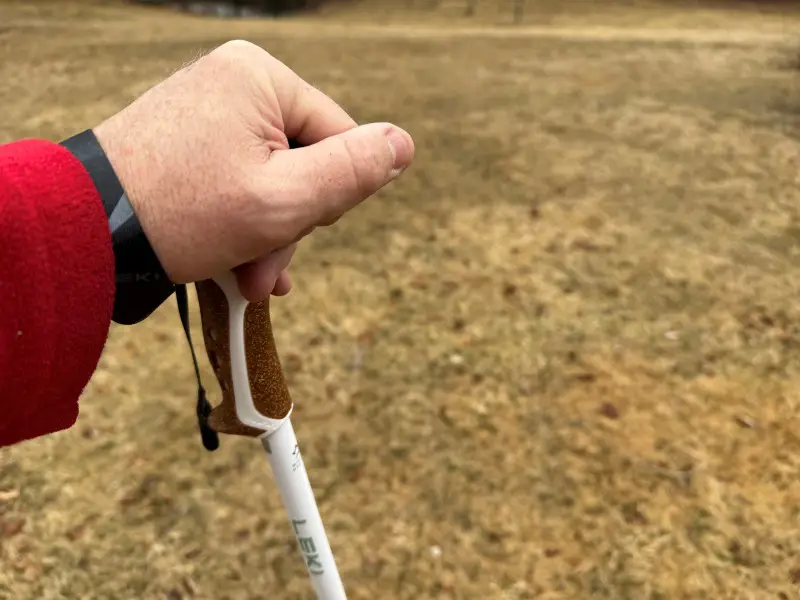
I also tend to hold the handle from the top so that I’m leaning on the pole from the top, rather than twisting my wrist to the side.
Traversing Slopes with Poles
Moving across steep slopes takes extra attention to pole placement. I always plant my uphill pole first, making sure it’s solid before shifting my weight. The pole on the high side of the slope works like an anchor point, while the lower pole helps with balance.
Keep your poles shorter on the uphill side and longer on the downhill side to match the angle of the slope. I tilt my body slightly into the hill, using the poles to maintain three solid contact points. On loose scree or gravel, I test each pole placement before committing my weight.
This technique really clicked for me when hiking across steep meadows. Rather than fighting the slope, I let my poles create a stable platform with each step. Even on sketchy traverses, good pole placement lets me move confidently without worrying about sliding downhill.
Using Poles on Flat Terrain
On flat ground, your poles can actually help propel you forward, making your hike easier and faster. Plant each pole tip slightly behind where your heel lands – this creates a pushing motion that helps drive you forward with each step.
I find it works best to keep a smooth, natural swing going. Your arms should move in time with your legs, like you’re walking normally. As the pole comes back, give a little push with your arm to add some forward momentum. It took me a few miles to get the timing right, but now it feels totally natural.
When I hit long flat sections, I’ll sometimes rest my poles across my pack if the trail’s easy. But I’ll sometimes keep using them – they help maintain a steady pace and take some weight off my legs. Plus, they’re ready when I need them for sudden trail changes or obstacles.
The key is staying relaxed. Let your arms swing naturally, and don’t force the pole placement. A light touch works better than jamming them into the ground. After a while, you’ll find yourself covering more distance with less effort.
Trekking Pole Tips for Rocky Terrain
Moving through rocky sections takes extra care with your poles. I always scan ahead and plan my pole placement before each step. Set your tips between rocks rather than on top of them – this prevents the poles from sliding out when you put weight on them.
Test each rock’s stability with your poles before stepping. I’ll often plant both poles first, then move between them if things look sketchy. Keep your poles closer to your body than usual – having them too far out reduces your control and reaction time.
I learned this after a close call on a boulder field – now I use my poles to check my path. Short, precise movements work better than long reaches. If you hit a really technical section, don’t be afraid to stow your poles and use your hands. Sometimes scrambling is safer than trying to force pole use on tricky terrain.
Trekking Poles in Muddy and Wet Conditions
Slippery trails are where poles really prove their worth. Plant your pole tips firmly into solid ground rather than directly in mud – look for roots, packed dirt, or small rocks that won’t give way. I keep my poles slightly closer to my body in these conditions, ready to catch myself if I start sliding.
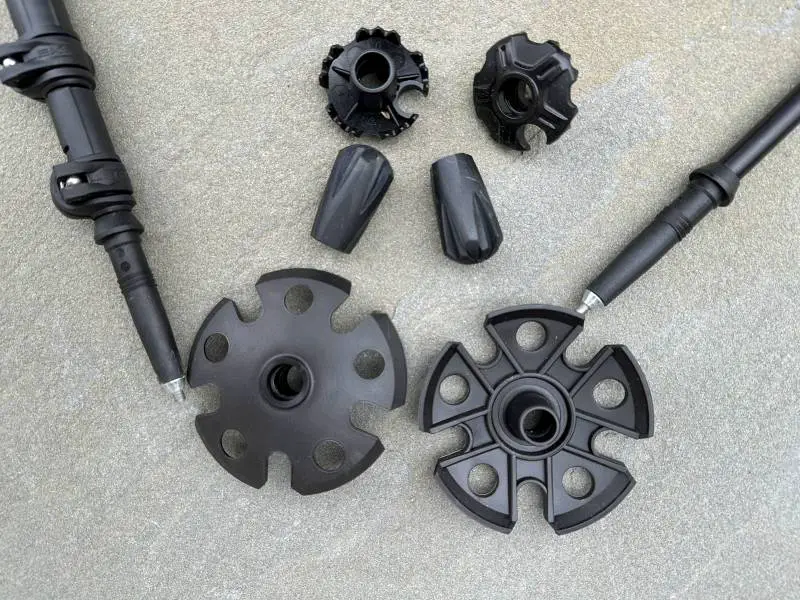
Rubber tips make a huge difference on wet surfaces. They grip better than bare metal tips and won’t sink as deep into soft ground. I learned this after a rainy hike where I kept getting my tips stuck in the mud. Now I always pack rubber tips, especially when the forecast looks wet.
Take smaller steps and test each pole placement before putting your full weight on it. I plant both poles, then move between them like a walking bridge.
This slower pace has kept me upright on plenty of sketchy trails where others were sliding around. Your poles become your mud-season friends, giving you two extra points of contact when every step feels like a gamble.
Crossing Streams and Rivers with Poles
Stream crossings get way safer with poles – if you know how to use them right. Before stepping in, I test each underwater spot with my poles to check the depth and feel for stable footing. This has saved me from more than a few unexpected holes.
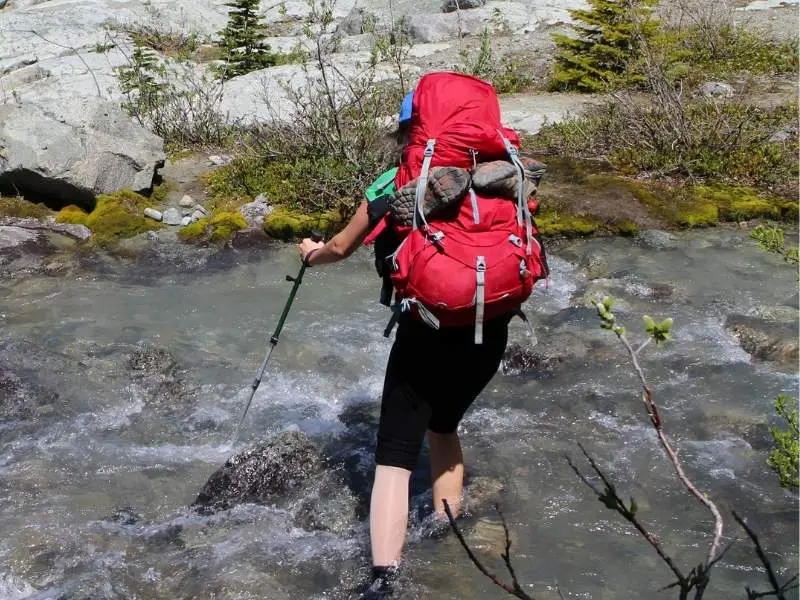
Keep your poles slightly wider than normal for better stability. I plant both poles firmly, then move between them like I’m using parallel bars at the gym. This gives me four points of contact – two feet, two poles – which is super helpful when the current’s pushing against my legs.
If I need to cross on logs or rocks, I’ll adjust my poles a bit longer to reach the stream bottom. That way, if I slip, my poles are already braced. On really sketchy crossings, I’ve learned to face slightly upstream and use my poles to steady myself against the current. The key is keeping your movements slow and testing each placement before shifting your weight.
Winter Hiking and Snow Usage
In winter conditions, snow baskets are essential – they stop your poles from punching deep into soft snow. I always keep a set in my pack from late fall through spring. The wider surface area lets you push against the snow for better stability instead of just sinking through.
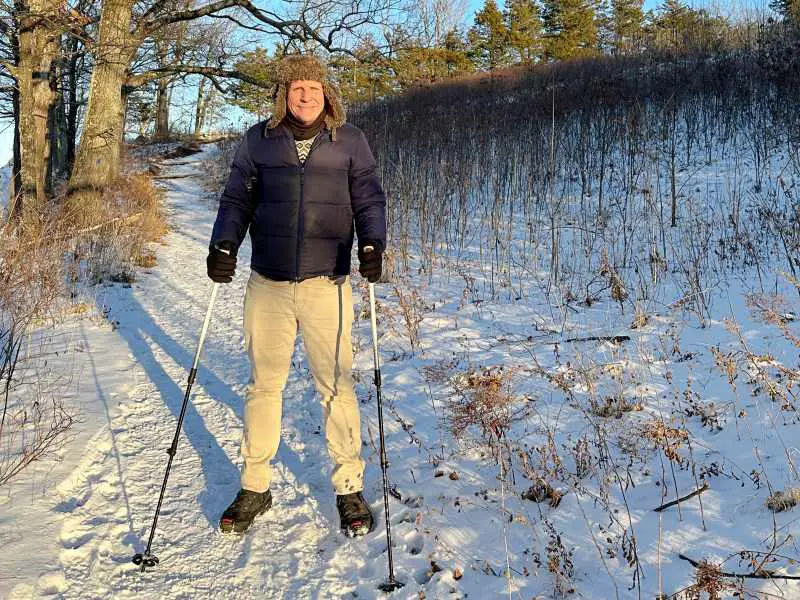
Your pole length needs change with snow depth. I typically add 2-3 inches in deep powder to account for the snow surface. On packed trails, I stick closer to my normal length but watch for changes in snow consistency that might affect pole placement.
Ice requires extra caution with pole tips. I’ve learned to plant them deliberately, testing each spot before putting weight on it. The metal tips work better than rubber ones on ice, but you still need to watch for spots where they might slip.
Walking in a slight zigzag pattern lets you use your poles more effectively on icy slopes – I place my uphill pole first, then move across the slope with small steps. When crossing icy patches, I keep my walking poles close and ready to catch myself if needed.
Trekking Pole Techniques for Balance and Stability
When you’re moving across uneven ground, your poles work like extra legs to keep you steady. Plant them slightly wider than your feet to create a broader base – I find this really helps when the trail gets wobbly. Each pole should touch down just before your opposite foot lands.
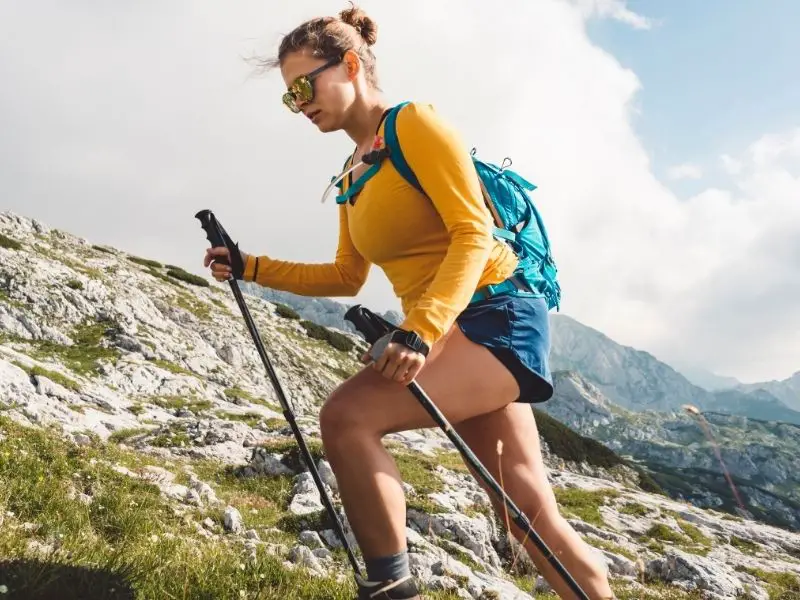
Your body weight should shift smoothly between your poles as you walk. I keep my arms relaxed but ready, letting the poles take some of my pack weight with each step. This has saved me countless times when a foot slipped or a rock moved unexpectedly.
Start practicing on easy trails before taking on tough stuff. I spent time getting comfortable with how to use poles on flat ground first, then gradually worked up to steeper, rockier sections. Now I automatically adjust my pole placement based on what’s coming up – wider spacing for sketchy spots, closer in when things get tight.
The real magic happens when you stop thinking about using the poles and just let them move with you. After a while, they feel like natural extensions of your arms, ready to catch you if things get dicey.
Adjusting Technique for Different Weather Conditions
In windy conditions, I keep my poles closer to my body and plant them more firmly. Strong gusts can catch your poles if they’re too far out, throwing off your balance. I’ve learned to adjust my stride length and pole placement based on wind direction – shorter steps and poles slightly angled into the wind work best.
Rain changes everything about pole handling. I loosen my grip since wet handles get slippery, relying more on the wrist straps for control. Your poles tend to sink deeper in wet soil, so I watch for solid spots to plant them. After one too many slips, I always pack spare rubber tips – they wear down faster in wet conditions but give better grip than bare metal tips.
In hot weather, my hands tend to sweat more, affecting my grip. I’ll sometimes wrap athletic tape around the handles for better control. The key is keeping your hands relaxed but ready – trekking pole strap positioning makes a huge difference when conditions get tough. Tight gripping in any weather just leads to fatigue and less control.
Using Poles to Test Terrain Ahead
Your trekking poles can work like two extra sensors to check what’s coming up on the trail. I tap the ground ahead lightly with my poles to feel for loose rocks or soft spots before stepping. This has saved me from plenty of ankle-twisting moments, especially on trails covered with leaves or shallow puddles.
When I hit questionable terrain, I plant one pole first and put a little weight on it. If it feels solid, I’ll test the other side. Think of your poles as mini scouts – they can tell you a lot about what’s underneath before you commit your full weight to a step.
I make this pole-testing a regular habit, especially after rain when trails get deceptive. Sometimes what looks like firm ground turns out to be a mud pit in disguise. Quick, light taps with your poles let you read the trail without risking a slip or stumble.
Common Mistakes to Avoid
Holding the poles too tightly is probably the biggest mistake I see on the trails. Your hands should rest lightly on the grips – that death grip will just tire you out and can lead to numb fingers. Let the straps do the work of supporting your weight.
A lot of hikers keep their poles the same length all day, missing out on the benefits of adjusting for different terrain. I used to do this too, until I realized how much easier hiking got when I shortened them for uphills and lengthened them for descents.
Setting pole height wrong is another classic error. I see people with their elbows bent at weird angles, fighting their poles instead of letting them help. Your arms should make that 90-degree angle when standing on flat ground – this gives you the best control and power transfer.
Many folks plant their poles way too far in front or behind them. I learned to keep my pole tips landing about where my heel strikes. When you plant them too far out, you lose power and stability. Too close, and you’ll trip over them.
Walking out of sync with your poles throws off your whole rhythm. Your right pole should move with your left foot, and vice versa. When I first started, I’d get tangled up trying to match my poles to my same-side foot. Getting this cross-pattern down makes a huge difference in how smoothly you move.
Not using the straps – or using them backwards – cuts your pole efficiency in half. Thread your hands up through the bottom of the straps, not down from the top. I wasted months fighting my poles before someone showed me this simple fix.
Trekking Pole Etiquette on Busy Trails
When you hit popular trails, pole awareness becomes super important. I always collapse or hold my poles vertically when passing others – this keeps the tips from getting in anyone’s way. Sometimes I’ll even tuck them under my arm in really tight spots.
Watch your pole swing on narrow paths. I keep my poles close to my body when other hikers are nearby, especially if they have kids or dogs. There’s nothing worse than accidentally poking someone because you weren’t paying attention to your poles properly.
If you’re coming up behind slower hikers, a quick “hello” lets them know you’re there with poles. I’ve found most people appreciate the heads-up and will make room when they can. Same goes for stepping aside to let faster hikers pass – I point my pole tips down and away from the trail.
In towns or developed areas or rock surfaces, the rubber tips really help cut down on the clicking noise that can bug other people. I’ve started carrying my poles through busier sections – it’s just more considerate than trying to navigate through crowds with them extended.
Remember to give extra space to horse riders or pack animals. I step off the trail when I see them coming and hold my poles still and close. Animals can get spooked by moving poles, so I’d rather play it safe and keep everyone happy on the trail.
➡️ Read more Hiking Trail Etiquette
Caring for and Maintaining Your Poles
I check my poles after every hike – it only takes a few minutes and keeps them working smoothly. A quick wipe down with a damp cloth removes dirt and grit that could wear down the mechanisms. I make sure to dry them completely, especially around the locking systems, to prevent rust.
The locking mechanisms need regular attention. I take a few seconds before each hike to test all the locks and adjust them if needed. If they start feeling loose during a hike, I’ll stop and tighten them up – loose poles are basically useless when you really need them.
The tips wear down faster than you’d think. I check mine for wear about every month during hiking season. Once they start looking rounded or chipped, it’s time for new ones. I learned this after my worn tips slipped on some wet rocks – not fun at all.
One thing I do religiously is clean any mud or dirt from the telescoping sections before collapsing my poles. Sand and grit can scratch up the inner tubes if you ignore it. A quick brush off with my hand or bandana works fine. When I get home, I’ll extend the poles fully and let them air dry before storing them.
I keep an eye on the straps too – they take a lot of abuse over time. Any fraying or wear means it’s time to replace them. Same goes for the grips – if they’re getting slick or torn up, don’t wait until they fail on the trail.
Advanced Techniques for Experienced Hikers
When you’ve gotten comfortable with basic pole use, there’s a whole new level of skills to work on. I started playing with pole timing to match different speeds – a quick, light tap for fast-paced hiking, and a more deliberate plant when moving through technical stuff.
On long-distance hikes, I’ve learned to switch up my pole technique throughout the day. Sometimes I’ll use just one pole to give one arm a break, or I’ll change my grip position slightly to work different muscles. This has helped me avoid the hand numbness that used to bug me on 20+ mile days.
You can also use your poles to help set your hiking rhythm. I count my steps and pole plants when I want to maintain a steady pace uphill. It’s like having a built-in metronome – left pole, right step, right pole, left step. This really helps when I’m trying to keep my heart rate steady on big climbs.
The real game-changer was learning to read the trail through my poles. Little taps tell me about surface stability before I commit my weight. When crossing sketchy terrain, I’ll use my poles like antenna, feeling out the safest route before moving forward.
Adapting Pole Usage for Backpacking Trips
Adding a heavy pack changes how your poles work with your body. I start by shortening my poles about an inch when I’m loaded up – this gives me better leverage and keeps my center of gravity lower. The straps become even more important now since they help transfer some pack weight through your arms.
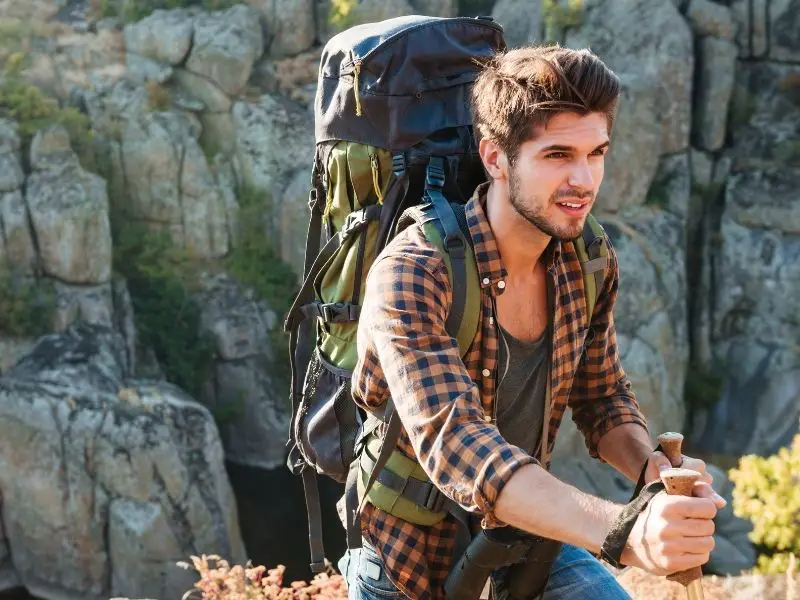
Your walking rhythm shifts too with a full pack. I take slightly shorter steps and plant my poles more deliberately. This helps me stay stable and uses less energy over long miles. After a few trips, you’ll find your own sweet spot for pole placement that matches your pack weight and walking style.
Practice with your loaded pack before hitting long trails. I started in my neighborhood, getting used to how the extra weight affected my balance and how using walking poles felt different. Start with short walks, then work up to longer distances as you build confidence. Your poles will feel like natural stabilizers once you dial in your technique.
Subscribe to daily national parks planning tips, travel inspiration and trip ideas and I’ll send you a free PDF of this Guide:
How to Use Trekking Poles: A Complete Guide for Hikers (With Pro Tips)
Final Thoughts
Getting comfortable with trekking poles takes some practice, but the payoff is worth every minute spent learning. They’ll save your knees on brutal descents, help you power up hills, and keep you steady when the trail gets sketchy. Plus, they’ll make you feel like a mountain goat once you get the hang of them.
Remember, there’s no shame in starting slow and building up your technique. Focus on the basics – proper length, good grip form, and matching your poles to the terrain. Before you know it, you’ll be moving through the mountains with the grace of a seasoned hiker, wondering how you ever managed without them.
Read More:
➡️ Pros & Cons of Trekking Poles
➡️ How to Choose Hiking Poles
➡️ Review of my Leki Jannu Hiking Poles
➡️ Read more Product Reviews
These are the ones I own and use for day hikes:
If you found this guide helpful, Pin It to your Hiking board!


💡 Are you just starting to think about taking a National Parks trip? Get Inspiration
‼️ Do you need tips and additional information? Read a selection of tips for visiting US national parks
💻 Are you starting to plan a trip to a national park? Read my free guides
📋 Do you need an itinerary? Buy a detailed itinerary for your park
💲 Are you ready to book your trip? Use these Planning and Booking Resources
📖 Do you want to read a book about US national parks? Check out my Recommended Reading Lists
About the Author
James Ian is a national park, camping and hiking expert.
He has dedicated his life to travel, visiting more than 80 countries, all 7 continents and most of the national parks in the United States. With over 35 years experience in the travel industry, James has worked on cruise ships, at resorts and hotels, and as a travel planner who’s helped hundreds of people plan successful trips to US national parks.
Based on his experience visiting our national parks multiple times, in-depth research and expertise as a travel planner, James has published detailed itineraries for many of the major national parks in the US. These itineraries, as well as in-depth park guides, and other resources will help you have your own incredible trip to US national parks without stress and hassle.
As a national park expert, James has contributed to many publications, including USA Today, Newsweek, Time Business News, Savoteur, Best Trip, and Wired.
I’m a member of the Amazon Services LLC Associates Program. As an Amazon Associate I earn from qualifying purchases.
